More Datsun 280z Heritage Restomod Episodes
Carcass Featured Projects
Carcass Builds
Want more content like this?
Join the PowerNation Email NewsletterParts Used In This Episode
ARP
ARP Bolts & Fasteners
Jim Wolf Technology
Jim Wolf Technology Kit
Optima
High Performance AGM Battery: YellowTop Deep Cycle & Starting
Sonax USA
Ceramic Spray Coating
Z Car Depot
Adapters
Z Car Depot
Fuel Injection Kit
Video Transcript
(Jeremy)>> You're watching Powernation!
(Jimmy)>> Today on Carcass our Datsun 280-Z heritage project is coming to an end. We'll install a new clutch and the CD-009 six speed transmission.
(Jeremy)>> We fabricate a custom exhaust. Plus we finish up under the hood with a modern fuel injection system that will keep our "Z" running smooth. Then we head out to the track to see how our Datsun stands up with the new "Z" and have a little fun with some good friends. [ Music ] [ engine revving ] [ Music ]
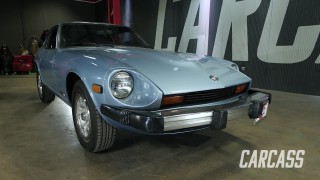
(Jeremy)>> Hey guys, welcome to Carcass. The car you see before you is the 280-Z that Jimmy and I have been working on for quite a while. Now when we chose to build this car we wanted to do more of a JDM feel. So, we've done a couple of modifications. We went ahead and cut the fenders and the quarters, we added the fender flares, and then we moved the mirrors up here on the fender to give it more of that Fairlady feel. Now to pay homage to the new "Z" we decided to paint this car a bold color. This is boulder gray. Now it's not a new color to Nissan but it is a color that you can find on the new "Z", and we think it just matches our car and fits it perfectly.
(Jimmy)>> And obviously this car is really far along into the assembly process. A couple of small details we want to share about that. We went through all the hardware and found a bunch of nice stainless stuff, and also as we were putting the car together you find a bunch of small parts and pieces. You pull them from the table, start putting them on, and you realize how dirty everything is relative to just the nice, clean nature of the car as it is now. So, we went ahead and cleaned everything up, painted it, just to give everything a nice, cohesive look.
(Jeremy)>> And to stay with that cohesive look we did paint the fender flares to match the mirrors. It's more of a flat black. Probably one thing you guys have noticed already is the fact that we went ahead and installed some yellow headlights. Now we feel this gives our car a more aggressive look, and they were pretty simple to install. These are just a standard l-e-d headlight. They're seven inches. We got them from Holley, and they fit directly into our headlight socket.
(Jimmy)>> Going forward some things that we have to do to finish up the car. We have to get the transmission in it, the full clutch set up, fabricate an entire exhaust system, and also the last thing to wrap it up is we have a new fuel injection setup to go on this engine just to make it a really nice driving car, and just finish it in a good way.
(Jeremy)>> Let's just get cracking and we'll finish this thing up. [ Music ]
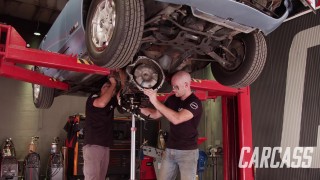
(Jimmy)>> To start us off here we have the rest of our Jim Wolff Technologies kit, which includes a flywheel and some other stuff you're about to see. We already have the pilot bushing installed. So just get these bolts torqued down and keep going. [ Music ] Finish torquing these to 100-pound feet. Make sure you don't forget your thread locker. [ Music ]
(Jeremy)>> Just start a couple of these for now, and then we can go ahead and throw some thread locker on it. It stays in place, right? [ Music ] Kinda hard to see over here though. [ Music ] [ torque wrench clicking ] [ Music ]
(Jeremy)>> One transmission Jimmy. [ Music ]
(Jimmy)>> Last time!
(Jeremy)>> Last time, right? [ Music ] Alright, let's get a couple of bolts started here. Then we'll tighten everybody down, and move on to the cross member. Again, don't forget to torque everything down.
(Jimmy)>> Now that we have the transmission in we're gonna mockup the crossmember so Jeremy can take a measurement for the driveshaft. [ drill humming ]
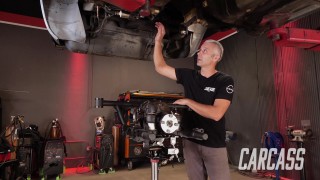
(Jeremy)>> So the last thing we need to do to tie our engine and transmission to our differential is we need to measure for a driveshaft. Now some driveshaft shops will have you take specific measurements, but in our case we need to measure from the back of the output shaft on the transmission to the front of the flange on the differential, and this one's about 34.5 inches. Now most of the time you need to have the suspension compressed or at least the weight of the car on the suspension to make this measurement, but we have an independent rear suspension. So our differential won't move no matter what. So, we'll go ahead and call in this 34.5 and we'll get a driveshaft made.
(Jimmy)>> Coming up, we install new headers and build a custom exhaust for our "Z".
(Jeremy)>> So while we're waiting on our driveshaft to be made we're gonna tackle one more thing underneath the car, and that's the exhaust system. Now we do have a header that fits the 2.8, and this did come as a kit, but there is no off the shelf kit to fit the 2.8 and the CD-009 transmission that we're running. So we're only gonna be using the header for this. I'm gonna go ahead and get this up inside here, get it bolted down, and then we'll start making our way out the back. [ Music ] [ ratchet clicking ] [ Music ]
(Jeremy)>> So the other piece to this header kit is this kind of Y-pipe right here, and as you guys can see, it really doesn't fit. Now if you were building a four wheel drive Datsun, or if you really wanted a cool transmission skid plate this would work out great, but in our case it's just not gonna work, but we are gonna use a piece from this. We're actually gonna come up here and cut the tube off, and we're gonna use the "Y". So over to the chop saw we go. [ saw buzzing ]
(Jeremy)>> So after we cut this piece I went ahead and cleaned it up on our belt sander just so we can get ready to start welding here. Now what we're gonna end up doing is using a piece of two and a quarter. This is out of a builder's kit that we got from Summit Racing. We're gonna start just heading our way out the back. So, I'll get this to set there, we'll fire up the welder, and get it tacked in. Got her Jimmy? [ Music ] [ welder crackling ] [ Music ]
(Jeremy)>> Now since this is going to be a street driven car we're gonna go ahead and put in a catalytic converter. This is a high flow cat. We got it from Summit Racing, and it really shouldn't rob us of any power. So, we'll get this tacked in here and we'll keep moving backwards. [ welder crackling ] [ Music ] [ welder crackling ]
(Jeremy)>> So to keep moving back here we're gonna add this stainless steel butt joint clamp, and we're gonna add this 90 so we can start traveling up to our muffler. This will allow us to get the exhaust out from underneath the car, and it'll also allow me to kinda turn this to get the perfect angle on it. We'll try that Jimmy. You can tighten that one down. [ welder crackling ]
(Jeremy)>> Now when it comes time to choosing the exhaust or the sound you guys want out of your car Summit Racing has got you guys handled, and there's a couple of different options you can go with. This is what considered to be more of a glass pack. This is a free flowing design and it's gonna give you that distinctive tone that you guys remember from the '60s and the '70's. Now this is what is considered to be more of a muffler. This is made out of 409 stainless steel. It comes in a bunch of different options as far as inlet and outlet size. Plus the orientation of those so you guys can pick and choose whatever you need for your project. Plus, this is completely reversible. So, it doesn't matter which way you install it. Inside of here is a perforated tube that's kinda wrapped in fiberglass mesh. So this one will be a little bit quieter than the glass pack. You guys also saw us use these underneath the car. This is a butt connector or kind of a band clamp. What this allows you to do is take two pieces of the same size tubing, butt them together so you don't have to weld it. That way you can take your exhaust out of the car if you ever need to service something. Now you guys can go to Summit Racing and pick all of this stuff up. That way you can figure out what you want, what you need, and what you'd like to hear from underneath your car. We think we're gonna like the glass pack. So this is what we're going with. [ Music ] [ welder crackling ]
(Jeremy)>> Well that takes care of the mockup stage of our exhaust. From here we have to add a couple of hangers, take everything down, weld it up, and that'll pretty much button up everything underneath the car. We install a modern e-f-i system. Plus protect our Datsun's paint with a little t-l-c.
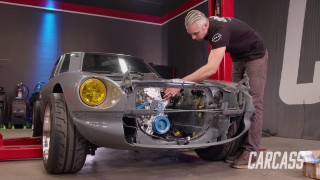
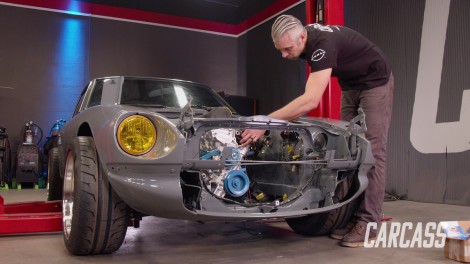
(Jimmy)>> We're moving right along back up to the top of the car, and we're gonna start installing our new fuel injection system. We're gonna start with the intake manifold. Something that we're doing with this along with the rest of the engine is installing ARP hardware just because the stock stuff over time has gotten really beat up and it doesn't look too great. So, the ARP hardware is gonna give some nice corrosion protection, and in general it's just gonna last a long time.
(Jeremy)>> Now to go along with the upgraded intake that Jimmy just installed we're also gonna be upgrading our fuel injection. Now the 280-Z originally was fuel injected, but the old harness has seen better days and the connectors for the injectors are very brittle. It makes the car very unreliable, but on the flipside of that we have a brand new fuel injection setup. Not only will this make our car even more reliable. It's also gonna clean up the underside of the hood here. So, we'll just get this stuff plugged in and keep moving forward here.
Now we got our fuel injection setup from the guys over at ZCar Depot. Now this is a FAST fuel injection setup, and it's made for an eight cylinder, but what the guys do is they set this up as a batch fire. What that means is every injector is gonna fire every time. So it doesn't matter which way you guys hook these up as long as you hook up six of them. Speaking of that, you are gonna have two extra connectors. Don't worry about this. You can either cut them or put them back in the harness. Just get them out of the way. What we'll do is come back and clean this up a little bit later, but for now we're just connect six of these. Okay so another thing that the ZCar Depot guys do is they send you adapters to adapt some brackets. On the side of the throttle body here we have an adapter that runs a different throttle position sensor than stock. That just allows you to plug the harness directly into this throttle position sensor. [ Music ] [ ratchet clicking ] [ Music ]
(Jeremy)>> So now with any e-f-i setup the e-c-u's gonna have see some sort of r-p-m signal. So FAST sends this little r-p-m module. This connects directly to our stock distributor. That way we don't have to run some fancy distributor. What that does is gonna send this r-p-m signal to the e-c-u so the fuel injection runs correctly. It installs very simple. You just run the white wire to the negative side of our coil, put the yellow wire right to the harness, and the black one just goes to ground. [ Music ] So another thing that we do have to do is make sure when we connect the e-c-u power and ground it goes directly to the battery. What that's gonna do is give our e-c-u a very clean signal so it's not dirty or noisy as they call it, and that can make our computer do some kinda wonky things. Now to do that we're gonna be connecting it over here to an Optima Yellow Top battery. This will give us a bunch of cold cranking amps when we go to start it for the first time. Plus, it'll give us a bunch of reliable starts when we go take this thing for a rip.
(Jimmy)>> One thing we want to do before we finally take our car out is get the exterior looking really nice. So we have Rob and Cole from Sonax to help us out, and ultimately we want to get their ceramic spray coating on the car but we have a few steps to do before that, including a little bit of wet sanding, cutting, and polishing. So, we'll let these guys work their magic and make this thing really shine. [ buffer buzzing ] [ Music ] [ buffer buzzing ] [ Music ] [ buffer buzzing ] [ Music ] [ buffer buzzing ] [ Music ]
(Jeremy)>> Well Rob and Cole did a great job really slicking this car out. They gave the color a bunch of depth, and the clear is super smooth, and now it's time to give it a little bit of protection.
(Rob)>> We are going to actually put on the new ceramic spray coating. Simply spray it on, wipe it, flip your towel over, remove it, and it'll give you up to six months durability.
(Jeremy)>> And it's super easy to put on, right?
(Rob)>> It couldn't be any easy. Literally you just spray it on your towel, wipe it on the paint, flip your towel over, and wipe it off. It'll leave the paint really slick.
(Jeremy)>> You can feel it actually as you're applying it and as you're wiping it back off. The car just slicks right back out.
(Rob)>> The hydrophobic capabilities of this is amazing too. I'm always amazed at when you're praying for rain just so you can see how your protection is working.
(Jeremy)>> Well the car is super straight and slick, and we've got some good protection on it. So Jimmy and I have a couple more things to do. We've got to put the hood, and grille, and the bumper on the front, but then we can take it out for a rip and have some fun with it, huh?
(Jimmy)>> It'll be super fun! There's no better way to show off our finished Datsun than with some friends at the track.
[ electronic music ]
(Jimmy)>> When we started this project our whole plan was to honor the history of Datsun and the "Z" platform. We wanted to keep the proud heritage of Nissan's pursuit for performance combined with the sleek and sporty look. We believe our 280-Z keeps with these core visions with a slight nod to subsequent generations of the "Z" family. Taking the best of the old, accentuated with the new, and adding a dash of ultimate Nissan performance to create what we feel is the perfect culmination of the "Z" car dynasty.
(Jeremy)>> So we headed out to the Nashville Super Speedway to meet up with our good friends from Nissan and see what they thought. [ Music ] [ engine revving ] ( )>> Look at those fender mirrors. ( )>> Big flares, big, wide tires. ( )>> Yellow headlights, nice! ( )>> That thing is aggressive. Look at those tires on that thing. That is insane! [ clapping ] ( )>> It's fantastic! ( )>> That thing looks great!
(Jeremy)>> It's been a long time coming. ( )>> You guys nailed it.
(Jeremy)>> It's great to actually see the two of them side by side finally. ( )>> The colors are spot on. ( )>> These bumpers, fender mirrors, flares all look fantastic. ( )>> The yellow headlights, nice touch.
(Jeremy)>> That was Jimmy! ( )>> It works really well with the color, and the red ties in a little bit with the badge.
(Jeremy)>> We've had a lot of communications with you guys over the entire build, and everybody has a little piece that they brought into the car. Constant phone calls, and we just want to make sure everything we did we did the car justice and to bring the car to this point. Right down to the color choice, or Jonathan calling you about the badges. What color badges go back on the car? The yellow just didn't seem right in the "Z" insignia, but whatever's correct to the car.
(Carl)>> It just works too. I think it's been a great opportunity to be able to support you guys on this project. So great to touch on our heritage and see it here with the new "Z" is fantastic.
(Jeremy)>> I think the color choice was right. I've fallen in love with it more and more every day.
(Jonathan)>> And the color really suits the car, and it's so cool to see them side by side, and now you can really see the influence that the designers took for the new "Z" out of all the design elements from the original S-30 chassis.
(Jeremy)>> We really enjoyed it. It was a giant labor of love that's for sure.
(Jimmy)>> We're more muscle car guys, traditional hot rod stuff. So, this being a really high level build in the import world is a really special thing.
(Carl)>> You guys are coming around. You're coming to the light. Out of the muscle car darkness and into the import light.
(Jimmy)>> That's funny too because we took this car down to nothing and you learn so much about it, and I feel like now I know about just this world and this car, and I can do it again with relative ease versus us working on Camaros and C-10 trucks. That's what we're used to, and that's what we like, but it's comfortable, and this is a little bit uncomfortable for us.
(Carl)>> Always good to stretch your boundaries a bit, learn something new. ( )>> This thing turned out killer guys.
(Carl)>> Knocked it out of the park.
(Jeremy)>> We're all here at the track. You guys brought a bunch of super nice cars and the sun is shining. We could go do a couple laps if everybody wants to jump in a car.
(Carl)>> Let's do it!
(Jeremy)>> Let's hop in and go! It'll be the first time we really stretch its legs and get to use sixth gear on this. Besides for the testing and tuning that we get to do. [ Music ]
(Jimmy)>> Well the Nissan guys liked it. I'd say that's a win.
(Jeremy)>> The best way to say that is it's a win in our book.
(Jimmy)>> It's scary you know. We build this car, and we have their help with stuff. We're always asking them for advice, but the ultimate judgement of it, rolling up on them and asking did we actually do it?
(Jeremy)>> Did we pull it off?
(Jimmy)>> Got a good reaction. So, we've got to be happy about it.
(Jeremy)>> I'm happy with the car period. We're American muscle car guys. That's how we grew up when we were younger. This has definitely pushed me one direction.
(Jimmy)>> And just to learn something new. Now we've broadened our skill set. We know a little bit more, and it's just all fun.
(Jeremy)>> We've had a great time out here at the Nashville Super Speedway, and we want to give a giant thanks to them. Plus, all of the Nissan guys for bringing out their cars, and or all the support for us to build our 280-Z. We've got a lot of daylight left, a bunch of killer cars. We're gonna go enjoy the track.
Show Full Transcript
(Jimmy)>> Today on Carcass our Datsun 280-Z heritage project is coming to an end. We'll install a new clutch and the CD-009 six speed transmission.
(Jeremy)>> We fabricate a custom exhaust. Plus we finish up under the hood with a modern fuel injection system that will keep our "Z" running smooth. Then we head out to the track to see how our Datsun stands up with the new "Z" and have a little fun with some good friends. [ Music ] [ engine revving ] [ Music ]
(Jeremy)>> Hey guys, welcome to Carcass. The car you see before you is the 280-Z that Jimmy and I have been working on for quite a while. Now when we chose to build this car we wanted to do more of a JDM feel. So, we've done a couple of modifications. We went ahead and cut the fenders and the quarters, we added the fender flares, and then we moved the mirrors up here on the fender to give it more of that Fairlady feel. Now to pay homage to the new "Z" we decided to paint this car a bold color. This is boulder gray. Now it's not a new color to Nissan but it is a color that you can find on the new "Z", and we think it just matches our car and fits it perfectly.
(Jimmy)>> And obviously this car is really far along into the assembly process. A couple of small details we want to share about that. We went through all the hardware and found a bunch of nice stainless stuff, and also as we were putting the car together you find a bunch of small parts and pieces. You pull them from the table, start putting them on, and you realize how dirty everything is relative to just the nice, clean nature of the car as it is now. So, we went ahead and cleaned everything up, painted it, just to give everything a nice, cohesive look.
(Jeremy)>> And to stay with that cohesive look we did paint the fender flares to match the mirrors. It's more of a flat black. Probably one thing you guys have noticed already is the fact that we went ahead and installed some yellow headlights. Now we feel this gives our car a more aggressive look, and they were pretty simple to install. These are just a standard l-e-d headlight. They're seven inches. We got them from Holley, and they fit directly into our headlight socket.
(Jimmy)>> Going forward some things that we have to do to finish up the car. We have to get the transmission in it, the full clutch set up, fabricate an entire exhaust system, and also the last thing to wrap it up is we have a new fuel injection setup to go on this engine just to make it a really nice driving car, and just finish it in a good way.
(Jeremy)>> Let's just get cracking and we'll finish this thing up. [ Music ]
(Jimmy)>> To start us off here we have the rest of our Jim Wolff Technologies kit, which includes a flywheel and some other stuff you're about to see. We already have the pilot bushing installed. So just get these bolts torqued down and keep going. [ Music ] Finish torquing these to 100-pound feet. Make sure you don't forget your thread locker. [ Music ]
(Jeremy)>> Just start a couple of these for now, and then we can go ahead and throw some thread locker on it. It stays in place, right? [ Music ] Kinda hard to see over here though. [ Music ] [ torque wrench clicking ] [ Music ]
(Jeremy)>> One transmission Jimmy. [ Music ]
(Jimmy)>> Last time!
(Jeremy)>> Last time, right? [ Music ] Alright, let's get a couple of bolts started here. Then we'll tighten everybody down, and move on to the cross member. Again, don't forget to torque everything down.
(Jimmy)>> Now that we have the transmission in we're gonna mockup the crossmember so Jeremy can take a measurement for the driveshaft. [ drill humming ]
(Jeremy)>> So the last thing we need to do to tie our engine and transmission to our differential is we need to measure for a driveshaft. Now some driveshaft shops will have you take specific measurements, but in our case we need to measure from the back of the output shaft on the transmission to the front of the flange on the differential, and this one's about 34.5 inches. Now most of the time you need to have the suspension compressed or at least the weight of the car on the suspension to make this measurement, but we have an independent rear suspension. So our differential won't move no matter what. So, we'll go ahead and call in this 34.5 and we'll get a driveshaft made.
(Jimmy)>> Coming up, we install new headers and build a custom exhaust for our "Z".
(Jeremy)>> So while we're waiting on our driveshaft to be made we're gonna tackle one more thing underneath the car, and that's the exhaust system. Now we do have a header that fits the 2.8, and this did come as a kit, but there is no off the shelf kit to fit the 2.8 and the CD-009 transmission that we're running. So we're only gonna be using the header for this. I'm gonna go ahead and get this up inside here, get it bolted down, and then we'll start making our way out the back. [ Music ] [ ratchet clicking ] [ Music ]
(Jeremy)>> So the other piece to this header kit is this kind of Y-pipe right here, and as you guys can see, it really doesn't fit. Now if you were building a four wheel drive Datsun, or if you really wanted a cool transmission skid plate this would work out great, but in our case it's just not gonna work, but we are gonna use a piece from this. We're actually gonna come up here and cut the tube off, and we're gonna use the "Y". So over to the chop saw we go. [ saw buzzing ]
(Jeremy)>> So after we cut this piece I went ahead and cleaned it up on our belt sander just so we can get ready to start welding here. Now what we're gonna end up doing is using a piece of two and a quarter. This is out of a builder's kit that we got from Summit Racing. We're gonna start just heading our way out the back. So, I'll get this to set there, we'll fire up the welder, and get it tacked in. Got her Jimmy? [ Music ] [ welder crackling ] [ Music ]
(Jeremy)>> Now since this is going to be a street driven car we're gonna go ahead and put in a catalytic converter. This is a high flow cat. We got it from Summit Racing, and it really shouldn't rob us of any power. So, we'll get this tacked in here and we'll keep moving backwards. [ welder crackling ] [ Music ] [ welder crackling ]
(Jeremy)>> So to keep moving back here we're gonna add this stainless steel butt joint clamp, and we're gonna add this 90 so we can start traveling up to our muffler. This will allow us to get the exhaust out from underneath the car, and it'll also allow me to kinda turn this to get the perfect angle on it. We'll try that Jimmy. You can tighten that one down. [ welder crackling ]
(Jeremy)>> Now when it comes time to choosing the exhaust or the sound you guys want out of your car Summit Racing has got you guys handled, and there's a couple of different options you can go with. This is what considered to be more of a glass pack. This is a free flowing design and it's gonna give you that distinctive tone that you guys remember from the '60s and the '70's. Now this is what is considered to be more of a muffler. This is made out of 409 stainless steel. It comes in a bunch of different options as far as inlet and outlet size. Plus the orientation of those so you guys can pick and choose whatever you need for your project. Plus, this is completely reversible. So, it doesn't matter which way you install it. Inside of here is a perforated tube that's kinda wrapped in fiberglass mesh. So this one will be a little bit quieter than the glass pack. You guys also saw us use these underneath the car. This is a butt connector or kind of a band clamp. What this allows you to do is take two pieces of the same size tubing, butt them together so you don't have to weld it. That way you can take your exhaust out of the car if you ever need to service something. Now you guys can go to Summit Racing and pick all of this stuff up. That way you can figure out what you want, what you need, and what you'd like to hear from underneath your car. We think we're gonna like the glass pack. So this is what we're going with. [ Music ] [ welder crackling ]
(Jeremy)>> Well that takes care of the mockup stage of our exhaust. From here we have to add a couple of hangers, take everything down, weld it up, and that'll pretty much button up everything underneath the car. We install a modern e-f-i system. Plus protect our Datsun's paint with a little t-l-c.
(Jimmy)>> We're moving right along back up to the top of the car, and we're gonna start installing our new fuel injection system. We're gonna start with the intake manifold. Something that we're doing with this along with the rest of the engine is installing ARP hardware just because the stock stuff over time has gotten really beat up and it doesn't look too great. So, the ARP hardware is gonna give some nice corrosion protection, and in general it's just gonna last a long time.
(Jeremy)>> Now to go along with the upgraded intake that Jimmy just installed we're also gonna be upgrading our fuel injection. Now the 280-Z originally was fuel injected, but the old harness has seen better days and the connectors for the injectors are very brittle. It makes the car very unreliable, but on the flipside of that we have a brand new fuel injection setup. Not only will this make our car even more reliable. It's also gonna clean up the underside of the hood here. So, we'll just get this stuff plugged in and keep moving forward here.
Now we got our fuel injection setup from the guys over at ZCar Depot. Now this is a FAST fuel injection setup, and it's made for an eight cylinder, but what the guys do is they set this up as a batch fire. What that means is every injector is gonna fire every time. So it doesn't matter which way you guys hook these up as long as you hook up six of them. Speaking of that, you are gonna have two extra connectors. Don't worry about this. You can either cut them or put them back in the harness. Just get them out of the way. What we'll do is come back and clean this up a little bit later, but for now we're just connect six of these. Okay so another thing that the ZCar Depot guys do is they send you adapters to adapt some brackets. On the side of the throttle body here we have an adapter that runs a different throttle position sensor than stock. That just allows you to plug the harness directly into this throttle position sensor. [ Music ] [ ratchet clicking ] [ Music ]
(Jeremy)>> So now with any e-f-i setup the e-c-u's gonna have see some sort of r-p-m signal. So FAST sends this little r-p-m module. This connects directly to our stock distributor. That way we don't have to run some fancy distributor. What that does is gonna send this r-p-m signal to the e-c-u so the fuel injection runs correctly. It installs very simple. You just run the white wire to the negative side of our coil, put the yellow wire right to the harness, and the black one just goes to ground. [ Music ] So another thing that we do have to do is make sure when we connect the e-c-u power and ground it goes directly to the battery. What that's gonna do is give our e-c-u a very clean signal so it's not dirty or noisy as they call it, and that can make our computer do some kinda wonky things. Now to do that we're gonna be connecting it over here to an Optima Yellow Top battery. This will give us a bunch of cold cranking amps when we go to start it for the first time. Plus, it'll give us a bunch of reliable starts when we go take this thing for a rip.
(Jimmy)>> One thing we want to do before we finally take our car out is get the exterior looking really nice. So we have Rob and Cole from Sonax to help us out, and ultimately we want to get their ceramic spray coating on the car but we have a few steps to do before that, including a little bit of wet sanding, cutting, and polishing. So, we'll let these guys work their magic and make this thing really shine. [ buffer buzzing ] [ Music ] [ buffer buzzing ] [ Music ] [ buffer buzzing ] [ Music ] [ buffer buzzing ] [ Music ]
(Jeremy)>> Well Rob and Cole did a great job really slicking this car out. They gave the color a bunch of depth, and the clear is super smooth, and now it's time to give it a little bit of protection.
(Rob)>> We are going to actually put on the new ceramic spray coating. Simply spray it on, wipe it, flip your towel over, remove it, and it'll give you up to six months durability.
(Jeremy)>> And it's super easy to put on, right?
(Rob)>> It couldn't be any easy. Literally you just spray it on your towel, wipe it on the paint, flip your towel over, and wipe it off. It'll leave the paint really slick.
(Jeremy)>> You can feel it actually as you're applying it and as you're wiping it back off. The car just slicks right back out.
(Rob)>> The hydrophobic capabilities of this is amazing too. I'm always amazed at when you're praying for rain just so you can see how your protection is working.
(Jeremy)>> Well the car is super straight and slick, and we've got some good protection on it. So Jimmy and I have a couple more things to do. We've got to put the hood, and grille, and the bumper on the front, but then we can take it out for a rip and have some fun with it, huh?
(Jimmy)>> It'll be super fun! There's no better way to show off our finished Datsun than with some friends at the track.
[ electronic music ]
(Jimmy)>> When we started this project our whole plan was to honor the history of Datsun and the "Z" platform. We wanted to keep the proud heritage of Nissan's pursuit for performance combined with the sleek and sporty look. We believe our 280-Z keeps with these core visions with a slight nod to subsequent generations of the "Z" family. Taking the best of the old, accentuated with the new, and adding a dash of ultimate Nissan performance to create what we feel is the perfect culmination of the "Z" car dynasty.
(Jeremy)>> So we headed out to the Nashville Super Speedway to meet up with our good friends from Nissan and see what they thought. [ Music ] [ engine revving ] ( )>> Look at those fender mirrors. ( )>> Big flares, big, wide tires. ( )>> Yellow headlights, nice! ( )>> That thing is aggressive. Look at those tires on that thing. That is insane! [ clapping ] ( )>> It's fantastic! ( )>> That thing looks great!
(Jeremy)>> It's been a long time coming. ( )>> You guys nailed it.
(Jeremy)>> It's great to actually see the two of them side by side finally. ( )>> The colors are spot on. ( )>> These bumpers, fender mirrors, flares all look fantastic. ( )>> The yellow headlights, nice touch.
(Jeremy)>> That was Jimmy! ( )>> It works really well with the color, and the red ties in a little bit with the badge.
(Jeremy)>> We've had a lot of communications with you guys over the entire build, and everybody has a little piece that they brought into the car. Constant phone calls, and we just want to make sure everything we did we did the car justice and to bring the car to this point. Right down to the color choice, or Jonathan calling you about the badges. What color badges go back on the car? The yellow just didn't seem right in the "Z" insignia, but whatever's correct to the car.
(Carl)>> It just works too. I think it's been a great opportunity to be able to support you guys on this project. So great to touch on our heritage and see it here with the new "Z" is fantastic.
(Jeremy)>> I think the color choice was right. I've fallen in love with it more and more every day.
(Jonathan)>> And the color really suits the car, and it's so cool to see them side by side, and now you can really see the influence that the designers took for the new "Z" out of all the design elements from the original S-30 chassis.
(Jeremy)>> We really enjoyed it. It was a giant labor of love that's for sure.
(Jimmy)>> We're more muscle car guys, traditional hot rod stuff. So, this being a really high level build in the import world is a really special thing.
(Carl)>> You guys are coming around. You're coming to the light. Out of the muscle car darkness and into the import light.
(Jimmy)>> That's funny too because we took this car down to nothing and you learn so much about it, and I feel like now I know about just this world and this car, and I can do it again with relative ease versus us working on Camaros and C-10 trucks. That's what we're used to, and that's what we like, but it's comfortable, and this is a little bit uncomfortable for us.
(Carl)>> Always good to stretch your boundaries a bit, learn something new. ( )>> This thing turned out killer guys.
(Carl)>> Knocked it out of the park.
(Jeremy)>> We're all here at the track. You guys brought a bunch of super nice cars and the sun is shining. We could go do a couple laps if everybody wants to jump in a car.
(Carl)>> Let's do it!
(Jeremy)>> Let's hop in and go! It'll be the first time we really stretch its legs and get to use sixth gear on this. Besides for the testing and tuning that we get to do. [ Music ]
(Jimmy)>> Well the Nissan guys liked it. I'd say that's a win.
(Jeremy)>> The best way to say that is it's a win in our book.
(Jimmy)>> It's scary you know. We build this car, and we have their help with stuff. We're always asking them for advice, but the ultimate judgement of it, rolling up on them and asking did we actually do it?
(Jeremy)>> Did we pull it off?
(Jimmy)>> Got a good reaction. So, we've got to be happy about it.
(Jeremy)>> I'm happy with the car period. We're American muscle car guys. That's how we grew up when we were younger. This has definitely pushed me one direction.
(Jimmy)>> And just to learn something new. Now we've broadened our skill set. We know a little bit more, and it's just all fun.
(Jeremy)>> We've had a great time out here at the Nashville Super Speedway, and we want to give a giant thanks to them. Plus, all of the Nissan guys for bringing out their cars, and or all the support for us to build our 280-Z. We've got a lot of daylight left, a bunch of killer cars. We're gonna go enjoy the track.