Carcass Featured Projects
Carcass Builds
Want more content like this?
Join the PowerNation Email NewsletterVideo Transcript
[ Jimmy ] You're watching Powernation!
[ Jeremy ] Today on Carcass we bring in a new project. We'll turn this beaten down Beemer into a multifaceted race car, but first we have to shed all of our old worn out interior to make room for a full roll cage. Then yank out the drivetrain to give us space for our new power plant. [ Music ] [ engine revving ] [ Music ] [ engine revving ] [ Jimmy ] Bring it on back. Bring it on back. What's up everybody, welcome to Carcass. Jeremy and I have a new project in the shop today which is a certified pile of junk. It's a 2001 BMW 330i, which is the E-46 chassis, but we do have some plans for this thing to make it quite a bit better than it is. [ Jeremy ] Now we paid just under $2,000 for this car but we're not interested in the way that it runs or the way that it looks. We're more interested in it for the chassis. This car's gonna be multifaceted. We're gonna be able to take it up and down some hill climbs, run it around the autocross course, and have some fun with it at those track day events. This car is a handful of work but let me tell you how we're gonna get it done. Just like with all of our race cars the first thing we're gonna do is gut the interior so we can make way for a true race specific roll cage to stiffen up the car and to keep us safe. We'll also slap in a pair of racing seats. Up front we'll tear out the stock inline six and manual trans and swap it out for a mildly built LS and a five speed transmission. The stock brakes will come off and get upgraded to something that's a little more useful on the track along with some coil over shocks all the way around. An aftermarket set of wheels and racing slicks will make sure the BMW sticks to the track and looks good doing it. Last but not least we'll add some fender flares, a sunroof delete up top, and a spoiler in the back. We'll finish the car off with a very animated paint job. [ Music ] Before we get started with all the fun work we're gonna make our lives a whole lot easier and get rid of the doors followed by the front seats, and then everything else. [ Music ] [ drill humming ] [ Music ] [ Jeremy ] Take this out the back door. Oh it's heavy! [ Music ]
[ Music ]
Look at that, a wrench, and it's the missing 10 millimeter. The thing that goes missing the most often we finally found it. [ drill humming ] [ Music ] More pennies! [ drill humming ] [ Jeremy ] Give that a good pull. Keep taking plastic parts out of the way. Oh look at this! It's called a rebate. Let's count it. These are old bills. One, two, three, four dollar bills and a pile of change. So we're up to five, six, seven bucks just with randoms we've found so far. This is great! Could do this more often. Ok guys, we're gonna talk about dealing with air bags. First and foremost, disconnect your battery and I like to wait at least five or ten minutes just to let all that residual power drain out of the car because the last thing you want to do when you disconnect one of these is have it go off in your face! Everything's disconnected, air bag comes out nicely, and we're gonna get it out of the way. [ drill humming ] Let's get this out of here. Weasel it out through the door here. [ Music ] [ Jeremy ] Up next, we start the process of fabricating the roll cage of our BMW.
[ Jeremy ] Welcome back! The interior of the BMW is pretty much all gone except for this dingy carpet. The last thing we have to do is get this out of here. Then we'll clean up a little bit on the inside. That way Jimmy can make way for the roll cage. [ Music ]
[ Jimmy ] We are well underway preparing our BMW for the roll cage, and if you are building a roll cage for your vehicle there's a couple of important things to consider. Number one, how are you going to attach the cage to the floor? Number two, how are you going to gain access to the top portions of the cage to weld it? A well constructed roll cage includes 360 degrees of weld on every single joint. And a little bit of fore thought and planning can save you a lot of headache later and give you a good, finished product. In the past we have used three different methods and we have achieved very good results. The first method is using a simple eighth inch plate to contour the floor where the cage lands. In some cars you can get lucky and find flat areas of the floor where only cutting a plate to size is necessary. To access the top of the cage the plates will be removed, a hole will be drilled in the floor to drop the cage down a few inches giving some space for your torch. The plates can be reinstalled later and the cage can be final welded. Second a plinth box can be made. This is a little bit more involved to fabricate, however no drilling through the floor is necessary. Once the cage is constructed the boxes can be removed to drop the cage all the way to the floor pan for welding and reinstalled later on. This is the most common method, and the box height can be tailored depending on how much drop you are looking for. Finally the last method to gain access for welding is cutting the roof off of your vehicle. This can be quite complex and it often helps to have multiple people available to reinstall the roof after welding. I do prefer this method because it completely opens the top of the vehicle and allows the use of simple flat plates to attach the cage to the floor. The biggest downside is reinstalling the roof, welding and finishing the seams. With all of that said the method that we're gonna be using for our car is the plinth box method. I've got a lot of prep work to do. So let's get started. One of the most important things about getting the floor prepped for the roll cage is getting all the sound deadening off. That way we can grind the paint off and have a nice, clean, bare metal surface to weld to. To get all of this sound deadening off we want to release the glue. So we're using dry ice and rubbing alcohol. This is stuff you can get from your local grocery store. Putting the dry ice down makes everything really cold, and the rubbering alcohol will conduct all that heat or cold to the glue. Shortly here this stuff should release from the floor. Then we'll get the paint off and have a nice, clean surface for our roll cage. [ Music ] [ vacuum humming ] [ Music ] [ Jimmy ] As I said earlier, we'll be using the plinth box method to attach the cage to our BMW. Up front we will be building a full box but in the rear the box is already kinda built in for us already because of the way that the floor pan is constructed. So it slopes down here and then there's a big vertical drop off all the way into the bottom of the floor pan. We're just gonna use some steel to reinforce the vertical face and this face up top. Then we'll weld everything in here, land the cage on top, and then we can just push the cage forward. It'll drop all the way down into the bottom of the floor pan, and then we can access everything up top to weld. Right now I'm just gonna whittle away at this folder, create a template, and we'll transfer it to some steel. [ Music ]
[ Ironworker humming ] [ Music ] [ grinder buzzing ] [ Music ] [ grinder buzzing ] [ Music ] [ grinder buzzing ] [ Jimmy ] I've got these areas prepped for our plates. Obviously I have the first one made for the top face, and I also went ahead and made the plate for the vertical face. I'm gonna go ahead and get these tacked in, and then we can move on to the fronts, make the boxes, get everything set up for the cage. Coming up, our cage starts taking shape.
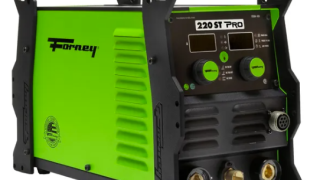
[ Jeremy ] Hey everybody, welcome back. We are knee deep into the E-46 build and Jimmy's got all the interior out and ready to start the roll cage. Since we're gonna be doing a lot of welding we've got Gabby in here with Forney Industries. You guys brought us a stick tig machine that's gonna help us get that car finished up. [ Gabby ] Yeah, I brought you our 220-ST which is our pro stick tig machine. This unit is a d/c output only unit. So you cannot weld aluminum, only steel, but this unit does have some advanced features like high frequency as well as pulse controls and some arc force adjustments on the stick side of this. Therefore we have our Pro unit, and you can also use a foot pedal with this machine or a triggered torch as well. [ Jeremy ] We've got some pieces here for you to simulate how we'd be welding up the roll cage. If you want to give us a little demonstration. Maybe give us some tips and tricks on the machine, and even for somebody that might just be starting to weld kinda let them know how to get started in this. [ Gabby ] Definitely let's do some welding and I'll try to give you guys some tips and tricks. [ Jeremy ] I'll go grab a helmet. [ Music ] Tell me about the pulse feature too. [ Gabby ] So when you're using pulse it allows you to reduce your heat. So it's going to put the top end amperage in, and then you're able to set your percentage on. So when your percentage on you're setting how long the machine is on its high setting, and then it will go down into its lowest amperage setting that the machine is set to. Therefore it's going to allow your heat to work its way through the material instead of causing warping because you're just putting a bunch of heat into one spot. [ Jeremy ] Which is huge, especially on more of a sheet metal thing. [ Gabby ] Also a lot of people like to use it for exhaust work and things like that because it makes your welds look pretty. Therefore it does look a little bit better as well when you're using a pulse setting when you know what you're doing. It is a little bit more of an advanced setting. So you do need to understand tig functions before you just go ahead and start using pulse. [ Jeremy ] That should work out great. He's got a lot of work to do on the cage. So this will just help speed things up there. [ Gabby ] Awesome! Well I hope that you guys like it. If you have any questions or anything go ahead and give me a call. [ Jeremy ] I'll let you pack that up, get my helmet off, and get back over to the car so we can get going. [ Jimmy ] I've been making some great progress on the roll cage and I have the main hoop structure completely welded. I have some of the driver's side tubes in along with the rear down braces. I also have the support plates for the main hoop and the rear braces fully welded in, and I do have the plinth boxes for the front just tacked in for now. Something that's really nice to do if possible is completely finish the main hoop structure outside of the car. We have a lot of open space in here. So it's easy for me to get this thing in and out of here. So what I did was once I fitted the main hoop I actually fit up all the tubes and welded everything out on the table where I can be comfortable, weld everything, flip it over, do the other side versus welding everything in here. You have to contort your body. It's very time consuming and uncomfortable. So if you can do that that's a really good thing and it'll save you some time and some headaches. Now I'm just gonna try to mirror the driver's side over here on the passenger's side and we'll get this thing finished up. [ saw buzzing ] [ Music ]
[ Music ] [ tube bender humming ] [ Music ] [ tube bender humming ] [ Music ] [ Jimmy ] That's close enough. [ tube bender humming ] [ Music ] [ saw buzzing ] [ Music ] [ grinder buzzing ]
[ welder crackling ] [ Music ] [ tube bender humming ] [ Music ] [ saw buzzing ]
[ welder crackling ] [ Music ] [ welder crackling ] [ Music ] [ saw buzzing ] [ Music ]
[ Jimmy ] Alright, I've got a heck of a lot of welding to do. Gotta add a few more gussets and then this cage will be done. [ Jeremy ] Coming up, we get rid of our inline six cylinder so we can make way for our new power plant.
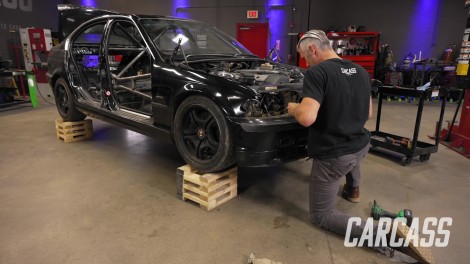
[ Jeremy ] Welcome back! Well Jimmy did a great job on the roll cage and we've got the car shifted over here and up on the boxes because now we're gonna make way for our new power plant. So we have to get the engine and transmission out from underneath the hood here. So nothing too fancy. Just get rid of a couple of key components and we'll get this thing out of here. [ ratchet clicking ]
[ Music ]
[ Jeremy ] Then the headlights come out. Since this one's broke, the mounts are broke off, this one's easy. Just do the passenger side. [ Music ]
[ drill humming ] [ Music ] [ Jeremy ] That one's already loose. Look at that! I don't think somebody put this car back together very nicely. Coming apart nicely though. [ drill humming ] [ Music ] [ Jeremy ] Last thing for the front here is to take off the hood release cable. It separates right there, which is convenient. Now the whole front should come off. One connector yet. There we go. Let's see if there's any coolant in it. Oh, there's coolant in it, and all over my boot! Not much coolant in it though. Gotta wipe my booth off. These are quick connects. I can just do that and make a giant mess. Same thing goes for the bottom one here. We'll do the a/c lines quick. [ Music ]
[ drill humming ] [ Music ] [ Jeremy ] So we have most of everything disconnected up top here. I went ahead and disconnected the fuel line that's in the back. It's a little bit of a bugger to get to but we've got that handled. So from here we'll transition under the car. Got the exhaust to tackle, the driveshaft, and a couple of crossmembers. [ Music ] [ drill humming ] [ Music ] [ Jeremy ] Okay, there's that. I made a huge hole. [ drill humming ] [ Music ] [ drill humming ] [ Jeremy ] Heck yeah brother! [ drill humming ] [ Music ] [ Jeremy ] Alright, that's it. [ Music ] [ drill humming ] So we have everything disconnected underneath the car except for the transmission crossmember. We do have the mounts loose. So it's just sitting on there keeping this in position. So we'll go ahead and get this picked up here and try to weasel it out of the hole. A little bit, okay. Check this side. Perfect! The passenger side engine mount, the stud didn't even pull out. The mount just separated from the rubber. Like it wasn't doing anything. [ Jimmy ] Just old, deteriorated. [ Jeremy ] You know what'll probably happen. That is exactly what I was gonna say. Get it off the crossmember. Get jammed in here or not. [ Music ] Beauty! Don't want this thing rolling off of our blocks here. Keep going, alright, I think you're clear. See you later six cylinder. Now I have to take this thing outside and give it a bath. That'll have to wait until next time. For now we're gonna call that a win and wrap things up. [ Jimmy ] See you next time!
Show Full Transcript
[ Jeremy ] Today on Carcass we bring in a new project. We'll turn this beaten down Beemer into a multifaceted race car, but first we have to shed all of our old worn out interior to make room for a full roll cage. Then yank out the drivetrain to give us space for our new power plant. [ Music ] [ engine revving ] [ Music ] [ engine revving ] [ Jimmy ] Bring it on back. Bring it on back. What's up everybody, welcome to Carcass. Jeremy and I have a new project in the shop today which is a certified pile of junk. It's a 2001 BMW 330i, which is the E-46 chassis, but we do have some plans for this thing to make it quite a bit better than it is. [ Jeremy ] Now we paid just under $2,000 for this car but we're not interested in the way that it runs or the way that it looks. We're more interested in it for the chassis. This car's gonna be multifaceted. We're gonna be able to take it up and down some hill climbs, run it around the autocross course, and have some fun with it at those track day events. This car is a handful of work but let me tell you how we're gonna get it done. Just like with all of our race cars the first thing we're gonna do is gut the interior so we can make way for a true race specific roll cage to stiffen up the car and to keep us safe. We'll also slap in a pair of racing seats. Up front we'll tear out the stock inline six and manual trans and swap it out for a mildly built LS and a five speed transmission. The stock brakes will come off and get upgraded to something that's a little more useful on the track along with some coil over shocks all the way around. An aftermarket set of wheels and racing slicks will make sure the BMW sticks to the track and looks good doing it. Last but not least we'll add some fender flares, a sunroof delete up top, and a spoiler in the back. We'll finish the car off with a very animated paint job. [ Music ] Before we get started with all the fun work we're gonna make our lives a whole lot easier and get rid of the doors followed by the front seats, and then everything else. [ Music ] [ drill humming ] [ Music ] [ Jeremy ] Take this out the back door. Oh it's heavy! [ Music ]
[ Music ]
Look at that, a wrench, and it's the missing 10 millimeter. The thing that goes missing the most often we finally found it. [ drill humming ] [ Music ] More pennies! [ drill humming ] [ Jeremy ] Give that a good pull. Keep taking plastic parts out of the way. Oh look at this! It's called a rebate. Let's count it. These are old bills. One, two, three, four dollar bills and a pile of change. So we're up to five, six, seven bucks just with randoms we've found so far. This is great! Could do this more often. Ok guys, we're gonna talk about dealing with air bags. First and foremost, disconnect your battery and I like to wait at least five or ten minutes just to let all that residual power drain out of the car because the last thing you want to do when you disconnect one of these is have it go off in your face! Everything's disconnected, air bag comes out nicely, and we're gonna get it out of the way. [ drill humming ] Let's get this out of here. Weasel it out through the door here. [ Music ] [ Jeremy ] Up next, we start the process of fabricating the roll cage of our BMW.
[ Jeremy ] Welcome back! The interior of the BMW is pretty much all gone except for this dingy carpet. The last thing we have to do is get this out of here. Then we'll clean up a little bit on the inside. That way Jimmy can make way for the roll cage. [ Music ]
[ Jimmy ] We are well underway preparing our BMW for the roll cage, and if you are building a roll cage for your vehicle there's a couple of important things to consider. Number one, how are you going to attach the cage to the floor? Number two, how are you going to gain access to the top portions of the cage to weld it? A well constructed roll cage includes 360 degrees of weld on every single joint. And a little bit of fore thought and planning can save you a lot of headache later and give you a good, finished product. In the past we have used three different methods and we have achieved very good results. The first method is using a simple eighth inch plate to contour the floor where the cage lands. In some cars you can get lucky and find flat areas of the floor where only cutting a plate to size is necessary. To access the top of the cage the plates will be removed, a hole will be drilled in the floor to drop the cage down a few inches giving some space for your torch. The plates can be reinstalled later and the cage can be final welded. Second a plinth box can be made. This is a little bit more involved to fabricate, however no drilling through the floor is necessary. Once the cage is constructed the boxes can be removed to drop the cage all the way to the floor pan for welding and reinstalled later on. This is the most common method, and the box height can be tailored depending on how much drop you are looking for. Finally the last method to gain access for welding is cutting the roof off of your vehicle. This can be quite complex and it often helps to have multiple people available to reinstall the roof after welding. I do prefer this method because it completely opens the top of the vehicle and allows the use of simple flat plates to attach the cage to the floor. The biggest downside is reinstalling the roof, welding and finishing the seams. With all of that said the method that we're gonna be using for our car is the plinth box method. I've got a lot of prep work to do. So let's get started. One of the most important things about getting the floor prepped for the roll cage is getting all the sound deadening off. That way we can grind the paint off and have a nice, clean, bare metal surface to weld to. To get all of this sound deadening off we want to release the glue. So we're using dry ice and rubbing alcohol. This is stuff you can get from your local grocery store. Putting the dry ice down makes everything really cold, and the rubbering alcohol will conduct all that heat or cold to the glue. Shortly here this stuff should release from the floor. Then we'll get the paint off and have a nice, clean surface for our roll cage. [ Music ] [ vacuum humming ] [ Music ] [ Jimmy ] As I said earlier, we'll be using the plinth box method to attach the cage to our BMW. Up front we will be building a full box but in the rear the box is already kinda built in for us already because of the way that the floor pan is constructed. So it slopes down here and then there's a big vertical drop off all the way into the bottom of the floor pan. We're just gonna use some steel to reinforce the vertical face and this face up top. Then we'll weld everything in here, land the cage on top, and then we can just push the cage forward. It'll drop all the way down into the bottom of the floor pan, and then we can access everything up top to weld. Right now I'm just gonna whittle away at this folder, create a template, and we'll transfer it to some steel. [ Music ]
[ Ironworker humming ] [ Music ] [ grinder buzzing ] [ Music ] [ grinder buzzing ] [ Music ] [ grinder buzzing ] [ Jimmy ] I've got these areas prepped for our plates. Obviously I have the first one made for the top face, and I also went ahead and made the plate for the vertical face. I'm gonna go ahead and get these tacked in, and then we can move on to the fronts, make the boxes, get everything set up for the cage. Coming up, our cage starts taking shape.
[ Jeremy ] Hey everybody, welcome back. We are knee deep into the E-46 build and Jimmy's got all the interior out and ready to start the roll cage. Since we're gonna be doing a lot of welding we've got Gabby in here with Forney Industries. You guys brought us a stick tig machine that's gonna help us get that car finished up. [ Gabby ] Yeah, I brought you our 220-ST which is our pro stick tig machine. This unit is a d/c output only unit. So you cannot weld aluminum, only steel, but this unit does have some advanced features like high frequency as well as pulse controls and some arc force adjustments on the stick side of this. Therefore we have our Pro unit, and you can also use a foot pedal with this machine or a triggered torch as well. [ Jeremy ] We've got some pieces here for you to simulate how we'd be welding up the roll cage. If you want to give us a little demonstration. Maybe give us some tips and tricks on the machine, and even for somebody that might just be starting to weld kinda let them know how to get started in this. [ Gabby ] Definitely let's do some welding and I'll try to give you guys some tips and tricks. [ Jeremy ] I'll go grab a helmet. [ Music ] Tell me about the pulse feature too. [ Gabby ] So when you're using pulse it allows you to reduce your heat. So it's going to put the top end amperage in, and then you're able to set your percentage on. So when your percentage on you're setting how long the machine is on its high setting, and then it will go down into its lowest amperage setting that the machine is set to. Therefore it's going to allow your heat to work its way through the material instead of causing warping because you're just putting a bunch of heat into one spot. [ Jeremy ] Which is huge, especially on more of a sheet metal thing. [ Gabby ] Also a lot of people like to use it for exhaust work and things like that because it makes your welds look pretty. Therefore it does look a little bit better as well when you're using a pulse setting when you know what you're doing. It is a little bit more of an advanced setting. So you do need to understand tig functions before you just go ahead and start using pulse. [ Jeremy ] That should work out great. He's got a lot of work to do on the cage. So this will just help speed things up there. [ Gabby ] Awesome! Well I hope that you guys like it. If you have any questions or anything go ahead and give me a call. [ Jeremy ] I'll let you pack that up, get my helmet off, and get back over to the car so we can get going. [ Jimmy ] I've been making some great progress on the roll cage and I have the main hoop structure completely welded. I have some of the driver's side tubes in along with the rear down braces. I also have the support plates for the main hoop and the rear braces fully welded in, and I do have the plinth boxes for the front just tacked in for now. Something that's really nice to do if possible is completely finish the main hoop structure outside of the car. We have a lot of open space in here. So it's easy for me to get this thing in and out of here. So what I did was once I fitted the main hoop I actually fit up all the tubes and welded everything out on the table where I can be comfortable, weld everything, flip it over, do the other side versus welding everything in here. You have to contort your body. It's very time consuming and uncomfortable. So if you can do that that's a really good thing and it'll save you some time and some headaches. Now I'm just gonna try to mirror the driver's side over here on the passenger's side and we'll get this thing finished up. [ saw buzzing ] [ Music ]
[ Music ] [ tube bender humming ] [ Music ] [ tube bender humming ] [ Music ] [ Jimmy ] That's close enough. [ tube bender humming ] [ Music ] [ saw buzzing ] [ Music ] [ grinder buzzing ]
[ welder crackling ] [ Music ] [ tube bender humming ] [ Music ] [ saw buzzing ]
[ welder crackling ] [ Music ] [ welder crackling ] [ Music ] [ saw buzzing ] [ Music ]
[ Jimmy ] Alright, I've got a heck of a lot of welding to do. Gotta add a few more gussets and then this cage will be done. [ Jeremy ] Coming up, we get rid of our inline six cylinder so we can make way for our new power plant.
[ Jeremy ] Welcome back! Well Jimmy did a great job on the roll cage and we've got the car shifted over here and up on the boxes because now we're gonna make way for our new power plant. So we have to get the engine and transmission out from underneath the hood here. So nothing too fancy. Just get rid of a couple of key components and we'll get this thing out of here. [ ratchet clicking ]
[ Music ]
[ Jeremy ] Then the headlights come out. Since this one's broke, the mounts are broke off, this one's easy. Just do the passenger side. [ Music ]
[ drill humming ] [ Music ] [ Jeremy ] That one's already loose. Look at that! I don't think somebody put this car back together very nicely. Coming apart nicely though. [ drill humming ] [ Music ] [ Jeremy ] Last thing for the front here is to take off the hood release cable. It separates right there, which is convenient. Now the whole front should come off. One connector yet. There we go. Let's see if there's any coolant in it. Oh, there's coolant in it, and all over my boot! Not much coolant in it though. Gotta wipe my booth off. These are quick connects. I can just do that and make a giant mess. Same thing goes for the bottom one here. We'll do the a/c lines quick. [ Music ]
[ drill humming ] [ Music ] [ Jeremy ] So we have most of everything disconnected up top here. I went ahead and disconnected the fuel line that's in the back. It's a little bit of a bugger to get to but we've got that handled. So from here we'll transition under the car. Got the exhaust to tackle, the driveshaft, and a couple of crossmembers. [ Music ] [ drill humming ] [ Music ] [ Jeremy ] Okay, there's that. I made a huge hole. [ drill humming ] [ Music ] [ drill humming ] [ Jeremy ] Heck yeah brother! [ drill humming ] [ Music ] [ Jeremy ] Alright, that's it. [ Music ] [ drill humming ] So we have everything disconnected underneath the car except for the transmission crossmember. We do have the mounts loose. So it's just sitting on there keeping this in position. So we'll go ahead and get this picked up here and try to weasel it out of the hole. A little bit, okay. Check this side. Perfect! The passenger side engine mount, the stud didn't even pull out. The mount just separated from the rubber. Like it wasn't doing anything. [ Jimmy ] Just old, deteriorated. [ Jeremy ] You know what'll probably happen. That is exactly what I was gonna say. Get it off the crossmember. Get jammed in here or not. [ Music ] Beauty! Don't want this thing rolling off of our blocks here. Keep going, alright, I think you're clear. See you later six cylinder. Now I have to take this thing outside and give it a bath. That'll have to wait until next time. For now we're gonna call that a win and wrap things up. [ Jimmy ] See you next time!