Building the Beast — Project UnSanctioned Part 4
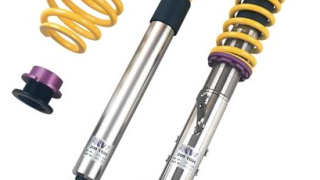
Our 2001 BMW race car gets a set of coilovers, as well as big brake upgrade. Then we change the aerodynamics of our project to give it a fierce look.
Season 5
Episode 12