Classic Trucks! Builds
Want more content like this?
Join the PowerNation Email NewsletterVideo Transcript
Today on Truck, Stace and I finished transforming Chevy's extreme S 10 into a muscle bound sport truck. We'll lay on the stripes, then melt off the rubber on our extreme pickup. After that, we'll show you how to build a ramp that'll help grade your vehicle's off road capability. Then we'll hit the trail. We'll show you how to get the most out of your experience behind the wheel. That's all coming up today on trucks.
Hello, everybody. And thanks for dropping into the shop. If you've been around the last couple of weeks and you've seen our extreme S 10 go through quite a transformation. But if you've missed the last couple of shows, we need to bring you up to speed with Project Lt Extreme.
The first thing we did was tear out the stock four banger to make room for the donor LT one with a 700 R four automatic tranny. Of course, that's controlled with B and M's hammer shifter
video gauges and a custom panel, monitor the heartbeat of our extreme
to handle the weight and get a better grip. We upgraded our front suspension with I box springs and Edelbrock shocks, dual spa
fans and a Griffin radiator will keep things cool while a new fuel pump and pickup assembly found a home in the gas tank. Finally, we finished up last week by strapping on a custom drive shaft from wheel to wheel.
Now I've already made all the electrical connections and dropped in the battery. I also hooked up the heater hoses, but I'm gonna wait to put the antifreeze in until we make sure this bad boy's got its rumble.
Now, while Mel was doing that, I hooked up the throttle cables and the fuel lines and topped everything off with this custom set of moroso valve covers.
Now comes the moment of truth, we're gonna put fire to this thing to check our clearances and make sure everything's ready to go.
Not to mention we're dying to hear what this thing sounds like with open headers.
Oh man, that sucker sounds healthy.
Now, of course, the performance motor is useless without a performance exhaust. So we're gonna go with a complete flow master system that connects both headers together and flows through 13 inch pipe.
Full
master's real claim to fame is the muffler because it uses a series of chambers instead of baffles to help reduce back pressure without breaking your ear drums or the law. Speaking of breaking the law, that is exactly what you'll do if you try to run without a catalytic converter on anything less than 25 years old.
And now catalytic converters have crashed the party for hot rodders for years
because you had high flowing headers, a great flow and exhaust and then you had to choke it right back down with a restrictive cat.
But random technologies has the answer with their high flow converters that still control emissions but are far less restrictive. Breathe a new life back into the party.
Our stock we're in has a posse in it. And wheel to wheel says the axles are gonna be strong enough to handle that donor lt one. We'll find out when we drop the hammer on our stream later in the show.
One thing's for sure though, we are gonna have severe wheel hop problems. Thanks to all that newfound torque, we're gonna counter that
problem with Lakewood's traction bars built specifically for S tens. The design has been around forever because it works. And Stacy's gonna show you how
spring wrap is what causes wheel hop. Now what happens when you stomp on the gas? This rear end housing wants to rotate upwards
that takes this nice U shaped leaf spring and tries to turn it into an S shape by causing it to buckle here.
Now, that in turn makes this tire lose contact with the road and this spring being a spring shoves it back to its original position.
So you've got this constant back and forth motion which is will hop
and that can also cause broken springs, shackles axles
and a whole lot of bad performance.
These new bars are gonna replace the rear shadow plates here. So the first thing we need to do is pull the stock shots
as well as the four nuts on the U
bolt.
Lakewood's hardware slides right into place. You may have to remove this overload leaf in some applications. We're gonna be all right here.
We're going to loosely mount the U bolt to the spring because we'll have to make the final adjustments with the truck on the ground. Now, we can show you how these things really work when the torques apply to the axle and it twists up like stace was telling you earlier, the bump stop here hits the frame and the bar keeps the spring from flexing, eliminating your wheel hop problem and giving you the performance you're after.
Since we have the shocks off, we're gonna go ahead and upgrade them with the same Edelbrock performer shocks that we use on the front. Not only do they perform better but heck, you got a match.
Once you've got your truck on the ground, you need to cut the bump stop with a hacksaw to get the proper height for a racing set up. You want to lightly touch the frame for better traction
for running the streets. You need to leave about a half inch to give your suspension room to work.
Now, the U bolt is important because it keeps your traction bar from rotating downwards and possibly hitting the pavement when you hit your brakes,
adjust your jam nut to where you have about a quarter inch gap
between the top of your spring and the U bolt.
Well, project LT extremes all buttoned up underneath. After the break, we're gonna put the finishing touches on it before we roast the meat off. It. Don't go away. We'll be right back
later on trucks. We'll show you how to build an articulation ramp that'll help you get the most out of your off road vehicle. But up first the donor lt one is stuffed under the hood. All we have to do now is lay down some stripes before we can lay down some rubber with our extreme sport truck.
Welcome back to the show. Everybody. I know it's just about killing you to see this thing roll down the street. Not as bad as it's killing us. Well, that's for sure. But it's important to remember anytime you do a major project, like our donor swap here, you need to check all the fluids as well as your wire connections. Believe me, nothing will ruin your day. Like a lot of horsepower and no brakes or a fire under the hood due to bad wiring or a bad fuel connection. You know, the worst thing for the performance of the fuel injection is a big old gulp of hot air from the radiator.
So the kit from wheel to wheel comes with a custom made extension tube and elbow to help redirect the intake to cooler air.
Of
course, the extreme Arrow package just wouldn't be complete without a cool hood as in cow induction.
A and a fiberglass made the molds for this, but you can buy it at your local Chevy dealer. A big mistake people make when using fiberglass parts is they paint them before making sure they fit right and trust us, there's always some tweaking. You gotta do.
So check the fit before you paint it.
Stripes have gotten really hot again over the last few years. So Wheel to Wheel decided to take a page out of the Camaro's heritage and design some rally sports style stripes exclusively for this kit.
If you've never put on vinyl graphics before, we're gonna show you a few tricks to help make the installation a little bit easier. Most important of which is a clean surface, use a high quality cleaner that removes wax and grease to ensure the best stick.
Now, since these stripes are gonna be centered on the hood, we need to find the true center line so we don't end up going crooked. Now, whatever you do, don't trust the factory seam line of the hood. Always use a tape measure.
Now you can mock up your stripes to the center line to get an idea of where they're gonna lay this way. When the backings off, you have a general idea where to go. These are gonna look pretty cool, aren't they Stacey? And they are.
Now, the most important step is to take a solution of soapy water and soak the hood and I mean, coat it. This will give you an opportunity to move the stripes around before they stick permanently.
Now comes the easy part, just line up your marks. We like to leave about a half inch at the top to curl under the hood for a nice finished look. Once you have it where you want it slowly press down, starting from the middle of moving outward with a squeegee. When you see bubbles, just take your time and slowly work them out.
Since we're going with the cow induction hood, we need to modify the stripes that come with the wheel to wheel kit. We narrowed ours to fit the hood scoop, which means we'll have to do the quarter inch stripes by hand,
pull the protective covering back at a sharp angle to avoid raising the stripe and the hoods finished.
We need to narrow our roof stripes to eight inches to match the hood. Now, these stripes are for an extended cab pickup. So we're gonna have to shorten them as well. Now make sure of your measurements because if you cut them too short,
you might as well just chuck them in the trash
for a real clean look. We're gonna run our stripes through the brake light pocket, so we need to get this lens out of the way,
then we can douse the roof with that soap and water solution. You about ready for these graphics mel
we're ready
to do
it.
This is gonna look really good. I think the narrower stripes much better actually.
All right. A little closer, a little closer, more to the right,
more to the right, right
there, right there.
Now, even though we marked a center line on the center of the roof, it's a good idea to step back and eyeball everything to make sure it's lining up. Right.
Mel. That's perfect man.
After your stripes have been smoothed out and worked into place, take a razor blade and cut off the excess at the window rubber.
While Mel finishes up the roof, I'm gonna go ahead and put on this window graphic. Now compared to the stripes, this is a piece of cake.
Just make sure you get it centered.
Hey, stay you about finished up back there. Yeah, we got stripes on our truck. Let's go see if we can lace them on the road some rubber. Let's do it man
with a stock four banger in the extreme. All we could do is dream about burnout with our donor LT one that pumps out more than 320 horse. It's a smoke in reality.
Surprisingly, the added nose weight from our V8 didn't hurt us through the corners either. Thanks to our shock and spring upgrade
and the extreme arrow package and unique. Striping definitely makes a statement
but not near the statement we'll send to those unsuspecting vets, Camaros and Mustangs when we chase them down. Don't go away. We got more trucks for you right after the break.
Later in the show, we'll take Big Orange out for a thrashing
and show you how to get the most out of your driving ability when you hit the trail. But up first, we'll show you how to grade your vehicle's ability off road with an articulation ramp.
Welcome back to the shop. If you're in the off road, you've at least heard about articulation ramps and the term RT I. But if you haven't, you probably do know more suspension movement usually means a better performing vehicle off road.
But with any kind of suspension mods,
whether it be a lift or just bigger tires, there's always gonna be questions like, did I go too high or? Oh, I could have gone higher.
Fortunately,
an articulation ramp can answer all those questions.
But before we build our ramp for the truck shop, we need to clarify articulation, which is basically how much your suspension can flex with all four wheels still on the ground for our ramp. We're gonna use two by two square tubing for strength. Now, the only requirement is your ramp needs to be longer than your longest wheel based vehicle. So we're gonna make ours 13 ft long
and 16 inches wide. That'll be plenty.
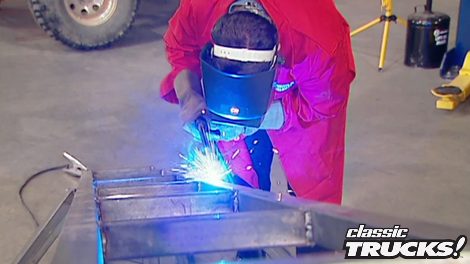
Well, Stacey is busy laying out the side rails. I'm gonna go ahead and cut our cross members with a plasma cutter.
How far apart we set these days?
I've got a mark at 2 ft apart for extra strength.
It's a good idea to tack each piece in place so they don't move on you before you run a full seam.
Now, the ramp needs to sit at a 20 degree incline for standard testing.
We'll use an angle gauge to make sure that measurement is accurate.
We're right on
next measure and cut your rear support
as well as your lower cross members and rails before you weld them on.
Of
course, we need to have some support to keep this thing from tipping over. So we're gonna put a 3 ft out rigor at the end and a 2 ft piece in the center.
Don't forget to support him.
The last thing we need to do is weld some expanded metal onto the face of the ramp to give us traction.
It also ties everything together.
The reason for the ramp is to get accurate comparisons between vehicles with different wheelbases. Now, states can just keep it on the ramp as soon as any of the tires lift off the ground or rub a fender
measure in inches from the base of the ramp to the center of the wheel on the ramp.
Divide this number by the wheelbase and multiply it by 1000 to get your ramp travel index or RT I
with 1000 being a perfect score. A 921 is slogan for a Wrangler with a four inch lift. You know, it really is. And the best part is it only costs us about 200 bucks to build the ramp. Don't go away. We got more trucks for you right after the break
up next on trucks. Stace has this week's quick tip for you and we'll take you for a ride in Big orange to show you how to get the most out of your experience behind the wheel.
Welcome back. You know, Stace and I have been off road in a lot of different vehicles and as everyone knows, no two trails are alike, but there are some basic driving skills that'll save your equipment and pull you out of some pretty hairy situations.
I
see
that.
Oh,
the most important thing is knowing your vehicle
and that includes approach and departure angle. So you don't tear off your bumper on a steep incline
where your differential pumpkins are. So you don't split them open on a rock and how much tire clearance you have to prevent body damage.
Knowing these things will help you develop the ability good drivers possess.
Now, when crawling rocks, the bash and crash approach only destroys your vehicle and your pride. Granted, sometimes you get lucky but slow and easy is the key.
It's also important to take the time to pick your way through the obstacles, get out and walk the trail if necessary to plan your line
and make sure each move sets you up for the next maneuver. So you don't get hung up. But remember things rarely go as planned. So give yourself some options before you end up hanging off the side of the hill.
Hello?
Of course not everyone's going to go rock climbing. Some of you like to get down and dirty and so do we. But this takes a whole different approach. Running, mutter sand requires momentum, gnarly tires and enough tire spin to clean the tread. This can be tricky. Not enough throttle will bog you down too much to be second place and destroyed equipment.
Now, that's just a few basic tips and we'll show you some more in the weeks to come.
But remember no tip in the world is gonna do you any good without a little common sense.
So
how many times you've been working on something and had a part fall down into a place you couldn't get to,
uh,
you know, the feeling, not to mention the hours you'll spend trying to retrieve it.
Well, here's a tip. That really sucks. Now, I mean, that literally
just take a standard shot back,
take the leg of a pair of pantyhose and stretch it over the nozzle,
hit the switch and your troubles are over.
This works really great on plastic parts. A magnet won't grab
the shop back. You can pick up at any hardware store. The pantyhose.
Well, you're on your own for that.
Stay with us. We got truck gear coming at you right after the break
and now truck gear, parts, tools and equipment for pickups and sport utilities.
If you're tired of the cargo in the back of your truck or SUV giving you the slip, this cargo bar by sable load is worth its weight in gold. And since it's made of aircraft aluminum, it won't rust or corrode either it's with adjustable to fit any compact or full size vehicle and has a bending strength of more than 700 pounds. The easy
pump handle and quick release push button make it safe to use as well. Keep the cargo right where you want it with a sable load for about $70. Now, for those of you truck guys that are running a high RPM motor
and a standard shift transmission, this blow proof bell housing from Lakewood is cheap insurance. Should you grenade a clutch?
It's made out of high tensile steel and offers a full 360 degrees of protection by retaining the shrapnel of a blown clutch.
Now, these things only cost about 250 bucks and are available for most Ford Chrysler and Chevy applications.
That's gonna do it for truck gear. Let's see what we have for you next week on trucks.
Stacey and I take a Jeep scrambler and get it ready for the trail by Bolton on a hydraulic winch and power steering box. Then we'll take a trip to Reno Nevada where 16 time Baja 1000 Champion Rod Hall teaches desert racing skills in a Hummer. After that, it's back to the shop for some bumping tips that will give you a professional results without the cost. That's all next week on trucks.
Well, that's gonna do it for this week's show. Hey,
you got anything you wanna say?
How about? Just goodbye.
Goodbye.
Yeah, goodbye. Just straight. Goodbye. Yeah, just tell him goodbye. All right, goodbye.
Well, now you told him about next week's show.
Well, you said you just wanted to say goodbye. What do you think? This is jeopardy? You gotta tell him something you tell him. Go ahead. This is your big chip.
See us next week
there. Are you happy though? Yeah, that's perfect.
Rock is an RTM production.
Show Full Transcript
Hello, everybody. And thanks for dropping into the shop. If you've been around the last couple of weeks and you've seen our extreme S 10 go through quite a transformation. But if you've missed the last couple of shows, we need to bring you up to speed with Project Lt Extreme.
The first thing we did was tear out the stock four banger to make room for the donor LT one with a 700 R four automatic tranny. Of course, that's controlled with B and M's hammer shifter
video gauges and a custom panel, monitor the heartbeat of our extreme
to handle the weight and get a better grip. We upgraded our front suspension with I box springs and Edelbrock shocks, dual spa
fans and a Griffin radiator will keep things cool while a new fuel pump and pickup assembly found a home in the gas tank. Finally, we finished up last week by strapping on a custom drive shaft from wheel to wheel.
Now I've already made all the electrical connections and dropped in the battery. I also hooked up the heater hoses, but I'm gonna wait to put the antifreeze in until we make sure this bad boy's got its rumble.
Now, while Mel was doing that, I hooked up the throttle cables and the fuel lines and topped everything off with this custom set of moroso valve covers.
Now comes the moment of truth, we're gonna put fire to this thing to check our clearances and make sure everything's ready to go.
Not to mention we're dying to hear what this thing sounds like with open headers.
Oh man, that sucker sounds healthy.
Now, of course, the performance motor is useless without a performance exhaust. So we're gonna go with a complete flow master system that connects both headers together and flows through 13 inch pipe.
Full
master's real claim to fame is the muffler because it uses a series of chambers instead of baffles to help reduce back pressure without breaking your ear drums or the law. Speaking of breaking the law, that is exactly what you'll do if you try to run without a catalytic converter on anything less than 25 years old.
And now catalytic converters have crashed the party for hot rodders for years
because you had high flowing headers, a great flow and exhaust and then you had to choke it right back down with a restrictive cat.
But random technologies has the answer with their high flow converters that still control emissions but are far less restrictive. Breathe a new life back into the party.
Our stock we're in has a posse in it. And wheel to wheel says the axles are gonna be strong enough to handle that donor lt one. We'll find out when we drop the hammer on our stream later in the show.
One thing's for sure though, we are gonna have severe wheel hop problems. Thanks to all that newfound torque, we're gonna counter that
problem with Lakewood's traction bars built specifically for S tens. The design has been around forever because it works. And Stacy's gonna show you how
spring wrap is what causes wheel hop. Now what happens when you stomp on the gas? This rear end housing wants to rotate upwards
that takes this nice U shaped leaf spring and tries to turn it into an S shape by causing it to buckle here.
Now, that in turn makes this tire lose contact with the road and this spring being a spring shoves it back to its original position.
So you've got this constant back and forth motion which is will hop
and that can also cause broken springs, shackles axles
and a whole lot of bad performance.
These new bars are gonna replace the rear shadow plates here. So the first thing we need to do is pull the stock shots
as well as the four nuts on the U
bolt.
Lakewood's hardware slides right into place. You may have to remove this overload leaf in some applications. We're gonna be all right here.
We're going to loosely mount the U bolt to the spring because we'll have to make the final adjustments with the truck on the ground. Now, we can show you how these things really work when the torques apply to the axle and it twists up like stace was telling you earlier, the bump stop here hits the frame and the bar keeps the spring from flexing, eliminating your wheel hop problem and giving you the performance you're after.
Since we have the shocks off, we're gonna go ahead and upgrade them with the same Edelbrock performer shocks that we use on the front. Not only do they perform better but heck, you got a match.
Once you've got your truck on the ground, you need to cut the bump stop with a hacksaw to get the proper height for a racing set up. You want to lightly touch the frame for better traction
for running the streets. You need to leave about a half inch to give your suspension room to work.
Now, the U bolt is important because it keeps your traction bar from rotating downwards and possibly hitting the pavement when you hit your brakes,
adjust your jam nut to where you have about a quarter inch gap
between the top of your spring and the U bolt.
Well, project LT extremes all buttoned up underneath. After the break, we're gonna put the finishing touches on it before we roast the meat off. It. Don't go away. We'll be right back
later on trucks. We'll show you how to build an articulation ramp that'll help you get the most out of your off road vehicle. But up first the donor lt one is stuffed under the hood. All we have to do now is lay down some stripes before we can lay down some rubber with our extreme sport truck.
Welcome back to the show. Everybody. I know it's just about killing you to see this thing roll down the street. Not as bad as it's killing us. Well, that's for sure. But it's important to remember anytime you do a major project, like our donor swap here, you need to check all the fluids as well as your wire connections. Believe me, nothing will ruin your day. Like a lot of horsepower and no brakes or a fire under the hood due to bad wiring or a bad fuel connection. You know, the worst thing for the performance of the fuel injection is a big old gulp of hot air from the radiator.
So the kit from wheel to wheel comes with a custom made extension tube and elbow to help redirect the intake to cooler air.
Of
course, the extreme Arrow package just wouldn't be complete without a cool hood as in cow induction.
A and a fiberglass made the molds for this, but you can buy it at your local Chevy dealer. A big mistake people make when using fiberglass parts is they paint them before making sure they fit right and trust us, there's always some tweaking. You gotta do.
So check the fit before you paint it.
Stripes have gotten really hot again over the last few years. So Wheel to Wheel decided to take a page out of the Camaro's heritage and design some rally sports style stripes exclusively for this kit.
If you've never put on vinyl graphics before, we're gonna show you a few tricks to help make the installation a little bit easier. Most important of which is a clean surface, use a high quality cleaner that removes wax and grease to ensure the best stick.
Now, since these stripes are gonna be centered on the hood, we need to find the true center line so we don't end up going crooked. Now, whatever you do, don't trust the factory seam line of the hood. Always use a tape measure.
Now you can mock up your stripes to the center line to get an idea of where they're gonna lay this way. When the backings off, you have a general idea where to go. These are gonna look pretty cool, aren't they Stacey? And they are.
Now, the most important step is to take a solution of soapy water and soak the hood and I mean, coat it. This will give you an opportunity to move the stripes around before they stick permanently.
Now comes the easy part, just line up your marks. We like to leave about a half inch at the top to curl under the hood for a nice finished look. Once you have it where you want it slowly press down, starting from the middle of moving outward with a squeegee. When you see bubbles, just take your time and slowly work them out.
Since we're going with the cow induction hood, we need to modify the stripes that come with the wheel to wheel kit. We narrowed ours to fit the hood scoop, which means we'll have to do the quarter inch stripes by hand,
pull the protective covering back at a sharp angle to avoid raising the stripe and the hoods finished.
We need to narrow our roof stripes to eight inches to match the hood. Now, these stripes are for an extended cab pickup. So we're gonna have to shorten them as well. Now make sure of your measurements because if you cut them too short,
you might as well just chuck them in the trash
for a real clean look. We're gonna run our stripes through the brake light pocket, so we need to get this lens out of the way,
then we can douse the roof with that soap and water solution. You about ready for these graphics mel
we're ready
to do
it.
This is gonna look really good. I think the narrower stripes much better actually.
All right. A little closer, a little closer, more to the right,
more to the right, right
there, right there.
Now, even though we marked a center line on the center of the roof, it's a good idea to step back and eyeball everything to make sure it's lining up. Right.
Mel. That's perfect man.
After your stripes have been smoothed out and worked into place, take a razor blade and cut off the excess at the window rubber.
While Mel finishes up the roof, I'm gonna go ahead and put on this window graphic. Now compared to the stripes, this is a piece of cake.
Just make sure you get it centered.
Hey, stay you about finished up back there. Yeah, we got stripes on our truck. Let's go see if we can lace them on the road some rubber. Let's do it man
with a stock four banger in the extreme. All we could do is dream about burnout with our donor LT one that pumps out more than 320 horse. It's a smoke in reality.
Surprisingly, the added nose weight from our V8 didn't hurt us through the corners either. Thanks to our shock and spring upgrade
and the extreme arrow package and unique. Striping definitely makes a statement
but not near the statement we'll send to those unsuspecting vets, Camaros and Mustangs when we chase them down. Don't go away. We got more trucks for you right after the break.
Later in the show, we'll take Big Orange out for a thrashing
and show you how to get the most out of your driving ability when you hit the trail. But up first, we'll show you how to grade your vehicle's ability off road with an articulation ramp.
Welcome back to the shop. If you're in the off road, you've at least heard about articulation ramps and the term RT I. But if you haven't, you probably do know more suspension movement usually means a better performing vehicle off road.
But with any kind of suspension mods,
whether it be a lift or just bigger tires, there's always gonna be questions like, did I go too high or? Oh, I could have gone higher.
Fortunately,
an articulation ramp can answer all those questions.
But before we build our ramp for the truck shop, we need to clarify articulation, which is basically how much your suspension can flex with all four wheels still on the ground for our ramp. We're gonna use two by two square tubing for strength. Now, the only requirement is your ramp needs to be longer than your longest wheel based vehicle. So we're gonna make ours 13 ft long
and 16 inches wide. That'll be plenty.
Well, Stacey is busy laying out the side rails. I'm gonna go ahead and cut our cross members with a plasma cutter.
How far apart we set these days?
I've got a mark at 2 ft apart for extra strength.
It's a good idea to tack each piece in place so they don't move on you before you run a full seam.
Now, the ramp needs to sit at a 20 degree incline for standard testing.
We'll use an angle gauge to make sure that measurement is accurate.
We're right on
next measure and cut your rear support
as well as your lower cross members and rails before you weld them on.
Of
course, we need to have some support to keep this thing from tipping over. So we're gonna put a 3 ft out rigor at the end and a 2 ft piece in the center.
Don't forget to support him.
The last thing we need to do is weld some expanded metal onto the face of the ramp to give us traction.
It also ties everything together.
The reason for the ramp is to get accurate comparisons between vehicles with different wheelbases. Now, states can just keep it on the ramp as soon as any of the tires lift off the ground or rub a fender
measure in inches from the base of the ramp to the center of the wheel on the ramp.
Divide this number by the wheelbase and multiply it by 1000 to get your ramp travel index or RT I
with 1000 being a perfect score. A 921 is slogan for a Wrangler with a four inch lift. You know, it really is. And the best part is it only costs us about 200 bucks to build the ramp. Don't go away. We got more trucks for you right after the break
up next on trucks. Stace has this week's quick tip for you and we'll take you for a ride in Big orange to show you how to get the most out of your experience behind the wheel.
Welcome back. You know, Stace and I have been off road in a lot of different vehicles and as everyone knows, no two trails are alike, but there are some basic driving skills that'll save your equipment and pull you out of some pretty hairy situations.
I
see
that.
Oh,
the most important thing is knowing your vehicle
and that includes approach and departure angle. So you don't tear off your bumper on a steep incline
where your differential pumpkins are. So you don't split them open on a rock and how much tire clearance you have to prevent body damage.
Knowing these things will help you develop the ability good drivers possess.
Now, when crawling rocks, the bash and crash approach only destroys your vehicle and your pride. Granted, sometimes you get lucky but slow and easy is the key.
It's also important to take the time to pick your way through the obstacles, get out and walk the trail if necessary to plan your line
and make sure each move sets you up for the next maneuver. So you don't get hung up. But remember things rarely go as planned. So give yourself some options before you end up hanging off the side of the hill.
Hello?
Of course not everyone's going to go rock climbing. Some of you like to get down and dirty and so do we. But this takes a whole different approach. Running, mutter sand requires momentum, gnarly tires and enough tire spin to clean the tread. This can be tricky. Not enough throttle will bog you down too much to be second place and destroyed equipment.
Now, that's just a few basic tips and we'll show you some more in the weeks to come.
But remember no tip in the world is gonna do you any good without a little common sense.
So
how many times you've been working on something and had a part fall down into a place you couldn't get to,
uh,
you know, the feeling, not to mention the hours you'll spend trying to retrieve it.
Well, here's a tip. That really sucks. Now, I mean, that literally
just take a standard shot back,
take the leg of a pair of pantyhose and stretch it over the nozzle,
hit the switch and your troubles are over.
This works really great on plastic parts. A magnet won't grab
the shop back. You can pick up at any hardware store. The pantyhose.
Well, you're on your own for that.
Stay with us. We got truck gear coming at you right after the break
and now truck gear, parts, tools and equipment for pickups and sport utilities.
If you're tired of the cargo in the back of your truck or SUV giving you the slip, this cargo bar by sable load is worth its weight in gold. And since it's made of aircraft aluminum, it won't rust or corrode either it's with adjustable to fit any compact or full size vehicle and has a bending strength of more than 700 pounds. The easy
pump handle and quick release push button make it safe to use as well. Keep the cargo right where you want it with a sable load for about $70. Now, for those of you truck guys that are running a high RPM motor
and a standard shift transmission, this blow proof bell housing from Lakewood is cheap insurance. Should you grenade a clutch?
It's made out of high tensile steel and offers a full 360 degrees of protection by retaining the shrapnel of a blown clutch.
Now, these things only cost about 250 bucks and are available for most Ford Chrysler and Chevy applications.
That's gonna do it for truck gear. Let's see what we have for you next week on trucks.
Stacey and I take a Jeep scrambler and get it ready for the trail by Bolton on a hydraulic winch and power steering box. Then we'll take a trip to Reno Nevada where 16 time Baja 1000 Champion Rod Hall teaches desert racing skills in a Hummer. After that, it's back to the shop for some bumping tips that will give you a professional results without the cost. That's all next week on trucks.
Well, that's gonna do it for this week's show. Hey,
you got anything you wanna say?
How about? Just goodbye.
Goodbye.
Yeah, goodbye. Just straight. Goodbye. Yeah, just tell him goodbye. All right, goodbye.
Well, now you told him about next week's show.
Well, you said you just wanted to say goodbye. What do you think? This is jeopardy? You gotta tell him something you tell him. Go ahead. This is your big chip.
See us next week
there. Are you happy though? Yeah, that's perfect.
Rock is an RTM production.