Classic Trucks! Builds
Want more content like this?
Join the PowerNation Email NewsletterVideo Transcript
Today on trucks, Stace and I take a Jeep Scrambler and get it ready for the trail by Bolton on a hydraulic winch and power steering box. Then we'll take a trip to Reno Nevada where 16 time Baha
1000 Champion Rod Hall teaches desert racing skills in a Hummer. After that, it's back to the shop for some buffing tips. That'll give you professional results without the cost. That's all today on trucks.
Welcome to this week's show everybody what you see here is what's fast becoming one of the hottest off road vehicles on the trail. Now, Jeep called it the CJ eight, but it's more affectionately known as the scrambler.
Unfortunately, they only built these things from 81 to 86 and they didn't sell too many of them.
But the reason they become so
fireable is that they have a longer wheelbase which makes them very capable off road. Not to mention they actually have a bed that you can put something in. Now, when it comes to off road upgrades, everybody looks to bigger tires, lift kits and lockers and believe us, we're gonna do all those things to the scrambler, but they won't be near as effective if our steering is a weak link.
Now, keep in mind your stock steering is safe. It's just not designed to turn the big old meats that'll eventually end up on that scrambler.
So we're gonna go with a Gr Super box too. Now, the secret to this box is that it's got a much larger piston than stock that gives it the ability to handle the most extreme stream off road vehicle and still keep it from getting squarely on the street.
Then they top it all off with caddy and plating to prevent rust. Now, this kid also comes with a super pump to run the box, new hoses, a steering shaft with U joints as well as a brand new belt and all the hardware, you'll need to complete the project.
Now, before you disconnect anything from your steering, make sure your wheels are pointing straight.
I'm gonna go ahead and get this air cleaner out of the way so we can see what we're doing.
After that. You can disconnect the steering shaft from the column. That's a good idea to mark your steering shaft. So if it accidentally gets rotated during the project, you can chew it up when you reconnect it.
Now, the space has a steering shaft undone at the column. I can undo the bottom end and pull it out.
Now I'm gonna tackle the box. The first thing we need to do is pull the pitman arm
so
then we can unbolt the box from the frame rail.
This makes it easier to disconnect the lines and get them up out of the way
before I can take out the power steering pump. I need to get this air pump out of the way.
I'm also gonna disconnect the hoses and slide them down to mel because we're gonna replace those too.
Once the old pumps out, remove the pulley and put it on the new pump,
I took a few extra minutes to clean up the stock bracket before I mounted it to the box. This would also be a good time to hook up your new hoses while you have easy access to the outlets.
I'll leave the mess up top for Stace to deal with.
Hey, I heard that
the truth is Mel didn't really leave me hanging. It's a lot easier to make your connections up here on top
once you have your power steering pump bolted in which I'm gonna go ahead and do while, uh,
Mel struggles with a much heavier and awkward steering box down below.
Speaking of which
I want some help down here, man,
this is definitely easier if you've got an extra set of hands
just a little bit. There you go, kid. Ain't got it.
All right. She started
once the box is bolted in, just reconnect the pitman arm and you're almost done underneath except for the steering shaft that Stacey is prepping right Now,
when you're measuring your steering shaft, make sure to take into consideration the length of your U joint and then cut accordingly.
Now, these U joints come with a set screw. So I've drilled a little indentation for them to seed into
after the lower U joints connected to the box states can slide the shaft down
so I can make the final connection.
All we need to do now is hook up the hoses, slap on the new belt and bolt. Everything down. A GRS entire system takes about four hours to install. Runs about 500 bucks. And believe us, the first time you crank the wheel, you'll know it was money well spent. If we want to keep the wheels rolling around here, we need to pay some bills. Stay with us. Trucks will be back right after this
up next on trucks. We'll show you how to pull yourself out of any situation by bolting on a hydraulic winch.
Welcome back to the shop. Now that we've upgraded the steering on our scrambler with an A GR system we're gonna put on the most important piece of equipment that you can have. If you're gonna run the trail
that my friends is a winch. We're gonna use mile marker two speed hydraulic winch because of its superior strength and line speed with hydraulics. You don't have to worry about overheating either.
This kit comes complete with all the hoses and hardware you'll need as well as a fair lead roller and remote control.
A mile marker knows that the people that use their winches are definitely serious about off road. So
they designed a heavy duty bumper that'll handle the rigors of winching.
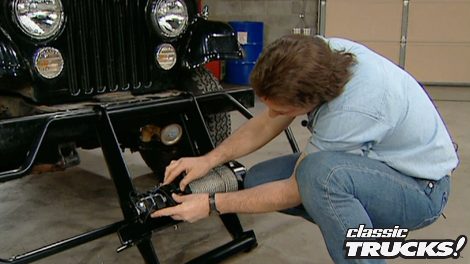
This project will only take a few hours to complete. We'll get started by mounting the winds to the new bumper
which only takes four bolts and an extra pair of hands to keep it from dancing on you.
Now that we have the winch mounted to the bumper, I'm gonna go ahead and put on this
Cleoid switch. Got those caps pulled for you, man. All right.
That's how she goes right there.
Then I'll mount the elbows. This will give us a chance to decide how we're going to run our lines.
Now, when you set the new system in place, it bolts right to the existing holes in the frame rail.
Oh, that looks great. It sure does. But we're not done yet. We still got some more hookups to do,
as we mentioned before. The hydraulic winch runs right off the power steering pump.
Now, your stock pump is plenty strong to run that winch with the motor just idling.
So you know that super pumps really gonna make this thing rock. Now, the first hook up we'll make is the new hose directly to the power steering pump.
Then we'll run the hose down the frame rail
out the front
and into the input on the winch. While Stacey is working on the hydraulics, I can mount the input jack for the remote. It looks like the perfect place right here. Stay. Oh, man, that's cool.
It's always a good idea to mount these with the hinge on top to help keep stuff from getting in there and interfering with your connection.
Now, you can make the electrical connections,
they only go in one way so you can't mess it up.
Now, this winch basically runs in line between the power steering pump and the box. Now, we've already made our connection between the pump and the winch. So the last hook up is to go from the winch to the box itself. Now, mile marker makes a whole bunch of special elbows. So there's no surprises when you hook up to the box.
We need to run a hotline from the battery to the Illinois. But the first thing you need to do is mount the circuit breaker. We're gonna stick ours right here on the fender.
Cool thing about this one is it has a reset switch.
Remember when you run your wires through body panels or around hot radiators, make sure they won't get pinched or burned. That's good advice, Mel, that's also one of the biggest mistakes that people make when dealing with their hydraulic hoses. Now, remember you've got a steering shaft that's turning here as well as belts and pulleys that can all damage your hoses if they come in contact with them.
It's also a good idea to use wire ties on the lines that go around the frame rail. Don't forget to check your tire clearance.
Last thing we have to do is bolt on the fair lead roller in the hook and we'll be fully operational. I can't wait. I gotta find a place to hook this too. You know, we do have to get it off those risers, man. You know, you're right.
I've got the perfect place.
This whole system goes for about 1400 bucks. And as you can see at this point, it's not even trying.
And with it being two speed, you can pull slow and low or you can kick it up to high and really yank something out in a hurry,
but we're not going anywhere soon. So hang with us, we'll be right back.
That'll do it, man.
No, it needs to go a little higher.
Just can't resist. Can you
up next on trucks? We'll take you for the ride of a lifetime with 16 time Baha
1000 champion
Rod Hall.
His name is Rod Hall and he owns the Baja 1000 running every race since the first in 1967 when he paid $1800 for a brand new CJ five and wrote the first chapter of what's become an epic novel of adventure and success in the bad lands of Baha.
His legacy is built on 16 class championships and includes an overall title in 1969.
The record setting run for this living legend has come from behind the wheel of a Ford Bronco Dodge Ram. And most recently the tour de force of off road vehicles, the Hummer.
I was always a person
that, uh, wanted to win
more than I wanted to go fast.
So I didn't go any faster than I had to, to win a race. But
if Roger me
and I was having a duke out to the finish line last 50 miles,
I mean, believe me, I would drive as hard as I could and take chances and,
and uh misuse my vehicle, but I saved it until I had to do it
when he's not running the competition ragged in the desert of Baja.
He returns to Reno Nevada to share more than 40 years of off road experience with hundreds of students each year.
The opportunity to learn from a master in a Hummer was something stace and I simply could not resist.
The first day out. Rod taught us vehicle placement and clearance before he turned us loose with a feature that's totally unique to the Hummer brake modulation.
Ok. That's good right there.
So the way this works, we're gonna mash on the brake pedal
with the left foot,
then we're gonna squeeze on the throttle
and override the brake pedal.
And once it takes a set and it starts to move, then you don't change anything. And especially on this side hill like this until you get to the top
because as soon as you take your foot off the brake,
then you lose your traction control system, start spending on it,
right? So let's see what happens.
Ok? A
little bit that way and bring it right on up the hill. Nice and slow.
Yeah, I think so.
Making it look pretty easy, so
easy. You're making it look easy. How about this man right here
looking good.
Yes, sir. But
boo just like, but
catch it on
after getting a feel for just how far we could push our stock hummers. It was time to review day one.
Well, the one thing you guys noticed this morning right now is that
you don't have to get a lot of momentum going. You don't have to need a lot of speed to make the hill. The Hummer is having
got lots of tracks and brake modulation. You just kind of
ease all the stuff and I noticed you pull the wheels off the ground a couple of times and you guys hit it just right. You dropped it down
just like on a big marshmallow.
If you don't drop it, crash it, you just, ah, you
guys are getting a good feel quick
with the equipment still in one piece and a head full of knowledge. We dashed home an eager anticipation of day two, a lesson in the race.
The three things you want to keep in mind when you're racing off road,
three patient girls we teach in school
what I miss.
Are you comfortable in the car?
If you're getting a good ride? The speed is probably ok.
The next thing is, are you putting the vehicle exactly where you want it?
Not almost where you want it exactly where you want.
And then the third thing is sometimes ambiguous. Are you comfortable behind the wheel?
I mean, if you're all tents and worked up,
then
you're probably driving too hard
now. Right now, you see, we're getting a comfortable ride. You got to relax behind the wheel.
So, uh
I say you're doing a fine job for not being,
you know, uh
behind the wheel a long time, not having a lot of experience in the desert,
doing a good job
I
thing
you did
to,
you was looking far enough down the road so you can anticipate what's gonna happen
from what you get to it.
That vehicle placed on the road is just fine, like right there.
You know, you kind of moved over to miss that big rock. That's good.
You know, why put the entire
up
if you don't have
plenty of
to get there. So
let's give it a break,
giving his equipment a break has made Rod Hall the off-road legend. He is, but at 61 years old, it doesn't sound like his competition is gonna get one any time soon.
Gosh, you know, you got to keep going as long as you can. And
then let me tell you guys something
getting old.
It ain't for sissies.
And so I figured that
I better keep going as long as I can
up next on trucks. We've got some simple bumping tips for you that get professional results.
Welcome back, everybody. You know, nothing quite adds the finishing touches to your vehicle. Like chrome or polished aluminum problem is it's expensive to have done and you're limited to what's available in the aftermarket mel and I found these cool valve covers and intake at a swap meet for 50 bucks. Now, if we went to a professional polisher, oh, he'd shine us all right, for about 300 bucks. But the truth is we're too cheap to go that route, that's for sure.
So we're gonna show you how to do it with a couple of kits from the Eastwood company.
This kit is made specifically for intake manifolds and only costs about $60
comes with all the special compounds, buffs and grinding rolls for getting into tight little corners.
Now, since these valve covers were polished before I'll get started with a spiral. So buff and triple E compound.
Eastwood's pedestal buffer is great for big pieces like these valve covers, but you can do the same job with a standard bench grinder and the materials only run about 20 bucks.
This compound we're using gives a mild cutting action as well as a good shine. Which is known as coloring.
This would be a good time to explain the idea behind buffing.
What you're basically doing is turning a rough surface into a smooth one using increasingly finer grits.
Always b
so the wheels roll off the edge of the workpiece, never into the edge.
Move on to your buffing step using these mini
buffs and these felt cones for tight corners.
I like to start with the Tripoli compound and progress to the white rouge compound for a brilliant high gloss.
As you can see, you don't have to go to a professional to get professional results. And the best part is once your buddy see what you can do, you'll probably be able to put a few bucks in your pocket as well.
Sooner or later. If you dink around with trucks, you're gonna have to do some wiring.
The problem is when you solder wire, you really need a third hand, which
I personally don't have. So a slick tip is to take the cap from a can of paint
cut slits in it opposite of each other
and then slide your wire down in there.
And what this does is hold your connection in place
so you can use both hands to solder with
the cap. Also catches any extra slag that might fall off. That's this week's quick tip. Stay with us. Truck gears coming up next
and now truck gear, parts, tools and equipment for pickups and sport utilities.
If you're in the off roading, whether it's desert racing or rock climb, sooner or later, you're gonna have to come up for air. That's why advanced air systems develop the power tank. It fills tires in seconds. Runs air tools for more than 20 minutes and operate your air lockers quicker and quieter than an air compressor.
It runs on 10 pounds of liquid CO2 and can be refilled at any welding shop for about 10 bucks. Stay on the trail with the power tank for about $300.
Now, for those of you building a custom pickup, what could be better than an original set of Raider wheels and the white wall drag FLS from the sixties.
How about a brand new set?
Now, these wheels are a one piece polished aluminum. They come with a custom center cap
and these extra long bullet shaped lug nuts that just drip with cool.
You'll definitely stop people in their tracks with this Raider combo. You off road guys know there's nothing worse than being stuck with nothing to winch to
the pull
pow guarantees you'll always have a winch point, mud, snow or even flat ground. Thanks to its shovel head design.
Best of all, once you're free, it pulls up for easy storage in your vehicle.
Get out of trouble with the pole
pal for about $250. That's gonna do it for this week's truck year. Let's take a look at what we have for you on next week's show.
And I take you step by step through the installation of an air suspension kit on a Ford F 150. After that, we'll turn up the heat and show you some basic tips that will help you lay down a perfect well, then we'll pull up a seat and rebuild a classic carburetor. The Stromberg 97. That's all next week on.
No,
you
cheated.
You
win
and hold
on. Hold
on. Listen, thanks for joining us this week, folks. We'll be back next week. But right now, as you can see, we've got more important things to do.
Trucks is an RTM production.
Show Full Transcript
1000 Champion Rod Hall teaches desert racing skills in a Hummer. After that, it's back to the shop for some buffing tips. That'll give you professional results without the cost. That's all today on trucks.
Welcome to this week's show everybody what you see here is what's fast becoming one of the hottest off road vehicles on the trail. Now, Jeep called it the CJ eight, but it's more affectionately known as the scrambler.
Unfortunately, they only built these things from 81 to 86 and they didn't sell too many of them.
But the reason they become so
fireable is that they have a longer wheelbase which makes them very capable off road. Not to mention they actually have a bed that you can put something in. Now, when it comes to off road upgrades, everybody looks to bigger tires, lift kits and lockers and believe us, we're gonna do all those things to the scrambler, but they won't be near as effective if our steering is a weak link.
Now, keep in mind your stock steering is safe. It's just not designed to turn the big old meats that'll eventually end up on that scrambler.
So we're gonna go with a Gr Super box too. Now, the secret to this box is that it's got a much larger piston than stock that gives it the ability to handle the most extreme stream off road vehicle and still keep it from getting squarely on the street.
Then they top it all off with caddy and plating to prevent rust. Now, this kid also comes with a super pump to run the box, new hoses, a steering shaft with U joints as well as a brand new belt and all the hardware, you'll need to complete the project.
Now, before you disconnect anything from your steering, make sure your wheels are pointing straight.
I'm gonna go ahead and get this air cleaner out of the way so we can see what we're doing.
After that. You can disconnect the steering shaft from the column. That's a good idea to mark your steering shaft. So if it accidentally gets rotated during the project, you can chew it up when you reconnect it.
Now, the space has a steering shaft undone at the column. I can undo the bottom end and pull it out.
Now I'm gonna tackle the box. The first thing we need to do is pull the pitman arm
so
then we can unbolt the box from the frame rail.
This makes it easier to disconnect the lines and get them up out of the way
before I can take out the power steering pump. I need to get this air pump out of the way.
I'm also gonna disconnect the hoses and slide them down to mel because we're gonna replace those too.
Once the old pumps out, remove the pulley and put it on the new pump,
I took a few extra minutes to clean up the stock bracket before I mounted it to the box. This would also be a good time to hook up your new hoses while you have easy access to the outlets.
I'll leave the mess up top for Stace to deal with.
Hey, I heard that
the truth is Mel didn't really leave me hanging. It's a lot easier to make your connections up here on top
once you have your power steering pump bolted in which I'm gonna go ahead and do while, uh,
Mel struggles with a much heavier and awkward steering box down below.
Speaking of which
I want some help down here, man,
this is definitely easier if you've got an extra set of hands
just a little bit. There you go, kid. Ain't got it.
All right. She started
once the box is bolted in, just reconnect the pitman arm and you're almost done underneath except for the steering shaft that Stacey is prepping right Now,
when you're measuring your steering shaft, make sure to take into consideration the length of your U joint and then cut accordingly.
Now, these U joints come with a set screw. So I've drilled a little indentation for them to seed into
after the lower U joints connected to the box states can slide the shaft down
so I can make the final connection.
All we need to do now is hook up the hoses, slap on the new belt and bolt. Everything down. A GRS entire system takes about four hours to install. Runs about 500 bucks. And believe us, the first time you crank the wheel, you'll know it was money well spent. If we want to keep the wheels rolling around here, we need to pay some bills. Stay with us. Trucks will be back right after this
up next on trucks. We'll show you how to pull yourself out of any situation by bolting on a hydraulic winch.
Welcome back to the shop. Now that we've upgraded the steering on our scrambler with an A GR system we're gonna put on the most important piece of equipment that you can have. If you're gonna run the trail
that my friends is a winch. We're gonna use mile marker two speed hydraulic winch because of its superior strength and line speed with hydraulics. You don't have to worry about overheating either.
This kit comes complete with all the hoses and hardware you'll need as well as a fair lead roller and remote control.
A mile marker knows that the people that use their winches are definitely serious about off road. So
they designed a heavy duty bumper that'll handle the rigors of winching.
This project will only take a few hours to complete. We'll get started by mounting the winds to the new bumper
which only takes four bolts and an extra pair of hands to keep it from dancing on you.
Now that we have the winch mounted to the bumper, I'm gonna go ahead and put on this
Cleoid switch. Got those caps pulled for you, man. All right.
That's how she goes right there.
Then I'll mount the elbows. This will give us a chance to decide how we're going to run our lines.
Now, when you set the new system in place, it bolts right to the existing holes in the frame rail.
Oh, that looks great. It sure does. But we're not done yet. We still got some more hookups to do,
as we mentioned before. The hydraulic winch runs right off the power steering pump.
Now, your stock pump is plenty strong to run that winch with the motor just idling.
So you know that super pumps really gonna make this thing rock. Now, the first hook up we'll make is the new hose directly to the power steering pump.
Then we'll run the hose down the frame rail
out the front
and into the input on the winch. While Stacey is working on the hydraulics, I can mount the input jack for the remote. It looks like the perfect place right here. Stay. Oh, man, that's cool.
It's always a good idea to mount these with the hinge on top to help keep stuff from getting in there and interfering with your connection.
Now, you can make the electrical connections,
they only go in one way so you can't mess it up.
Now, this winch basically runs in line between the power steering pump and the box. Now, we've already made our connection between the pump and the winch. So the last hook up is to go from the winch to the box itself. Now, mile marker makes a whole bunch of special elbows. So there's no surprises when you hook up to the box.
We need to run a hotline from the battery to the Illinois. But the first thing you need to do is mount the circuit breaker. We're gonna stick ours right here on the fender.
Cool thing about this one is it has a reset switch.
Remember when you run your wires through body panels or around hot radiators, make sure they won't get pinched or burned. That's good advice, Mel, that's also one of the biggest mistakes that people make when dealing with their hydraulic hoses. Now, remember you've got a steering shaft that's turning here as well as belts and pulleys that can all damage your hoses if they come in contact with them.
It's also a good idea to use wire ties on the lines that go around the frame rail. Don't forget to check your tire clearance.
Last thing we have to do is bolt on the fair lead roller in the hook and we'll be fully operational. I can't wait. I gotta find a place to hook this too. You know, we do have to get it off those risers, man. You know, you're right.
I've got the perfect place.
This whole system goes for about 1400 bucks. And as you can see at this point, it's not even trying.
And with it being two speed, you can pull slow and low or you can kick it up to high and really yank something out in a hurry,
but we're not going anywhere soon. So hang with us, we'll be right back.
That'll do it, man.
No, it needs to go a little higher.
Just can't resist. Can you
up next on trucks? We'll take you for the ride of a lifetime with 16 time Baha
1000 champion
Rod Hall.
His name is Rod Hall and he owns the Baja 1000 running every race since the first in 1967 when he paid $1800 for a brand new CJ five and wrote the first chapter of what's become an epic novel of adventure and success in the bad lands of Baha.
His legacy is built on 16 class championships and includes an overall title in 1969.
The record setting run for this living legend has come from behind the wheel of a Ford Bronco Dodge Ram. And most recently the tour de force of off road vehicles, the Hummer.
I was always a person
that, uh, wanted to win
more than I wanted to go fast.
So I didn't go any faster than I had to, to win a race. But
if Roger me
and I was having a duke out to the finish line last 50 miles,
I mean, believe me, I would drive as hard as I could and take chances and,
and uh misuse my vehicle, but I saved it until I had to do it
when he's not running the competition ragged in the desert of Baja.
He returns to Reno Nevada to share more than 40 years of off road experience with hundreds of students each year.
The opportunity to learn from a master in a Hummer was something stace and I simply could not resist.
The first day out. Rod taught us vehicle placement and clearance before he turned us loose with a feature that's totally unique to the Hummer brake modulation.
Ok. That's good right there.
So the way this works, we're gonna mash on the brake pedal
with the left foot,
then we're gonna squeeze on the throttle
and override the brake pedal.
And once it takes a set and it starts to move, then you don't change anything. And especially on this side hill like this until you get to the top
because as soon as you take your foot off the brake,
then you lose your traction control system, start spending on it,
right? So let's see what happens.
Ok? A
little bit that way and bring it right on up the hill. Nice and slow.
Yeah, I think so.
Making it look pretty easy, so
easy. You're making it look easy. How about this man right here
looking good.
Yes, sir. But
boo just like, but
catch it on
after getting a feel for just how far we could push our stock hummers. It was time to review day one.
Well, the one thing you guys noticed this morning right now is that
you don't have to get a lot of momentum going. You don't have to need a lot of speed to make the hill. The Hummer is having
got lots of tracks and brake modulation. You just kind of
ease all the stuff and I noticed you pull the wheels off the ground a couple of times and you guys hit it just right. You dropped it down
just like on a big marshmallow.
If you don't drop it, crash it, you just, ah, you
guys are getting a good feel quick
with the equipment still in one piece and a head full of knowledge. We dashed home an eager anticipation of day two, a lesson in the race.
The three things you want to keep in mind when you're racing off road,
three patient girls we teach in school
what I miss.
Are you comfortable in the car?
If you're getting a good ride? The speed is probably ok.
The next thing is, are you putting the vehicle exactly where you want it?
Not almost where you want it exactly where you want.
And then the third thing is sometimes ambiguous. Are you comfortable behind the wheel?
I mean, if you're all tents and worked up,
then
you're probably driving too hard
now. Right now, you see, we're getting a comfortable ride. You got to relax behind the wheel.
So, uh
I say you're doing a fine job for not being,
you know, uh
behind the wheel a long time, not having a lot of experience in the desert,
doing a good job
I
thing
you did
to,
you was looking far enough down the road so you can anticipate what's gonna happen
from what you get to it.
That vehicle placed on the road is just fine, like right there.
You know, you kind of moved over to miss that big rock. That's good.
You know, why put the entire
up
if you don't have
plenty of
to get there. So
let's give it a break,
giving his equipment a break has made Rod Hall the off-road legend. He is, but at 61 years old, it doesn't sound like his competition is gonna get one any time soon.
Gosh, you know, you got to keep going as long as you can. And
then let me tell you guys something
getting old.
It ain't for sissies.
And so I figured that
I better keep going as long as I can
up next on trucks. We've got some simple bumping tips for you that get professional results.
Welcome back, everybody. You know, nothing quite adds the finishing touches to your vehicle. Like chrome or polished aluminum problem is it's expensive to have done and you're limited to what's available in the aftermarket mel and I found these cool valve covers and intake at a swap meet for 50 bucks. Now, if we went to a professional polisher, oh, he'd shine us all right, for about 300 bucks. But the truth is we're too cheap to go that route, that's for sure.
So we're gonna show you how to do it with a couple of kits from the Eastwood company.
This kit is made specifically for intake manifolds and only costs about $60
comes with all the special compounds, buffs and grinding rolls for getting into tight little corners.
Now, since these valve covers were polished before I'll get started with a spiral. So buff and triple E compound.
Eastwood's pedestal buffer is great for big pieces like these valve covers, but you can do the same job with a standard bench grinder and the materials only run about 20 bucks.
This compound we're using gives a mild cutting action as well as a good shine. Which is known as coloring.
This would be a good time to explain the idea behind buffing.
What you're basically doing is turning a rough surface into a smooth one using increasingly finer grits.
Always b
so the wheels roll off the edge of the workpiece, never into the edge.
Move on to your buffing step using these mini
buffs and these felt cones for tight corners.
I like to start with the Tripoli compound and progress to the white rouge compound for a brilliant high gloss.
As you can see, you don't have to go to a professional to get professional results. And the best part is once your buddy see what you can do, you'll probably be able to put a few bucks in your pocket as well.
Sooner or later. If you dink around with trucks, you're gonna have to do some wiring.
The problem is when you solder wire, you really need a third hand, which
I personally don't have. So a slick tip is to take the cap from a can of paint
cut slits in it opposite of each other
and then slide your wire down in there.
And what this does is hold your connection in place
so you can use both hands to solder with
the cap. Also catches any extra slag that might fall off. That's this week's quick tip. Stay with us. Truck gears coming up next
and now truck gear, parts, tools and equipment for pickups and sport utilities.
If you're in the off roading, whether it's desert racing or rock climb, sooner or later, you're gonna have to come up for air. That's why advanced air systems develop the power tank. It fills tires in seconds. Runs air tools for more than 20 minutes and operate your air lockers quicker and quieter than an air compressor.
It runs on 10 pounds of liquid CO2 and can be refilled at any welding shop for about 10 bucks. Stay on the trail with the power tank for about $300.
Now, for those of you building a custom pickup, what could be better than an original set of Raider wheels and the white wall drag FLS from the sixties.
How about a brand new set?
Now, these wheels are a one piece polished aluminum. They come with a custom center cap
and these extra long bullet shaped lug nuts that just drip with cool.
You'll definitely stop people in their tracks with this Raider combo. You off road guys know there's nothing worse than being stuck with nothing to winch to
the pull
pow guarantees you'll always have a winch point, mud, snow or even flat ground. Thanks to its shovel head design.
Best of all, once you're free, it pulls up for easy storage in your vehicle.
Get out of trouble with the pole
pal for about $250. That's gonna do it for this week's truck year. Let's take a look at what we have for you on next week's show.
And I take you step by step through the installation of an air suspension kit on a Ford F 150. After that, we'll turn up the heat and show you some basic tips that will help you lay down a perfect well, then we'll pull up a seat and rebuild a classic carburetor. The Stromberg 97. That's all next week on.
No,
you
cheated.
You
win
and hold
on. Hold
on. Listen, thanks for joining us this week, folks. We'll be back next week. But right now, as you can see, we've got more important things to do.
Trucks is an RTM production.