Classic Trucks! Builds

Video Transcript

Today on trucks. Stace and I take you step by step through the installation of an air suspension kit on a Ford F 150. After that, we'll turn up the heat and show you some basic tips that'll help you lay down a perfect world. Then we'll pull up a seat and rebuild a classic carburetor. The Stromberg 97. That's all today on trucks.

Hello, everybody. And thanks for joining us this week. If you've been hanging around the truck shop for any time at all, you've seen us lower an S 10 in the past few weeks using spindle springs and blocks. Today, we're going to lower this full size F 150 with an air spring system that's going to allow us to raise it back up depending on our mood or driving conditions with the flick of a switch. But

wait a minute before we get too far ahead of ourselves. Let's take a look at some of the ingredients that make this truck stand out just as it sits,

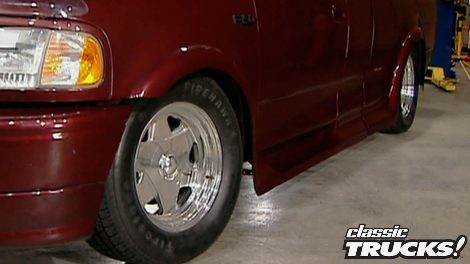
has a nice two grill treatment, full ground effects. Of course, you can't miss those Colorado custom wheels,

but for me, it's those subtle ghost flames that roll up over the hood lick down the side

and flicker out over the tail

while sta

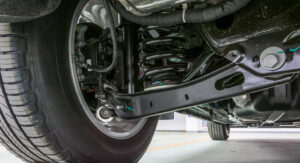
gets our Ford up in the air so we can get the wheels off it. I'll go ahead and show you the kit we're gonna be using on the rear. It's from air ride technologies and comes with a powder coated four bar set up that replaces your stock leaf springs. It also comes with fire stones, air springs, a pan

bar and bracket high strength lines as well as a compressor to put it all in motion. Now, some of the benefits of an air ride system is that it gives you the smooth ride of a luxury car,

but the increased payload and towing capacity of a big truck.

Heck about the only thing this won't do

is make your truck jump.

If you wanna do that, you gotta go with hydraulics. Yeah, and a lot more money. First thing we need to do is get a jack under the rear end.

Now, I know we've told you this before, but if you don't want to rattle the rear end, get some support under it before you pull the U bolts out. Now, 90% of the time when you go to pull a bolt out of a leaf spring, it's rusted in place. So I like to hit him with a little bit of lubricant to help knock him free.

Now we're gonna replace this whole shackle but we're gonna reuse this bolt because it holds the exhaust hanger.

Now comes the toughest part of this project and that's grinding off the rivet heads from the stock spring bracket.

Make sure you put up some sort of shroud to deflect the sparks away from the gas tank.

The reason you need to grind off the stock heads is because the kit replaces the entire oe bracket and bolts right to the frame rail using the existing holes.

Hey, Male, you wanna give me a hand. You're good.

Now, we can start bolting on the new hardware, starting with these brackets,

the bottom bracket slides under the brake lines and up into the spring perch,

the top bracket has a centering pin that drops into the top of the spring perch.

Now go ahead and put your bolts in and tighten them down.

As you can see, there's a place right here on the front bracket to connect your emergency brake cables. Once that's taken care of, we can bolt on the upper and lower bars. Now, one of the cool things about this system from air ride technologies is the polyurethane bushing that's designed to absorb road vibration.

On the other end, you have an adjustable hind joint that eliminates suspension bond.

The two ends are connected by thick walled steel for extra strength.

Now, we can mount the upper bracket for our air spring. Now it goes directly above the lower bracket and I've already drilled the holes for it.

Now, before you bolt it on, take the Panter bar bracket, slide it inside the frame rail, then take your upper spring bracket and bolt it into place, kind of making a frame sandwich.

Now, we can put on the air spring and make sure that you use Teflon tape on this fitting or leak like crazy.

The air spring is held on with just three bolts, two on the top one on the bottom.

The biggest question that people ask is how much height adjustment am I gonna get?

Well with this system,

you'll get anywhere from 5 to 6 inches in the rear and that's considerable. Once you're done with one side, move over to the other and repeat the same process. Just a reminder. It's always a good idea to do one side at a time. So you don't have to chase the rear end all over your driveway.

We're almost done with the rear end.

I mounted the bracket for the Panter bar and it bolts right to the pumpkin. Now, the purpose of the Panter bar is to keep the rear end from moving side to side,

replace the stock shocks and the rear ends done.

Now that we have our four bar and air springs in place, we can get ready to run our lines and mount the compressor that comes with the kit.

Now, an air suspension has a high air volume. So running a compressor alone, uh, uh, that's not gonna get it.

That's why air ride technology supplies an air tank. So you always have enough air to run the system

mel, are you ready for this?

Yeah, thanks, Stace.

First thing we need to do is find a place to mount the compressor along with the air tank on this floor. We got plenty of room to go right here on the outer frame rail.

Keep in mind it's always a good idea to put the compressor on the frame rail as opposed to the firewall or a body panel to help eliminate vibration noises in the cab. Are you about done with that compressor? Yeah, I think we're set. I'm gonna go ahead and mount this air tank. Now. Fortunately, we've got a lot of room on the frame rail here close to the compressor. So that's where she'll go.

Now, we can run our lines from the tank to the rear springs. The system operates on high pressure. So the lines that come with the kit are thick walled and connect to brass fittings to prevent any leakage.

It's also very important to use rubber grommets. Anytime you run airlines through metal.

Now that we have the rear end of our air ride system complete, it's time to take a break but don't go away. We'll hook up the front and slam our F 150. When trucks returns

later on, trucks will turn up the heat and show you how to handle a welder but up first we're going to finish putting the air bags on our F 150 so we can slam it to the ground.

Oh,

welcome back. Now, if you're just joining us, we're right in the middle of putting an air suspension on our F 150. If you low rider guys, there's nothing wrong with the hydraulic system.

They just cost a lot more and take a whole lot more fabrication than the bolt on kit from air ride technologies.

And while it's true, this system won't hop like hydraulics will, it does give you up to six inches of adjustment without sacrificing ride quality. The front end kit comes with a dual needle, air pressure gauge for front and rear control shocks and airbags with custom brackets that bolt right up to your vehicle. And one of the biggest questions that people ask about airbags is how safe are they? Am I gonna pop one?

Well, as you can see by this cutaway, they're made of four layers of nylon cord and rubber. Much like a car tire

and heck semi trucks have been using these things for 40 years.

Hey, if it's good enough for a semi, then it's gotta be good enough for us. What we have on our Ford here is an upper and lower A R independent front suspension. I'm gonna go ahead and get started with the tire rod in

next. You'll need to undo the suede bar

and remove the stock shots.

Now, you can remove your brake caliper and spindle and all this junk if you want to, but you don't have to.

We're gonna pop it loose right here at this upper ball joint and rotate the whole assembly down. Now, if you do it like this, make sure that you undo your A BS line from your upper A arm. So you have some slack when you roll it down,

then you can loosen your ball joint nut but do not take it all the way off, hit the upper spindle and the spring will force the ball joint apart.

Most of the time the spring will fall right out. But if you start to lower the jack and there's still tension on the spring, make sure to use a spring compressor. You can rent one at any parts store. Now, you may have noticed we're using a different style of spring on the front than we used on the rear.

This is a double convoluted design

that flexes up to 30 degrees to compensate for the extra movement that you get in an independent front suspension.

Thanks to the custom bracket from air ride technologies, installations real easy. It's also a lot easier to hook up your airlines before you get the spring in place.

It goes right where the coil spring was and bolts through the upper shock hole.

Now you can jack up the A arm so you can reassemble the sway bar and tie rod in.

The last thing we need to do is put on the front shocks. Now, like the rear, we're gonna use a good gas shock with plenty of travel. Keep things from binding up. When we slam this truck down,

we're gonna mount our top bracket to the upper A R support

and the bottom goes right to the lower A arm itself.

Tell you what.

That's definitely a big rig set up on our light truck, isn't it? Yeah.

It's hard to believe. Nobody came up with this sooner. You know, it really is. Let's go ahead and get that gauge and the lines hooked up and see what this system will do. All right.

When you're prepping your airlines, there's a couple of things I'd like to point out first of all, when you cut them, it's best to use a flat surface and a razor blade to get a nice straight cut.

And these fittings are really cool. Just slide the line in and it locks with an airtight seal,

but pull this little collar back and it'll pop right out again.

Mounting the interior gauge is limited only by your imagination. The standard mount is under the dash using the supply bracket.

We wanted to get more creative than that though, not to mention gauges under the dash, but we seem to get in the way.

So we decided to mount ours right here.

Go ahead and push the rest of those lines up sta

once the air is connected, splice into a wire from your instrument panel to illuminate the bulb in the gauge when your lights are on.

Well, Mel's taking care of things up in the cab. I've raised the truck back up and run the lines from the front, back to the air tank

and make sure you use some wire ties on these things. So they don't flop around

and for the power hook ups on the compressor, you've got a black wire that runs to a ground on the frame, the red wire that comes up here to the pressure switch. Now, the other side of the pressure switch, we're gonna take directly to the battery. But if you do it this way, make sure that you run an in line fuse.

Now, the last thing we need to do before we put our Ford on the ground is jack up the rear end to ride height.

That way we can check the pinning angle.

Now, if it's off, come out here and adjust it at the hem

joints on the floor bar.

Yeah, this looks good.

Now, I know these bags look pretty sorry right now, but as soon as we put air to them, they'll do exactly what they're supposed to go ahead and hit the switch mel

once you're in the weeds, it only takes about 10 to 20 seconds to pump the system back up to its highest level. But it isn't just for looks it also gives you a much better ride and greater towing capacity. The kit will take you about a day to install and goes for about 2400 bucks, which is a heck of a deal for a full suspension that'll move on you, but don't move out of your seat because we've got more trucks for you after this.

If you can't stand the heat, better get out of the shop because, well, tech is up next on trucks.

Welcome back. Everybody. Of course, you've seen us use welders on the show before and there's no doubt they can be one of the most useful tools you'll ever own.

In fact, once you get over some of the fear factor that comes with using a welder, you'll wonder how you ever got by without one and the money you can save will blow your mind as well.

There's various types of welders. There's stick tig and mig or wire feed welders. Today, we're gonna focus on the mig welder because it's the most versatile and easiest to use and they're affordable too. This sp 125 from Lincoln that we're using goes for about 500 bucks. Now, the first and most important thing when it comes to welding is safety, you have the risk of arc weld, so you have to have proper eye protection and you'll also wanna cover up any bare skin

or you'll end up with an unwanted welders tan.

Now, welding is more than just filling in the gap. What you're doing is taking two pieces of metal and melting them together to make one,

one of the most common questions people ask is, how do I move the gun? And what should I be looking at?

Ideally, you should slightly angle the gun and lead the whale bead. Keeping your eye on the molten puddle behind the arc.

Looks good man. One of the biggest gray area with novice welders is line speed and heat and what each of those should be. Lincoln provides a graph inside their welders that gives basic settings for both

depending upon the thickness of the steel you're welding with.

Now, here's an example of some problems that you might run into.

If your wire speed is too fast, you get a real erratic. Well,

if your wire speed is too slow, you can't retain a good bead.

And here's an example of your heat being too low. Notice how the bead is bald up on top of the metal. Look at this,

no penetration out of any of those.

Now, this is one that was too hot and obviously we just blew right through it and made a big mess. Now, here's what a weld should look like. This has a good even bead

and good penetration.

Welding is definitely an acquired skill that takes lots and lots of practice and these are just a few of the basic tips you'll need to get started

remember the more you work with it, the more you'll develop your own style like driving or anything else. Stay right where you are. We got more trucks for you. After the break

up. Next on trucks, we'll pull up a seat and take you through a little carburetor 101 by rebuilding a classic, the Stromberg 97.

Thanks for staying with us. We know you've been wondering about this 54 Chevy and we can't blame you because it really caught our eye too. Now,

this truck falls into the rectification category which means it's been restored

and slightly modified from the emerald green paint job to the original style interior.

John T Underwood from Murfreesboro, Tennessee owns this truck and as you can see, spared no cost on the wood bed that's laid down on the business end of this ride. Speaking of rides, the apple and orange crate

sins belong to Stace and I, and we'll have some fun with those later on

under the hood is the original straight six. But what really catches your eye is the multi

carb set up and there's been a huge resurgence in popularity of this type of car duration.

Not only is the cool factor undeniable, but it's possible to make these things perform great and still be reliable. We're gonna show you how

even if you're not into this type of setup, follow along because we're gonna lay out the build up of a Stromberg 97. The basics of which can be applied to a Ha Haley Carter or even quadrajet style car.

The kit we're gonna use on our Stromberg here is from 97 Heaven out of Downers Grove, Illinois.

It comes complete with a new accelerator pump, plunger and rod mixture, screws, needle and seat as well as all the gasket you'll need. Best part is the entire kit only costs about $35.

1st thing you do is pull off this throttle linkage. Did you take my good screwdriver? Why wouldn't I

then pull the top off?

Now, some of the things you need to look for when buying an old Stromberg

is to make sure that you've got all your linkage.

You also need to check and make sure your throttle butterflies aren't rusted shut,

take out this screw,

pop out the float

and then take off the needle and see assembly.

Now, the problem with a lot of these older carburetors is deterioration and pitting inside the bowl. If you've got a lot of it, you better find another carburetor.

Here's a little carburetor 101 for you.

This right here is your accelerator pump down inside the pump. Well, is your power valve? The jets are underneath the outer plugs and your check balls under the center one, of course, these are your mixture screws. Now, all that plus the base plate need to be removed before we can clean it.

The way the power circuit works in a carburetor is very simple. The accelerator pump comes down and gives you a spur of gas when you first hit the throttle. So you don't stall out.

Then at about three quarter throttle, it hits the plunger on the power valve which takes over until you return to idle.

The fuel is pulled by vacuum from the bowl through the metering jets up through the emulsion tubes and into the ventura where it's mixed with air.

So all these passages need to be clear.

Once you cleaned your housing with a good cleaner, take an air hose and blow out all the openings.

After that, you can reassemble your car,

make sure you don't over tighten the screws or you could warp the top.

Now, if you don't wanna dink with this yourself, you can go to 97 heaven and he'll custom build these beauties for you for about 200 bucks a pop. Let's see what Stace has for us in this week's quick tip.

Now, most people know that when you run steel bolts into aluminum, you need to use

anise or you could gall the threads and destroy them.

The problem is most people don't have a tube of

anise in their toolbox.

Well, the answer can be as close as your medicine cabinet

with a little bottle of antacid. I don't laugh. I'm serious.

The chalky substance coats the threads and prevents galling. It also won't burn off and an antacid it's a great gas treatment.

Medically. Speaking, of course, stay with us. Truck gears coming up after this

and now truck gear, parts, tools and equipment for pickups and sport utilities.

Now, here's an item that should be rolling around every shop. It's the creeper seat from summit racing equipment. Believe me, this will make using mil crates a thing of the past. Thanks to the padded seat. That's much kinder to the backside.

It's 13 inches high, which is perfect for doing those brake jobs or detailing the wheels on your truck.

It's made of heavy gauge square tubing and has a handy tool tray to keep you from having to hunt down your tools, trade in your milk crates for a creeper seat from summit for about 35 bucks.

The newest entry to the traction wars is true. Tracks, gear driven, limited slip differential

now because it's gear driven. It won't affect your steering or wear out prematurely problems normally associated with a clutch type limited slip. It's also great for two wheel drives, especially if you're pulling a boat out of the lake,

get more traction with true track for about 350 bucks. Finally today, the front grill of the truck can leave a lasting impression. One of the hottest add ons for late model pickups right now are grill inserts. This one's made by Stole and runs about 100 bucks. You can pick them up for any make or model polished or brushed and the best part is if you can handle a screwdriver, you can leave a lasting impression with your truck that's gonna do it for truck gear. Here's a preview of next week's show.

We'll take the fear factor out of replacing the rocker panels and fender extensions on your early model pickup. Then it's off to the hills of Tellico, North Carolina for a battle between some extreme hybrids and even nastier rocks. Finally, we'll show you how to put the wood grain that is to your SUV. That's all next week on trucks.

That's gonna do it for this week's show. Thanks for joining us. We'll see you next week.

Hey, man, that orange one's mine.

Now you get the red one

pace. The chain is off of this. What did you do to this? I didn't touch it. The orange one is mine. No, no, no. The orange one is mine.

It's not going on

a

little, little more persuasion.

You're constantly doing this for me. Why do you constantly, constantly have to do that? I had nothing to do with that. I wish you did

trucks is an RTM production.
Show Full Transcript