Classic Trucks! Builds

Video Transcript

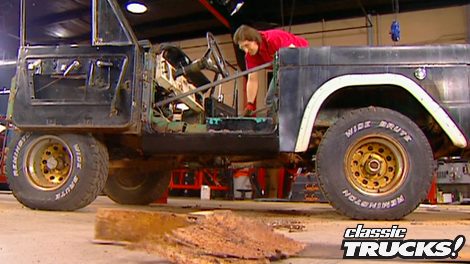
Day on trucks. It may not look like much now, but this old Bronco is the start of project Crazy Horse and Stacy's got a mess on his hands as he begins throwing out the bad

and Bolton on the good.

Then we'll take a look at a cool 48 Chevy street truck that's down on loan from Stacy's Bank officer.

That's all today on trucks.

Welcome to trucks.

I hope you're ready for this week's show because today I'm gonna start a new build up on this really sorry, 66 Ford Bronco. Now the direction behind this build up is number one

to pay tribute to the legendary big lie Bronco that absolutely dominated Baha

racing in the seventies with none other than Parnelli Jones behind the wheel and Bill Strope sitting beside him trying to hold everything together.

Number two,

it needs to be a state of the art trail rig. Something that you can crawl rocks and go through mud with the best of them also needs to be street legal.

Now, I know you're probably thinking, wait a minute, you're gonna do all that

with this piece of junk.

You're crazy. Can't be done. You've gone too far.

Well, I figured you'd probably say that. So that's why I'm calling this project. Crazy horse.

That, and it's gonna be really crazy when I get done with it.

Today's project deals with one of the most difficult, messy pain in the butt projects you can possibly do.

And that is replacing rusty floor pans.

Now, it, it doesn't matter if you're into cars, trucks, whatever, if you're a, how to guy you are eventually gonna buy a project that's got some rust in the floors. So you either need to know how to do this yourself or take it to somebody to do it for you. But either way you really need to know what types of tools and techniques are involved. And that is what I'm gonna show you.

The first thing you need to do is make sure you've got a tetanus shot.

Then you need to come in, look the vehicle over and assess the damage. So you know what kind of replacement panels you're gonna have to have. Now to do that,

you need to completely gut the interior, get rid of anything that might be bolted to the floor, like the seats, top roll bar, things like that.

Here you go, Barry, watch those edges. All right.

Now, here's something that you're not gonna see on truck gear, the legendary PV C Roll bar.

I think this company went out of business. Here it comes Barry, look out,

ok. With everything apart. You can kind of see what we're gonna have to replace. Now, obviously, these floor pans are shut

and also

notice that the cancer goes all the way up here into this tow board.

You're gonna have to replace all that. Now, the cross members,

those are pretty solid.

This one back here looks good,

but here in the very back,

yeah, that one shot. So I'm gonna go ahead and get all of them just to be safe.

Now, here's a surprise notice, our striker panel

is completely rusted through. So we're gonna have to replace that whole piece.

Now, the rocker may seem nice here, but it's shot. So we'll need to replace that too.

As you can see, we need a lot of stuff. So for floor pans, we went to a place called Wild Horses and got their complete five piece floor pan kit. Now these are stamped and formed just like the original pieces down to the beads on the floor,

the hump for the transmission, everything when you put these in,

it'll look just like that Bronco came from the factory and that is one of the good things about a Bronco.

You can buy these preformed panels so you don't have to make them yourself. Now, if you don't need all five pieces, you can buy each separately

for cross members, rocker panels and door striker panels. We went to a place called Jeff's Bronco Graveyard, got these heavy gauge direct replacements that pop right in place of the original pieces. Once we get them out

now you can see they're stamped in form just like the original parts.

Now, Jess Bronco Graveyard is a unique place. They not only have top quality new stuff but they also deal in hard to find used stuff like all metal hoods with no rust and door assemblies, both of which we got just in case we need them.

Ok? It's finally time to start cutting, right?

No,

there's still some prep work that you have to do in here. Now, since I'm gonna be cutting out so much of this floor, you need to stress up the body to keep it from flexing and bending and getting out of alignment on you because if that happens,

it's almost impossible to get it all straight again.

So the first thing I'm gonna do is weld in a support from fender to fender to keep those from moving. When I cut out those striker panels,

then we'll run a support down across the door openings.

This will support the door, keep it from flexing in on us when we take out the rockers.

Ok. It's finally time to start cutting things out. The question is where the heck do you start?

Well, you start at the lowest foundational support. In other words, the floor pan is supported by the cross member and that's supported by the rocker panel and that's kind of the beginning of the chain. So that is where we'll start

to get that off, take a drill bit or a spot weld cutter and drill out each one of these spot welds

that takes care of the rocker panel. Now, this is a nice surprise. Our inner rocker is really solid. So we're not gonna have to replace that

also to take out your striker panel. Do that the same way drill your spot welds and the new pieces just plop right in.

Now,

I'm gonna take a break, change my shirt and I told you this was a messy project. We'll see you in a few minutes.

Next Stacy strikess up the band to install new striker panels. Then he rocks on the new Rockers

and later we'll blow you away with truck gears.

Welcome back to the shop. I'm right in the middle of dealing with some really nasty rusty floor pans on project crazy horse. Now, before the break, I took care of the Rockers and the striker panels.

But before I put the new ones in, I'm gonna deal with some problems that you might run into. Namely,

what do you do if you can't get the panels out?

Now, if you'll remember on the Rockers, we drilled the spot welds and they pretty much just fell right out

and I'll tell you something right now.

Well, strikers are not gonna come out that easy. So what do you do?

Well, you're gonna have to cut them out

and as you can see,

they come out about an inch at a time screaming and kicking all the way.

Now, the tools that you're gonna need to do that is everything from an air nibbler to a Sawzall to a cut off tool,

hammer and chisel

and even some snips, all of which you need to have in your arsenal before you ever try this kind of project.

Now, we're ready to put the new panel in. But before you do come in here with a grinder,

hit this edge, hit all these edges where you're gonna be welding. So we have some nice clean metal to weld to. Now also notice I've got some paint in here, but it's not just any kind of paint

called miracle paint from Bill Hirsch

Auto Motive. You can literally paint this stuff right over rust and it'll seal it up and keep it from rusting. I've used that stuff for years and it really works.

Now, also notice that we've got a rusty panel here. We need to build a patch panel for it,

but we don't need to do that yet. We'll do that at the end of the project.

All right, slide the panel into place and position it,

have some clamps

and a body hammer are perfect for getting it just right.

Make sure you're checking it with your door. So, you know, it fits,

that's right on

when you have it. Perfect tack weld it in place.

Double check it with your door

and then finish welding it in.

Now, we're ready for the rocker and it should pretty much just slide into place.

Be prepared though to do a little bit of trimming with the snips

to get it to fit just perfect. Now, you're gonna want to spend some time here because this is what makes or breaks the look of this truck rocker needs to line up with the fender and it also needs to work with the door, right. So spend some time here. Now, once you have it right, go ahead and clamp it in place and weld it.

Ok. Now, finally, we are ready to tackle these old floor pans.

This is where you're gonna be really glad you got that tetanus shot.

Now, getting the old pans off of the cross members can be a little tough because all these spot welds have got to come out just like with the rocker. But an easy way to do it

is to cut the floor into sections,

using the outside of the cross members as a guide, then just come in here with a chisel. Get this old junk off the top.

Now, you can use a Sawzall to do that or a cut off tool. I definitely prefer the Sawzall because it's a lot quicker. Doesn't make near as big a mess.

But before you do any cutting, you need to come under here, make sure you know what's underneath before you unleash that Sawzall because it'll cut anything including your frame. Also.

Make sure you don't cut away more than, you know, the new pans will cover. Are you gonna have to go in and patch that later on?

Well, that takes care

of cutting out the old floors

and lays to rest yet another shirt and that's two of you counting.

So we're gonna take a break. But after that,

I'm gonna put some floor pans in this sucker. Stay with us.

Next Stacy's floor show is red hot as he's putting in the new medal. Stay tuned.

Just can't get enough of trucks. Check us out online at trucks, tv.com.

Welcome back. Now, if you're just joining us, you're way too clean because we're right in the middle of replacing some rusty floors and project crazy horse. Now, we've already got the rockers and the striker panels in, got the old metal cut out. Now it's time to check out the cross members because if those are bad

they got to go.

Now, you can see we actually lucked out really well because these are in great shape except for a little bit of surface rust. So

we're gonna take some clamps straighten up the ears.

So the new floors have a nice flat place to mount to.

Then we'll hit them with some miracle paint.

This rear one, we'll just replace that.

All right

now, take a grinder

and smooth off these cross member ears. So you have really nice metal to weld to

then set in your center pan.

Now, you should expect to do a little bit of tweaking and twisting on this to make sure it fits just right, but it should pretty much lay right in there.

Now, once you're happy with the fit, go ahead and punch some holes for your spot welds. Now, it is very important. These pans fit flushed down on the cross members, not only for strength,

but also nothing looks more amateurish

than a big old gap between the floor pan and the cross member. Remember

if you take your time and do this right?

This will look just like a factory install.

Once your main pan is tacked into place, go ahead and slide in this rear floor section and check the fit. Now, keep in mind you may have to do a little bit of trimming to get it just right and once you're happy with it,

go ahead and tack in place along with this rear floor section

that is fitting great.

The last thing we're gonna deal with are the tow boards. Now, these are cut just like the original pieces and that is really nice

because notice you've got a seam running up the side

along the top down this other side. Now, all we have to do is cut down that line

and this new piece will weld right in there. Now,

notice here we've got a problem. We got a rust hole in this transmission hump and we don't have a

patch panel to fix that. So, gonna have to custom make that.

Well, now you can see what kind of job it is to replace floors and rockers.

I went through three shirts,

put another couple of holes in my pants, ended up with some more cuts on my arms and it completely pegs out our difficulty meter. Now, you might be wondering if it's that difficult. Why

heck, what I wanna do it. It's a good question.

The reason is with all the parts that I put on this thing today from Jeff's Bronco Graveyard and wild horses.

I got about 700 bucks in this thing. Now, I still have some spot welding to do and a little bit of fabrication. But when I'm done,

I'm still gonna have 700 bucks in it. Now, if you were to pay somebody to do this kind of job provided you could find somebody to do it right. And

you'd pay upwards of five grand. Now, you just sit there and think about that for a minute. We'll be back

after the break. It's no repo wheel show. It's a banker's cool ride. So stay right there and we'll take you inside

and now truck gear, parts, tools and equipment for pickups and sport utilities

when it comes to bolting on some serious treatable horsepower. Well, putting on a super charger is one of the best ways to do that

and nothing screams blower like lion's awesome 671 street super charger. Now, this thing will give you up to 50% more power. And of course, it's got the look that shoot legends were made of this,

but there's a lot more to it than that. The kit comes with a fully polished 671 blower

intake manifold,

upper and lower drive pulleys, a three inch Gilmer belt, of course, pulleys for your V belts and all the hardware and brackets that you'll need to actually bolt this thing on and go

provided the rest of your engines up to the task. Now, you would think that something as legendary as a 671. Well,

Yan's kits probably pretty expensive, right? Say around five grand nope,

2500 bucks. Now, at a price like that,

the only choice is whether to tuck it up under the hood

or to let it stick out through. I know what I do

of all the performance aftermarket products available for your truck. Headers have been the most loved and hated all at the same time

because on one hand, you get great flow and performance on the other. They're notorious for blowing gaskets and leak it,

especially down at the collector where you'll warp that and they'll just leak forever.

Well, the guys at Rs Parker Company decided to fix that for good with a product called

the header hush. Now

this thing bolts right onto the collector and keeps the flange from warping, which of course keeps the gasket from blowing.

Now, installation of the header hush is as easy as bolting it on when you replace the gasket. The price is right too. 50 bucks will take care of both headers.

When you're working on your truck project, you're gonna find that you need some abrasives, whether it's cleaning something up or grinding something down

and you probably know that standard abrasives makes a whole line of products just for those needs. But what you probably don't know

is that they also make kits specifically for porting and polishing heads,

prepping and cleaning an engine block.

And they've got this kit with these little small abrasive rolls. That's for those certain projects where you need that special roll that you just can't find down at your local store. Now, you know, who makes them standard abrasives

question when I say the word banker,

what image pops into your mind?

Probably an uptight guy in a suit and tie driving around in a Mercedes or a Lexus or BMW.

Matter of fact, the last thing you'd probably ever associate with a banker is a really slick 48 Chevy pickup.

Unless of course, you're Larry Smith

who's always preferred to spend his money on the finer things in life like a really slick 48 Chevy pickup. This is his, let's check it out.

The first thing that really grabs you about Larry's truck is the vibrant purple paint that covers what at first glance might seem to be a stock body until you take a closer look

to make things just as smooth as glass. A V but windshield replaces the old stock center strip and flows really nicely with the one piece side glass,

the cowl vent, the fresh air door and the heater louvers were all shaved off the cow to make it smooth and clean

and all the trim was also removed from the hood, but that's not all

the original two piece hood was welded together to get rid of any unsightly bumps and bulges or seams.

The original grill is fully restored and it's the perfect centerpiece of that classic front end, but

it's even further enhanced by the fact that a stock looking bumper was tucked four inches closer to the body and the gaps filled with a handmade filler panel. Awesome.

Now, for those times where you need to break away from rush hour traffic and just drive down the road

well under the hood thumps a strong nicely detailed 350 Chevy

and that's nestled into an extremely clean smooth engine bay. I'd never be ashamed to raise this hood

flowing down the sides. The running boards are completely smooth and the stock door handles are probably the first thing shaved off this truck.

The interior would make any Mercedes green with envy with leather upholstery starting up in the headliner flowing down into the door panels and plush leather buckets supplying the seating and rounding out the package,

modern gauges, air conditioning, state of the art stereo system

all supply any of the modern conveniences that heck any banker would want.

The stance on this truck is right on the money and it got that way with an 86 Monte

Carlo donating the front sub frame

and a Camaro topping up the rear end

out back is a completely new bed with finished oak and stainless steel strips making up the bed floor

that's followed by a smooth tailgate

and a custom made roll pan to really finish out the rear

and that cleans up an area that's usually pretty rough on these old trucks.

Well, now let's see in a

H

48 Chevy pickup, we have performance and power handling,

awesome styling and all the modern comforts.

And the best thing is you can buy a truck like this for a heck of a lot cheaper than you'll ever pay for a new Mercedes or Lexus or BMW, which means you not only have something to drive to the bank, you'll also have something to put in the bank when you get there.

And that sounds like a good investment to me that's gonna wrap it up for today. Here's a look at next week's show.

Next week on trucks, we are turning up the heat on Project Crazy Horse as Stacy adds a new rear suspension wheels and tires

and then he's pulling off the body and rolling out the chassis to get to work on replacing the front.

And

finally we'll take an up close and personal. Look at the world of championship rock crawler, John Curry's fire ant.

That's all next week on trucks

for a VHS copy of today's show call, toll free 1877853 7260. Show videos are just 1295 plus shipping and hand

trucks is an RTM production.
Show Full Transcript