Classic Trucks! Builds
Want more content like this?
Join the PowerNation Email NewsletterVideo Transcript
Today on trucks, we're turning up the heat on Project Crazy Horse as Stacy adds a new rear suspension wheels and tires
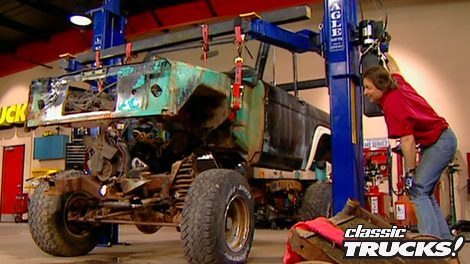
and then he's pulling off the body and rolling out the chassis to get to work on replacing the front.
And finally, we'll take an up close and personal. Look at the world of championship rock crawler, John Curry's fire ant.
You better keep your rear end planted because trucks is starting now.
Welcome to trucks.
The show where we get down and dirty and show you how to do the stuff that nobody else dares to do.
Case in point last week, I dug into this old 66 Bronco. And before I knew it,
I was buried up to my, uh,
eyeballs and replacing rusty floors. But now that we've showed you how to do that
move on to the next step of Project Crazy Horse and that is axles and suspension.
Now, eventually we're gonna pull this body completely off the frame to do this project. That's really the only way to do something like this right
now. You may be wondering, well, why didn't you take the body off first? Wouldn't it be a lot easier to pull the body off before you started everything.
Well, there's a couple of reasons I didn't do that. First of all, the body was not strong enough to take off. It would have wadded up like a ball of tin foil. That's why I had to do the floors and rockers first. Also,
I'm gonna need to do some modification inside this wheel. Well, when I put the rear suspension on,
kind of hard to do that with the body off. So we're gonna start with the rear suspension. Now, let me show you the parts we're gonna use.
Now for rear springs, we got this set of massive rear leaf spring from James Duff Enterprises and this has 10 leaves. It's got a 3.5 inch lift built right in
and it's got the military style double wrap up here for strength and safety.
Now, for rear shocks, we got their stage two dual shock kit which has the brackets,
all the hardware and of course four shocks.
Now, James Duff had a pretty impressive career as a ball hall racer himself. He ran right alongside Parnelli Jones
Rod Hall, all those guys in the seventies. He's also been supplying products for Broncos since about 67.
That's a pretty impressive record.
All right, first thing we need to do is get off the wheels and tires and the old shocks.
Now, this old shock mount is gonna be a problem because you can see it's welded on
and the new mount's gonna go just about where that's at. So we're gonna cut that off with the plasma cutter.
Now make your marks here in the front, lower corner of this wheel. Well, according to the instructions, finally cut out the piece, but make sure you don't cut too far and cut into the interior of the bed.
All right. Now, we'll go ahead and set the bracket in place
and notice
we're gonna have to have a body lift to clear this bracket and we're gonna put that on. But for now
I'm just gonna go ahead and outline this bracket.
So once I get the body off, I'll know where the bracket goes
and then we'll just go ahead and drill the holes and mount it.
Ok. Now we're gonna deal with these old springs. So we'll get this old rear end out of the way.
Sometimes they go easy.
Sometimes they go the hard way. Our decided to go the hard way.
As you can see, I had to cut off every single U bolt because they were so rusty. Of course, you don't want to reuse old U bolts anyway, another thing you don't want to reuse are these old brake hoses. You just come in here and cut those dang things off. Now, a prime example of why
you don't reuse them.
Notice how that thing is swollen completely shut. There is no fluid that's gonna flow through that line
after that
unbolt, the stock springs,
then just slide in the new Dove springs. Now, some of you might be raising an eyebrow about putting this brand new hardware against that rusty frame.
Well, I'm just mocking it into place right now and once I get the suspension all fitting right, I'm gonna pull it all back apart. Sandblast and paint the frame.
Ok. You probably know that the Ford Bronco came with a very stout Ford nine inch rear end.
Unfortunately, ours is completely shot. Now, by the time I upgrade the brakes, you can see somebody did some real creative brake line work here.
Stick in a new differential with low gears and the Detroit locker
and I might as well go ahead and just get a whole new axle, which is exactly what we did
for that. We went to Curry Enterprises. Now check this out.
They specialize in the 49 inch rear end and we're using their heavy duty housing.
We had them stuff it with 456 gears and a Detroit locker to get everything working together.
The axles are 35 spline axles. Now those if you break one of those when you're doing something hateful,
the brakes are their explorer disc brake kit. Now, this is a nice affordable disc brake kit that'll definitely get the job done.
Now, we also had them extend the housing one inch on either side.
That way we've got more room to mount those dual shocks. Now,
does that mean that this is just a worthless piece of junk? No, no.
The street rod guys love these because they're so narrow.
This will fit right under a 32 Ford. So
this goes to the swap meet
to install that new curry rear end. We'll just jack it up to the spring pad and bolt it up
for wheels. Uh, those have to be just right and we're going with a classic rim that also just happens to bear the name of an off road racing legend.
You notice a little theme going here.
The name is Mickey Thompson and these wheels are the challengers. Now, these are not only a forged very strong polished aluminum wheel, but they also have that classic style that Crazy Horse has just got to have. Now, the size is 15 by 10.
Now, as far as
I'm concerned, there is only one tire to use on a project like crazy horse, the Parnelli Jones tire from dirt grip. Now, this isn't just some weenie tire that's got Parnelli name on it. No,
this is a state of the art off road tire. You can see it's got a very aggressive tread for rocks and mud,
but it's also designed in such a way that it will be really nice on the highway.
Now, the size is 35 1251 of my favorite points
is that not only has Parnelli name in the side wall and little pjs up here on the top, but the tread itself is actually big PS and J's now, is that cool or what? Now this takes care of the rear end after the break, we're gonna tear into the front
next the saddle coming off. Project Crazy Horse. As Stacy lifts the body to get to the chassis
and later it's rock crawling 101 with World Champs, John Curry and Jeff Waggoner.
Welcome back to trucks and Project Crazy Horse. As you can see, I've got a heck of a mess going here, but that's ok because we're making some good progress. I already have a new axle brakes and suspension in the rear. Now it's time to deal with that front suspension. But before we do that,
I'm gonna pull that old body off the frame.
So
take a deep breath
because here we go.
Now, believe it or not, there is not a whole lot that holds a broncho body to the frame. You've got eight main mounting bolts and if you're lucky, those will just come right out.
But don't be surprised if they're a little rusty like ours were, but either way
they have got to come out. Oh boy. Look at that.
Now, you get to hunt down all the BS connections. Now,
I call them that because these are the connections that most people forget to unhook when they pull a body off the frame. And of course, that results in a nasty surprise right in the middle of the lifting process and this will make you cuss.
So
these are connections like a gas filler neck,
emergency brake cables, speedometer, cables,
transmission, linkage, steering, linkage hoses, wiring harness. You can see there is a lot of them. Now, the best way to do this is to start at one end and just unhook things as you work your way to the other end. That way
you won't forget anything.
All right.
All right. Come out of there.
Ok.
All right. Come on down.
All right. Now that we have everything disconnected, it is time to lift this body off. Now, do not even attempt to do something like this
on a convertible body style without stressing up the body through the doors to keep it from buckling on you. Even if you have new floors and rockers. Now, obviously, I'm using the lift and that's the easiest way to do it,
but you can take a body off using floor jack and jack stands. I've done it.
It just takes a little longer.
Now, when you're lifting the body off, it's very important that you watch these door scenes. If they're widening up on you, you're getting narrower. Stop, stop, you're flexing the body, you need to set it down and stress it up better.
Now, once you get the body up in the air, we're
gonna go ahead and just roll the chassis out to where we can work on it.
Now, as you probably guess that whole front suspension and that old stock axle is gonna go
and we need to put in something strong enough to handle the abuse that we're gonna put on this thing.
So, if you'll follow me over to the table,
I'll show you what we're gonna use.
Once again, we went to James Duff Enterprises for our front suspension. Now, the kit we're using is a 3.5 inch lift along
travel kit. Now, here's what it consists of. We got extended radius arms with a bend in him for tire clearance.
All the bushings and brackets that it takes to mount these up.
We've got their shock hoops and we're gonna mount dual shocks on each side,
new coil springs and of course, all the hardware that's gonna take to mount this up, which we're gonna do. But after the break
next, Stacy's got a table full of parts to feed Crazy Horse as he moves to the front suspension. Stay tuned.
Just can't get enough of trucks. Check us out online at trucks, tv.com.
Welcome back to trucks. All right. A quick update for those of you that are getting here late.
We've already put a new curry nine inch rear end and a James Duff suspension in the rear of project Crazy Horse. Then we lifted the body off and now I'm cutting this old front suspension out.
Now, since our new extended radius arms are gonna mount a good bit back from the originals,
this needs to be cut off. So, instead of trying to unbolt this old rusty arm shoot, I just torched the whole thing.
Also. Remember, you're gonna have to cut off your original shock mounts too,
then we'll just slide that whole mess right out from under there.
Now,
there's very little of this that we're gonna be able to reuse. A matter of fact, most of it is just junk. So a
lot of this is going to the scrap heap,
ok? To mount your new radius arm brackets measure back 10 and a quarter inches from the stock bracket
and then just drill your holes and bolt it on.
Now, since this is your main suspension mount, I strongly suggest running a weld beat around this too for strength.
The new shock hoops are next
and they just slide right onto the frame
and bolt up here to the spring bucket. Now to mount them on, you just drill the hole and bolt them down. But
I strongly suggest running a weld around there because these parts are under a lot of stress just like the radius arms.
All right. Now, we're ready to put these big old radius arms in place and notice they've got a big he
joint back here to allow them to move and flex not getting any kind of bind. These are heavy duty,
notice they've got the band for the big tires and they also have shock mounts already built in these things are ready to go.
Now, I know you're wondering about the front axle, man. We gotta have something cool to match that nine inch Ford in the rear.
So we went back to Curry Enterprises and had them put together a heavy duty Dana 44. Now, it's got 456 gears just like the rear,
but it's got a true track limited slip, which is a great
application for a front axle. Now, from here on out, it's all James duff stuff.
We've got their knuckles, we've got their steering arms and the crowning jewel is this massive disc brake kit. Now, that'll get everything stopped in a hurry. Now, there's no doubt that this is an awesome axle and it's gonna be a mother in the front of that Bronco, but
we're out of time for this project for today. So we're gonna have to continue it next week, but don't go away
because after the break, we're gonna show you some cool products
and then I'm gonna tell you about this. Well, you're not gonna wanna miss that
after the break. It's the king of the hill. Literally the number one rock crawler in the world, the fire ant
and now truck gear, parts, tools and equipment for pickups and sport utilities.
Now, if you're not into off road stuff, say you're more into building a hot street truck and what the ultimate attraction. Well, we got it for you.
The Mickey Thompson et Streets, which is really nothing more than a street legal version of the et drag wrinkle wall slick. Matter of fact, the only real difference is they've got these little tiny rain grooves that got this thing A dot Approval.
Now, if you want your truck to really hook up and you think the rest of your truck is up to it.
Well, you need to put a set of these on and hold on to something
in the world of off road driving, especially the hard core stuff. Well, the benefits of fuel injection over a carburetor,
they become apparent real quick because a carburetor
just wasn't designed to handle extreme angles until now.
The Holly truck Avenger carburetor.
Now, this thing has a one piece vent tube and special metering blocks to keep the fuel from sloshing over in extreme situations. Matter of fact,
it won't flood at a 40 degree climb
or a 30 degree off camera situation. And the best part is the price is right at 400 bucks
and you bolt it on. That's a whole lot cheaper and easier
than fuel injection
in the world of off roading. There is one area that's just exploded in popularity over the last few years and that is extreme rock crawling.
You've got obstacles that just a few years ago, people wouldn't even dream of going up. Now they're conquering them in competition. Now, if you're not sure what I'm talking about, check this out
the vehicle we have on the show here today is not just any old rock crawler. This is the Curry fire ant. It actually won the whole shooting match last year in the AA Rock Crawling series with the team of John Curry and Jeff Wagner. Now we're gonna take you inside this thing and show you what makes it tick. Jeff. Let's start inside there. Let's go.
All right. Take us through the controls. How do you operate the fire ant?
We're on the dash. We have our basic gauges, but we also have our winch controller on the dash
allows us to reel in. We'll reel out the winch all from in cab. Also from the cab, we can
disengage the winch right here from this lever. It allows us to run 50 75 ft, hook up the cable, let go of the lever and we're ready to go.
We also have the
Atlas twin stick shifter which allows us to put the front end neutral or the rear end in neutral,
which we need to do so we can use our steering brakes. We have steering brakes in here that
for the front end and also for the rear end which allows us to lock up one tire
pivot around that tire which helps us go around a bush, a cone,
a rock, whichever thing we needed.
Oh, that's great. Let's check out this front suspension with John.
Now, you know, everybody's dying to know what kind of axle and suspension you've got here. So if you don't mind sharing it with the competition, tell us about it.
Well, there's no secrets here. This is a curry nine inch front end. It's got a high p nine inch third member,
nine inch front housing. Notice we got the bottom of it cut off for extra ground clearance. Little skid plate up here for bashing into rocks,
inch and a quarter 38 wall croma
tie rod.
This is also getting bashed into rocks as we move around the front here, got anti rock sway bar
and sway way coal over shocks.
This gives us adjustable and controlled articulation
and then we go down to our Johnny joint J arm down there. Oh, that's cool, man. Let's check out the engine.
Now, this is where a lot of people get a big surprise.
Now most people wanna stick a big high horsepower, small block Chevy in here, but not you guys, you went with a smaller V8 out of a late model Jeep Grand Cherokee. Now, what's the secret?
Well, this is a 4.7 overhead cam V8
and the surprise about this engine is it makes 200 ft pounds of torque at 1500 RPM. Oh, that's right where you need it. Absolutely.
Now, safety is a big issue on these vehicles, especially since they spend a lot of time on the roof. So we're gonna get Jeff to tell us about the roll cage. Like you're saying, safety is our number one concern. The whole cage is made out of 120 watt Chromo
tubing.
The design of it is similar to a halo design found on sprint cars.
We have extra gussets throughout the frame and throughout the roll cage to strengthen the integrity of the cage. We also have sheet metal up on top to where if we do roll over on our top, nothing can come in and get either me or John.
Every piece of tubing here is tied together, clear from the front
in the middle and to the rear. We have one central point here, another one there and they all tie down to the frame down there looks strong. I understand that John has already tested this. Unfortunately, the first time out
now while we're back here, we're gonna go ahead and deal with this rear suspension. Now, it's set up very similar to the front, got a triangulated four bar,
big coil over shock and of course the Anna
Rock sway bar,
but the big difference is you got a big Dana 60 back here, shaved on the bottom 450 six gears and a Detroit locker.
Now, I know a lot of you guys might be wondering, hey, you know, I'd like to get some of this stuff for my Jeep.
What about it, John, is it available? You're right, Stacy. There is a version of this suspension and these ares available to anybody. So, if a guy wants to build a rock crawler like this, they can get the parts from you. They sure can.
Now you've seen what goes into them. Let's see, these guys in action.
Well, there you have it, a state of the art rock crawler. What goes into one and just a taste of what it might be like to drive one of these things. Now, if you think you might like to get into this sport, well, get out there and build you one. It doesn't have to be this nice. Just build something to come out and play with the rest of us.
Just don't miss trucks. And speaking of which, here's what we got for you next week,
next week on trucks project, Crazy Horse is kicking in the bar as Stacy's Bolton on a new front axle, spring shocks, wheels and tires
and that old straight six it's headed straight to the glue factory.
Then we'll take a look at the newest supercharged pick up on the block, the Nissan frontier. That's all next week on trucks
for a VHS copy of today's show call toll free 1877853 7260. Show videos are just 1295 plus shipping and handling
trucks is an RTM production.
Show Full Transcript
and then he's pulling off the body and rolling out the chassis to get to work on replacing the front.
And finally, we'll take an up close and personal. Look at the world of championship rock crawler, John Curry's fire ant.
You better keep your rear end planted because trucks is starting now.
Welcome to trucks.
The show where we get down and dirty and show you how to do the stuff that nobody else dares to do.
Case in point last week, I dug into this old 66 Bronco. And before I knew it,
I was buried up to my, uh,
eyeballs and replacing rusty floors. But now that we've showed you how to do that
move on to the next step of Project Crazy Horse and that is axles and suspension.
Now, eventually we're gonna pull this body completely off the frame to do this project. That's really the only way to do something like this right
now. You may be wondering, well, why didn't you take the body off first? Wouldn't it be a lot easier to pull the body off before you started everything.
Well, there's a couple of reasons I didn't do that. First of all, the body was not strong enough to take off. It would have wadded up like a ball of tin foil. That's why I had to do the floors and rockers first. Also,
I'm gonna need to do some modification inside this wheel. Well, when I put the rear suspension on,
kind of hard to do that with the body off. So we're gonna start with the rear suspension. Now, let me show you the parts we're gonna use.
Now for rear springs, we got this set of massive rear leaf spring from James Duff Enterprises and this has 10 leaves. It's got a 3.5 inch lift built right in
and it's got the military style double wrap up here for strength and safety.
Now, for rear shocks, we got their stage two dual shock kit which has the brackets,
all the hardware and of course four shocks.
Now, James Duff had a pretty impressive career as a ball hall racer himself. He ran right alongside Parnelli Jones
Rod Hall, all those guys in the seventies. He's also been supplying products for Broncos since about 67.
That's a pretty impressive record.
All right, first thing we need to do is get off the wheels and tires and the old shocks.
Now, this old shock mount is gonna be a problem because you can see it's welded on
and the new mount's gonna go just about where that's at. So we're gonna cut that off with the plasma cutter.
Now make your marks here in the front, lower corner of this wheel. Well, according to the instructions, finally cut out the piece, but make sure you don't cut too far and cut into the interior of the bed.
All right. Now, we'll go ahead and set the bracket in place
and notice
we're gonna have to have a body lift to clear this bracket and we're gonna put that on. But for now
I'm just gonna go ahead and outline this bracket.
So once I get the body off, I'll know where the bracket goes
and then we'll just go ahead and drill the holes and mount it.
Ok. Now we're gonna deal with these old springs. So we'll get this old rear end out of the way.
Sometimes they go easy.
Sometimes they go the hard way. Our decided to go the hard way.
As you can see, I had to cut off every single U bolt because they were so rusty. Of course, you don't want to reuse old U bolts anyway, another thing you don't want to reuse are these old brake hoses. You just come in here and cut those dang things off. Now, a prime example of why
you don't reuse them.
Notice how that thing is swollen completely shut. There is no fluid that's gonna flow through that line
after that
unbolt, the stock springs,
then just slide in the new Dove springs. Now, some of you might be raising an eyebrow about putting this brand new hardware against that rusty frame.
Well, I'm just mocking it into place right now and once I get the suspension all fitting right, I'm gonna pull it all back apart. Sandblast and paint the frame.
Ok. You probably know that the Ford Bronco came with a very stout Ford nine inch rear end.
Unfortunately, ours is completely shot. Now, by the time I upgrade the brakes, you can see somebody did some real creative brake line work here.
Stick in a new differential with low gears and the Detroit locker
and I might as well go ahead and just get a whole new axle, which is exactly what we did
for that. We went to Curry Enterprises. Now check this out.
They specialize in the 49 inch rear end and we're using their heavy duty housing.
We had them stuff it with 456 gears and a Detroit locker to get everything working together.
The axles are 35 spline axles. Now those if you break one of those when you're doing something hateful,
the brakes are their explorer disc brake kit. Now, this is a nice affordable disc brake kit that'll definitely get the job done.
Now, we also had them extend the housing one inch on either side.
That way we've got more room to mount those dual shocks. Now,
does that mean that this is just a worthless piece of junk? No, no.
The street rod guys love these because they're so narrow.
This will fit right under a 32 Ford. So
this goes to the swap meet
to install that new curry rear end. We'll just jack it up to the spring pad and bolt it up
for wheels. Uh, those have to be just right and we're going with a classic rim that also just happens to bear the name of an off road racing legend.
You notice a little theme going here.
The name is Mickey Thompson and these wheels are the challengers. Now, these are not only a forged very strong polished aluminum wheel, but they also have that classic style that Crazy Horse has just got to have. Now, the size is 15 by 10.
Now, as far as
I'm concerned, there is only one tire to use on a project like crazy horse, the Parnelli Jones tire from dirt grip. Now, this isn't just some weenie tire that's got Parnelli name on it. No,
this is a state of the art off road tire. You can see it's got a very aggressive tread for rocks and mud,
but it's also designed in such a way that it will be really nice on the highway.
Now, the size is 35 1251 of my favorite points
is that not only has Parnelli name in the side wall and little pjs up here on the top, but the tread itself is actually big PS and J's now, is that cool or what? Now this takes care of the rear end after the break, we're gonna tear into the front
next the saddle coming off. Project Crazy Horse. As Stacy lifts the body to get to the chassis
and later it's rock crawling 101 with World Champs, John Curry and Jeff Waggoner.
Welcome back to trucks and Project Crazy Horse. As you can see, I've got a heck of a mess going here, but that's ok because we're making some good progress. I already have a new axle brakes and suspension in the rear. Now it's time to deal with that front suspension. But before we do that,
I'm gonna pull that old body off the frame.
So
take a deep breath
because here we go.
Now, believe it or not, there is not a whole lot that holds a broncho body to the frame. You've got eight main mounting bolts and if you're lucky, those will just come right out.
But don't be surprised if they're a little rusty like ours were, but either way
they have got to come out. Oh boy. Look at that.
Now, you get to hunt down all the BS connections. Now,
I call them that because these are the connections that most people forget to unhook when they pull a body off the frame. And of course, that results in a nasty surprise right in the middle of the lifting process and this will make you cuss.
So
these are connections like a gas filler neck,
emergency brake cables, speedometer, cables,
transmission, linkage, steering, linkage hoses, wiring harness. You can see there is a lot of them. Now, the best way to do this is to start at one end and just unhook things as you work your way to the other end. That way
you won't forget anything.
All right.
All right. Come out of there.
Ok.
All right. Come on down.
All right. Now that we have everything disconnected, it is time to lift this body off. Now, do not even attempt to do something like this
on a convertible body style without stressing up the body through the doors to keep it from buckling on you. Even if you have new floors and rockers. Now, obviously, I'm using the lift and that's the easiest way to do it,
but you can take a body off using floor jack and jack stands. I've done it.
It just takes a little longer.
Now, when you're lifting the body off, it's very important that you watch these door scenes. If they're widening up on you, you're getting narrower. Stop, stop, you're flexing the body, you need to set it down and stress it up better.
Now, once you get the body up in the air, we're
gonna go ahead and just roll the chassis out to where we can work on it.
Now, as you probably guess that whole front suspension and that old stock axle is gonna go
and we need to put in something strong enough to handle the abuse that we're gonna put on this thing.
So, if you'll follow me over to the table,
I'll show you what we're gonna use.
Once again, we went to James Duff Enterprises for our front suspension. Now, the kit we're using is a 3.5 inch lift along
travel kit. Now, here's what it consists of. We got extended radius arms with a bend in him for tire clearance.
All the bushings and brackets that it takes to mount these up.
We've got their shock hoops and we're gonna mount dual shocks on each side,
new coil springs and of course, all the hardware that's gonna take to mount this up, which we're gonna do. But after the break
next, Stacy's got a table full of parts to feed Crazy Horse as he moves to the front suspension. Stay tuned.
Just can't get enough of trucks. Check us out online at trucks, tv.com.
Welcome back to trucks. All right. A quick update for those of you that are getting here late.
We've already put a new curry nine inch rear end and a James Duff suspension in the rear of project Crazy Horse. Then we lifted the body off and now I'm cutting this old front suspension out.
Now, since our new extended radius arms are gonna mount a good bit back from the originals,
this needs to be cut off. So, instead of trying to unbolt this old rusty arm shoot, I just torched the whole thing.
Also. Remember, you're gonna have to cut off your original shock mounts too,
then we'll just slide that whole mess right out from under there.
Now,
there's very little of this that we're gonna be able to reuse. A matter of fact, most of it is just junk. So a
lot of this is going to the scrap heap,
ok? To mount your new radius arm brackets measure back 10 and a quarter inches from the stock bracket
and then just drill your holes and bolt it on.
Now, since this is your main suspension mount, I strongly suggest running a weld beat around this too for strength.
The new shock hoops are next
and they just slide right onto the frame
and bolt up here to the spring bucket. Now to mount them on, you just drill the hole and bolt them down. But
I strongly suggest running a weld around there because these parts are under a lot of stress just like the radius arms.
All right. Now, we're ready to put these big old radius arms in place and notice they've got a big he
joint back here to allow them to move and flex not getting any kind of bind. These are heavy duty,
notice they've got the band for the big tires and they also have shock mounts already built in these things are ready to go.
Now, I know you're wondering about the front axle, man. We gotta have something cool to match that nine inch Ford in the rear.
So we went back to Curry Enterprises and had them put together a heavy duty Dana 44. Now, it's got 456 gears just like the rear,
but it's got a true track limited slip, which is a great
application for a front axle. Now, from here on out, it's all James duff stuff.
We've got their knuckles, we've got their steering arms and the crowning jewel is this massive disc brake kit. Now, that'll get everything stopped in a hurry. Now, there's no doubt that this is an awesome axle and it's gonna be a mother in the front of that Bronco, but
we're out of time for this project for today. So we're gonna have to continue it next week, but don't go away
because after the break, we're gonna show you some cool products
and then I'm gonna tell you about this. Well, you're not gonna wanna miss that
after the break. It's the king of the hill. Literally the number one rock crawler in the world, the fire ant
and now truck gear, parts, tools and equipment for pickups and sport utilities.
Now, if you're not into off road stuff, say you're more into building a hot street truck and what the ultimate attraction. Well, we got it for you.
The Mickey Thompson et Streets, which is really nothing more than a street legal version of the et drag wrinkle wall slick. Matter of fact, the only real difference is they've got these little tiny rain grooves that got this thing A dot Approval.
Now, if you want your truck to really hook up and you think the rest of your truck is up to it.
Well, you need to put a set of these on and hold on to something
in the world of off road driving, especially the hard core stuff. Well, the benefits of fuel injection over a carburetor,
they become apparent real quick because a carburetor
just wasn't designed to handle extreme angles until now.
The Holly truck Avenger carburetor.
Now, this thing has a one piece vent tube and special metering blocks to keep the fuel from sloshing over in extreme situations. Matter of fact,
it won't flood at a 40 degree climb
or a 30 degree off camera situation. And the best part is the price is right at 400 bucks
and you bolt it on. That's a whole lot cheaper and easier
than fuel injection
in the world of off roading. There is one area that's just exploded in popularity over the last few years and that is extreme rock crawling.
You've got obstacles that just a few years ago, people wouldn't even dream of going up. Now they're conquering them in competition. Now, if you're not sure what I'm talking about, check this out
the vehicle we have on the show here today is not just any old rock crawler. This is the Curry fire ant. It actually won the whole shooting match last year in the AA Rock Crawling series with the team of John Curry and Jeff Wagner. Now we're gonna take you inside this thing and show you what makes it tick. Jeff. Let's start inside there. Let's go.
All right. Take us through the controls. How do you operate the fire ant?
We're on the dash. We have our basic gauges, but we also have our winch controller on the dash
allows us to reel in. We'll reel out the winch all from in cab. Also from the cab, we can
disengage the winch right here from this lever. It allows us to run 50 75 ft, hook up the cable, let go of the lever and we're ready to go.
We also have the
Atlas twin stick shifter which allows us to put the front end neutral or the rear end in neutral,
which we need to do so we can use our steering brakes. We have steering brakes in here that
for the front end and also for the rear end which allows us to lock up one tire
pivot around that tire which helps us go around a bush, a cone,
a rock, whichever thing we needed.
Oh, that's great. Let's check out this front suspension with John.
Now, you know, everybody's dying to know what kind of axle and suspension you've got here. So if you don't mind sharing it with the competition, tell us about it.
Well, there's no secrets here. This is a curry nine inch front end. It's got a high p nine inch third member,
nine inch front housing. Notice we got the bottom of it cut off for extra ground clearance. Little skid plate up here for bashing into rocks,
inch and a quarter 38 wall croma
tie rod.
This is also getting bashed into rocks as we move around the front here, got anti rock sway bar
and sway way coal over shocks.
This gives us adjustable and controlled articulation
and then we go down to our Johnny joint J arm down there. Oh, that's cool, man. Let's check out the engine.
Now, this is where a lot of people get a big surprise.
Now most people wanna stick a big high horsepower, small block Chevy in here, but not you guys, you went with a smaller V8 out of a late model Jeep Grand Cherokee. Now, what's the secret?
Well, this is a 4.7 overhead cam V8
and the surprise about this engine is it makes 200 ft pounds of torque at 1500 RPM. Oh, that's right where you need it. Absolutely.
Now, safety is a big issue on these vehicles, especially since they spend a lot of time on the roof. So we're gonna get Jeff to tell us about the roll cage. Like you're saying, safety is our number one concern. The whole cage is made out of 120 watt Chromo
tubing.
The design of it is similar to a halo design found on sprint cars.
We have extra gussets throughout the frame and throughout the roll cage to strengthen the integrity of the cage. We also have sheet metal up on top to where if we do roll over on our top, nothing can come in and get either me or John.
Every piece of tubing here is tied together, clear from the front
in the middle and to the rear. We have one central point here, another one there and they all tie down to the frame down there looks strong. I understand that John has already tested this. Unfortunately, the first time out
now while we're back here, we're gonna go ahead and deal with this rear suspension. Now, it's set up very similar to the front, got a triangulated four bar,
big coil over shock and of course the Anna
Rock sway bar,
but the big difference is you got a big Dana 60 back here, shaved on the bottom 450 six gears and a Detroit locker.
Now, I know a lot of you guys might be wondering, hey, you know, I'd like to get some of this stuff for my Jeep.
What about it, John, is it available? You're right, Stacy. There is a version of this suspension and these ares available to anybody. So, if a guy wants to build a rock crawler like this, they can get the parts from you. They sure can.
Now you've seen what goes into them. Let's see, these guys in action.
Well, there you have it, a state of the art rock crawler. What goes into one and just a taste of what it might be like to drive one of these things. Now, if you think you might like to get into this sport, well, get out there and build you one. It doesn't have to be this nice. Just build something to come out and play with the rest of us.
Just don't miss trucks. And speaking of which, here's what we got for you next week,
next week on trucks project, Crazy Horse is kicking in the bar as Stacy's Bolton on a new front axle, spring shocks, wheels and tires
and that old straight six it's headed straight to the glue factory.
Then we'll take a look at the newest supercharged pick up on the block, the Nissan frontier. That's all next week on trucks
for a VHS copy of today's show call toll free 1877853 7260. Show videos are just 1295 plus shipping and handling
trucks is an RTM production.