More Copperhead Episodes
Classic Trucks! Builds
Want more content like this?
Join the PowerNation Email NewsletterVideo Transcript
Today on trucks. It's the start of project Copperhead as Stacy begins bolting the suspension onto the frame of a cool 1967 seat and Chevy
and we'll get some hammer time with Professor Hammer himself. Ron Covell.
That's all today on trucks.
Welcome to trucks. I've got a cool project planned for you today.
Now, if you're a regular viewer of the show,
you've probably been following along on some of the build ups like the Hairy Hauler or Crazy horse and they'll be back here in the near future. But for now, well, the Hairy Hauler is in the paint booth waiting its turn and of course the frame of Crazy Horse and it's at the sand blaster. So this is the perfect time to start a new build up.
You are gonna love this one. First of all, it's gonna be a high street truck. Second of all, it's gonna deal with one of the most popular body styles of truck ever built.
The 67 through 72 Chevrolet.
One of the reasons why these trucks are so popular is the styling is just so cool, man. Everybody likes these things. Now, the suspension is modern enough. To where you don't have to sub frame them.
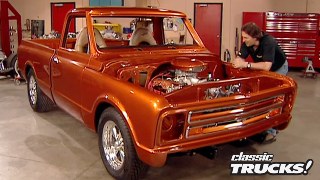
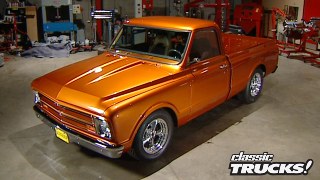
They're relatively easy to find, pretty inexpensive and you can build them stock, completely custom or a combination of both like this prime example that belongs to Dave Clark
of Fresno, California.
But one of the best things about these trucks is since they're so popular, you can get almost any piece for these things in the aftermarket. Matter of fact,
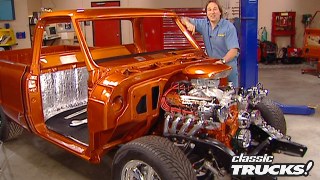
if you start with just the cab and the frame, you can build this truck and most of it is just bolt on stuff. Now,
I know a lot of you are probably saying, oh, now, wait a minute. Now, the old truck, you gotta, you gotta prove that to me. Well,
I thought you'd probably say that. So the only way to prove it to you
is to build one and that is exactly what we're gonna do.
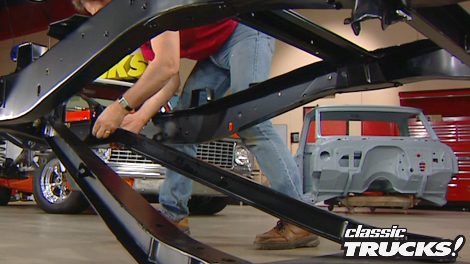
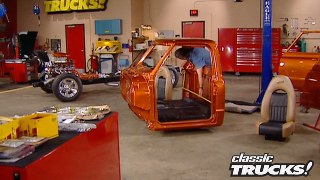
Ok. What I'm starting with is literally a 67 cab
a frame and of course, a title you, you gotta have a title. You don't have a truck without that. Now, if you look around and do a little bit of wheeling and dealing,
you can find a decent cab and frame for around 500 bucks, give or take a little bit.
Now, if you take the cab down, have it stripped and primer
have the frame sandblasted like we did. Well, you can literally be into one of these things for about 1000 bucks. Once again,
give or take a little bit and that is a good starting point. Now, one big question that people always ask is, do you have to box the frame for strength? The answer is no. Remember a lot of these trucks came from the factory with the big block. So the frames are plenty strong. You can leave that just the way it is.
Now, the first thing that you need to decide about any project
is what direction you're gonna go. Now, this project is gonna be nice and low and smooth,
but it's not gonna detract from the original classic lines of the truck. Gonna pretty much be the ultimate cruiser, but
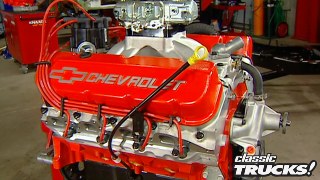
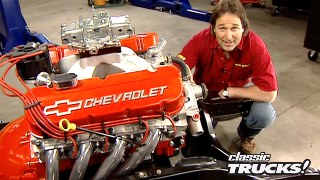
it's not just gonna be about looks under the hood is gonna be lethal. Matter of fact,
that's why I'm calling this project Copperhead because just like the snake doesn't have any rattles to warn you that he's around.
There's no way you're gonna know what's under that hood until it's too late and you have been had and I own your pink slip,
ok? To upgrade our suspension. We went to a place called Early Classic Enterprises. You need to write that down.
We got their whole front end rebuild kit. Now, this includes lower ball joints, upper ball joints, tie rod
ends, idler arm, pittman arm shocks, heck everything. We even got a kit to rebuild the upper control arms and this includes a pivot shaft
bushings and of course, the seals. Now, the good thing about early classics kits.
They include all the hardware right down to the Castle nuts and the cotter pins. And that
is a really nice touch
to install the new pivot shafts into the stock control arms.
You just slide them into place,
then take your seals, put them on your bushings
and just thread the bushing onto the shaft.
Now, it is very important
that you keep that pivot shaft centered in that control arm.
So you'll need to keep checking it as you tighten those ends down.
Then all you have to do is bolt on your upper ball joint and you're done. Now for the lower ball joints,
those need to be pressed in. So
do not try to do this with a hammer. You'll need to take it down a good machine shop, just charge you a few bucks to have that done.
Now, once your a arms are assembled, all you gotta do is bolt them on the chassis,
the top control arm bolts right to the factory studs on the chassis.
I'm gonna use about three shims on each stud
to give us a nice starting point for our alignment.
Now, the bottom control arm, it's just held in place with these U bolts that come with the kit.
Next, we're ready for springs and spindles. Now, we had to have something that'll give copperhead just the right stance, not too low,
but stock height won't work either. So we went back to early classic enterprises got a set of their two inch drop spindles. Now, these are the strongest spindles on the market. They've got lifetime warranty to back them up.
And that's a good thing because all the weight on the front of your truck is balanced on these little stubs.
Now, we're gonna use those together with a one inch drop coil spring that's gonna give us a nice 3.5 inch drop for that nice slinky Slithery look that we gotta have.
All right to install the springs and spindles, just slide in the spring, make sure it seats up in the top pocket, then bolt on your spindle. Now, if you're working on a bare frame like this,
you're not gonna have enough weight. So you're gonna have to add something
so you can jack up this lower control arm compress that spring. So you can bolt this spindle on
now to tie those two spindles together.
We're gonna bolt on the tie rod ends and the idler arm and the pitman arm
and those just bolt into the stock location.
Now, this is one area that a lot of people overlook when they're restoring an old truck and they end up with a truck of wanders all over the road. Now, these parts are inexpensive and they really should be the first thing that you replace on a restoration. Now, we're gonna take a break and after the break, we are gonna continue project Copperhead
coming up next, more of the assembly on the chassis of our classic short box Chevy
and later metal workout tools to get your body in shape.
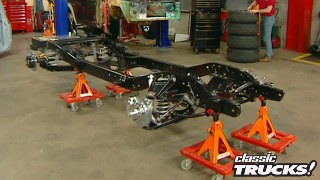
Welcome back to trucks. Now, if you're just getting here, we are literally building a 67 Chevy truck from the ground up, starting with just a bare frame
and a good solid old cab to show you just how easy it can be. Now, we've already got most of our brand new front suspension pieces on, but there are still a couple of things I need to talk to you about.
Now for our steering box, we went back to Early Classic Enterprises, got one of these awesome quick ratio power steering boxes.
Now, this thing obviously bolts right to the stock holes, but
it turns from lock to lock in 3.5 turns. A stalker is 4.5.
Now, this doesn't come with any particular kit.
It's definitely worth the extra money though to go ahead and get one of these and put it on, especially
if you're gonna stuff a big old heavy, big block under the hood. I know you're dying to know what's going in here. Now, the last thing that we're gonna put on the front is a sway bar. Now, the kit from early Classic Enterprises is just the ticket. Now, it features a
huge inch and a quarter bar
and of course all the polygraph bushings and hardware you need to bolt this thing in, I'll tell you,
you add this to a lowered suspension and your truck will handle like it's on rails. Now, one of the problems with dropping an early C 10 truck is that the sway bar is gonna hang down. Looks kind of like a growth down under there. It doesn't look real good.
So the kit comes with these brackets,
what that does is raise the bar up against the truck for a really cool clean look
like everything so far,
it just bolts right into place
that takes care of our front suspension for. Now.
Now we're gonna deal with the rear and these big old trailing arms in the springs.
Now we got new polygraph eye bushings from early classics
for this pivot point in these trailing arms
just grease them up real well.
Tap them in place. Now, for the springs, we also got drop spring. So the rear of the truck sits down low like the front,
the arms just slide into the stock location,
then jack up the arm
and bolt the spring
between the arm and the frame.
All right. Now we are ready for the rear end.
Now, since we are going to put a significant amount of horsepower under the hood of uh copperhead hint, hint
enough to churn a stock axle into a pile of dust.
Well, we went to drive train specialists and had them put together a huge Dana 60 for us. Now, this thing features massive 35 supplying axles,
a 373 gear and a power lock posi
are stuffed inside
and then they also put on the girdled cover that's got preload bolts that go down onto the carrier bearings and this keeps the housing from flexing.
Now, if we tear something like this up, well, we've done something
now for brakes. We went to aerospace components got their really trick rear disc brake kit.
This thing features polished aluminum four piston calipers,
drilled and slotted rotors and of course, all the bracketry to just bolt this onto your rear end.
Now, speaking of a break, we need to take one but don't go too far because we're gonna be right back onto this project. We'll see you in a minute.
Just can't get enough of trucks, check us out online at trucks, tv.com.
Welcome back to trucks and the lowly beginnings of project Copperhead.
Now we've already got new suspension components on the front and on the rear of this old Chevy. Now it's time to deal with this big old Dana 60 axle. Now, I've already got it jacked into place. I'm sitting over the top of the trailing arms,
but I don't have these saddles welded to the axle tubes yet. And there's a reason for that.
Now, once you weld those on, you permanently set your opinion angle, but
the only way to properly set the angle of your opinion is with the chassis sitting at ride height.
So I'm gonna have to wait at least until I have a drive train in this thing before I can weld those on.
But it doesn't mean I can't go ahead and assemble it for you.
Now,
this trailing arm system on these old trucks is very much like a heavy duty ladder bar system, which means
you gotta have some sort of lateral support to keep this axle from moving side to side.
Now, it came from the factory
with a Panter bar that ran from the frame rail
to the center chunk, but we've changed the axle and we've also dropped the truck, which means we need something better. So
we went back to early classic enterprises and got one of their super track bar kits.
This eliminates all the geometry problems that arise when you drop the rear of one of those old C tens.
Now, the kit includes an adjustable track bar
hardware and of course the brackets, but while we're in there, we went ahead and got one of their shock relocation kits too.
Now, this not only comes with high performance gas shocks
but also all the brackets and hardware to mount these in
to install the track bar. Take the bracket that comes with the kit,
slide it between the axle and the trailing arm on the passenger side.
Now, to make sure that everything stays even, you've got this spacer that you've got to stick into the driver's side in the same place.
Then
we'll take our shark relocation bracket,
slide it on to the U bolt
and then just bolt it up.
Then
we'll just bolt in the track bar.
Now, just like the pinion angle. This chassis needs to be sitting at right height before you can get your final adjustment with that track bar.
So we just have a ballpark for now.
We're gonna finish everything up with the shocks
and we're done. Now, one final very important thing,
these new axles like this are always shipped empty.
So
you're gonna wanna put in a good quality gear lube like this royal purple synthetic before you try to drive this thing down the road. Now, it's easy to forget. So do it. Now.
Now another thing we have to do right now is bring this project to a stop for today, but don't go away. We have some really cool stuff for you after the break.
Welcome back to trucks. Now, if you've been around the world of trucks very long, you know that there is more custom body work going on with trucks than,
than anything else, you've got everything from shaved door handles to custom roll pans to more difficult stuff like chopping the top or completely channeling and sectioning bodies. So today we're gonna show you some of the tools you're gonna need to do some top
quality metal work
and the place we went to was called Covell Creative Metal Working. But before I show you the tools. Let me introduce you to the man behind the name. One of the premier metal workers in the nation.
Ron
Covell.
Ron started building vehicles at a very early age and soon contributed to countless national show, winning cars,
bikes
and trucks and even won the pre
ST just America's most beautiful Roadster award with the California star, which he completely built from scratch.
In the early nineties, Ron now known as Professor Hammer
began to focus more on instruction,
giving metal working seminars across the country
as well as supplying top quality tools and videos. So people could learn to work with everything from steel to aluminum to tubing.
And that brings us up to the day. Now, we not only have a bunch of Ron's tools, but we also caught Ron between seminars. So we have Professor Hammer himself.
Now, like I've told you in past shows, the first thing you need to invest in
is a good set of body hammers and dollies. These are the foundation of good metal work.
But then what say you wanna build a nice contoured panel to replace rust. What kind of tools and techniques do you use? Well, we're gonna have Professor Hammer show you how to do that. How about it, Ron? I'll be glad to
if you want to take a piece of metal and put a compound curve in it.
The easiest tools to use are a mallet and sandbag.
The metal is placed over the sandbag and hit repeatedly with the mallet until you have the shape you want.
And this gets quite noisy. So I'm going to put on some headphones,
start your hammering in the center, then spiral out toward the edge.
If the edges get out of shape, you can usually straighten them with your hands.
Once your hammer marks cover the whole surface evenly, you are close to being finished.
OK.
Working with the mallet and sandbag is an excellent way to get an approximate shape. But of course, the mallet leaves a very bumpy surface on the metal.
The next step to start smoothing the bumps out
is to work with the dolly.
And in this case, we're going to balance the dolly on a sand bag
and then start working against the dolly with a smooth face tool called a slap hammer. This tool will take out all of the lumps and bumps in the metal.
OK?
So we've spent about 10 minutes working this part against the dolly with the slap hammer and this part is just about as smooth as you would need for a typical patch panel.
Now, another tool that you need to have is called a shrinker. Now, the way this thing works, Ron, let me see that panel there. What do you think? Oh, this is nice.
This allows you to shrink the edges of a custom made panel like this one that Ron made or
you can take a bent piece like this
and custom make repair panels for areas around a windshield or a trunk or doors. This is a wonderful tool now to use it,
just stick the piece into the machine
and start pulling on the handle. It's that easy.
The next tool we'll look at is interesting. It's called a bull's eye pick. The business end of it is like a gun site.
And when you squeeze the handle, there's a pointed tip that comes up to tap the metal from the back side,
we use this tool to take dents out of metal.
There's a small dent that we have in this panel. Let's use the bolts. I pick to take it out.
I'll put my ear muffs on.
Now, the gun side is placed on the top side of the dent
and we just squeezed the handle repeatedly.
All right, that should give you an idea what's out there. And all of these tools are available from Covell
Creative Metal working. Now in future shows, I'll continue to show you how to use these tools. But if you're impatient, don't wanna wait for that.
I strongly suggest that you invest in some iron's instructional videos or better yet. Go to one of his seminars,
doesn't matter what your skill level is. I promise you're gonna learn something that is why we call him, Professor Hammer.
Thanks Stacy. Thank you.
And now truck gear parts, tools and equipment for pickups and sport utilities.
One look that's been really popular with customizer for a long time is the look of
anodized metal. That is sweet.
Unfortunately, it's a little expensive to have done.
Well, duple color has changed that with this new paint called metal cast. This stuff actually looks just like anodized metal. Check this out. This is paint.
Now, this stuff sprays right over bare metal.
It's resistant to heat,
oil and gas and that is very impressive coming out of a can.
Now, if you think you'd like to try some of this stuff, well, it's as close as your local parts store.
One of the biggest drawbacks to owning a late model truck, other than the payments is getting true. Bolt on performance. There's a lot of warranty and emissions issues that you gotta be careful about.
Well, one of the best banks for the buck comes from Hyper Tech in the form of the power programmer three.
Now, this will not only give you good performance gains but it allows you to change your shift points and your rev limiter and even your speedometer, if you put on bigger tires,
now you can outfit your truck with a power programmer three for around 400 bucks depending on your application.
Now, it goes without saying that most people that watch shows like trucks are hands on, do it yourself. Sort of guys. You've also probably noticed that most gear heads are really into music. Heck, most of them are musicians themselves. Well, PV, electronics jumped in on that came out with their totally cool
big E amplifier. Now, this was designed by Dweezil Zappa as he sat in the front seat of his Aston Martin.
Check this out. It's got an RPM gauge. Speedometer. Oil temperature boost. Oh, we like boost. So, for those times that you want to play clean, well, you can,
dang, that's cool. Now, when you wanna get really dirty, well, you can do that too. You got 100 watts of power here under the hood.
Now, the wiggy goes for about 1200 bucks and you can get it at your local music store. Now, that's gonna do it for today's show.
Here's what we got for you next week,
next week on Trucks. Project. Copperhead continues. We've lowered this snake into the grass. Next, we'll slide on some cool brakes and hot wheels.
Then we'll show you the truck. Chevy never built but should have a 496 Ss Silverado.
That's all next week on trucks.
Trucks is an RTM production.
Show Full Transcript
and we'll get some hammer time with Professor Hammer himself. Ron Covell.
That's all today on trucks.
Welcome to trucks. I've got a cool project planned for you today.
Now, if you're a regular viewer of the show,
you've probably been following along on some of the build ups like the Hairy Hauler or Crazy horse and they'll be back here in the near future. But for now, well, the Hairy Hauler is in the paint booth waiting its turn and of course the frame of Crazy Horse and it's at the sand blaster. So this is the perfect time to start a new build up.
You are gonna love this one. First of all, it's gonna be a high street truck. Second of all, it's gonna deal with one of the most popular body styles of truck ever built.
The 67 through 72 Chevrolet.
One of the reasons why these trucks are so popular is the styling is just so cool, man. Everybody likes these things. Now, the suspension is modern enough. To where you don't have to sub frame them.
They're relatively easy to find, pretty inexpensive and you can build them stock, completely custom or a combination of both like this prime example that belongs to Dave Clark
of Fresno, California.
But one of the best things about these trucks is since they're so popular, you can get almost any piece for these things in the aftermarket. Matter of fact,
if you start with just the cab and the frame, you can build this truck and most of it is just bolt on stuff. Now,
I know a lot of you are probably saying, oh, now, wait a minute. Now, the old truck, you gotta, you gotta prove that to me. Well,
I thought you'd probably say that. So the only way to prove it to you
is to build one and that is exactly what we're gonna do.
Ok. What I'm starting with is literally a 67 cab
a frame and of course, a title you, you gotta have a title. You don't have a truck without that. Now, if you look around and do a little bit of wheeling and dealing,
you can find a decent cab and frame for around 500 bucks, give or take a little bit.
Now, if you take the cab down, have it stripped and primer
have the frame sandblasted like we did. Well, you can literally be into one of these things for about 1000 bucks. Once again,
give or take a little bit and that is a good starting point. Now, one big question that people always ask is, do you have to box the frame for strength? The answer is no. Remember a lot of these trucks came from the factory with the big block. So the frames are plenty strong. You can leave that just the way it is.
Now, the first thing that you need to decide about any project
is what direction you're gonna go. Now, this project is gonna be nice and low and smooth,
but it's not gonna detract from the original classic lines of the truck. Gonna pretty much be the ultimate cruiser, but
it's not just gonna be about looks under the hood is gonna be lethal. Matter of fact,
that's why I'm calling this project Copperhead because just like the snake doesn't have any rattles to warn you that he's around.
There's no way you're gonna know what's under that hood until it's too late and you have been had and I own your pink slip,
ok? To upgrade our suspension. We went to a place called Early Classic Enterprises. You need to write that down.
We got their whole front end rebuild kit. Now, this includes lower ball joints, upper ball joints, tie rod
ends, idler arm, pittman arm shocks, heck everything. We even got a kit to rebuild the upper control arms and this includes a pivot shaft
bushings and of course, the seals. Now, the good thing about early classics kits.
They include all the hardware right down to the Castle nuts and the cotter pins. And that
is a really nice touch
to install the new pivot shafts into the stock control arms.
You just slide them into place,
then take your seals, put them on your bushings
and just thread the bushing onto the shaft.
Now, it is very important
that you keep that pivot shaft centered in that control arm.
So you'll need to keep checking it as you tighten those ends down.
Then all you have to do is bolt on your upper ball joint and you're done. Now for the lower ball joints,
those need to be pressed in. So
do not try to do this with a hammer. You'll need to take it down a good machine shop, just charge you a few bucks to have that done.
Now, once your a arms are assembled, all you gotta do is bolt them on the chassis,
the top control arm bolts right to the factory studs on the chassis.
I'm gonna use about three shims on each stud
to give us a nice starting point for our alignment.
Now, the bottom control arm, it's just held in place with these U bolts that come with the kit.
Next, we're ready for springs and spindles. Now, we had to have something that'll give copperhead just the right stance, not too low,
but stock height won't work either. So we went back to early classic enterprises got a set of their two inch drop spindles. Now, these are the strongest spindles on the market. They've got lifetime warranty to back them up.
And that's a good thing because all the weight on the front of your truck is balanced on these little stubs.
Now, we're gonna use those together with a one inch drop coil spring that's gonna give us a nice 3.5 inch drop for that nice slinky Slithery look that we gotta have.
All right to install the springs and spindles, just slide in the spring, make sure it seats up in the top pocket, then bolt on your spindle. Now, if you're working on a bare frame like this,
you're not gonna have enough weight. So you're gonna have to add something
so you can jack up this lower control arm compress that spring. So you can bolt this spindle on
now to tie those two spindles together.
We're gonna bolt on the tie rod ends and the idler arm and the pitman arm
and those just bolt into the stock location.
Now, this is one area that a lot of people overlook when they're restoring an old truck and they end up with a truck of wanders all over the road. Now, these parts are inexpensive and they really should be the first thing that you replace on a restoration. Now, we're gonna take a break and after the break, we are gonna continue project Copperhead
coming up next, more of the assembly on the chassis of our classic short box Chevy
and later metal workout tools to get your body in shape.
Welcome back to trucks. Now, if you're just getting here, we are literally building a 67 Chevy truck from the ground up, starting with just a bare frame
and a good solid old cab to show you just how easy it can be. Now, we've already got most of our brand new front suspension pieces on, but there are still a couple of things I need to talk to you about.
Now for our steering box, we went back to Early Classic Enterprises, got one of these awesome quick ratio power steering boxes.
Now, this thing obviously bolts right to the stock holes, but
it turns from lock to lock in 3.5 turns. A stalker is 4.5.
Now, this doesn't come with any particular kit.
It's definitely worth the extra money though to go ahead and get one of these and put it on, especially
if you're gonna stuff a big old heavy, big block under the hood. I know you're dying to know what's going in here. Now, the last thing that we're gonna put on the front is a sway bar. Now, the kit from early Classic Enterprises is just the ticket. Now, it features a
huge inch and a quarter bar
and of course all the polygraph bushings and hardware you need to bolt this thing in, I'll tell you,
you add this to a lowered suspension and your truck will handle like it's on rails. Now, one of the problems with dropping an early C 10 truck is that the sway bar is gonna hang down. Looks kind of like a growth down under there. It doesn't look real good.
So the kit comes with these brackets,
what that does is raise the bar up against the truck for a really cool clean look
like everything so far,
it just bolts right into place
that takes care of our front suspension for. Now.
Now we're gonna deal with the rear and these big old trailing arms in the springs.
Now we got new polygraph eye bushings from early classics
for this pivot point in these trailing arms
just grease them up real well.
Tap them in place. Now, for the springs, we also got drop spring. So the rear of the truck sits down low like the front,
the arms just slide into the stock location,
then jack up the arm
and bolt the spring
between the arm and the frame.
All right. Now we are ready for the rear end.
Now, since we are going to put a significant amount of horsepower under the hood of uh copperhead hint, hint
enough to churn a stock axle into a pile of dust.
Well, we went to drive train specialists and had them put together a huge Dana 60 for us. Now, this thing features massive 35 supplying axles,
a 373 gear and a power lock posi
are stuffed inside
and then they also put on the girdled cover that's got preload bolts that go down onto the carrier bearings and this keeps the housing from flexing.
Now, if we tear something like this up, well, we've done something
now for brakes. We went to aerospace components got their really trick rear disc brake kit.
This thing features polished aluminum four piston calipers,
drilled and slotted rotors and of course, all the bracketry to just bolt this onto your rear end.
Now, speaking of a break, we need to take one but don't go too far because we're gonna be right back onto this project. We'll see you in a minute.
Just can't get enough of trucks, check us out online at trucks, tv.com.
Welcome back to trucks and the lowly beginnings of project Copperhead.
Now we've already got new suspension components on the front and on the rear of this old Chevy. Now it's time to deal with this big old Dana 60 axle. Now, I've already got it jacked into place. I'm sitting over the top of the trailing arms,
but I don't have these saddles welded to the axle tubes yet. And there's a reason for that.
Now, once you weld those on, you permanently set your opinion angle, but
the only way to properly set the angle of your opinion is with the chassis sitting at ride height.
So I'm gonna have to wait at least until I have a drive train in this thing before I can weld those on.
But it doesn't mean I can't go ahead and assemble it for you.
Now,
this trailing arm system on these old trucks is very much like a heavy duty ladder bar system, which means
you gotta have some sort of lateral support to keep this axle from moving side to side.
Now, it came from the factory
with a Panter bar that ran from the frame rail
to the center chunk, but we've changed the axle and we've also dropped the truck, which means we need something better. So
we went back to early classic enterprises and got one of their super track bar kits.
This eliminates all the geometry problems that arise when you drop the rear of one of those old C tens.
Now, the kit includes an adjustable track bar
hardware and of course the brackets, but while we're in there, we went ahead and got one of their shock relocation kits too.
Now, this not only comes with high performance gas shocks
but also all the brackets and hardware to mount these in
to install the track bar. Take the bracket that comes with the kit,
slide it between the axle and the trailing arm on the passenger side.
Now, to make sure that everything stays even, you've got this spacer that you've got to stick into the driver's side in the same place.
Then
we'll take our shark relocation bracket,
slide it on to the U bolt
and then just bolt it up.
Then
we'll just bolt in the track bar.
Now, just like the pinion angle. This chassis needs to be sitting at right height before you can get your final adjustment with that track bar.
So we just have a ballpark for now.
We're gonna finish everything up with the shocks
and we're done. Now, one final very important thing,
these new axles like this are always shipped empty.
So
you're gonna wanna put in a good quality gear lube like this royal purple synthetic before you try to drive this thing down the road. Now, it's easy to forget. So do it. Now.
Now another thing we have to do right now is bring this project to a stop for today, but don't go away. We have some really cool stuff for you after the break.
Welcome back to trucks. Now, if you've been around the world of trucks very long, you know that there is more custom body work going on with trucks than,
than anything else, you've got everything from shaved door handles to custom roll pans to more difficult stuff like chopping the top or completely channeling and sectioning bodies. So today we're gonna show you some of the tools you're gonna need to do some top
quality metal work
and the place we went to was called Covell Creative Metal Working. But before I show you the tools. Let me introduce you to the man behind the name. One of the premier metal workers in the nation.
Ron
Covell.
Ron started building vehicles at a very early age and soon contributed to countless national show, winning cars,
bikes
and trucks and even won the pre
ST just America's most beautiful Roadster award with the California star, which he completely built from scratch.
In the early nineties, Ron now known as Professor Hammer
began to focus more on instruction,
giving metal working seminars across the country
as well as supplying top quality tools and videos. So people could learn to work with everything from steel to aluminum to tubing.
And that brings us up to the day. Now, we not only have a bunch of Ron's tools, but we also caught Ron between seminars. So we have Professor Hammer himself.
Now, like I've told you in past shows, the first thing you need to invest in
is a good set of body hammers and dollies. These are the foundation of good metal work.
But then what say you wanna build a nice contoured panel to replace rust. What kind of tools and techniques do you use? Well, we're gonna have Professor Hammer show you how to do that. How about it, Ron? I'll be glad to
if you want to take a piece of metal and put a compound curve in it.
The easiest tools to use are a mallet and sandbag.
The metal is placed over the sandbag and hit repeatedly with the mallet until you have the shape you want.
And this gets quite noisy. So I'm going to put on some headphones,
start your hammering in the center, then spiral out toward the edge.
If the edges get out of shape, you can usually straighten them with your hands.
Once your hammer marks cover the whole surface evenly, you are close to being finished.
OK.
Working with the mallet and sandbag is an excellent way to get an approximate shape. But of course, the mallet leaves a very bumpy surface on the metal.
The next step to start smoothing the bumps out
is to work with the dolly.
And in this case, we're going to balance the dolly on a sand bag
and then start working against the dolly with a smooth face tool called a slap hammer. This tool will take out all of the lumps and bumps in the metal.
OK?
So we've spent about 10 minutes working this part against the dolly with the slap hammer and this part is just about as smooth as you would need for a typical patch panel.
Now, another tool that you need to have is called a shrinker. Now, the way this thing works, Ron, let me see that panel there. What do you think? Oh, this is nice.
This allows you to shrink the edges of a custom made panel like this one that Ron made or
you can take a bent piece like this
and custom make repair panels for areas around a windshield or a trunk or doors. This is a wonderful tool now to use it,
just stick the piece into the machine
and start pulling on the handle. It's that easy.
The next tool we'll look at is interesting. It's called a bull's eye pick. The business end of it is like a gun site.
And when you squeeze the handle, there's a pointed tip that comes up to tap the metal from the back side,
we use this tool to take dents out of metal.
There's a small dent that we have in this panel. Let's use the bolts. I pick to take it out.
I'll put my ear muffs on.
Now, the gun side is placed on the top side of the dent
and we just squeezed the handle repeatedly.
All right, that should give you an idea what's out there. And all of these tools are available from Covell
Creative Metal working. Now in future shows, I'll continue to show you how to use these tools. But if you're impatient, don't wanna wait for that.
I strongly suggest that you invest in some iron's instructional videos or better yet. Go to one of his seminars,
doesn't matter what your skill level is. I promise you're gonna learn something that is why we call him, Professor Hammer.
Thanks Stacy. Thank you.
And now truck gear parts, tools and equipment for pickups and sport utilities.
One look that's been really popular with customizer for a long time is the look of
anodized metal. That is sweet.
Unfortunately, it's a little expensive to have done.
Well, duple color has changed that with this new paint called metal cast. This stuff actually looks just like anodized metal. Check this out. This is paint.
Now, this stuff sprays right over bare metal.
It's resistant to heat,
oil and gas and that is very impressive coming out of a can.
Now, if you think you'd like to try some of this stuff, well, it's as close as your local parts store.
One of the biggest drawbacks to owning a late model truck, other than the payments is getting true. Bolt on performance. There's a lot of warranty and emissions issues that you gotta be careful about.
Well, one of the best banks for the buck comes from Hyper Tech in the form of the power programmer three.
Now, this will not only give you good performance gains but it allows you to change your shift points and your rev limiter and even your speedometer, if you put on bigger tires,
now you can outfit your truck with a power programmer three for around 400 bucks depending on your application.
Now, it goes without saying that most people that watch shows like trucks are hands on, do it yourself. Sort of guys. You've also probably noticed that most gear heads are really into music. Heck, most of them are musicians themselves. Well, PV, electronics jumped in on that came out with their totally cool
big E amplifier. Now, this was designed by Dweezil Zappa as he sat in the front seat of his Aston Martin.
Check this out. It's got an RPM gauge. Speedometer. Oil temperature boost. Oh, we like boost. So, for those times that you want to play clean, well, you can,
dang, that's cool. Now, when you wanna get really dirty, well, you can do that too. You got 100 watts of power here under the hood.
Now, the wiggy goes for about 1200 bucks and you can get it at your local music store. Now, that's gonna do it for today's show.
Here's what we got for you next week,
next week on Trucks. Project. Copperhead continues. We've lowered this snake into the grass. Next, we'll slide on some cool brakes and hot wheels.
Then we'll show you the truck. Chevy never built but should have a 496 Ss Silverado.
That's all next week on trucks.
Trucks is an RTM production.
