More Copperhead Episodes
Classic Trucks! Builds
Want more content like this?
Join the PowerNation Email NewsletterVideo Transcript
Stay on trucks. Project. Copperhead continues. We've lowered this snake into the grass. Next, we'll slide on some cool brakes and hot wheels.
Then we'll show you the truck Chevy never built but should have a 496 Ss Silverado.
That's all today on trucks.
Welcome to the truck shop. Now, you might as well just plan it down for the next 30 minutes or so because if you've ever been interested in rebuilding or restoring an old classic truck,
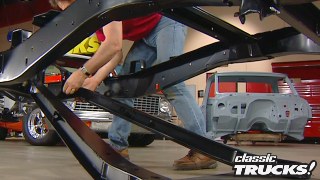
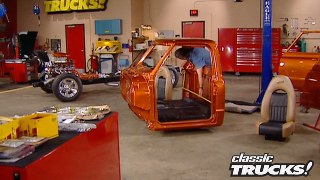
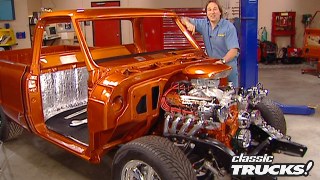
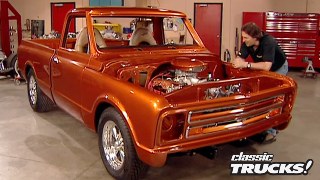
well, you're gonna wanna see this show. Now, last week we started a build up on a little 67 Chevy pickup, started with nothing but a nice solid cab, a bare frame and of course a clear title
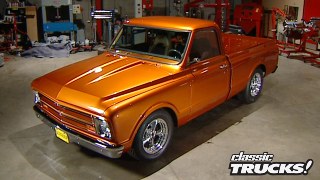
and we're gonna call this project Copperhead. Now, the first thing that we did
is totally rebuild the front suspension springs, spindles, steering.
In the meantime, we also picked up a 3.5 inch drop.
Then we moved to the back, rebuilt the rear suspension picked up a four inch drop and also stuck in a huge Dana 60 rear axle so we can handle some serious horsepower. Now, we're gonna continue to build up right where we left off. Now, when you're rebuilding an old truck, you really need to put some serious consideration into what you're gonna do about your gas tank. Now, the reason for this is these old trucks had the gas tank behind the seat
in the passenger compartment,
not the most desirable situation. So
to make things a lot safer and to give us a little more leg room,
we're gonna relocate the tank from behind the seats
to the rear frame rails. Now, the tank we're gonna use is from Kent performance and it says handmade aluminum piece, got the mounting
fangs already installed.
All the bones you're ever gonna need for fuel injection or Carbury,
whatever are already on there. We'll just plug the ones we don't use.
Sending unit is already installed and the filler neck is here on top, which means to get to this,
we're gonna have to go through the bed floor.
All right, to mount this tank. First of all, clamp it into place, then just drill through the mounting flange through the frame and bolt it on. Now, before you bolt it on,
make sure you take a little strip of rubber and put it between the tank and the frame. So you got a little bit of cushion there.
All right, since we're here at the back of the truck now is a good time
to start thinking about some sort of hitch so we could tow a trailer if we needed to
Well, we didn't have to think very hard because early classic enterprises has got this super slick class four hidden receiver hitch. Now, installation is really easy. It just bolts to existing holes in the frame.
And the best part about it is it's a hidden hitch. Nothing looks worse on a nice slick classic truck than a big hitch hanging down.
Now, this one bolts up tight against the frame and it's hidden behind the bumper or roll pan. Now, the way you get to it
is you have a flip down license plate. That is cool.
Ok. Now we're gonna talk about front brakes and I've got a couple of options here for you. First, I've got a kit from early Classic Enterprises. Now, it includes everything you're gonna need to completely upgrade your front brakes.
It comes with these huge drilled rotors,
new calipers and pads, brake hoses, dust shields, master cylinder proportioning valve. That's really nice. All the lines, all the hardware, all the bearings to put this thing in and go.
Now, this kit goes for about 800 bucks
and that includes the spindles. That is a smoking deal. Now, if you drive your truck every day, if you tow a trailer,
if you go out to the drag strip once in a while, this is the kit that you want.
Now, let's say that you want something a little more fancy than that show situation
or you're gonna be running some road courses or
maybe you spend a lot of time on the other side of 100 miles an hour. Well, you're gonna want to upgrade a little more than that
early classic enterprises. Has this kit from aerospace component
that features these really cool polished aluminum four piston calipers,
drilled and slotted removable rotors,
all the hardware and bearings
and check out this polished aluminum tapered hub. This will fit just about any custom wheel out there.
Now, of course, since Copperhead is going to uh
be very fast, this is the kit we're gonna use.
But I need to warn you.
This kit's a lot more expensive than that one and it doesn't just bolt on like that one does. But now you've got two different choices, two different price ranges and two complete completely different applications. Now we're gonna show you how to put this on. Now, the first thing we need to do is modify those spindles so we can mount that new caliper. Now, these ears that held the original caliper, well, those need to be cut off and we've got us a template to show us where to make our cuts.
Now to mount the caliper. You got some good news and bad news. The good news is, these original holes are in the perfect spot to mount a new caliper. The bad news is
they're the wrong size. So they're gonna have to be drilled out and re tapped
when you're using a tap, make sure that you use plenty of cutting lobe and go slow. So you don't break the tap or thread, it crooked
once you're done with your grinding and it looks like you've completely destroyed your spindles, check with your caliber to make sure that you've got enough clearance
and we got just a little more to go,
then you're ready to start putting things together. But we need to take a break first, but don't go too far because we are gonna be right back on this project
after the break. We'll be putting the brakes on as Stacy gives Copperhead some major stopping power
and later, it's mind control for your truck as we show you a good upgrade for your onboard computer.
Welcome back to trucks. We are coming down the home stretch of building a really cool chassis for project Copperhead. Now before the break, put on a cool trailer, hitch and a custom gas tank. Now, these were both pretty much just bolt on applications.
Then we had to do some modifications to our new spindles to mount these really trick front disc brakes
now that our modifications are done and it's time to put these guys on. So here we go
pack and install the bearings,
then tap in the inner seal,
then install the caliper mounting bracket to the spindle.
Follow that
with the freshly greased hub and rotor combination.
Finally bolt on your calipers
slide in your pads
and your brakes are on now look at these. These are awesome.
Of course, those fancy brakes need to be plumbed. So we went back to early Classic enterprises got their complete brake and fuel line plumbing kit. Now these aren't just a bunch of old lines that you have to bend and form. Mm mm. These are stainless steel, preformed lines that go right in the stock locations, check this out.
All the fittings and flares are already done. Now, using a kit like this can save you hours of cutting and flaring and fitting.
Now, like I said, these lines are pre bent to slide right into the stock locations, but don't be surprised if you have to do just a little bit of bending to make them just perfect
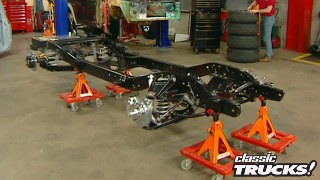
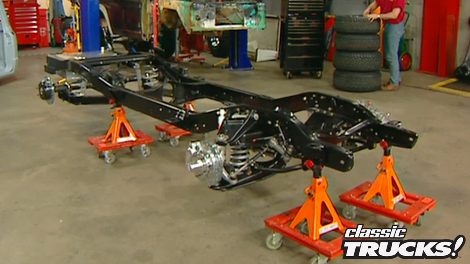
once you have your lines in. Well, that pretty much takes care of the chassis of project Copperhead.
Now, while you're checking it out, I've got some numbers I'm gonna give you now if you use the other early classics brake kit stock, rear end and the stock gas tank.
Well, you can build a chassis like this for around 1800 bucks. That is a smoking deal. Now, of course, ours is a little more expensive with that rear axle and those front brakes.
But that's the magic about these trucks. They're so popular. You can build them any way you want. You got 1000 different choices.
Unfortunately, the only choice we've got now is to take another break. So we'll see you right after this.
When trucks returns, we'll be getting things rolling with a cool set of wheels and tires.
Just can't get enough of trucks. Check us out online at TRUCKS, tv.com.
Welcome back to trucks and the build up of our chassis for project Copperhead.
Now that we've got everything assembled, we come to the crowding touch,
the part that really sets the personality to any vehicle and that
is the wheels and tires. Now for tires, we went to toil and got these proxy
sts
because they're a very high performance street tire. You got a really cool directional, aggressive tread
and they've actually got a side wall rating for trucks. So they're good and strong. Now, the size we're gonna use in the front
is 2 55 60 R 17
and in the rear,
we're gonna use these great big 2 85 60 R seventeens.
Now that is gonna give us a really cool look. It's also really gonna fill those fender wells out.
Now for wheels,
we had to have something cool. So we made a call to Colorado custom and got a super trick set of these lazier five spokes. Now notice they've got a real unique shape in the spoke in the hub, but take a good look at those spokes
as little flutes cut right into them. It's really cool. Not only that, but it'll just sparkle like a diamond when the light hits it. Of course, everything is completely polished. Now, the size that we're using on the front 17 by eight size on the rear 17 by 9.5, but that's not all there's more come and check this out.
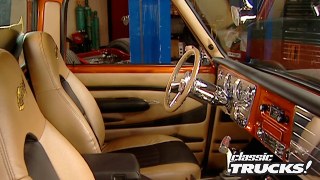
Colorado custom also makes custom steering wheels to match the regular wheels.
So we had to have a lazier wheel. Now, it matches the wheels in the polished aluminum
and the spokes,
but they also will put on custom leather to match whatever color your interior is gonna be. Man, that is awesome.
Now, you're probably wondering why I didn't stick twenties or 20 twos on this thing.
There's no doubt that the big diameter wheels look really cool, but this is gonna be a real high performance truck. It's gonna be driven hard and fast. So I need a tire that's got some side wall to it and seventeens give me a lot of choices. Not only that
they look killer.
Well, there you have it, the complete rolling chassis of Project Copperhead.
Now, hopefully this gives you some ideas and some options on how to build something like this for yourself. Now, unfortunately, I gotta tell you, there's only gonna be one Copperhead and I'm gonna show you why next week, but
I can give you a hint. So, come on back here,
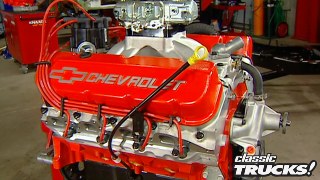
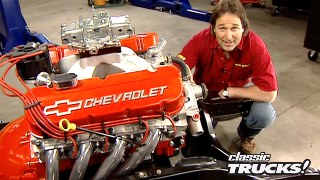
you see this crate. This is the poison for Copperhead. Now, this is the biggest baddest crate engine
that Chevy Ford Dodge, anybody has ever put out
and you're gonna have to wait till next week to see it, which means you better not miss next week's show the suspense
when you're dealing with a late model truck trying to get some extra horsepower out of it. Well,
that can be a little tough since everything's computer controlled.
Now, if you mess around with it too much,
you can really screw things up, not to mention your warranty. However, there is a way to tweak your computer,
get the most performance out of your engine that you can. That
is with a hypertech power programmer. Three. Now, the benefits of these go a lot deeper than just picking up a few horsepower. No, no, they do a lot more than that
you guys have sent in a lot of emails want to know more about them. So
I'm gonna dig into one a little bit for you.
Now to install the programmer is very simple. Just plug it into the diagnostic port
and punch in a few buttons. Now, I've done some installs on these in the past. So let me talk you through one
first off, choose the type of fuel you're gonna be using
next. You can adjust your rev limiter.
You can also adjust the speed limiter. So your truck doesn't shut off at 90 miles an hour,
then factor in the size of your tires,
factor in your rear axle ratio. Finally, the shift points of the tranny,
one of the best things about the power programmer though is once you install your custom program,
it stores your factory settings right here in the box. So, if you ever want to return the truck to stock, well, you just plug it in, punch the buttons
and it changes everything back and that is all there is to it.
We'll be right back after this
when we come back. It's a Camaro.
No, wait, it's a Chavel. No, it's a Silverado.
And we've got the only one like it.
Welcome back to trucks. Now, I know I've said over and over again on the show.
If you wanna build a really cool truck, something that nobody else has but something everybody's gonna take notice of. Well, you need to plan the direction of your build up before you ever get started.
Well, Terry Delong took that idea one step further when he started to wonder, you know, what would happen
if you took a 70 El Camino,
mixed it with a 70 Chevelle threw in a little 69 Camaro
and put it on a modern truck platform.
What he ended up with was a 496 Ss
Silverado.
The first thing that Terry did was start with the 2001 3 quarter ton long bed HD pickup.
That's right.
But all he really wanted was the cab.
Then he bought a brand new half ton short bed frame and bed and needed him to get.
Isn't that like uh illegal or something?
Then this new body was shot in a classic 69 Camaro Grabber orange
and a custom bumper and grill was constructed a
496 cubes equals 8.1 L. And that is exactly what is something under the hood?
Do you want some of this?
You want some of this?
Now, this thing kicks out 340 horses. Then of course, there's that little nitrous button
that makes things get really crazy.
Now, speaking of that hood, it features a fully functional cow induction set up.
It looks like it came up a 70 Chevelle. But
uh, this was custom made for this truck
inside the seats and door panels were reupholstered in the same style orange and black Hound's tooth material
that you'd find on a 69 Camaro
and of course, the dash and console,
those were all painted in detail to match
the wheel, entire combo is right on the money with twenties in the front and the rear and those American racing wheels add just the right look and punch to this truck.
The suspension is sitting on airbags. Now, this allows this thing to get way down in the weeds. When Terry is out bruising in style
in the bed, you'll find a real oak floor that adds a nice classic touch to the rear of the truck.
You also have a custom tailgate and roll pan
that not only continue the 69 Camaro theme,
but it also reminds you of what just smoked by you and blew your doors off.
Well, there you have it, a new body style truck with all kinds of vintage El Camino and Chevelle and Camaro all rolled into it. Now, the good news is,
it's the only one like it. So Terry's happy, the bad news is everybody's gonna wanna try to buy it from him. Uh, provided he puts on some new tires
and now truck gear, parts, tools and equipment for pickups and sport utilities.
A couple of the best upgrades that you can do to your truck is number one, change the sound of it. Number two, add some power. Well, Flowmaster a few years ago figured out how to do both at the same time
with their unique chambered mufflers. Well, now Flowmaster has figured out how to take that Dyn
Muffler and stick it in a much smaller package in this Delta flow low profile street muffler. Now it's got the same benefits as its Big Brother, but in a much smaller package. So you can put it in tight applications.
Now, you're probably thinking that's great, man. Where do I buy these at?
Well, your local Meineke Muffler shop is now carrying Flowmaster so you can get one of the world's best mufflers, good installation, good price,
all the same place. It
sounds like a good team to me.
It wasn't too long ago that multi port fuel injection units started to become available from the aftermarket and this was really cool provided you were running a Chevy. Now, if you were driving a Ford, well,
there wasn't too many options out there. Well, Edelbrock has even the score with this ultra cool pro flow fuel injection unit for the small block Ford. Now, check this out,
the manifold comes fully dressed with injectors, fuel rail and throttle body all installed.
You have the complete computer system,
you have the wiring harness,
got a new fuel pump, you've even got a new distributor. They didn't leave anything to chance and this stuff just bolts right in.
But the best part about this unit is the price. This whole thing run you about 2500 bucks from jigs.
One of the biggest hassles of working in a shop is trying to move your projects around all the time. Well, the way that we do it here on trucks is with this cool little invention called the go jack from Grillo's Garage.
Now, the go jack is nothing more than a couple arms
with rollers on them
and they've got casters out here on the end
and here in the center,
they've got a jacking mechanism
and you just slide them around your tire,
then
just pump the jack.
Look at that,
fix your vehicle right up off the ground and now
you can really roll this thing around. Now, if you need a set of these, you've gotta call Grillo's Garage and that's gonna do it for today.
We'll see you next time
for a VHS copy of today's show call, toll free 1877853 7260. Show videos are just 1295 plus shipping and handling
trucks is an RTM production.
Show Full Transcript
Then we'll show you the truck Chevy never built but should have a 496 Ss Silverado.
That's all today on trucks.
Welcome to the truck shop. Now, you might as well just plan it down for the next 30 minutes or so because if you've ever been interested in rebuilding or restoring an old classic truck,
well, you're gonna wanna see this show. Now, last week we started a build up on a little 67 Chevy pickup, started with nothing but a nice solid cab, a bare frame and of course a clear title
and we're gonna call this project Copperhead. Now, the first thing that we did
is totally rebuild the front suspension springs, spindles, steering.
In the meantime, we also picked up a 3.5 inch drop.
Then we moved to the back, rebuilt the rear suspension picked up a four inch drop and also stuck in a huge Dana 60 rear axle so we can handle some serious horsepower. Now, we're gonna continue to build up right where we left off. Now, when you're rebuilding an old truck, you really need to put some serious consideration into what you're gonna do about your gas tank. Now, the reason for this is these old trucks had the gas tank behind the seat
in the passenger compartment,
not the most desirable situation. So
to make things a lot safer and to give us a little more leg room,
we're gonna relocate the tank from behind the seats
to the rear frame rails. Now, the tank we're gonna use is from Kent performance and it says handmade aluminum piece, got the mounting
fangs already installed.
All the bones you're ever gonna need for fuel injection or Carbury,
whatever are already on there. We'll just plug the ones we don't use.
Sending unit is already installed and the filler neck is here on top, which means to get to this,
we're gonna have to go through the bed floor.
All right, to mount this tank. First of all, clamp it into place, then just drill through the mounting flange through the frame and bolt it on. Now, before you bolt it on,
make sure you take a little strip of rubber and put it between the tank and the frame. So you got a little bit of cushion there.
All right, since we're here at the back of the truck now is a good time
to start thinking about some sort of hitch so we could tow a trailer if we needed to
Well, we didn't have to think very hard because early classic enterprises has got this super slick class four hidden receiver hitch. Now, installation is really easy. It just bolts to existing holes in the frame.
And the best part about it is it's a hidden hitch. Nothing looks worse on a nice slick classic truck than a big hitch hanging down.
Now, this one bolts up tight against the frame and it's hidden behind the bumper or roll pan. Now, the way you get to it
is you have a flip down license plate. That is cool.
Ok. Now we're gonna talk about front brakes and I've got a couple of options here for you. First, I've got a kit from early Classic Enterprises. Now, it includes everything you're gonna need to completely upgrade your front brakes.
It comes with these huge drilled rotors,
new calipers and pads, brake hoses, dust shields, master cylinder proportioning valve. That's really nice. All the lines, all the hardware, all the bearings to put this thing in and go.
Now, this kit goes for about 800 bucks
and that includes the spindles. That is a smoking deal. Now, if you drive your truck every day, if you tow a trailer,
if you go out to the drag strip once in a while, this is the kit that you want.
Now, let's say that you want something a little more fancy than that show situation
or you're gonna be running some road courses or
maybe you spend a lot of time on the other side of 100 miles an hour. Well, you're gonna want to upgrade a little more than that
early classic enterprises. Has this kit from aerospace component
that features these really cool polished aluminum four piston calipers,
drilled and slotted removable rotors,
all the hardware and bearings
and check out this polished aluminum tapered hub. This will fit just about any custom wheel out there.
Now, of course, since Copperhead is going to uh
be very fast, this is the kit we're gonna use.
But I need to warn you.
This kit's a lot more expensive than that one and it doesn't just bolt on like that one does. But now you've got two different choices, two different price ranges and two complete completely different applications. Now we're gonna show you how to put this on. Now, the first thing we need to do is modify those spindles so we can mount that new caliper. Now, these ears that held the original caliper, well, those need to be cut off and we've got us a template to show us where to make our cuts.
Now to mount the caliper. You got some good news and bad news. The good news is, these original holes are in the perfect spot to mount a new caliper. The bad news is
they're the wrong size. So they're gonna have to be drilled out and re tapped
when you're using a tap, make sure that you use plenty of cutting lobe and go slow. So you don't break the tap or thread, it crooked
once you're done with your grinding and it looks like you've completely destroyed your spindles, check with your caliber to make sure that you've got enough clearance
and we got just a little more to go,
then you're ready to start putting things together. But we need to take a break first, but don't go too far because we are gonna be right back on this project
after the break. We'll be putting the brakes on as Stacy gives Copperhead some major stopping power
and later, it's mind control for your truck as we show you a good upgrade for your onboard computer.
Welcome back to trucks. We are coming down the home stretch of building a really cool chassis for project Copperhead. Now before the break, put on a cool trailer, hitch and a custom gas tank. Now, these were both pretty much just bolt on applications.
Then we had to do some modifications to our new spindles to mount these really trick front disc brakes
now that our modifications are done and it's time to put these guys on. So here we go
pack and install the bearings,
then tap in the inner seal,
then install the caliper mounting bracket to the spindle.
Follow that
with the freshly greased hub and rotor combination.
Finally bolt on your calipers
slide in your pads
and your brakes are on now look at these. These are awesome.
Of course, those fancy brakes need to be plumbed. So we went back to early Classic enterprises got their complete brake and fuel line plumbing kit. Now these aren't just a bunch of old lines that you have to bend and form. Mm mm. These are stainless steel, preformed lines that go right in the stock locations, check this out.
All the fittings and flares are already done. Now, using a kit like this can save you hours of cutting and flaring and fitting.
Now, like I said, these lines are pre bent to slide right into the stock locations, but don't be surprised if you have to do just a little bit of bending to make them just perfect
once you have your lines in. Well, that pretty much takes care of the chassis of project Copperhead.
Now, while you're checking it out, I've got some numbers I'm gonna give you now if you use the other early classics brake kit stock, rear end and the stock gas tank.
Well, you can build a chassis like this for around 1800 bucks. That is a smoking deal. Now, of course, ours is a little more expensive with that rear axle and those front brakes.
But that's the magic about these trucks. They're so popular. You can build them any way you want. You got 1000 different choices.
Unfortunately, the only choice we've got now is to take another break. So we'll see you right after this.
When trucks returns, we'll be getting things rolling with a cool set of wheels and tires.
Just can't get enough of trucks. Check us out online at TRUCKS, tv.com.
Welcome back to trucks and the build up of our chassis for project Copperhead.
Now that we've got everything assembled, we come to the crowding touch,
the part that really sets the personality to any vehicle and that
is the wheels and tires. Now for tires, we went to toil and got these proxy
sts
because they're a very high performance street tire. You got a really cool directional, aggressive tread
and they've actually got a side wall rating for trucks. So they're good and strong. Now, the size we're gonna use in the front
is 2 55 60 R 17
and in the rear,
we're gonna use these great big 2 85 60 R seventeens.
Now that is gonna give us a really cool look. It's also really gonna fill those fender wells out.
Now for wheels,
we had to have something cool. So we made a call to Colorado custom and got a super trick set of these lazier five spokes. Now notice they've got a real unique shape in the spoke in the hub, but take a good look at those spokes
as little flutes cut right into them. It's really cool. Not only that, but it'll just sparkle like a diamond when the light hits it. Of course, everything is completely polished. Now, the size that we're using on the front 17 by eight size on the rear 17 by 9.5, but that's not all there's more come and check this out.
Colorado custom also makes custom steering wheels to match the regular wheels.
So we had to have a lazier wheel. Now, it matches the wheels in the polished aluminum
and the spokes,
but they also will put on custom leather to match whatever color your interior is gonna be. Man, that is awesome.
Now, you're probably wondering why I didn't stick twenties or 20 twos on this thing.
There's no doubt that the big diameter wheels look really cool, but this is gonna be a real high performance truck. It's gonna be driven hard and fast. So I need a tire that's got some side wall to it and seventeens give me a lot of choices. Not only that
they look killer.
Well, there you have it, the complete rolling chassis of Project Copperhead.
Now, hopefully this gives you some ideas and some options on how to build something like this for yourself. Now, unfortunately, I gotta tell you, there's only gonna be one Copperhead and I'm gonna show you why next week, but
I can give you a hint. So, come on back here,
you see this crate. This is the poison for Copperhead. Now, this is the biggest baddest crate engine
that Chevy Ford Dodge, anybody has ever put out
and you're gonna have to wait till next week to see it, which means you better not miss next week's show the suspense
when you're dealing with a late model truck trying to get some extra horsepower out of it. Well,
that can be a little tough since everything's computer controlled.
Now, if you mess around with it too much,
you can really screw things up, not to mention your warranty. However, there is a way to tweak your computer,
get the most performance out of your engine that you can. That
is with a hypertech power programmer. Three. Now, the benefits of these go a lot deeper than just picking up a few horsepower. No, no, they do a lot more than that
you guys have sent in a lot of emails want to know more about them. So
I'm gonna dig into one a little bit for you.
Now to install the programmer is very simple. Just plug it into the diagnostic port
and punch in a few buttons. Now, I've done some installs on these in the past. So let me talk you through one
first off, choose the type of fuel you're gonna be using
next. You can adjust your rev limiter.
You can also adjust the speed limiter. So your truck doesn't shut off at 90 miles an hour,
then factor in the size of your tires,
factor in your rear axle ratio. Finally, the shift points of the tranny,
one of the best things about the power programmer though is once you install your custom program,
it stores your factory settings right here in the box. So, if you ever want to return the truck to stock, well, you just plug it in, punch the buttons
and it changes everything back and that is all there is to it.
We'll be right back after this
when we come back. It's a Camaro.
No, wait, it's a Chavel. No, it's a Silverado.
And we've got the only one like it.
Welcome back to trucks. Now, I know I've said over and over again on the show.
If you wanna build a really cool truck, something that nobody else has but something everybody's gonna take notice of. Well, you need to plan the direction of your build up before you ever get started.
Well, Terry Delong took that idea one step further when he started to wonder, you know, what would happen
if you took a 70 El Camino,
mixed it with a 70 Chevelle threw in a little 69 Camaro
and put it on a modern truck platform.
What he ended up with was a 496 Ss
Silverado.
The first thing that Terry did was start with the 2001 3 quarter ton long bed HD pickup.
That's right.
But all he really wanted was the cab.
Then he bought a brand new half ton short bed frame and bed and needed him to get.
Isn't that like uh illegal or something?
Then this new body was shot in a classic 69 Camaro Grabber orange
and a custom bumper and grill was constructed a
496 cubes equals 8.1 L. And that is exactly what is something under the hood?
Do you want some of this?
You want some of this?
Now, this thing kicks out 340 horses. Then of course, there's that little nitrous button
that makes things get really crazy.
Now, speaking of that hood, it features a fully functional cow induction set up.
It looks like it came up a 70 Chevelle. But
uh, this was custom made for this truck
inside the seats and door panels were reupholstered in the same style orange and black Hound's tooth material
that you'd find on a 69 Camaro
and of course, the dash and console,
those were all painted in detail to match
the wheel, entire combo is right on the money with twenties in the front and the rear and those American racing wheels add just the right look and punch to this truck.
The suspension is sitting on airbags. Now, this allows this thing to get way down in the weeds. When Terry is out bruising in style
in the bed, you'll find a real oak floor that adds a nice classic touch to the rear of the truck.
You also have a custom tailgate and roll pan
that not only continue the 69 Camaro theme,
but it also reminds you of what just smoked by you and blew your doors off.
Well, there you have it, a new body style truck with all kinds of vintage El Camino and Chevelle and Camaro all rolled into it. Now, the good news is,
it's the only one like it. So Terry's happy, the bad news is everybody's gonna wanna try to buy it from him. Uh, provided he puts on some new tires
and now truck gear, parts, tools and equipment for pickups and sport utilities.
A couple of the best upgrades that you can do to your truck is number one, change the sound of it. Number two, add some power. Well, Flowmaster a few years ago figured out how to do both at the same time
with their unique chambered mufflers. Well, now Flowmaster has figured out how to take that Dyn
Muffler and stick it in a much smaller package in this Delta flow low profile street muffler. Now it's got the same benefits as its Big Brother, but in a much smaller package. So you can put it in tight applications.
Now, you're probably thinking that's great, man. Where do I buy these at?
Well, your local Meineke Muffler shop is now carrying Flowmaster so you can get one of the world's best mufflers, good installation, good price,
all the same place. It
sounds like a good team to me.
It wasn't too long ago that multi port fuel injection units started to become available from the aftermarket and this was really cool provided you were running a Chevy. Now, if you were driving a Ford, well,
there wasn't too many options out there. Well, Edelbrock has even the score with this ultra cool pro flow fuel injection unit for the small block Ford. Now, check this out,
the manifold comes fully dressed with injectors, fuel rail and throttle body all installed.
You have the complete computer system,
you have the wiring harness,
got a new fuel pump, you've even got a new distributor. They didn't leave anything to chance and this stuff just bolts right in.
But the best part about this unit is the price. This whole thing run you about 2500 bucks from jigs.
One of the biggest hassles of working in a shop is trying to move your projects around all the time. Well, the way that we do it here on trucks is with this cool little invention called the go jack from Grillo's Garage.
Now, the go jack is nothing more than a couple arms
with rollers on them
and they've got casters out here on the end
and here in the center,
they've got a jacking mechanism
and you just slide them around your tire,
then
just pump the jack.
Look at that,
fix your vehicle right up off the ground and now
you can really roll this thing around. Now, if you need a set of these, you've gotta call Grillo's Garage and that's gonna do it for today.
We'll see you next time
for a VHS copy of today's show call, toll free 1877853 7260. Show videos are just 1295 plus shipping and handling
trucks is an RTM production.