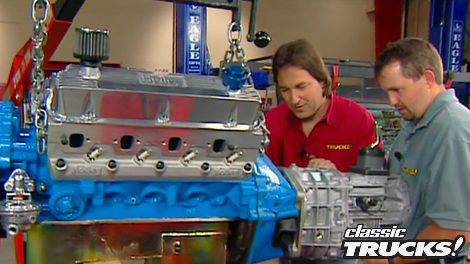
Classic Trucks! Builds
Want more content like this?
Join the PowerNation Email NewsletterVideo Transcript
Today on trucks. Project Crazy Horses back in the stable and ready for some horses of its own 390 to be exact.
And later Stacy gives us a taste of the Tundra Toyota style. That's all today on trucks.
Welcome to trucks. We have got a kicking show for you today. Now, the last couple of weeks we've been working on Project Copperhead, which is a very cool, very hot 67 Chevy Street truck.
Well, this week, we're gonna turn our attention back to our old 66 Ford Bronco
known as Crazy Horse. We're gonna stick in an engine and drive train. So this thing will kick some butt
out on the trail. But before we do that,
let me bring you up to date on what I've done with this chassis so far, if you've been following this project, well, you saw us install the James Duff suspension and the curry axles and steering and the motor mounts, et cetera, et cetera.
Then I took it all back apart. Had the frame sandblasted. Then I shot on a good thick coat of house of colors. Epoxy primer,
followed by House of Colors, Passion Pearl purple for color
and a lot of coats are clear. Now, some of you might be thinking, well, shoot, aren't you just gonna scratch that paint up? Well, yeah, probably so, I'll just fix it. The point is
whenever you take something down this far, it really is worth your while to spend a little extra time
money putting on some good quality paint materials. Trust me, you won't regret it later on.
Now. The engine, we also showed you that a few weeks ago. Now it's a 302 stroked out to a 350 dyno
at 390 horsepower by Keith Dorton, an automotive specialist.
Now, today's project is not just how to put an engine in, it's the whole drive train that goes behind it and it needs to be strong and it is, it's right over here. Let's go check it out
since our Bronco originally had a standard shift. Well, we wanted to keep it that way.
It's a lot more fun, but we want more than three forward gears. So we went to advance adapters, got one of their NV 3555 speed kits.
Now, this comes with a center force clutch
and pressure plate.
You've got the all important bell housing adapter,
got a new cross member,
all the hardware transmission mount and of course, an NV 3555 speed. Now, the reason this is such an excellent swap for the early Bronco
is the length is almost exactly what your stock three speed is. The weight, almost exactly what your stock three speed is.
It'll also handle around 450 ft pounds of torque in a 5000 pound rig. So strength shouldn't be a problem. The best part is
you got five forward gears.
The first thing we're gonna do is mount that new cross member into the frame and it bolts right to the stock hole. So it's a good idea to take a tap and clean out the threads. Now,
here is something that you see a lot on an older vehicle. Notice that we've got a stud broken off in here. So to get that out, take a punch stick it right in the center of the stud.
This will put a dimple right in the center of the bolt.
Now drill a pilot hole down the center of the bolt.
Then we'll step up to a bigger bit to enlarge this hole. Just make sure you don't get into those original threads.
Then we'll take a tool called an Easy out or a screw extractor,
which is basically a hardened piece of steel.
It has little teeth in it, that'll grip the bolt when you remove it
and you just slide that in the hole
and tap it in place.
Now,
carefully rotate the easy out. You wanna make sure you don't break these things off because if you do, they're almost impossible to get out.
And once it starts to turn like this.
Usually they start to come out pretty easy,
make sure you use plenty of penetrating lube on them.
And it's also a good idea to chase these threads. Once you get everything out, there you go.
All right. There you go.
Finally, with all that taken care of, we can set the new cross member in place and then just finger tight the bolts.
Ok. Now it is time to get this new engine ready. The first thing we're gonna do
is bolt on this new flywheel that we got from Ford racing.
Now, here's a couple of tips for you if you are thinking about reusing an old fly wheel.
Well, first you need to check it for any kind of stress cracks, then have it resurfaced
and make sure that you check the starter ring gear. As you can see, this is buggered up pretty bad.
That would need to be replaced if we were gonna reuse this.
Now, something you should never reuse is a clutch plate, pressure plate or a throw out bearing. I don't care how good they look.
That's not the place to get cheap. So replace them
with the flywheel in. It's time to put in that new clutch, a pressure plate. Now, this clutch alignment tool does not come with the kit, but it is definitely worth the extra five or six bucks to go get one
because it lines everything up. So when you go to install the tranny, it just slides right in.
Ok. Now, we're ready to turn our attention to that transmission.
The first thing we'll do slide on this aluminum adapter plate from the kit,
then take a pen
and mark around these upper bolt holes on either side.
Then we'll take a grinder, grind a notch here in this mounting plan. So we've got clearance for our mounting bolts
using lock tide on the supplied hardware.
We'll go ahead and bolt the adapter
to the transmission.
Moving on. It's time for the bell housing. Now, this is just an old stock bell housing that I picked up, used, cleaned it up and painted it.
Now, notice when I set this thing into place,
uh, oh, we got a problem.
It's gonna hit this shift rail. So
what we're gonna have to do
is modify this vent hole. Now, the best way to do that
is to drill some pilot holes and then take a dye grinder with a rotary file on it and just open this up. Just remember when you have to do this, you don't want to cut all the way down into that indexing ring.
All right, we're gonna go ahead and take a break while I finish this up. But after the break, we're gonna put all this stuff together. We'll see you. Then
after the break, this little Bronco gets 390 wild horses packed into a small block board.
And later it's a dirty job, but Stacy's just got to do it
and this time it's Toyota's turn.
Welcome back to the truck shop. Well, we are right in the middle of putting a tough little five speed
behind this hot 302 and it is all gonna go in that old 66 Bronco.
Now, we've already got our bell housing modified,
which means it is time for the clutch fork. Now you're gonna have to use an original clutch fork on this application.
So you're gonna wanna check it and make sure that it's not damaged on the ends. Now, if you need a replacement fork,
well, you can get one from Jeff's Bronco Graveyard.
Now, some other things that you wanna get from Jeff's is a new fork, boot
bushings for all the linkage and of course, any linkage pieces that might be destroyed, for example,
look at this cobbled up piece of junk. Now,
I hope I don't have to tell you not to reuse something like this.
Ok. Now that we've got the fork
and the new throw out bearing on, we'll take the whole bell housing assembly,
slide it onto the block
and bolt it up.
All right, Barry, you be ready
just about now. It is time to bolt this new five speed up to the engine. Now, it just slides into place, but you're definitely gonna need an extra set of hands because they never just slide into place.
All right, you ready
Here we go
easy. Ok. Careful to throw it. Barry
came out real easy. There it goes.
All right, Barry, roll that thing in here. All right.
Now with your motor mounts and your transmission mounts in place. It is time for the moment of truth to set this thing in the chassis where it belongs.
Ok. Go ahead and lower it down
slowly, slowly.
There you go. It looks good.
Looks good
right there. A little further
transmission
in
looks perfect.
All right. There you go. Barry,
thank you.
Now, as you can see this thing literally just dropped into place. All the mounts were exactly where they were supposed to be.
I love it when they fit like that. Now,
we are ready for the four wheel drive part of this project, which means a transfer case. So for that, we went back to advance adapters and got their bullet proof Atlas two transfer case.
Now, the Atlas is a gear driven transfer case
with a one piece body for superior strength. Now, you can get these in three different ratios, the 4.3 for super low gearing,
the new 3.0 Highlander for higher gearing
or the one like we've got, which is the 3.8. It's right between those two
and it's gonna work perfect with our axle ratios, transmission gearing and our tire size.
Now the Atlas shifts with twin sticks. So you got a lot of control in your axles
and you have shift on the fly capabilities
to put it real blunt. The Atlas two is the toughest transfer case on the market
period.
End of story.
No.
Now, remember when I told you earlier how I loved it when things just popped into place. Well, that's because they don't always do that. I know. You know what I mean?
Well, the James Duff suspension stuff works perfect on a stock Bronco.
All the advanced adapter stuff perfect on a stock Bronco. Now, when you add components together, though,
sometimes they don't mesh perfectly. Let me show you what I mean.
You notice I can't push this transfer case all the way up against the transmission. I got some clearance problems down here.
So I'm gonna go ahead and notch these holes, slide the cross member forward and that'll take care of that.
I also notice over here
when I rotate the transfer case up, I'm gonna hit this duff mount right here. So I'm gonna have to grind a little notch there. So that'll clear
and that'll take care of it. Unfortunately, I don't have time to do all that today.
So that's a project for another day. But after the break and we're gonna show you some more cool stuff.
There you go.
When trucks return, Stacy shows you how he's gonna keep that hungry pony fed with a new fuel tank for crazy Horse. That's next.
Just can't get enough of trucks. Check us out online at trucks. Tv.com.
Welcome back to the shop where I'm doing some of the final fit and finish on Project Crazy Horse. And it is gonna be awesome.
As you can see, I've got the engine, the transmission drive train pretty well taken care of. Now it's time for the gas tank. Now, the tank we're gonna be using.
I got from wild horses and it's EPA approved 20 gallons.
As you can see, it's got all the vents and tubes so you can run fuel injection or a carburetor.
Now, it also comes with all the hardware and the hoses to put it in,
but we forked out a little extra, got this really thick skin plate
to protect the bottom of the tank from rocks and trees and things like that.
Now, the first thing we're gonna do
is put in this sending unit,
make sure you use some sealant on the gasket,
then install a sender. So the float goes out into the body of the tank. You don't want it over in here
and then slide it in
and bolted on.
Take some thin rubber strips,
lay them on the skid plate. So you don't have any metal, metal contact,
then
take the gas tank, set it down on the skid plate
and then just jack it into place.
The tank is held in place with these straps and these J bolts
that come with a kit and go right into the stock holes on the frame Now, you will need to take a rotary file kind of open those holes up a little bit because this new hardware is a little thicker than the stock stuff. Now, when you tighten everything up, it lifts that tank
until these little feet come in contact with the body of the truck
and the tanks mounted. Now, one other thing that you do have to permanently mount to the door jam is this little sticker. Now, this certifies that this tank meets all the safety and emissions requirements of a new tank. Very important. Well, there it is project crazy horse, the chassis. What do you think?
Well,
I can't wait to get this thing out and get it off road. Now, you're probably wondering, well, what about the body? Well, the next time we work on this truck, we're gonna deal with the body and the interior, but
not today. That's for another show, but we're not done today. We got more trucks right after this.
When we come back. What do you do with a nice new clean white Toyota tundra?
Why drive it through the mud? Of course. Stay tuned.
Welcome back to trucks. All right, here's the deal. You're in the market for a brand new V8 powered truck because you need that extra torque and horsepower for, for truck stuff and you're having trouble deciding between Ford Chevy and Dodge. Well,
before you limit yourself to just those three choices,
there is another V8 truck out there that you really need to take a look at.
Now, the V8 tundra won numerous awards when it came out a couple of years ago, including the coveted four by four of the year award.
But just how good is it?
Well, the only way to answer that is to show you one up close and personal
and to take one on the type of test drive that everybody would like to do to one of these. So
here we go.
All right, let's get right to the heart of this truck. The engine is a 4.7 L double overhead cam 32
V V8.
Now it's kicking out 245 horses and 315 ft pounds of torque.
And this gives you a 7200 pound towing capacity
and over a ton hauling capacity.
The thunder suspension is very stable on the road. It handles well under most normal road conditions with just the expected mild understeer.
Of course, having that extra power on tap is a whole lot of fun. Makes it really easy to break the rear end of this thing loose and slide it around.
Breaking is excellent hauling the tundra down to a stop quickly in just about any situation
off road, the tundra really comes into its own with the independent front suspension easily absorbing high speed ruts
when you get into deep ruts. Well, a little Toyota is really tough
as you can see, I laid this thing down on the skid plates and cross members numerous times with no damage to the exhaust system or the drive train because they are all tucked up out of the way.
Now, the limited slip differentials kept me moving instead of getting hung up and stuck
in mud, the stock tires definitely limited the Toyota's potential. But once again, the four wheel drive and limited slip pulled us through some pretty sticky situations
in climbing hills, the tundra definitely has the power despite the tires
has decent ground clearance. And of course, the departure angle is pretty much what you would expect on a truck, but you put on some aggressive tires and about a four to a six inch lift
and you're gonna have a great trail rig.
One of the best parts about the new tundra though is after you're done thrashing it and beating it around.
You just drive it back on the road to the local car wash and clean it up, which makes this a very tough truck to which we've got to give two thumbs up.
And now truck, gear, parts, tools and equipment for pickups and sport utilities
when you're working on your project and you've gotten it torn down this far. Well, now is the perfect time to start thinking about the exhaust system. Now, your first reaction might be. What exhaust system? Now, are you crazy? No, when are you gonna have better access to the frame and the suspension components and the cross members and when the body's off, even if you don't install it, you can still lay it out
and Flowmaster can help you do that with their mufflers and their universal tailpipe kits.
Now, for this old Bronco, we're gonna use these new delta mufflers very low profile, very small.
They will tuck right into a really tight spot but
they still flow and sound like a flow master. Very important.
Now, the universal tailpipe kits,
they come with a whole bunch of different pipes. All have a little bit different, be
2.5 inch aluminized pipe. You just take some of those
and you can literally
build the custom exhaust system that you want without ever going to a muffler shop.
Now for a vehicle that has a lot bigger engine and a little more room to spare like our old 67 here. Well, we're also gonna use flow masters.
We're gonna use these big series 50 mufflers. That's pretty much the muffler that
made Flow master. Well, Flow master.
Now they'll slide right in here. Tuck in. Nice fit great and sound awesome. Now, for the tail
pipes, once again, we'll take the universal tailpipe kit,
we'll be able to slide right around the cross members around the gas tank
and we won't have to make a single custom bin
that's gonna save us a lot of time and money. Now, Flowmaster also has
eight pipe kits
as well as some really trick stainless steel tips, which should go to show you that Flowmaster is not just a muffler company, they can help you with the whole exhaust system.
Now, for those of you that are into doing some serious metal working. Well, I know there is one tool you are just die and own an English wheel
man. The compound shapes and curves that you can get in metal with an English wheel. Oh, they're amazing.
Unfortunately, so is the price
you'll be lucky to find an English wheel for under five grand. Well, Covell
Creative Metal working decided to do something about that and came out with this English wheel kit.
Now, this kit consists of an upper yoke and the upper wheel.
You have the lower yoke and various different anvil wheels. So you can get the shape in the metal that you want.
And you also have metal casters.
You have the screw lift assembly
and most important. You have a very detailed set of instructions so you can build a nice framework to hold all this stuff.
Now, Covell Creative Metalwork sells this kit for around 1300 bucks.
All you add is some time and some metal and you have a state of the art full sized English wheel
that all your friends are gonna wanna borrow. That's gonna take care of it for today.
I think I'm gonna start putting this thing together. I'll see you next week
for a VHS copy of today's show call toll free 1877853 7260. Show videos are just 1295 plus shipping and handling
trucks is an RTM production.
Show Full Transcript
And later Stacy gives us a taste of the Tundra Toyota style. That's all today on trucks.
Welcome to trucks. We have got a kicking show for you today. Now, the last couple of weeks we've been working on Project Copperhead, which is a very cool, very hot 67 Chevy Street truck.
Well, this week, we're gonna turn our attention back to our old 66 Ford Bronco
known as Crazy Horse. We're gonna stick in an engine and drive train. So this thing will kick some butt
out on the trail. But before we do that,
let me bring you up to date on what I've done with this chassis so far, if you've been following this project, well, you saw us install the James Duff suspension and the curry axles and steering and the motor mounts, et cetera, et cetera.
Then I took it all back apart. Had the frame sandblasted. Then I shot on a good thick coat of house of colors. Epoxy primer,
followed by House of Colors, Passion Pearl purple for color
and a lot of coats are clear. Now, some of you might be thinking, well, shoot, aren't you just gonna scratch that paint up? Well, yeah, probably so, I'll just fix it. The point is
whenever you take something down this far, it really is worth your while to spend a little extra time
money putting on some good quality paint materials. Trust me, you won't regret it later on.
Now. The engine, we also showed you that a few weeks ago. Now it's a 302 stroked out to a 350 dyno
at 390 horsepower by Keith Dorton, an automotive specialist.
Now, today's project is not just how to put an engine in, it's the whole drive train that goes behind it and it needs to be strong and it is, it's right over here. Let's go check it out
since our Bronco originally had a standard shift. Well, we wanted to keep it that way.
It's a lot more fun, but we want more than three forward gears. So we went to advance adapters, got one of their NV 3555 speed kits.
Now, this comes with a center force clutch
and pressure plate.
You've got the all important bell housing adapter,
got a new cross member,
all the hardware transmission mount and of course, an NV 3555 speed. Now, the reason this is such an excellent swap for the early Bronco
is the length is almost exactly what your stock three speed is. The weight, almost exactly what your stock three speed is.
It'll also handle around 450 ft pounds of torque in a 5000 pound rig. So strength shouldn't be a problem. The best part is
you got five forward gears.
The first thing we're gonna do is mount that new cross member into the frame and it bolts right to the stock hole. So it's a good idea to take a tap and clean out the threads. Now,
here is something that you see a lot on an older vehicle. Notice that we've got a stud broken off in here. So to get that out, take a punch stick it right in the center of the stud.
This will put a dimple right in the center of the bolt.
Now drill a pilot hole down the center of the bolt.
Then we'll step up to a bigger bit to enlarge this hole. Just make sure you don't get into those original threads.
Then we'll take a tool called an Easy out or a screw extractor,
which is basically a hardened piece of steel.
It has little teeth in it, that'll grip the bolt when you remove it
and you just slide that in the hole
and tap it in place.
Now,
carefully rotate the easy out. You wanna make sure you don't break these things off because if you do, they're almost impossible to get out.
And once it starts to turn like this.
Usually they start to come out pretty easy,
make sure you use plenty of penetrating lube on them.
And it's also a good idea to chase these threads. Once you get everything out, there you go.
All right. There you go.
Finally, with all that taken care of, we can set the new cross member in place and then just finger tight the bolts.
Ok. Now it is time to get this new engine ready. The first thing we're gonna do
is bolt on this new flywheel that we got from Ford racing.
Now, here's a couple of tips for you if you are thinking about reusing an old fly wheel.
Well, first you need to check it for any kind of stress cracks, then have it resurfaced
and make sure that you check the starter ring gear. As you can see, this is buggered up pretty bad.
That would need to be replaced if we were gonna reuse this.
Now, something you should never reuse is a clutch plate, pressure plate or a throw out bearing. I don't care how good they look.
That's not the place to get cheap. So replace them
with the flywheel in. It's time to put in that new clutch, a pressure plate. Now, this clutch alignment tool does not come with the kit, but it is definitely worth the extra five or six bucks to go get one
because it lines everything up. So when you go to install the tranny, it just slides right in.
Ok. Now, we're ready to turn our attention to that transmission.
The first thing we'll do slide on this aluminum adapter plate from the kit,
then take a pen
and mark around these upper bolt holes on either side.
Then we'll take a grinder, grind a notch here in this mounting plan. So we've got clearance for our mounting bolts
using lock tide on the supplied hardware.
We'll go ahead and bolt the adapter
to the transmission.
Moving on. It's time for the bell housing. Now, this is just an old stock bell housing that I picked up, used, cleaned it up and painted it.
Now, notice when I set this thing into place,
uh, oh, we got a problem.
It's gonna hit this shift rail. So
what we're gonna have to do
is modify this vent hole. Now, the best way to do that
is to drill some pilot holes and then take a dye grinder with a rotary file on it and just open this up. Just remember when you have to do this, you don't want to cut all the way down into that indexing ring.
All right, we're gonna go ahead and take a break while I finish this up. But after the break, we're gonna put all this stuff together. We'll see you. Then
after the break, this little Bronco gets 390 wild horses packed into a small block board.
And later it's a dirty job, but Stacy's just got to do it
and this time it's Toyota's turn.
Welcome back to the truck shop. Well, we are right in the middle of putting a tough little five speed
behind this hot 302 and it is all gonna go in that old 66 Bronco.
Now, we've already got our bell housing modified,
which means it is time for the clutch fork. Now you're gonna have to use an original clutch fork on this application.
So you're gonna wanna check it and make sure that it's not damaged on the ends. Now, if you need a replacement fork,
well, you can get one from Jeff's Bronco Graveyard.
Now, some other things that you wanna get from Jeff's is a new fork, boot
bushings for all the linkage and of course, any linkage pieces that might be destroyed, for example,
look at this cobbled up piece of junk. Now,
I hope I don't have to tell you not to reuse something like this.
Ok. Now that we've got the fork
and the new throw out bearing on, we'll take the whole bell housing assembly,
slide it onto the block
and bolt it up.
All right, Barry, you be ready
just about now. It is time to bolt this new five speed up to the engine. Now, it just slides into place, but you're definitely gonna need an extra set of hands because they never just slide into place.
All right, you ready
Here we go
easy. Ok. Careful to throw it. Barry
came out real easy. There it goes.
All right, Barry, roll that thing in here. All right.
Now with your motor mounts and your transmission mounts in place. It is time for the moment of truth to set this thing in the chassis where it belongs.
Ok. Go ahead and lower it down
slowly, slowly.
There you go. It looks good.
Looks good
right there. A little further
transmission
in
looks perfect.
All right. There you go. Barry,
thank you.
Now, as you can see this thing literally just dropped into place. All the mounts were exactly where they were supposed to be.
I love it when they fit like that. Now,
we are ready for the four wheel drive part of this project, which means a transfer case. So for that, we went back to advance adapters and got their bullet proof Atlas two transfer case.
Now, the Atlas is a gear driven transfer case
with a one piece body for superior strength. Now, you can get these in three different ratios, the 4.3 for super low gearing,
the new 3.0 Highlander for higher gearing
or the one like we've got, which is the 3.8. It's right between those two
and it's gonna work perfect with our axle ratios, transmission gearing and our tire size.
Now the Atlas shifts with twin sticks. So you got a lot of control in your axles
and you have shift on the fly capabilities
to put it real blunt. The Atlas two is the toughest transfer case on the market
period.
End of story.
No.
Now, remember when I told you earlier how I loved it when things just popped into place. Well, that's because they don't always do that. I know. You know what I mean?
Well, the James Duff suspension stuff works perfect on a stock Bronco.
All the advanced adapter stuff perfect on a stock Bronco. Now, when you add components together, though,
sometimes they don't mesh perfectly. Let me show you what I mean.
You notice I can't push this transfer case all the way up against the transmission. I got some clearance problems down here.
So I'm gonna go ahead and notch these holes, slide the cross member forward and that'll take care of that.
I also notice over here
when I rotate the transfer case up, I'm gonna hit this duff mount right here. So I'm gonna have to grind a little notch there. So that'll clear
and that'll take care of it. Unfortunately, I don't have time to do all that today.
So that's a project for another day. But after the break and we're gonna show you some more cool stuff.
There you go.
When trucks return, Stacy shows you how he's gonna keep that hungry pony fed with a new fuel tank for crazy Horse. That's next.
Just can't get enough of trucks. Check us out online at trucks. Tv.com.
Welcome back to the shop where I'm doing some of the final fit and finish on Project Crazy Horse. And it is gonna be awesome.
As you can see, I've got the engine, the transmission drive train pretty well taken care of. Now it's time for the gas tank. Now, the tank we're gonna be using.
I got from wild horses and it's EPA approved 20 gallons.
As you can see, it's got all the vents and tubes so you can run fuel injection or a carburetor.
Now, it also comes with all the hardware and the hoses to put it in,
but we forked out a little extra, got this really thick skin plate
to protect the bottom of the tank from rocks and trees and things like that.
Now, the first thing we're gonna do
is put in this sending unit,
make sure you use some sealant on the gasket,
then install a sender. So the float goes out into the body of the tank. You don't want it over in here
and then slide it in
and bolted on.
Take some thin rubber strips,
lay them on the skid plate. So you don't have any metal, metal contact,
then
take the gas tank, set it down on the skid plate
and then just jack it into place.
The tank is held in place with these straps and these J bolts
that come with a kit and go right into the stock holes on the frame Now, you will need to take a rotary file kind of open those holes up a little bit because this new hardware is a little thicker than the stock stuff. Now, when you tighten everything up, it lifts that tank
until these little feet come in contact with the body of the truck
and the tanks mounted. Now, one other thing that you do have to permanently mount to the door jam is this little sticker. Now, this certifies that this tank meets all the safety and emissions requirements of a new tank. Very important. Well, there it is project crazy horse, the chassis. What do you think?
Well,
I can't wait to get this thing out and get it off road. Now, you're probably wondering, well, what about the body? Well, the next time we work on this truck, we're gonna deal with the body and the interior, but
not today. That's for another show, but we're not done today. We got more trucks right after this.
When we come back. What do you do with a nice new clean white Toyota tundra?
Why drive it through the mud? Of course. Stay tuned.
Welcome back to trucks. All right, here's the deal. You're in the market for a brand new V8 powered truck because you need that extra torque and horsepower for, for truck stuff and you're having trouble deciding between Ford Chevy and Dodge. Well,
before you limit yourself to just those three choices,
there is another V8 truck out there that you really need to take a look at.
Now, the V8 tundra won numerous awards when it came out a couple of years ago, including the coveted four by four of the year award.
But just how good is it?
Well, the only way to answer that is to show you one up close and personal
and to take one on the type of test drive that everybody would like to do to one of these. So
here we go.
All right, let's get right to the heart of this truck. The engine is a 4.7 L double overhead cam 32
V V8.
Now it's kicking out 245 horses and 315 ft pounds of torque.
And this gives you a 7200 pound towing capacity
and over a ton hauling capacity.
The thunder suspension is very stable on the road. It handles well under most normal road conditions with just the expected mild understeer.
Of course, having that extra power on tap is a whole lot of fun. Makes it really easy to break the rear end of this thing loose and slide it around.
Breaking is excellent hauling the tundra down to a stop quickly in just about any situation
off road, the tundra really comes into its own with the independent front suspension easily absorbing high speed ruts
when you get into deep ruts. Well, a little Toyota is really tough
as you can see, I laid this thing down on the skid plates and cross members numerous times with no damage to the exhaust system or the drive train because they are all tucked up out of the way.
Now, the limited slip differentials kept me moving instead of getting hung up and stuck
in mud, the stock tires definitely limited the Toyota's potential. But once again, the four wheel drive and limited slip pulled us through some pretty sticky situations
in climbing hills, the tundra definitely has the power despite the tires
has decent ground clearance. And of course, the departure angle is pretty much what you would expect on a truck, but you put on some aggressive tires and about a four to a six inch lift
and you're gonna have a great trail rig.
One of the best parts about the new tundra though is after you're done thrashing it and beating it around.
You just drive it back on the road to the local car wash and clean it up, which makes this a very tough truck to which we've got to give two thumbs up.
And now truck, gear, parts, tools and equipment for pickups and sport utilities
when you're working on your project and you've gotten it torn down this far. Well, now is the perfect time to start thinking about the exhaust system. Now, your first reaction might be. What exhaust system? Now, are you crazy? No, when are you gonna have better access to the frame and the suspension components and the cross members and when the body's off, even if you don't install it, you can still lay it out
and Flowmaster can help you do that with their mufflers and their universal tailpipe kits.
Now, for this old Bronco, we're gonna use these new delta mufflers very low profile, very small.
They will tuck right into a really tight spot but
they still flow and sound like a flow master. Very important.
Now, the universal tailpipe kits,
they come with a whole bunch of different pipes. All have a little bit different, be
2.5 inch aluminized pipe. You just take some of those
and you can literally
build the custom exhaust system that you want without ever going to a muffler shop.
Now for a vehicle that has a lot bigger engine and a little more room to spare like our old 67 here. Well, we're also gonna use flow masters.
We're gonna use these big series 50 mufflers. That's pretty much the muffler that
made Flow master. Well, Flow master.
Now they'll slide right in here. Tuck in. Nice fit great and sound awesome. Now, for the tail
pipes, once again, we'll take the universal tailpipe kit,
we'll be able to slide right around the cross members around the gas tank
and we won't have to make a single custom bin
that's gonna save us a lot of time and money. Now, Flowmaster also has
eight pipe kits
as well as some really trick stainless steel tips, which should go to show you that Flowmaster is not just a muffler company, they can help you with the whole exhaust system.
Now, for those of you that are into doing some serious metal working. Well, I know there is one tool you are just die and own an English wheel
man. The compound shapes and curves that you can get in metal with an English wheel. Oh, they're amazing.
Unfortunately, so is the price
you'll be lucky to find an English wheel for under five grand. Well, Covell
Creative Metal working decided to do something about that and came out with this English wheel kit.
Now, this kit consists of an upper yoke and the upper wheel.
You have the lower yoke and various different anvil wheels. So you can get the shape in the metal that you want.
And you also have metal casters.
You have the screw lift assembly
and most important. You have a very detailed set of instructions so you can build a nice framework to hold all this stuff.
Now, Covell Creative Metalwork sells this kit for around 1300 bucks.
All you add is some time and some metal and you have a state of the art full sized English wheel
that all your friends are gonna wanna borrow. That's gonna take care of it for today.
I think I'm gonna start putting this thing together. I'll see you next week
for a VHS copy of today's show call toll free 1877853 7260. Show videos are just 1295 plus shipping and handling
trucks is an RTM production.