Classic Trucks! Builds

Video Transcript

Today on trucks. Stacy's got an awesome leather upgrade for your tired old cloth seats. And believe it or not, it's easy.

And if that's not enough, you'll throw in a kick in entertainment center,

but don't get too comfortable because later Stacy's taking you wheeling in this wild Jeep DJ.

That's all today on trucks.

Hey, welcome to trucks. We got a really cool project planned for you today.

It's a project that number one just about anybody can do.

Number two, it's affordable and number three, it's gonna make a huge difference in the overall look and feel of your truck.

And I'm talking about upgrading your interior.

Now, usually when you mention interior or upholstery work, most people are like, no, no, I don't wanna mess with that. I'm afraid I'll screw it up or they look at this and they go,

don't, you have to go to an upholstery shop and like, spend a lot of money to do this. Well, the good news is, no, you don't have to go to an upholstery shop or spend a lot of money

and no, you won't screw it up provided you watch trucks because we are gonna show you how to do it.

Now, today's subject, vehicle is

pretty much what you'd find on any used car lot

across the nation. And you probably know that buying a truck or an SUV, that's a few years old is a great way to save some money and get a really nice vehicle. For example,

this is a 95 Ford Explorer. It's got a little over 100,000 miles on it. It's been well taken care of. So the engine and drive train should go a lot longer.

The body,

it's in good shape. No damage, no rust.

Heck, the paint's not even too bad

but

the interior,

that's where this thing needs some help.

Remember, this is a seven year old vehicle for cloth seats like we've got,

uh, it's pretty much like you or I wearing the same pair of pants for seven years and never washing them.

Who? That's rough also. This is a four wheel drive explorer. But one look, you can see that this thing's never been off road,

which probably means that whoever owned this before

probably had small Children. So you can imagine what has been spilled and puked up on these seats over the last seven years.

So it is time to replace it. So while we do it,

we're also gonna give ourselves a little bit of a face lift in here.

First, we'll unbolt the front seats from the floor

and pull them out.

Make sure that you disconnect all the wires that run to the seat,

then unbolt the rear seats and remove them too.

Of course, now is a good time to do some carpet cleaning and don't be surprised what you might find.

Just try not to suck up the money.

All right, let's take a look at these new covers we're gonna put on. Now, we got them from a place called Cat Scan and these are awesome two tone leather covers that'll fit right on your stock seats. That is really cool.

Now, we got enough upholstery to go on both front buckets,

the whole rear seat assembly,

the headrest, heck, even the console. Now, the best thing about cat skin is they have literally thousands of applications. So no matter what you're driving,

they've probably got a leather interior to go in it.

They'll also custom make your covers

in just about whatever color combination that you can come up with

and they will custom stitch a logo and the headrest if you want that.

All right,

let's get those old covers off

to re upholster a seat. You're gonna have to disassemble it. But right now we're gonna go ahead and leave it all together because it's gonna be easier to re upholster this back rests with it all together. First thing we'll do is pop off this plastic clip

runs across the back

and we'll just

pull the cover up,

then

peel the cover up, holding down on these Velcro strips,

so you don't rip the foam when you pull the cover off.

Next, take the new cover, turn it inside out

and slide it down onto the headrest.

Then

attach this Velcro strip here

and unroll

the cover,

making sure that you work out all the wrinkles as you go.

Once you have it all rolled down,

run your hands down these seams to stick that Velcro inside

and we are ready to move to the table.

Now, pop off any plastic covers that go around the seat,

then unbolt the seat back and remove it.

Finally

zip up the bottom.

Yeah.

Tuck in the zipper.

And you are done with the backrest.

Next up is the seat bottom.

So the first thing we'll do is take off this seat track.

Then we'll pop these plastic clips

off of the framework.

Then we'll just peel that old nasty upholstery right off of there.

Oh, man, that's funky.

Now, before you put your upholstery on, you need to look at your foam to make sure it's not broken down or destroyed because this

is what gives you the shape of your seat.

Now, if you need to build it up in some areas, cats skins got some universal foam and that'll take care of that problem

as you can see. Ours is in great shape. So we are ready for the upholstery

with the upholstery inside out.

Start your velcro strip here in the back, slowly, lay it on

pulling slightly so you don't get any wrinkles here across the seat cushion,

then just roll the leather down over the pad,

making sure that you smooth out any wrinkles as you go,

then roll everything over

and just snap these plastic clips that are underneath.

All right,

all you have to do. Now, let's put this back together and that shows you what's involved in doing the front seats. See pretty simple. Now, after the break, we're gonna dig into the rears. So stay with us

after the break. Stacy's moving to the back as he finishes our leather upholstery upgrade.

And later it's a Jeep, that's as much go as it is shown. And Stacy's behind the wheel.

Welcome back to the trucks, upholstery shop. Well, we're right in the middle of showing you how to re upholster a 95 Ford Explorer and we're using a leather kit from cat skin. Now, if you're just getting here, well, you've messed up because we've already shown you how to do the front seats. But

you're in luck because we're gonna continue with the rears and they're a little different

because they have got the removable headrest, a little different design. So here we go.

First, we'll remove the side plastic,

then

we'll unbolt the seat back,

then

pop the plastic clips

off the bottom of the seat frame

and then carefully

remove the cover, making sure that you don't destroy the foam underneath,

then take the new cover set it in place over the metal arms

and lay it down over the foam, pulling it slightly. So you don't have any wrinkles across the cushion.

Then slowly roll the upholstery

down over the foam. Make sure you do slow. So you don't rip it.

Then underneath, all you do is hook up these plastic clips

and that takes care of the seat cushion. Doesn't get much easier than this.

Oh,

that fits like a glove. All right.

Now, we're on to the rear back. Now. It's a little different than what you've seen so far because it's got this adjustable headrest. So to get this apart, we're gonna peel up the upholstery, remove the foam and that'll give us access to the releases of this headrest.

All right, pop out these clips,

slide out the headrest

and then reinstall the clips.

Next, we'll take some spray adhesive

and we'll glue the seat foam to the seat back. Now, what this will do is keep the foam from moving around on us when we slide that upholstery on

and

on the bottom. Once again, take your glue

and glue these side panels in,

then roll the front and the back together

and snap them up

with the seat reassembled.

Go ahead and cut the holes for your

headrest. Just make sure you don't cut them too big

or you'll see them when you're done.

Ok. Up next is the head rest. That is as easy as just popping the clips and feeling it.

Now take the original foam out of the headrest, throw that away,

then take the foam

and tuck it into the new leather material,

then install the framework into the material.

Finally snap the plastic clips in back

and you are done

well.

There you have it, man. That looks awesome.

Now, you can see by our difficulty meter, this is pretty much something anybody can do. Now, here's some tips when you're installing upholstery. First of all, make sure that the upholstery is nice and warm. It makes it so much easier to work with.

Also, if you're having, having trouble getting the upholstery down over the foam.

Well, you can take some silicone spray and spray it on the foam. This will make everything slide really well. Now, obviously we didn't have to do that, but most of the time you're gonna have to also, you don't have to be he man pulling and tugging on this leather, even though it's a nice thick automotive grade,

you can still rip it. Finally,

you see all these little wrinkles and everything. Well, don't worry about those. As soon as this goes out in the sun, those will shrink up and these things will look perfect. Now, that takes care of the upholstery after the break. Well, you're just gonna have to come back,

so not home enough to watch trucks. Well, we've got you covered with a cool entertainment center for the road. That's next

just can't get enough of trucks. Check us out online at TRUCKS, tv.com.

Welcome back to trucks and our interior rehash. Take a look around. You can see what a difference that this leather upholstery makes in a 95 Ford Explorer

man. It has the look and the feel.

Oh, even the smell of a brand new vehicle and this obviously is a whole lot cheaper.

Ok. There is something else that we're gonna do in here and that is put in an entertainment center. So we got something to watch when we're parked in these nice seats. So if you follow me over to the table, I'll show you what we got.

There is nothing cooler than having a VCR in the back of a vehicle so the rear passengers can watch movies or play games or whatever. Well, the kit that we're using, we also got from cat skin

and it consists of a nice compact VCR made specifically for automotive applications.

We also have a low profile roof mounted monitor, flips down.

So it also flips up out of the way when you're not using it,

you have all the bracketry and hardware and wiring to put this thing in. You have a remote control

and you also have wireless headphones. So the people in front don't have to listen to what's going on in the back if they don't want to no more Barney

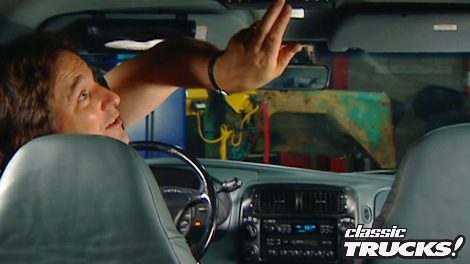
to install the monitor. The first thing we need to do

is pop off this stock

overhead light.

Then we'll cut the headliner material to make room for the new mining bracket.

Now, take the new bracket

and bolt it right to the existing roof support. Now, this is very important because this is what supports your new monitor.

Next, we'll pull the plastic off the passenger side B pillar

and we'll run the wiring up under the headliner

to the monitor

and then we'll run it down the B pillar

to the VCR.

Finally make your electrical connections

and then bolt the monitor to the bracket.

The next thing you need to decide is where you're gonna mount this VCR under the front seat facing to the rear is perfect if you have enough room. Unfortunately, our seat sits way too low, so that's not gonna work,

but under the rear seat is almost always perfect. Yeah, look at that.

We'll just have to take the seat off

drill down through this mounting bracket and bolt it to the floor. Now, something worth mentioning

any time you mount an electrical component, VCR power amp, whatever to the floor,

you need to keep a gap underneath it. So air can flow under there and keep it cool because if you don't,

it'll overheat and you'll burn it up.

The final hookup we'll make is the wiring and you've got three wires, got a ground, a constant power and a switched power. We'll make these connections here at the fuse box and we will be ready to turn this thing on.

The best part is since this thing works on FM, radio signals. Well, you don't have to hook up any other wires, no speakers. Nothing matter of fact, since most vehicles already have kind of a surround sound system.

Well, you're gonna have awesome stereo

to go with your awesome picture. So, all you have to do is kick back in this nice leather and pop a cool one and take a break.

When we come back, it's built up, tricked out, lifted and flamed

that. How could you resist a ride like this?

Have you ever wondered how companies test new products say, you know, somebody is coming out with a new tire. How in the world are they gonna know it's any good if they don't test it?

Well, the answer is they won't. So obviously, test vehicles are very important. For example,

this 2000 Jeep TJ belongs to the Mickey Thompson company and it was put together specifically

to test and showcase new products. We managed to pry it out of their fingers for a couple of weeks so we could take you inside and show you just what makes this thing tick

and we promised them we'd try not to scratch it.

The first thing that catches your eye about this, Jeep is the paint

with multicolor flames flowing over the hood and down the sides.

Well, this thing looks like a full time street machine and it could be, but

it's a lot more than that.

Of course, this Jeep is fully dressed with custom front and rear bumpers, lights and winch to help you in and out of any of those unexpected situations

that can happen on a trail.

The front axle is a Dana 30 with 28 spline axles and 488 gears

which will handle some pretty tough situations without blowing all apart.

The axle is also equipped with a new

lock cable operated locker.

So extra traction is literally right there at your fingertips.

The rear axle is a Dana 44 and it's also packed in 28 spinet axles for 88 years. And the ox lock locker

wheels and tires are of course, 35 inch Mickey Thompson Baha

claws and these are well named because they will claw and bite and chew through mud or rocks or just about any kind of terrain that you can imagine.

Of course, using that size tire is only possible with a four inch suspension lift and a three inch body lift to try to keep those tires from hitting the body and

tearing up that killer paint job.

The drive train consists of the stock 4.0 straight six,

but the transfer case is the Mighty Atlas too and it combined with that six cylinder,

they give you all the power and gearing options that you're gonna need

to get you through just about any situation.

Well, there. You have it. The Mickey Thompson Flaming TJ.

A rig that looks just as good wearing mud

as it does wearing wax.

Now, it's possible that I just might have put a scratch or two on this thing.

Anything's possible,

but, hey,

I won't tell the guys at Mickey Thompson if you won't.

And now truck gear, parts, tools and equipment for pickups and sport utilities.

All right. What is the deal with this new purple ice stuff you've been hearing about from Royal Purple.

Well, it's purple

and it's also supposed to drop your cooling temperatures by about 20% which it does. But how does it do it?

Well, very simple. It reduces the surface tension of your coolant which allows it to transfer heat much better. And this stuff will also protect the aluminum components in your radiator and it will even lubricate your water pump seals. Now, that is a lot of stuff for one little bottle. It's less than 10 bucks. The best part is

you just pour this in.

It seems like the last few years that everybody's all of a sudden started to realize just how important airflow is to the performance of your engine.

Just ask any racer out there. Well, nobody understands this better than Barry Grant.

So they came out with their rush high performance air filters. Now, these things feature a removable washable element

that'll really open up your airflow and give you some horsepower. The best part is these come with a million mile warranty. So you're never gonna have to buy another one

and you can also get them for just about any application you can imagine.

And Barry Grant is who you gotta call

when it comes to accessories. Well, people are always looking for ways to customize the rigs

and your receiver hitch is the perfect place to put something when it's not in use. Well, that's what the people at logo light thought when they came out with. Well, the logo light.

Now this thing slides right into your receiver hitch

and it gets power by plugging it into the harness for your trailer.

Now, the best part about this product is you can have it custom made in whatever logo you can imagine. And for 40 bucks a pop,

that's a pretty cheap way to personalize your rig

for a VHS copy of today's show call toll free 1877853 7260. Show videos are just 1295 plus shipping and handling

trucks is an RTM production.
Show Full Transcript