Classic Trucks! Builds

Video Transcript

Today on trucks. Project. Crazy Horse goes under the knife as Doctor Stacy performs some heavy duty reconstructive surgery

and then we'll take a look at a hot little Ford truck that Ford never made

the 428 Ranchero Fast Lane.

That's all today on trucks.

Welcome to trucks. We are glad that you're here. Now, recently, we've been putting the finishing touches on the chassis of Project Crazy Horse, our old 66 Ford Bronco.

It's been really nice. Everything's nice and clean. Shoot. This thing is about ready to go, which means it is time to turn our attention back to this old rusty body.

Now, it doesn't matter if you're working on a Bronco or a Jeep or a mustang or a Camaro if you're trying to reconstruct an old body.

Well, we're gonna deal with some stuff today that you're gonna wanna see.

So

get prepared to get down and dirty because this ain't gonna be pretty, but it is necessary and you can do it yourself for the last few months while I've been working on some of these other projects. I've also been stockpiling all the parts that I know I'm gonna need to put that old Bronc back together.

Now, this is the first thing that you need to do on this kind of project is walk around it

and assess just exactly what you're gonna need to reconstruct this thing.

That way you can figure it into your budget and into your time frame. Now, the reason you wanna get just as much stuff as your budget will allow before you start

it because then when you start the project, you won't get stalled, waiting for parts, possibly get discouraged and give up on the project.

Ok? We already have new floors and rockers in this thing.

So it is time to deal with this front clip.

It's also time for a little bit of detective work. Now, judging by the fender that I took off of this thing, this truck took a heck of a shot right here, bent, this whole front end over. You can look in here, see this inner fender is all bent up

and this wheelhouse has all been up here in the back. This all needs to be replaced.

Now, the core support,

it's just as wavy as can be.

Also looks like somebody came in here with a cutting torch or something open up this opening probably to fit a bigger radiator. So all that will need to be replaced.

The damage continues clear over to this inner fender. You can see it's beat up and bent, got some rust here,

the wheelhouse

and that's rusted in half. That all needs to be replaced.

The passenger side door.

It never did fit right. Ever since we bought this thing and here's why

the damage over there translated all the way over here broke the welds and whoever fixed it. Well, they didn't chew it back up before they welded it back together. So it's out of whack. Also

notice that the bolts all broke off because those were rusty. So this whole pillar needs to be replaced.

Now, I know

this looks like a big job and it is, but we're gonna show you how to do it. But before we get to any of that,

well, we still have some things to take off and deal with.

We'll get started by unbolting the windshield and removing that.

You be clear over there, Barry just a bit.

Ok.

Now, these things are surprisingly heavy and awkward, so an extra set of hands will definitely help you.

Once you have the windshield off,

you need to look it over, make sure that you're still gonna be able to reuse this thing because if you can't,

you're gonna have to hunt down another used one and these boys can be a little hard to find. Now, we have been real lucky with this old 66. We've got one rust hole back here in the corner, we'll weld that up. Shoot this thing will be as good as new. Now, another area that we're gonna have to deal with on this windshield are these old vacuum wipers? Matter of fact, the passenger side is already gone.

Now, the kit that we're gonna use we got from Tom's Bronco parts,

it comes with two electric motors, wipers and arms, the wiring harness, all the hardware to completely upgrade your old vacuum system to electric wipers. Now, another thing we got from Tom's is a new windshield gasket that way, once we have the frame all painted and back together,

we're not gonna get leakage around the glass

to install the new wiper motor.

You need to open up this stock hole a little bit,

then slide in the new motor

drill, your new mounting hole.

Finally on the other side,

put on your retaining hardware

and these guys are mounted.

All right.

Now, we are ready to get rid of what's left of the steering column.

Then our old crack dash pad,

finally,

we are ready for the whole metal dash

and it just unbolts from the truck body.

Now, you've got a couple options when it goes to taking these things out,

you can unhook your wiring harness from your gauges and just pull the dash out. But

since our harness is completely

shot, I'm going ahead and just cutting it, disconnecting it. We're gonna pull this whole whole mess out.

Come on out of there.

Ok, let's talk about this dash. Now, the original Bronco dash was steel and you can see ours is actually in pretty good shape. It's not gonna take much to come in here, repaint this and restore it.

Make this look really good.

But

how about the gauges or in the

Broncos case, the gauge?

Well, you can come in and try to reuse this, but remember most of these are around 30 years old, they weren't that accurate to start with.

And if you're gonna put on bigger tires and a bigger gas tank and do the kind of stuff that we've done,

you're gonna have a problem with that thing being accurate. Also

notice you don't have a lot of room here to come out and put in custom gauges

without doing some serious surgery in here. So

to fix the problem, we went to wild horses, got this new digital gauge. It's made specifically for the early Bronco. It's got the same kind of style. Now, check this out, got your volts, your fuel, oil pressure, water temperature speedometer control down here.

You got a tachometer right in the center. Now, the original gauge didn't have anything like that.

Best part is fits right into the stock location.

You have the control unit,

all your sending units. This is a slick piece. Now we're gonna take a break, but after the break,

we are gonna deal with some wiring.

Oh, what a mess

when trucks returns, Stacy's going to show you what to use to replace that scary old wiring harness.

And later it didn't exist in 67

but it does. Now,

welcome back to trucks. We are in the process of trying to resurrect this old Bronco body and kind of bring it back to life and we've already got it torn apart and the dashes out of it and we've dealt with the wipers and the gauges. Now it is time to do something about the steering because we're not gonna reuse this.

So we went to a place called Wild Horses, got a new steering column and a steering wheel. Now, this column is very cool. Check this out. It's a tilt unit, chrome plated

has all modern wiring in it.

You also get the shaft to connect this thing down to your steering box

and you even get this drop bracket. So this thing will literally bolt right into the stock location.

Now, the steering wheel is made by La

Carra.

It's got a leather binding on, it

has all the adapters and hardware to literally bolt this thing down to that column. It looks great.

Now, we come to probably the most important part that anybody should consider for a restoration, but especially an early Bronco. That

is your wiring harness.

The old original harness for the early Broncos was barely adequate right from the factory. It only had five fuses and look at this. This is all spliced into man. This is really common. Matter of fact, if you were gonna run lights or any other kind of accessories.

Well, that's kind of what you had to do and with this kind of harness,

well, you're asking for trouble. Now, add on top of that. Most of these wires are cracked and broken and brittle.

Now you're asking for a fire

now up to just a couple of years ago. Well, you only had a couple choices. One. You can either go down to a junkyard and

try to find something better than what you had or you could build your own.

Well, now

there's a much better choice and it comes from auto crafters in this brand new wiring harness for the early Bronco.

Now, this thing features 11 modern fuses so you can hook up air conditioning and lights and all other kinds of accessories and do it safely.

Now, that's not all though, you also have new light switches and relays and flashers and

here's the hook up for that new column that we showed. You got a dimmer switch, it's got everything, but it's not just for under the dash. It also has the whole harness to go into the hood and back into the back of the truck. Matter of fact, every piece of wire for a Bronco is included in this kit.

Now,

installation. Now, I know when you start talking wiring, a lot of people get nervous.

Well, this comes with a complete instruction manual, but it's a lot easier than that. Look at this.

Every wire in this kit has where it goes literally written right on the wire. So all you gotta do is plug it in where it goes. This is a nice kit and this is a wise investment,

ok. Earlier in the show, we showed you just how rough all this little sheet metal was and told you that we're gonna need to replace some of it.

Obviously. Now, since we've got the dash, all taken care of it is time to start cutting and welding, but not right now after the break, I told you it wasn't gonna be real pretty

after the break. Stacy's lopping off a big chunk of truck. That's next.

Welcome back to trucks.

We are just about ready to start cutting out some of this old nasty sheet metal on project crazy horse.

Now, when you're doing a project like this before you just jump in and start cutting away,

well, you need to take some time and plan what you're gonna do because if you don't,

you can end up with a bigger mess than you can imagine. For example, usually when you go to replace a panel like this,

you come in, you drill out the spot welds, remove the old panel slide in the new one,

spot weld it in and that takes care of it.

You run into a problem though. When all your other panels are bad, you don't wanna weld to those and we're bad all the way here into the door jam. So

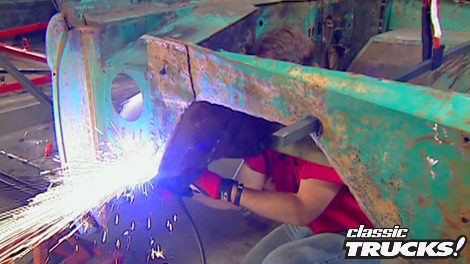
I'm gonna come in here with a torch and just cut this whole front clip off and that's gonna do a couple of things for me.

First of all, it's gonna save me a ton of time. Second of all,

it's gonna keep this whole clip intact so I can use it as a reference when I'm putting the new parts on. Also

make sure that you're taking some measurements so you can use those as a reference when you're reassembling the new parts.

Now, this is very important even on an old beat up front clip like this

because remember all of your fenders and your hood and your grill,

they all center off of this inner structure. So if it's out of whack, well, everything is gonna be out of whack. And the idea here is to have a body that's straight.

We start by drilling out the spot wells to release the wheel wells from the firewall supports.

It's important that you don't damage these supports because you're gonna have to reuse them.

Now, we're ready to start cutting

for this. I'm using a plasma cutter because it's nice and quick and maneuverable. If you have access to one, it is the way to go.

However, a Sawzall

or a cut off wheel. Well, they'll definitely do the job too

with this front clip out of the way. Finally, we are gonna deal with this kick panel

and this door pillar.

Now, unfortunately, these are a major support area of this body. You can see that my support is welded to it.

So I'm gonna have to do something different in here.

Now, guys, I can't tell you how important this is. You have got to support all of this up before you cut something like this out. Because if you don't,

this whole cow, this whole firewall could collapse down on you,

then you're gonna have a mess.

Once all your supports are in,

it's time to start cutting.

Finally

pull it all out.

Now, don't expect this stuff to come out easy. It's gonna fight you every inch of the way.

Uh Look at this. Don't be surprised to come in and have to do a little bit of hidden repair work too.

All right, it should become real apparent. Now, how important this bracing is as bad as all of this looks, believe it or not, it's still in perfect alignment. So our new panels should literally just slide right in.

Oh yeah.

Once everything's cleaned up, it is time for the new panels. And we got these from Jeff's Bronco Graveyard

and these are exact reproductions of the original Bronco panels and that is really nice and you know they're gonna fit.

Now, once you've got them in place, go ahead and spend some time looking and checking and double checking because

this decides how your door is gonna fit. So this needs to be in right now. Once you've got it, how you want it. Go ahead and weld it in. Now it's time for us to take another break, but don't go away because we've got more trucks for you after this

when we come back. No, you're not dreaming. It's a 428 Ford Ranch ero.

And now truck gear, parts, tools and equipment for pickups and sport utilities.

When you set out to build that hot engine for your truck, getting all the right parts together

can be kind of a hassle. Well, Edelbrock decided to help you out with, that came out with their performer RPM kit. Now, this includes everything you're gonna need

to build a killer top end from the cam to the lifters to the timing set,

push rods,

you get their killer aluminum heads filled with valves and springs and screw in studs and guide plates. Heck, you even get the intake and the carburetor.

Also remember this stuff is all

dyno tested by Edelbrock. So you know exactly what kind of horsepower you're gonna be bolting on. Now, where do you get it?

Well, pull out your Jake's catalog and give him a call.

Ok. You've got all your parts to build that hot engine

or do

you, how about gaskets

and don't put on cheap ones? You're gonna end up with a leak monster. What you need are Mr Gaskets, ultra seal, premium

engine gaskets. This will completely eliminate any ceiling problems. Now, you can get a complete engine overhaul kit like this

or you can buy them separate if you're gonna replace just an intake manifold or some headers. The best part is you can get Mr gasket stuff at just about any auto parts store across the nation.

All right, you got your engine all put together. Now, what are you gonna do to detail it? And I'm talking about the good stuff. Well, two words for you, billet specialties,

they whittle all their stuff out of a big hunk of billet aluminum. Check out this air cleaner, big thick piece of aluminum,

cool oval shape, highly polished and you got some really neat fins running down it.

That is nice. Now, how about setting that off with a set of Finn breathers? And those are cool too. Matter of fact, billets specialties has pulleys and brackets and pretty much anything that you're gonna need to really set your engine off.

So, what are you waiting for? Give them a call

in the 19 sixties at the height of the muscle car wars?

You had a lot of choices to go fast. Mustang. Camaro, roadrunner, GTO, et cetera, et cetera.

Unfortunately, if you were a truck guy

and wanted to go for,

well, you didn't have those choices because nobody was really building a muscle truck except for Chevy's S S3 96 El Camino.

But for some reason, Ford never answered that with a 428 cover

Jet Ranchero.

Well, for Kevin Tates, this was a problem because he always found himself daydreaming about just what that animal might have looked like.

First of all, the body would have to be a 67 because it had the same Coke bottle styling as the 67 fairlane car.

And this was also the only year that shared the fairlane style front end,

which really sets it apart from the Falcon and Torino style Rancheros. Of

course, in the sixties,

you really didn't have a muscle car if you didn't have some sort of scoop on the hood and pins holding that sucker down.

So this truck would have a fully functional fiberglass fairlane GT hood

and pins were a mean aggressive racing look.

The body would be stripped of all moldings for a nice smooth look.

And since all muscle cars had to have some kind of stripe,

a totally unique stripe would lay over flawless red paint

flow down the sides of the truck and up diagonally across the hood,

the interior would have to have cool black leather bucket seats

and all the original gauges and chrome trim would have to be perfectly restored for a classic vintage feel

under the hood is where the magic would really lie in the form of the mythical 428 Co

Bridget.

And it would have to be fully dressed with all the aftermarket goodies to make it pump out around 450 horsepower.

Now, this is where Kevin's daydream

gets a little crazy.

Oh,

notice all the room that you have on the size of the engine.

Well, that's because the original shock towers have been removed and flat panels welded in for an ultra clean look.

Of course, with no shock towers,

you have no suspension.

So a complete mustang two front suspension is fitted

to not only sink the nose down in the weeds,

but also make driving this thing a real pleasure.

The wheels. Well, who hasn't dreamed about owning a set of American racing torch rust.

Unfortunately,

the truck that Kevin dreamed about

didn't exist,

but

after a couple of years of hard work, a

fair amount of money and an understanding wife, this is what rolled out of the shop. Exactly. The truck that Kevin had been dreaming about and now there's a lot of people dreaming about these things, which brings me up to my question,

why in the world didn't Ford ever build these

next week on trucks? The heavy metal continues as project. Crazy Horse starts looking more like a bronco again.

And later we'll take a look at a few of our favorite moments from past shows. That's all next week on trucks

for a VHS copy of today's show call Toll Free 1877853 7260. Show videos are just 1295 plus shipping and handling

trucks is an RTM production.
Show Full Transcript