More Copperhead Episodes

Classic Trucks! Builds

Video Transcript

Welcome to trucks. Are you ready?

You better be because we're jumping back on a project that you've wanted to see for a long time.

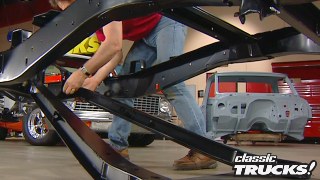
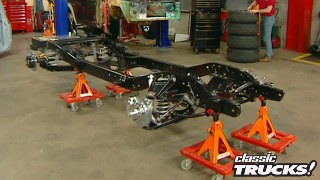
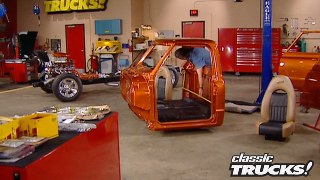
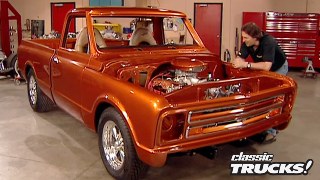
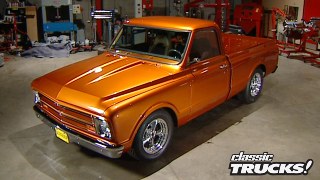
It's Copperhead, our 67 half ton Chevy truck started out as a bear frame, a cab and a title.

Now we're gonna finish up some of the details on the frame here.

Get it ready for the cab that's coming out of the paint booth here in a week or so.

Now details details. Now that is an area that can absolutely make or break a big project like this.

It's also an area where most people get in a hurry start hacking things together because they're impatient, wanna finish the project or

they ran out of money because they forgot about the details.

Everybody knows you need an engine and a tranny and a rear end and of course wheels and tires,

but that's not all there is to it. No man, you still need to put on brackets and pulleys and a fuel system and an exhaust system.

Oh, there's a lot to do and I'm gonna show you how to lay these systems out

and in the meantime, introduce you to some really cool products that

you can use on your project.

So, hold on because this is where it all starts to come together.

First up is the engine now, just in case you've forgotten,

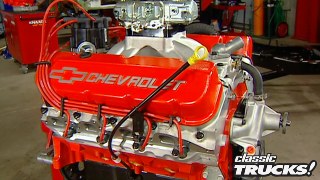
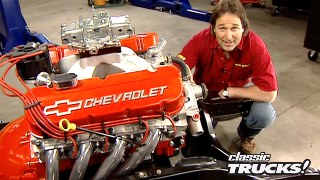
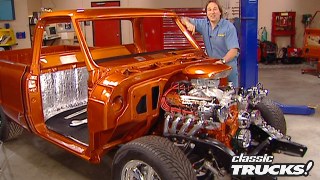
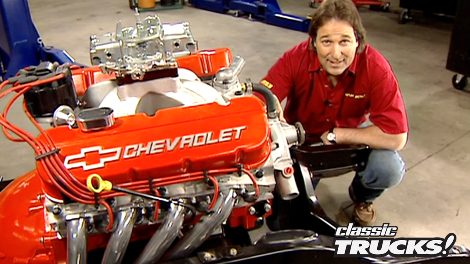
this is Chevrolet's brand new 572 cubic inch crate engine.

It's kicking out 620 horsepower and over 650 ft pounds of torque. It's also the very first one ever made. So,

yeah, it's pretty special. But all that aside, it's also a really good example of what you get when you buy a new engine. Very rarely. Do you ever get pulleys and brackets and hardware. But that's ok because the answer is over here on the table.

The name to know here is Zos

products and we're using what they call the super cool pulleys and these are available for big block and small block Chevy.

They're forged aluminum, so they're very strong and they're highly polished, but they're not just for looks,

they overdrive the accessories. So the engine will run 15 to 20% cooler.

Also, your alternator and air conditioning will work better at lower RPM. S

check out the bow ties built right into the pulley. See it's all about the details.

The next question is, what about brackets? Well, you can go to a junk yard or swap meet, hoping and praying that you're gonna find something that would work

or

you can go to

Zos and get these really cool aluminum brackets

that hold alternators and air conditioning, compressors and power steering pumps and they bolt right here to the front of the engine.

Also, they're completely adjustable. So lining up your pulleys is not gonna be a problem

for the power steering pump. We also got that from Zos

and it's this little tiny thing that mounts down on the driver's side low on the engine. Of course, we got a polished pulley to go with that.

Now, you might be wondering how come this thing is so small. Well, if you'll notice it doesn't have a reservoir on

it,

that's because

you use this remote reservoir and mounting bracket and you can put this on the firewall or on the inter fender, any place that you've got some room

and that's really nice when you have a tight engine bay. Now, to put this thing on,

it just goes on the bracket that we put on earlier

for the starter and the alternator. Well, we needed something that would match the look and the performance of what we're building here.

So we went to tough stuff performance, got one of their cool charger, polished aluminum alternators. Now, this thing kicks out 100 and 40 amps. The raw current has a one wire hook up and an internal cooling fan. If you use a lot of power accessories, this is a must, of course, you know where we got the pulleys and now you can see how this is all starting to work together.

There's your adjustment for your belt tension

for those of you that have ever run headers on a Chevrolet, you've probably experienced their unique ability to cook a starter.

That's because the original starter is really big, sits right in this area here and the headers run right down alongside of it. You might as well just stick the starter in the oven and bake it because that's what the headers do.

Well, tough stuff has solved that with these high torque starters that have a super strong electric motor gear reduction

and a little tiny body that keeps the starter away from the headers. These will eliminate your starter problems forever.

The last accessory is the air conditioning compressor. We got this from vintage air and this is a fully polished unit and it just happens to go with a complete air conditioning unit for the 67 through 72 Chevy truck and don't get impatient. We'll tell you all about it later on.

Of course, like everything else, it just bolts onto the brackets and that takes care of your pulley system. Pretty awesome. Huh.

Now, just a minute, I got something. I want to show you.

One of the cool things about this particular bracket system is everything is mounted off to the side. So you can still look down on top of the engine, you can get the valve covers off, nothing's cluttered up, but you can only do this if you've got plenty of room in your engine bay.

Now, here's how our inner fenders are gonna mount.

Notice how everything tucked down into this dead area here. Like I said before, man, it's all about the details.

All right, moving on. It is time for the drive shaft. Now, remember I've got some serious power kicking out of that engine. Heck, I might even put some nitrous on it.

So I need a drive shaft that'll handle that. And for that three words, Denny's drive shaft service. Now, this is what the

call their nitrous ready shaft. And if you've done your measurements, right, it should just slide right in and bolt up.

Now, these shafts are completely balanced, fully painted

and they're built out of a special tubing that just happens to be Denny's trade secret. But what's not a secret

is his incredible warranty.

If you happen to break one of these welds or twist this tube,

he'll replace it for free. Matter of fact, these are so strong,

I got two of them for the crazy horse Bronco.

This is what they call their four by four off road shaft. And this is a heavy duty little sucker comes with the CV joint at one end

and that unbreakable warranty

that takes some guts because Denny knows I'm gonna do my best to try to break one of these things and put that warranty to the test. Now, on that note, we're gonna take a break, but don't go too far. It's got a lot more to do before this show's over.

Welcome back to trucks. We are right in the process of finishing up the chassis, a project copper head.

We've already got the pulleys and the belts and the brackets on the front, got the drive shaft in. Now it is time to deal with the exhaust system.

Now, the reality of one of these kind of projects is you are not gonna find a system that's just gonna bolt right in.

This gives you the opportunity to hunt the aftermarket, find all the cool products that you wanna use.

And then once you got all the products set aside,

you need to hunt down a place to bend you up some pipes. Now for that,

we went to Mike's Muffler shop in Lebanon, Tennessee, they specialize in custom exhaust

and they custom build us a dual exhaust system exactly the way I wanted it.

The first part we're gonna put on is the head pipe and it bolts right to the header,

but check this out. It's got a flex coupling. Now, what this does

is allows the engine to flex and move and not the pipes. These are gonna be solidly mounted, got to use this if you're gonna solidly mount your pipes. Now notice Mike also built in A Y here that's gonna split our exhaust and it's also gonna allow me to bolt on one of the coolest things we're gonna put on this truck, check it out.

This is an electric exhaust cut out and we got it from Doug's headers. Now, it uses an electric motor to slide a stainless steel door inside the pipe and close it off. Now, if you're not familiar with the way that these things work, you know,

I'll explain it to you a little bit later. You're gonna love this.

Now, keep in mind you have got a lot of mass out here. You got a little shaft that sticks out when this thing's open.

So make sure you're leaving enough room around your transmission or a cross member, wherever you're mounting this thing.

Next, we'll slide in the pipe that goes through the cross member.

Now to hold it in place, we got these really slick aluminum clamps from the guys at early Classic enterprises. Now, these aren't in their catalog,

but if you call them up and ask real nice. I bet they'll make some for you

to mount them, just drill your holes

and bolt them on.

Now, we're ready for the Mufflers and these 304 series Mufflers or Metal Brock are just the ticket. These things are made out of Polish 304 stainless steel. So they're always gonna look good.

They flow like crazy

and they're gonna just thunder back behind that 572

after the muffler will put on the tail pipes

that are held in place with these clamps, they also go through a cross member down around the gas tank and tuck up against the frame for a nice clean stealthy. Look, you'll never see this system, but you're sure gonna hear it.

The last pipe we're gonna put on are these dump pipes and

they slide right under the frame

and into the exhaust cut out

and this whole system is gonna be held in place with these stainless steel clamps.

Now, I know you're wondering just how this system is gonna work. So here's a scenario for you.

I'm sitting at the stoplight, minding my own business. Some hot shot pulls up wants to run me. So

I flipped the switch

open up the exhaust cut out that bypasses my main exhaust and now I'm running straight pipe right out of the 572 out the side into the side of his head. And this is the last thing he's gonna hear before I uncork this thing and give him a really good look at my tail end

then after I'm done. So I don't add to my ticket collection.

Reach over, flip the switch, close up the exhaust and copperhead slinks off into the night

waiting for the next victim.

And is this the fun or what?

All right done. Now, one thing that you do wanna do with a system like this is protect it. So we're gonna take the pipes down to a place called color coded and have them put a high temperature coating on these pipes. Shoot, then they'll last forever. Now, we're gonna lay out a fuel system because we gotta feed that thing. But

not now after the break, stay with us

just can't get enough of trucks. Check us out online at trucks. Tv.com.

Welcome back. Question.

How do you feed a very thirsty big block engine that's kicking out about 650 horses.

Well, you gotta have a high performance fuel system, that's for sure.

So we went to Mallory and here's what we got first,

the fuel filter. Now this is a comp filter. Series 140.

It features a replaceable filter element,

dual inlets, dual outlets

and this thing will handle flows up to 200 gallons an hour.

That's getting it for the fuel pump. We also got their series 140 pump has a nice quiet electric motor and this thing will kick out enough volume to feed that big old engine.

The problem is these are factories set at 12 P SI.

It's too much for a carburetor. You blow out your seats and stuff.

So

we are gonna use this fuel pressure regulator.

That way we can set our fuel pressure at seven P SI, which is what you need for a carburetor.

Now,

one problem that you always run into any time you're putting on an aftermarket fuel system and that is where are you going to put it?

Most parts come with their own mounting bracket, but the problem is most frames are an open sea channel. So

you're gonna mount them,

you can't turn them on their side and you don't wanna mount them to the outside of the frame. Matter of fact, the perfect spot would be right here. But

what are you gonna do?

Well, you need to custom make your own mounting point.

That's a little involved. Take some special tools and I'm gonna show you how to do it.

First take a piece of cardboard, set it up against the frame in the desired area,

then tap down the frame edges with a hammer

to get the desired pattern.

Now, cut out the pattern

and make sure that it's gonna fit and I know you're wondering about these curves here. Those are for looks, see it's all about the details.

Now, I'll transfer the pattern to 3/16 steel

and cut it out using a plasma cutter or a torch,

take your part

and mark your mounting holes,

then drill and tap your holes,

fire up the welder and weld them in,

grind down your welds.

Finally paint it to match. See, it looks like the frame came from the factory this way.

Now, like I said before, this is pretty involved, but it is the best way to deal with these open sea channel frames permanently.

Now, just bolt on the filter, make sure it goes between the tank and the pump because this is what keeps any trash from getting in the pump and locking it up.

Now, the pump, obviously, you're gonna have to do the same thing for it that you had to do for the filter,

but check this out. Look how nice and clean this thing's gonna fit around this exhaust system,

ok? To tie this all together, we're gonna use some of this braided stainless steel hose that we got from Russell performance because it not only looks really good, it's also really strong.

Now, the size we're using is dash 10 A N, which is just about the same size as your garden hose. Now, to connect it all, we're gonna use some of their anodized fittings.

Now, the regulator,

well, we're gonna have to wait on that because we're gonna mount it on the firewall and obviously we don't have a firewall yet. But remember with the regulator that doesn't do you any good unless you have a gauge to go with it.

So for that, we went to auto meter and got their fuel pressure gauge and we got one more thing to do here. You're gonna love it.

But after the break,

welcome back to trucks. We're finishing up some of the details on the chassis project. Copperhead. Now, there's one more thing that I wanna do today before we're done that is rig up some sort of air cleaner. Now, there's a lot of really nice air cleaners out there, chrome, polished aluminum, things like that.

But I wanted something really unique and different for Copperhead. Check this out.

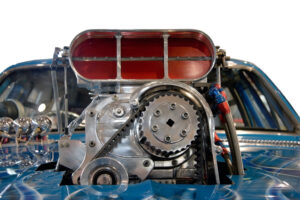
I saw the prototype for this over a year ago and now they are finally available to the public. Now, Johnson's Rod Shop is where you get them and they look just like the old scoops that were on the top fuel dragsters back in the sixties. Now, they've got a top fiberglass shell.

Then of course, you have the lower plate and the filter and a whole bunch of options on how to mount this. So this is not just a simple bolt on.

It's up to you to make it fit and look the way you want. Here's how you do it.

If you look closely, the upper shells got these faint little marks so you can cut out a couple of openings here in the front. But that's not all

the kid also comes with these cool little grills that are preformed to fit right into those openings. Very slick.

We're using a dremel tool to carefully cut out the openings go slow because if you cut out too much,

you're gonna have a big problem

once your cuts are made, take some sandpaper, smooth down the edges. So everything's nice and smooth and flowing together. Now, don't forget

to keep checking the fit of your grills, so everything will be perfect.

Oh, that's gonna be cool.

Now it's time to determine just how high you want this thing to sit.

Uh Johnson's Rod shop. Designs these with a tall base on them.

But unfortunately, that will put it through the hood of most trucks. So if that's not the look you're after

they'll need to come in and measure, see how much of the base you're gonna cut off about an inch and an eight will do it,

then just cut off the base

and finally reassemble it all.

Yeah,

there that should show you

that the little extra time and work to make this thing fit, right? Is definitely worth it,

man. That is sweet.

Now, we've gone ahead and painted it orange to match the engine, but

imagine graphics or pinstriping or flames or something on here. Like I keep telling you if you want something special and unique and it's all about the details

for the first truck gear. I'm gonna take you back to a kit that we gave you just a little glimpse of earlier.

It's a complete air conditioning unit for a 67 through 72 Chevy truck and you can get it from vintage air.

Now, the good news is this is a complete kit, not just a bunch of parts to kind of help you put together a kit.

Now, you've already seen me put on the polished compressor

kit also comes with a wiring harness and relays, glove box, condenser and evaporator,

soft lines, hard lines,

a firewall cover and of course an under dash heat and air unit already has the fan. The wiring all the vents

guys, this is what Chevy should have put in them from the factory. Now, if you're working on a vintage truck and you wanna keep it cool. Now, vintage air can help you out.

One of the biggest hassles of working on an older truck is finding the little stuff. Like what do you do when you need bezels and knobs and handles and things like that?

Well, if the truck's an old Chevy, you call early Classic Enterprises because they've got all the knobs,

the bezels, the control units,

the vents for the heat and the air conditioning, everything to make your truck as good as new. Just think no more. Hunting around in the junkyards for old nasty cruddy parts. All you do is call Early Classic Enterprises

and wait for ups. Now that's gonna do it for today. I know a lot of you are wondering, when am I gonna finish Copperhead and Crazy Horse and Hairy Hauler?

Well, the answer is soon sometime this season,

but you need to keep watching trucks because if you don't,

you'll miss the day I fire this thing up and then cork those headers and trust me, you don't want to miss that.
Show Full Transcript