More Copperhead Episodes

Classic Trucks! Builds

Video Transcript

Hey, welcome to trucks. Today. We're jumping back on a project that

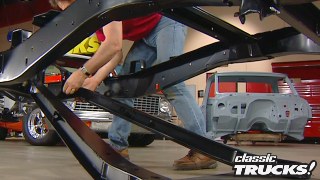
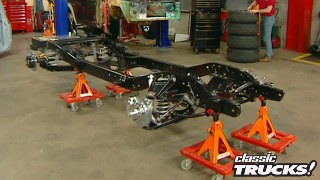
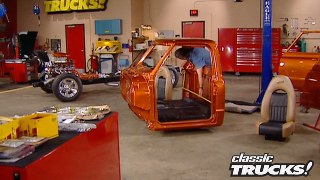
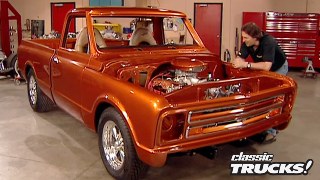
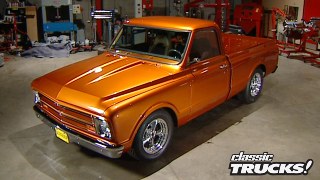
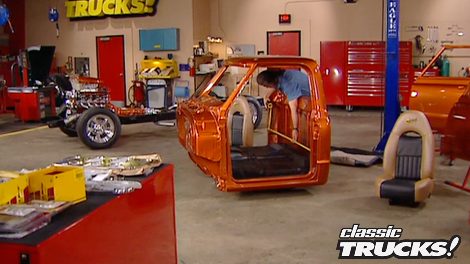
I get a lot of requests for Copperhead. Now, for those of you that don't know, this is a late sixties Chevy truck that started out live here in the shop as a bear frame and a cab.

Now, the reason is to show you what's available for these old trucks and some of the choices you have when you're putting one together.

Now, today, I'm gonna jump into the interior show, you how to lay one of those out. But before we do that,

I'm gonna bring you up to date on some of the stuff you have. I haven't seen

the chassis is pretty much finished. We covered that on the show.

You got the Dana 60 rear end,

the custom dual exhaust system,

the gear vendors overdrive,

the electric exhaust cut outs,

the B and M turbo 400

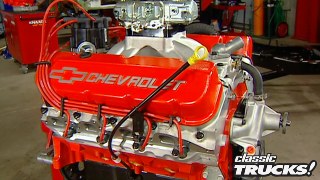
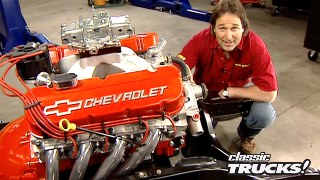
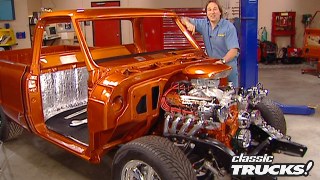
of course, the 572 crate motor. But what you haven't seen is that I painted the engine transmission and valve covers, a special copper color

more on that later on.

But before I painted the valve covers, I sent them down to the guys advanced planting

and had them not only chromed

but also had them engraved with 572

copperhead and since this is the first production 572 engine 001. Yeah, this is special.

Ok. Paint. Yeah, paint.

Now a new copperhead needed a special color. So got together with Ron Payton at the PPG custom shop and we started looking and painting and mixing, looking some more. Found a lot of

Hier colors, but

not the right one until

I saw that 2002 Ford ranger color.

And I said, Ron, this is the color, this is the right pigment. It's just a little flat, needs something to bring the depth out in it.

So we went into the mixing room added a much bigger, more aggressive flake and bam just brought the color to life. Notice that the bigger flake brings out the gold overtones adds a ton more depth. It's hard to believe. This is the same color with just a different flake in it.

Now, this color is available from PPG. Now it's one of their new custom colors. It's called copperhead metallic and you need to get it from auto body color and supply in Nashville, Tennessee

because they have the mixing code.

The paint and body work on this thing was done by Kevin Tates who does the paint education video series and as you can see, he just rocked on this thing.

Now, we kept the body modifications to a minimum. Shaved the drip rails filled a few holes and heck, that's it. These old cabs don't need a lot. They were pretty right from the factory

then Kevin worked this thing down to perfection. Shot on the flawless paint. Let me tell you it is. Right.

Incidentally, he's got a new video out in his series. You may wanna check it out.

It's called Body shop Basics and it's perfect for the do it yourself or you can get it on his website. Paint education.com, check it out. It's good stuff.

All right. Now that we're all up to date, it is time to get to work. Now, any time that you lay out a custom interior, it doesn't matter if you're working on a Ford Chevy Dodge, import new old, doesn't matter

if you don't do things in the right order.

You're gonna have a big mess on your hands. Now, most people think, well, first thing you put in is the carpet, right? Only if you're doing something original. If you're doing something custom, it's a lot easier to do your mounting and fabricating with the carpet out. So let's go look at some seats.

This is the

B five Corvette style seat from steel horse automotive,

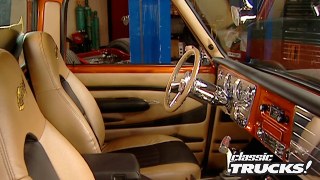
but these are made specifically for trucks. So they've got a thicker base on them. They're a little beefier and they come with great upholstery. However, the first thing I did was ship them off to cat skin and have them reupholstered with black leather here in the center.

Then around the sides is a tan Naga

H that's got just a little bit of a metal flake in it, which is gonna be perfect with that paint.

Now, of course, cat skin is known for the custom logos.

So we had them stitch this copperhead logo in there because just like the valve covers, man, it's all about the details.

All right, mounting a set of seats

in an area where they were never supposed to go is a challenge that you're gonna run into

whether you're putting in new seats like this

or something out of a salvage yard. Now, after three things here, number one

is seat height. You wanna make sure that the seat is sitting high enough.

So you're looking through the center of the windshield, not through the bottom, not through the top, right through the center

and this isn't bad. Can actually go up about an inch though.

Number two is the angle of the seat

and you want the bottom of the seat to angle back just a little bit. So it supports the bottom of your legs

around 7 to 10 degrees is usually about right

finally, make sure the seat is centered up with the steering column. Now, a paper plate stapled to a broom handle makes a surprisingly accurate mock up.

Once all your measuring is done, it's time to fabricate your seat pedestals. Now I'm making these out of old seat brackets that I had laying around

when they're all together, bolt the pedestals to the seats

mark and drill your holes in the floor pan

and then bolt the seats in the truck. Now, if you took your time with the measurements, they should be perfect.

Next up is the shifter. And for that, we're using the B and M Light truck mega shifter because it's not only a high performance ratcheting shifter,

but it also comes with a little taller base because like I said before, most truck seats sit a little higher than cars. And you want this shifter up where you can get your hands on it.

Once your location is decided,

it's just a matter of trim in the base to match the contours of the floor,

then just drill your holes

and bolt on your shifter.

Now, this particular B and M is really nice because it's got a lot of adjustment. So it's perfect for a custom application

then just put on your shroud

and that takes care of your shifter.

All right. Once you've decided the location of your seats and your shifter and a

console, if you're gonna use one, anything that goes on the floor.

Well, sit back, man, take a break and enjoy your handiwork because

yeah, you guessed it. Everything's got to come back out because now it's time for your carpet and we're gonna take care of that after the break,

man. It's looking great in here.

There you are. Yeah, I knew you'd be back because the truck on the chopping block today is Copperhead and we're showing you how to lay out a custom interior. Now, the cab floors, all clean

bowl holes are all drilled for the seats and stuff like that time for carpet.

Now, for that, we went to early classic enterprises. Got this one piece form fitting carpet that's gonna fit our floors like a glove. Now, most aftermarket carpet comes with this jute padding like this and that's really nice, but

that's not quite enough, especially when that big 572 starts bellowing. So we're gonna soundproof the cab a little bit. This kit is from Quiet Ride Solutions and they call this stuff a cous

to shield.

Now it's thick sound ending pad that goes on the floor in the doors, on the firewall, the back of the cab, any place where noise and heat can get into the vehicle. Now, you also get these damper pads that go right on the sheet metal and they keep vibration from coming through the sheet metal.

And then of course, we got these form fitting covers for the firewall. Now, the best part about this quite right kit is it's made for specific applications. So this will literally just slide into place.

The first thing you need to do is make sure the floor is clean and dry,

then lay out the damper pads according to the diagram,

use a wallpaper roller to make sure that the adhesive gets a good bond to the metal.

Now you're ready for the acoustic shield pads. First, give them a good thick coat of the supplied glue,

then lightly set it into place and position it.

Now you'll notice that I'm not glue in this front part yet.

That's because

I need to be able to get to these body bolts when I bolt this body down on the frame, make sure that you're planning ahead on your project

because if not, you might work yourself into a corner. Now, all you have to do to make this permanent once you have it, how you like it,

it's just use some firm pressure on it

smoothen it as you go.

Once the panels are in place, the final step is to seal all the seams and edges

with the aluminum tape,

then just set the carpet in place.

Now, once this cab is bolted down on the frame, we'll go ahead and glue this in,

then we'll hold it in place on the sides with these new seal plates that we got from early classic enterprises. Now notice our carpet only comes back so far. That doesn't mean we got a bad piece of carpet. It means that this truck used to have a gas tank back here and a bench seat.

If you take your gas tank out, you're gonna need to make a trip down to the upholstery shop, get a strip of carpet about this wide and glue it in there.

Next up is the dash and the gauges. Now, even though the original gauge cluster was cool and it's still available,

we want to move beyond that a little bit and no limit engineering had exactly what I was looking for and this is their gauge panel for the 6772 GM trucks

and it's a nice thick piece of ball milled polished aluminum. This thing is awesome.

Now, notice that the wipers and the lights have been relocated down here to the corners.

The turn signal indicators have been moved out here to the sides

and then to keep the look of the big gauges, these big holes here

are stuffed with huge auto meter speedometer and tack.

Then the smaller holes or for the smaller auto meter gauges. So you've got complete instrumentation.

So you've got performance gauges and a really nice package. But wait, there's more no limit. Engineering also has a matching glove box door

with cup holders to round out your dash

to install the panel. You do need to cut the dash just a little bit. These little corner pieces have got to go.

So go ahead and mark your cut lines with some asking tape,

cut it out,

then just mount the gauges into the panel, slide the whole assembly into the dash. Now you'll be glad to know that the glove box doesn't require any modifications. It just bolts right on. Clean, simple. And man, that looks good

for a dash pad. The guys at early classic were waiting for my call because they knew what I wanted and this is it

a genuine GM dash that looks and fits exactly

like what came in this truck.

Yeah.

Now we've done a lot today. Got a lot more to do more. Copperhead after this

just can't get enough of trucks. Check us out online at trucks, tv.com.

Welcome back to trucks and project Copperhead where today's subject is interiors. Now I'm showing you how to lay one out on this classic Chevy

and we've already dealt with sound proofing and carpet seat placement and layout of the dash.

Now we're gonna move on to an area that most people are a little afraid of and that is interior panels, things like door panels, kick panels, that kind of stuff. Now, on most vehicles, you got a couple choices, you can buy an original style replacement panel

or you can do a custom panel and that of course is what we're gonna do.

Now, I showed you how to make custom panels before on the Wicked Willies project. First, you need to make your panel out of some backing material to however you want it to fit the surface. Now, this is a creative process. So it is time consuming.

Then when you have the panel made, you have to upholster it

and this is why most people run from interior work like the plague.

This kit will make that whole process a heck of a lot easier. Now, this is from a company named Rod Doors and they specialize in plastic panels for your interior.

Now, the kit that I'm using is called the dyno

made

specifically for the 67 through 72 Chevy trucks.

And you've got door panels, they've got arm rests,

this utilizes your stock door puller and you've got room out here for your stock window roller or you can mount buttons for power windows.

You've got a pillar covers that have little tweeters in them.

You have kick panels,

a headliner panel

and you even get this huge piece that goes back behind the seats covers the area where the gas tank used to be.

Yeah, this is a complete kit. Now, the best part about using rod doors is that now all you have to do is glue on your upholstery. So all you bring to this equation is some adhesive, some tools and your actual material. And you can go from this

to this in just a few hours.

Then once the panel is done,

it just pops in place using supplied Velcro. Look at this covers the whole door

that way you don't have to come in and do any repair work on something like these speaker holes.

And if you don't think using a rod doors kit is gonna save you some time, you just try to do this the old way, get all those contours right.

Now. This brings us to a stopping point on the interior. The only thing I have to do now is

put all this stuff away because I've got a truck, I'm gonna roll in here and show you after the break.

One thing's for sure if you're a hunter or a fisherman or just enjoy being outdoors. Chances are you own a truck or an SUV,

and you'd probably love to own a rig like this big old Chevy.

However, when Tom Mayer at me, racing and restoration was contracted to build this Hunter themed rig for the

SEMA show.

Well, he thought it was gonna be easy.

That is until this new Chevy

Duramax showed up five days before the show

and now things are serious. This is what five guys pulled off in five days

first, since this is a rig for the Hunter or the fisherman,

a six inch suspension lift was installed to get the big truck up in the air and get some ground clearance.

The lift was further enhanced with the addition of 35 inch tall tires

and some cool aluminum wheels.

The engine was up next and the Chevy

Duramax is already a stout well designed package right from the factory,

but that's not enough. So the big diesel was brought to life with a hot chip propane injection.

This will allow you to pull just about anything you want

or just slope those hides if the fish aren't biting and

you're late getting back to work

while the engine work was being done. The rest of the crew dove into the paint.

A dark base was laid down and then covered with snow camouflage, but not before figures and landscape were cut into the camo

to bring out a unique silhouette look.

Now, this combination may not do much in hiding you from animals, but it may attract Wayward Bullet or two from a near sighted hunter with an itchy finger.

Of course, the front was treated to a billet grill, winch lights, tools and a massive bumper that was also covered with camo to match the rest of the rig.

The rear also received a massive bumper and winch

and the bed is loaded with tool and storage bins and even a place to carry a couple of your best hunting buddies

with that. The truck was ready for sa

and the crew collapsed in exhaustion but not for long because when it came back,

the interior received some attention too

as the seats were recovered with a tough denim material from diamond cut jeans

and the camel runs into the door panels and flows all the way into the headliner.

At this point. The truck was completely done

and ready for the show circuit and also to be driven.

However, keep in mind, this is not a hardcore off road rig.

This is an outdoor enthusiast rig.

Which means it's a nice solid everyday driver

that looks good,

but it can still handle a muddy trail

which goes to show you what can be done if you have the tools, the talent

and a crew willing to pull those all nighters

for a long time. People have been talking about the benefits of fuel injection, especially on an off road rig.

But what if you're running something? That's a little odd, like a Oldsmobile or a Pontiac or an A MC.

Well, you can give Holly a call, pick up one of their commander 950 universal multi port fuel injection kits.

Now, this of course includes your wiring harness, your computer, all your sensors, all the electrical stuff, but you also get a throttle body

fuel rails and injector bungs. Now, what you add to this kit, of course is a manifold

fuel injectors, fuel pump and of course, the machining and the welding to put the kit on your manifold. Now, this is not just a bolt on kit,

but it will allow you to put multi port fuel injection on literally any engine.

When it comes time to tweak on your fuel injection. You can't just grab a screwdriver and dial in a few extra horsepower like you could with a carburetor.

So super chips has got the next best thing with the max micro tuner. Now, this thing just plugs into your diagnostic port allows you to recalibrate your computer, giving you more horsepower, more torque. You can change your speed limiter and your shift points. A lot of neat stuff. Now, super chips doesn't sell the old style screwdrivers.

They sell the new type.

We've all heard about the benefits of synthetic oil on your engines. Well, the gears in your rig can benefit from that protection too.

Quaker State saw the need for that came out with this four by four synthetic blend gear lube.

Now this is for extreme heavy duty situations to be

trade in a manual shift transmission

open or limited slipper ear ends, heck even steering boxes, check it out the next time you change your lube.

If you've just dropped some serious money on a custom exhaust system or a set of headers,

well, you wanna protect them. Right. Right.

So you wanna send them off to a place called color coded because they'll not only coat each and every pipe with a super high temperature coating,

but they'll also do your headers for you,

then they hand polish each part. So you have a show quality finish on there.

But the best part is

they guarantee the stuff to never discolor never flake, never burn off. So if you want the best

at a price, you can afford

color coded is where you need to send your stuff and you can find out how to get a hold of them on the truck's website.

Now, it takes care of it for today, next week. This body goes down on that chassis.

We start putting this sucker together. We'll see you then.
Show Full Transcript