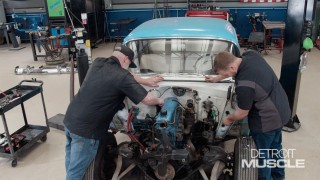
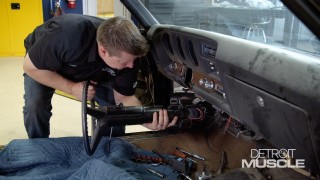
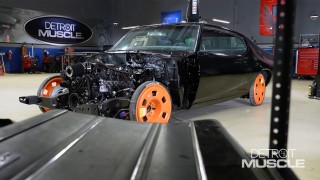
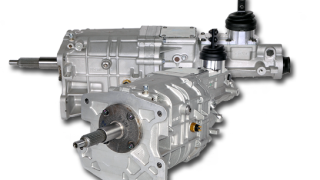
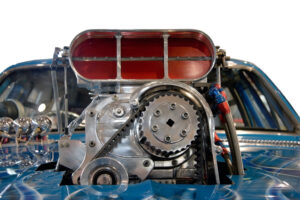
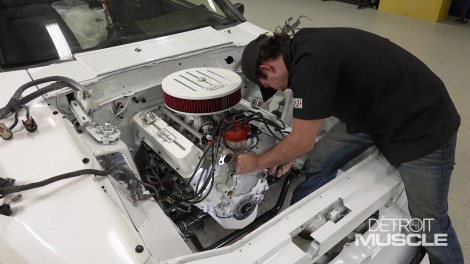
Detroit Muscle Featured Projects

Detroit Muscle Builds

Parts Used In This Episode

Vintage Air
Alternator
Vintage Air
Chrome Plated Timing Cover
Vintage Air
Compressor
Vintage Air
Condensor Kit
Vintage Air
EVAP Kit
Vintage Air
Power Steering Hard Link
Vintage Air
Power Steering Hose Kit

Video Transcript

[ Tommy ] You're watching Powernation.

[ Tommy ] It's time to grab the clutch and downshift as this Fox body gets the heart it was meant to have today on Detroit Muscle. [ Music ] [ engines revving ] [ Music ] [ Tommy ] Welcome to Detroit Muscle. Today our subject is all on this old Fox body. Now Peyton's worked pretty hard to convert this thing into something to talk about. If these things pique your interest it's gonna be a good day. We're dropping in that stroker small block and converting it over from that little ole slush box automatic to what this thing really should have came with. Oftentimes with a ride like that the primary goal with it is to simply have a good time and I am definitely all about that. We're gonna be installing this TKX that we got from American Powertrain. This thing has a lot of benefits to it, and one of the main ones is the overdrive. It gives us the opportunity to stretch that thing out on the interstate with the r-p-ms relatively low. The main thing for me about this whole install is adding this right here, a stick in it. Keeping both hands, both legs busy, umm hmm, definitely sounds like fun. Or as you Canadians would say, that'd be pretty sweet, eh? With our car being factory automatic it only has an accelerator and brake pedal, and we're gonna have to add this third one. Now originally these cars have a completely different unit than this right here. From the factory these cars have a plastic quadrant that has been known to break whenever you combine it with a high performance pressure plate. They just can't hold up. They also have a cable in them, and those also will give you some problems. The balls on each end will pull off it and they've been known to stretch. Going with this hydraulic unit is a far superior piece. Not only will it give you smoother operations but it'll give you a longer life as far as the assembly goes. I'm also gonna tell you with this piece it's pretty sweet as far as putting it in the car. It's already been engineered and there's really no fabrication that's required. Plus the math as far as figuring out your pedal ratio is taken care of as well. [ Peyton ] Before we can go in with the new we've got to go out with the old, and this shifter is first on the chopping block. Then we're gonna throw out this seat, give myself a little more room to work on that factory pedal assembly. [ Music ]

[ metal clanging ] [ Music ]

[ Music ] [ metal clanging ] [ Music ] [ Peyton ] We got our brake bracket out of the car but before we install our new clutch assembly I'm gonna throw it in the sand blaster and knock some of this rust off and get a coat of paint on it. [ Music ] [ spray gun hissing ] [ Music ]

[ Peyton ] So the shaft part of the rotating assembly will actually slide through the bigger hole on the mount, and it's got some nylon bushings that kinda take up some of that slack. Without it kinda got a lot of wobble. With it nice and tight. Then you've got this plate. [ Music ] That's notched to go around this bolt. That's got a bolt that goes in the end here. [ Music ]

Got another one that goes through and mounts all the way through with a nut on the inside. [ Music ]

[ Music ] Now this is actually the piece that the pedal will mount on. Got a lock nut on the end, a nylon washer, and then it's got this square grooved washer that fits into the clutch pedal itself, another one, and then another nylon. [ Music ] Next we'll throw on this spring, and this is actually what returns the pedal to the rest position after you shift a gear or start the car. Then we can throw on our washers. Now we're ready for the pedal assembly. With this being a hydraulic clutch we've got this extra bracket. It will bolt on here kinda using the factory large bolt for your brake booster in the back and then this smaller bolt that just comes through the inside of the pedal bracket here. [ ratchet clicking ] [ Music ]

[ Peyton ] Well I got the pedal bracket reinstalled and all that's left is a little bit of tidying up, but I'm sure you don't want to watch me do that. So I'll get it knocked out and I'll see you in a minute. [ Tommy] Coming up, this Mustang is about to get five speeds of race ready.

[ Tommy ] Hey guys, welcome back to Detroit Muscle. Today's the day that we finally get to drop our stroker motor off into our Fox body, and we're pretty jazzed about it because this thing is gonna go above and beyond giving that plenty of motivation. [ Peyton ] If you'll remember, the guys over at Engine Power built this Windsor. With a 10.32 to 1 static compression ratio this baby puts out 617 horses and 537 foot pounds. Then we came in to paint and fuel inject this puppy improving the performance and ensuring it lasts in any condition. [ Music ] This race ready engine deserves better than an automatic. [ Tommy ] Before we get too carried of shoehorning that small block into our Mustang we've got a little bit of work that we need to do. We need to install our Pro Twin dual disc clutch setup that came along in the kit that we got from American Powertrain. It's designed to hold 1,100 pound feet of torque and it comes fully balanced. It fits any 26 spline Tremec transmission, and it's also designed to have smooth and quiet operation without that twin disc rattle. Remember, to install all this stuff there's a few steps that's very important. In the past we have shown you in detail how to go about installing a setup like this. Ford, Chevy, or Dodge, it's all basically the same. Just different size bolts. There are several parts and an order of assembly. If this is your first time don't sweat it. Really it's not all that complicated. Just pay attention to what you're doing and double check your measurements and you'll be smooth shifting before you know it. Everything checks out and we're ready now to go ahead and slap in our transmission onto the bell housing. However we're gonna do things different than sometimes we've done in the past. What we're gonna do is leave this off and just put the engine with the bell housing on it over into the Mustang. If you remember back when we pulled the engine out originally it was at what some could call an extreme angle. Peyton's done a lot of work back there making sure that engine bay looks really nice, and I don't want to chance scratching it up. So that's the reason we're going this route. The motor will go in, and then later this thing will come in from under the bottom. [ Music ]

I've installed quite a few of these things over the course of a couple of years and I'm a big fan because there's a lot going on in this little bity package. I've mentioned earlier that if you've got an old car these sure do make it a lot more friendly adding that overdrive but there's also other benefits. One, if you really like to crank up the r-p-ms these will give you smooth shifts up to the 7,500 range. Plus they come in different ratios. What we've got to do now is take our release bearing off of here. Then slide your hose and all back through the bell housing. Once we get that input shaft up close and starting to go through the bell housing we'll have to slide this release bearing back on to it. Also another little helpful thing is to make sure the opposite end of this, meaning the hose where it connects to that bearing, make sure it's tight. Otherwise you're gonna be working off into the bell housing and that's not much fun. [ Music ] If all goes well this will simply just slide into place. It may take a little bit of wiggling, which is expected but you don't want to like fight it. [ ratchet clicking ] [ Tommy ] Now we're using these bolts to actually draw the transmission to the bell housing. I'm not putting any pressure on it. If you'll notice whenever I was cinching them down it just went in real easy. That's all you're looking to do. [ Music ] Now we're ready to install our transmission crossmember, and this thing has a lot of adjustability to it cause it's designed to fit numerous transmissions. It also has a much higher arc here in this little brace. That gives us more clearance for those big tubes that are gonna be heading towards the back. Now if you wanted to move your engine around, slide it back, this thing gives you the ability to do it. All you have to do is rearrange your bushings and you're good to go. [ Music ]

[ Music ]

[ drill humming ] That's gonna be nice! [ Peyton ] Coming up, we'll take a look at an experimental piece of muscle car history. [ Todd ] You see it you'll buy it. Went and looked at it and bought it the next day.

[ Tommy ] When it comes to muscle cars people tend to only think about the ones made by the big three, Ford, Chevy, and those Mopars. But they weren't the only ones to build domestic muscle back in the day. There was another company that had an offering and it was all about the red, white, and blue, the American Motor Company. [ Todd ] You can drive these cars with three fingers. Three, four inches either way makes a world of difference right now. [ Tommy ] Meet Todd Harrison and he's talking about a '69 American Motors Experimental. Most muscle car enthusiasts will think big three when you ask them what is their favorite ride, but not Todd. He is AMC all the way. This is one of the four American Motor cars he has parked in his garage. This big, bad blue '69 was love at first sight for Todd. [ Todd ] A bunch of parts came available and my buddy Tim Kemp was telling me about it. He said you see it you'll buy it. Went and looked at it and went and bought it the next day. [ Peyton ] This rare AMX has a little over 29,000 ticks on the odometer and it's in great shape. After Todd bought the car in '07 all it needed was a little engine work. Some guys might lock this car up and start pulling out the mothballs after this sort of find but not Todd. He bought this car for the go, and with a 390 under the hood it's got plenty of it. [ Todd ] When you're accelerating in any way it just gains so much speed so fast. Give it a little a bit of gas and you're really moving before you know it. This shouldn't be this fast already! [ Tommy ] The Borg Werner T-10 four speed backs up the 390 and dual torque links coupled with a posi rearend makes sure all that power makes it to the asphalt. With a wheelbase and overall length exactly 12 inches less than its big brother the Javelin the AMX was made to race. The shorter wheelbase allowed tighter handling through the windy roads that Trans Am racers were constantly subjected to. [ Todd ] It's also comfortable to drive on the interstate. It's a good all around vehicle. [ Peyton ] The outward styling of these cars screams AMC. The front bumper was painted to match the rest of the car in '69 but was changed to chrome in '70. The sloping hatchback design keeps the car's aerodynamics in check and out back AMC kept it simple with more paint on the bumpers and limited badging. [ Tommy ] As if these cars don't already stand out in a crowd AMC decided to make three big, bad colors in '69. 284 were big green, 283 are big orange, and only 195 were made in Todd's big, bad blue. The stripe that runs over the top indicates that this is a Power Pack car. This option was only available in the 343 or 390 AMX, and it included power disc brakes, red line tires, twin grip axle, and 140 mile per hours speedometer. [ Peyton ] The insides of these cars are downright small. Two bucket seats up front and that's all she wrote. The gauges are oversized and easy to read, and every AMC has a dash plate with the unique production numbers. There's a lot of things that can be said about a '69 AMX but Todd likes to keep a simple philosophy on his. [ Todd ] Wrench, wash, and enjoy. [ Music ] [ Tommy ] If you like American Muscle and want to stand out an AMX may be your ticket to grab the attention that you need. [ Peyton ] Up next, this ice cold Mustang gets its cooling factor.

[ Peyton ] Welcome back to the shop. As you can see we've got a mess of bright work to add a little bit of shine back in our engine bay. After that we're gonna be bringing the cool factor back with a new a/c system from Vintage Air. First we've got a couple of old things we need to get yanked out before we can get started. [ Music ]

With the remnants of our old belt drive system removed we're ready to start installing our new front runner kit from Vintage Air. Now it sports this chrome plated timing cover, a shiny new compressor, as well as an alternator featuring that classic Vintage Air logo. So I've gone ahead and put a little bit of black r-t-v around the inside face of the gasket. That way it helps it stick to the cover while I slide it on. [ Music ]

[ Music ]

I'm ready to start installing some of our pulleys, starting with the power steering. This takes a special tool, not just a hammer. You don't want to beat this on cause it can mar up the inside of it. If you don't have this tool you can always rent one at your local auto parts store. [ Music ]

[ Music ]

Not only did Vintage Air send us a new belt drive. They also sent us a complete new a/c kit. This system comes with everything from the evap, the condenser, all new ductwork under the dash, as well as the plumbing that goes under the hood. Before I can get this new system in the car I've got to get the old one out because it's junk. [ Music ] Before the new evap box is ready to go under the dash I've got to install the new heater core hardlines as well as the new mounting brackets. With these heater core hardlines they supply a little bit of mineral spirit oil just to lube the O-rings so you don't pinch them when you're tightening it down. When you're installing these hardlines it's really important to make sure that the O-ring surface is flat so that you don't distort the O-ring and have leaks. [ Music ]

When you're tightening these down you want to make sure that you don't overtighten them cause then you could actually blow out that O-ring and cause a leak. Now our mounting bracket will be mounted with the four supplied screws. Two on this end and two on this end. [ Music ] So I'll use the firewall cover to make sure that the heater hardlines are lined up centered in the holes so that when it goes through the firewall everything matches up. Everything looks good to me. Ready to move on. [ clicking ] [ Music ]

[ Music ] [ Peyton ] I just finished installing the main harness in the car. Now the evap is ready to go into its final home. Few little more plumbing bits to get done and it'll be right as rain. As I put the new assembly in these two heater hoses will poke through these holes right here in the firewall. [ Music ]

[ Music ] I've got a few more a/c lines to run, a little bit of ductwork, and I've got to get our new compressor put in, but we're about out of time for today. I'd say we got quite a bit done. We got our clutch mated to the motor, that motor put in our ride, and we're ready to shift gears with our new five speed transmission. I really hope you enjoyed hanging out in the shop with us today. Until next time thank you for watching Detroit Muscle.
Show Full Transcript