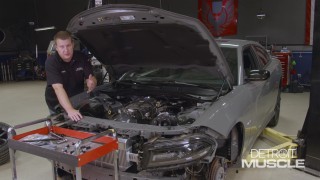
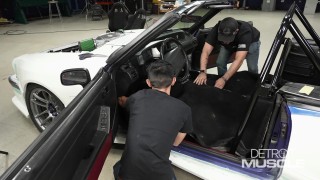
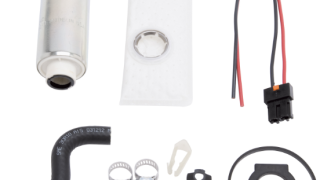
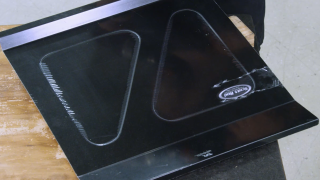
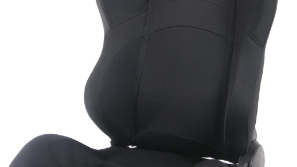
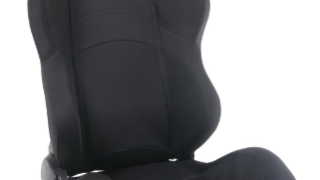
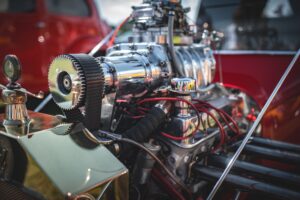
Detroit Muscle Featured Projects

Detroit Muscle Builds

Parts Used In This Episode

Cold-Case Radiators
Radiator
Maximum Motorsports
Steering Shaft
Maximum Motorsports
Street Roll Bar

Video Transcript

[ Tommy ] You're watching Powernation!

[ Peyton ] Today on Detroit Muscle it's what's on the inside that counts. Project Fastlane's interior gets the boost it needs before we dive into the engine bay. [ Music ] [ engines revving ] [ Music ] [ Tommy ] Hey y'all, welcome to Detroit Muscle. We've got our Fastlane Fox body back here in the shop in efforts to keep moving forward. Now Peyton's creation is really coming along. The focus that we're gonna be on today is this inner beauty. [ Peyton ] Tommy couldn't be more right. The outside of this car really has come a long way. It's made a pretty big visual transformation but now the inside's getting a little jealous. We've got a handful of goodies to take it up to the next level. We're gonna start by installing our Maximum Motorsports roll bar. We're gonna go ahead and test fit this. Since this is a weld in or a bolt in we're gonna mark the floor mat here or sound deadening so we can remove it and get a good weld on the floor. [ Niles ] Sounds good man. [ Music ] [ Peyton ] With a little surface prep we're ready to break out the welder. [ welder crackling ] [ Peyton ] With the main hoop installed now we can go ahead and put in the rear support bars, but first I need to put these reinforcement plates in to keep this sheet metal from bending and bowing. We'll just mark it out like, get it ground out, and tacked in. [ grinder humming ] Peyton ] There's another plate that will go on the backside of this panel but in order to get it to sit flush we're gonna have to drill out these rivets. [ Music ] [ welder crackling ] [ Peyton ] I've got our first support bar tacked in and our second one cut to length. We're gonna go ahead and fully weld the bottoms but not the tops. We've got some panels for our rear seat delete that we're gonna cut with a hole saw and actually slide down. Then we'll fully weld the top. [ welder crackling ] Peyton ] So the teeth on a hole saw are actually quite coarse, and aluminum being a really soft material it'll actually cause it to bite down and leave a nasty hole. So a good rule of thumb is to run your pilot bit in and forward, but then when you go to cut your hole run the drill in reverse. The teeth are still sharp enough to cut through the aluminum but it won't mar it up. [ drill humming ] [ Music ] [ Peyton ] Obviously it's not gonna be perfect. So come back with a file and just clean up these edges to get rid of any sharp burrs. [ Music ]

[ Music ]

[ welder crackling ] [ Peyton ] With the rear panels in we can finish up the welding and lay down a little black paint. We're ready to put the carpet back in and we're gonna reuse the one that came with the car. It's already got all the cutouts for the seats and the shifter. So it's easier, but we will have to make a few cuts for our new roll bar. Get Niles to help me stretch this out. [ Niles ] Under the dash first, right? [ Peyton ] Yep, nice thing is it's already kinda molded cause it's been in the car. [ Niles ] I think that's pretty close to where we need to be. [ Music ] Is it close? [ Peyton ] Yeah it's pretty close. [ Music ] It's time to finish up our rear seat delete. We'll be using these support pieces that go in the side panels here to hold them up. Just use a self tapper and run them in on the line between plastic and carpet. [ Music ]

We are ready for the lower seat delete panels now that the carpet's back in, and we'll use some Cleco to hold it in place. With the interior on the Mustang about wrapped up we've got to have somewhere to sit. So we picked up these seats from Summit Racing. They're a race style seat featuring harness holes and bolstered sides but they also recline and have adjustability forward and backward. To get them in the car we needed some adapter brackets that we also got from Summit Racing. They are specifically for our Mustang. All that's left is to get them bolted in. This kit comes with a square headed bolt that slips down in the tracks. [ Music ] Then just bolts right onto the new adapters. [ Music ] [ ratchet clicking ] [ Music ] [ Niles ] Seat delivery for Peyton Pittman. [ Peyton ] Cool, let's get this thing slapped in here. [ Niles ] Alright, guide me in. [ Music ] [ Peyton ] Use these bottom holes on the thing here. [ Music ]

[ Niles ] Feels nice actually! [ Music ] [ Peyton ] Up next, we're turning up the heat to cool this horse down.

[ Peyton ] Well we've made quite a bit of progress catching the interior up with the exterior, but this ratty old steering wheel has got to go. The top of it's worn out from years of use. Plus it still has the cruise control, which we no longer have that option. [ Music ]

With our interior upgrades most of the way done we've got a little bit more buttoning up to do in here but first we're gonna move up under the hood. Today we're gonna be finishing a few things up under the hood like installing our Cold Case radiator as well as a few other components. We're starting with this Duralast a-g-m battery that we found at the Autozone Pro website. We went with an a-g-m battery for its superior starting as well as life cycle. Plus it'll be going in the trunk of the car. So we want a non-spillable battery. Another reason we went with the a-g-m battery is our power demand. We have a lot of extra systems on this car that require their own power, like our e-f-i, our air conditioning, and a host of other sensors. Plus two electric fans. We'll secure the battery with this heavy duty tray and hook up our cables. [ Music ] [ air ratchet humming ] [ Music ]

Well the time has finally come to install our cooling system. We're gonna start with this four core radiator from Cold Case. I believe we're gonna have to custom fab a holder for the top. So we'll get started on that. First I'm gonna hold it in with some zip ties. We'll start by making a few measurements. Then we can get going on fabbing up our mount. [ Music ]

I went ahead and sheared the piece that we're gonna be using for our radiator support, but before I put it in our brake I'm gonna throw a little bit of masking tape on it to keep from getting any scratches on it. [ Music ] Now that I've got the face side protected I can go ahead and lay out my bends and get them broke. So this first brake line will be the hook that actually hooks onto the front of the car. Then we'll bend it to a 90-degree angle. Then our next brake will jump us up to the radiator, and our final brake we'll be coming down on the back side to capture the radiator in. [ Music ] Without access to a brake you could use the edge of a work bench, a two by four, and some C-clamps. [ Music ]

Good 90 there. We got our first bend and now we just have to mark out our other two and make sure that we keep the right distance for the radiator to fit in. [ Music ] I'm gonna make my inside bend first instead of the outside because if I make the outside then it won't fit back in the brake. [ Music ] We'll we've got our cover fabbed up and all that's left is to get it attached. I think I'm gonna use a few nut-serts in the front and a couple of bolts. Then we'll put some rubber of some sort under it to cushion it from rocking back and forth. [ Music ]

The next step is to install our steering shaft that we got from Maximum Motorsports. We've got to have something to connect our pretty new steering wheel to the steering rack. [ Music ] This steering shaft is a heavy duty factory replacement that gets rid of the rag joint. [ Music ] Well we've made some pretty good progress on our Mustang's engine bay. A few more things and she'll be ready to rip and roar. If you like 119 miles an hour in a high dollar hot rod you're gonna like what we've got next.

[ Peyton ] When it comes to our Mustang we've got one thing in mind, and that's going fast, but we won't be taking ours to the strip any time soon. Dodge had similar ideas when they introduced their Coronet. [ Tommy ] That thing got a Hemi? Yes it does. The year was 1965, and Chrysler offered its infamous engine to the public for the very first time. To get one though you had to fork over and $1,800 bucks and sign away your warranty. [ Peyton ] That's cause this engine was in full race tune. Built to power Dodge's factory modified Super Stock Coronet. A car designed with one thing in mind, to win at the strip. [ Tommy ] Well that's exactly what Harmon Friend was looking for back in '65 and he was one of the lucky few to get his hands on one. [ Harmon ] The surge of power in this thing feels like you're getting shot out of a canon. [ Peyton ] He raced Harm's Way all over the mid-west drawing lots of attention with his roller skate wheelie bars. His goad was to break a record, and he promised his wife he'd sell the car as soon as he did. [ Tommy ] The Hemi found its way into the Coronet when Nascar banned the engine after Dodge used it to completely annihilate the competition in the '64 season. Chrysler packed up its things and poured all its resources into drag racing. [ Peyton ] The Coronet was Dodge's new mid-size model, and a perfect fit for the 426. Only 101 units were built to meet the NHRA quota. Dodge did everything they could to lighten the car while still sticking to the new Super Stock rules. [ Music ] [ Tommy ] That meant no aluminum bodies or Plexi-glass windows. Dodge had a few tricks up its sleeve to get around all that, like acid dipping the fenders and hood, and using thinner glass for the windows. [ Peyton ] Even the race Hemi got the weight loss treatment of cast aluminum cylinder heads and a magnesium intake. [ Tommy ] Then they went to work hitting the delete button. Inner headlights and right had wiper delete, rear seat delete. Visor, dome light, coat hook delete. Radio and heater delete. They even got rid of the parking gear. [ Peyton ] Yeah, and notice the reverse pattern, RN-1-2-D? That's so you could shift from first to second, to drive without accidentally throwing it into reverse. [ Tommy ] Plus the tranny had a high stall torque converter to feed the r-p-m hungry Hemi. The setup was nicknamed Dial A Win cause it was so dang dependable on the track. [ Music ] [ Peyton ] Dodge dominated the strip that year with Bob Harp's Coronet winning the NHRA Nationals. Harm raced his car for four years until he set an AHRA class record of 119 miles an hour at Norwalk Dragway. He kept his word and sold the car never thinking he'd see the car again but history had something else in store. [ Harmon ] Over a year ago I got a phone call. He says you don't know us. We know a little bit about you. We have your old race car. I thought to myself what? [ Tommy ] The car had been found and brought to Danny Proctor, who had it restored by the guys at Pro Classics. [ Matt ] We started with a really big bucket of bolts and transformed it into something really nice after a year and a half of hard work. [ Peyton ] Matt made sure he returned it o-e specs before he showed it to Harm. [ Harmon ] I had tears in my eyes. First time I walked up to it I had tears in my eyes. [ Tommy ] The car that cost him about $4,400 bucks brand new is now worth way more than that. [ Harm ] See I told you we shouldn't have sold this thing! [ Peyton ] While we may not be running a Hemi we still think Harm would be pretty proud of our rad ride. This Mustang's fuel system is still stuck in the '90s. We can fix that coming up next.

[ Peyton ] Welcome back to the shop. Today it's all about fuel. Now this old system doesn't quite support the 600 horsepower that our car's making now. So we've got a new kit from back to front that'll get the fuel at a higher volume. [ Music ]

Hey Niles, would you mind bringing in that jack so we can support this tank? [ Niles ] Got ya! [ Peyton ] Running that up. Gonna get it up and bolted. [ Music ]

[ Niles ] So we done with this tank? [ Peyton ] We're done with the tank but we're just gonna reuse the sending unit as well as the vent. Put them in our new tank. I'll get started doing that if you want to pull those old fuel lines out. [ Niles ] Sounds good! [ Music ] [ Peyton ] Niles and I are doing a little divide and conquer on the fuel system. The old lines were rusty and weak in a few spots, and the tank had some rust in the bottom. I definitely say I got the easier job this time. [ Music ]

[ Music ] [ Niles ] First thing that we're installing in our fuel system is this pre-filter, and this is the original bracket but this is a new filter. I did have to modify the bracket a little bit but this should work fine. [ Music ] [ air ratchet humming ] [ Niles ] Up next we're installing this inline fuel pump. This flows 255 liters per hour and will support up to 600 horsepower. I'm gonna mount that right here on the lower frame rail, and this is perfect location because we have our fuel filter right there and this gives us a straight shot to the front of the vehicle. I'm marking the two mounting holes and drilling with a three-eighths bit. And pressing in a riv-nut and two quarter inch bolts hold everything in place. [ Music ] Alright, tilt it to your side. [ Music ] You good? [ Peyton ] I just gotta pull this filler neck down some. We are in. [ Music ] [ Niles ] That bolt's gonna fall in your eyeball. [ Peyton ] What is your major malfunction? [ Music ] [ Niles ] Like Atlas supporting the world. [ Music ]

Right there on the diff cover. [ Music ] [ Peyton ] While Niles does the heavy lifting I start reinstalling the tank straps and bolts. That is if I can find my tools. [ Music ] [ Niles ] Ugh, a spider web. [ Music ] [ Peyton ] One of the bolts decided to give us a little trouble, but with a little elbow grease we got it done. No, it's going into it. [ drill humming ] [ Peyton ] Come on! [ Music ] [ air ratchet humming ] [ Music ]

[ Peyton ] This Edelbrock fuel system comes with everything needed to plumb your ride. It has a new inline fuel pump as well as pre and post pump filters. [ Music ] This kit also provides new supply and return lines and all the fittings to hook it up. [ Music ]

[ Music ] I'm gonna poke a hole here in the fender liner so we can run our fuel lines in. Then install a grommet to keep them from rubbing and we'll be good. [ drill humming ] [ Music ]

[ Peyton ] The final part of our Edelbrock fuel system is this e-f-i regulator, which we're gonna mount to the firewall using the supplied bracket. [ Music ]

We had to do a slight modification to our regulator mount to make it fit our application. Then we can get our fitting screwed on. [ Music ] With a little help from Niles we got a lot accomplished today. Got the interior back in the car, a little work done under the hood, and our fuel system run. That's all I've got time for today. Thank you for watching Detroit Muscle.
Show Full Transcript