Engine Power Featured Projects
Engine Power Builds
Want more content like this?
Join the PowerNation Email NewsletterParts Used In This Episode
ARP
ARP Fasteners
Holley
Holley 750 CFM Brawler Dyno Carburetor
Holley
Holley Sniper Nitrous System
Matco Tools
MATCO Tools are the Official Tool Supplier to PowerNation
The Industrial Depot
Tools, Hardware, Shop Supplies
Video Transcript
(Pat)>> You're watching Powernation!
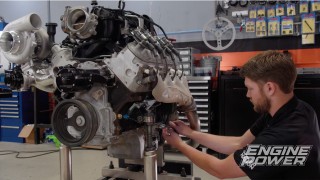
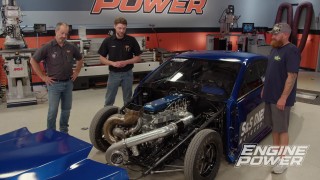
(Pat)>> We found this 302 small block Ford hidden away in the corner of the building. We don't know anything about it but we're gonna fill it with parts we've got lying around the shop and see what happens. [ MUSIC ]
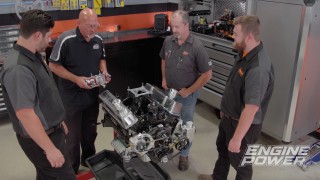
(Mike)>> Hey everybody. When Pat and I got to the shop this morning we had to switch gears on a project we originally had planned because we're waiting on parts for it. So we took a little walk around our shop and found an engine that was stashed with all the others. Now really don't know anything about it except it came from one of the other projects in the other shows, and it seems to have very little run time.
(Pat)>> Being it's just a short block we need some parts to get this engine running. So we searched around on the shelves and we think we have enough parts to get it together, and maybe even do a little bit of tech with some different intake manifolds and cam shafts. So we decided to call this Scavenged Small Block Ford.
(Mike)>> Some of these parts are leftovers from other projects that were not used or new parts that have been floating around for a while. We're not going to get everything done today but here is what we will be doing to this engine over time. It will get a couple of different flat tappet cam shafts. We'll show the difference between a standard manifold and a high ram, which we are excited about, and even swap out a carburetor for e-f-i. This engine has a little something for everyone even if you are not a Ford guy. It's all tech that can be used on any engine.
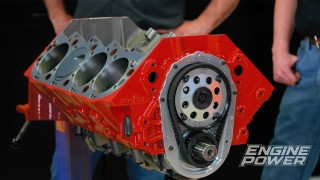
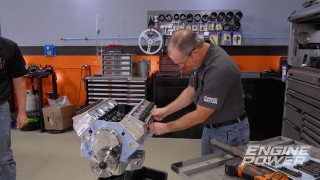
(Pat)>> This block's casting number is an E-7-TE, making it a 1987 model. It's been bored and honed 40 thousandths over and has a cast piston that is 28 thousandths in the hole. It turns over nicely, and by looking at it we think it has only been started and ran for a couple of minutes. It's missing some crucial components like the cam shaft, valvetrain, and the rest of the induction. So let's get it together so we can start some dyno time. Having one that you don't know anything about to me is kinda fun.
(Mike)>> Yes.
(Pat)>> The FE was like that, the 300 was like that.
(Mike)>> The 5-3 LS we got.
(Pat)>> You don't know what's been done. This one has ran for like...
(Mike)>> That's what puzzles me about it.
(Pat)>> It ran, now it's apart.
(Mike)>> This is how clean it was when...
(Pat)>> This was some sort of either crate engine. I don't know what it is. [ MUSIC ]
(Mike)>> There's not much oil in the engine but the little that's in there looks good. The rotating assembly turns over easily with no binding or interference, another good sign.
(Pat)>> We're gonna scrape off the gaskets. [ compressed air hissing ]
(Pat)>> Blow out the debris, clean the cylinders with some lacquer thinner, and continue with the build.
(Mike)>> We're using what we have. So that's why we're running a flat tappet cam shaft. This first one we will use is for a Windsor and is pretty mild. It has 213 degrees of intake duration and 219 degrees on the exhaust at 50 thousandths lift. Lift at the valve with a 1-600 rocker arm is 483 on the intake and 499 on the exhaust. Lobe separation angle is 112 degrees.
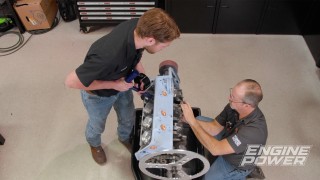
(Pat)>> A factory cam retaining plate keeps the cam in place. This timing set was in an oil pan in our parts cage. After a little searching we found out it's a Summit Racing heavy duty double roller with an iron gear and sprocket. It is not adjustable. The cam was degreed and it comes in 105.5 degrees intake centerline, which is 6.5 degrees advanced. Remember it has 112 degree lobe separation angle. The pan that we removed was not the correct one for the pickup that is bolted to the oil pump. So a bonus scavenger hunt ensued and it led us to the correct Canton pan. It has oil control baffles and a built in crank scraper.
(Mike)>> Before it goes on the timing cover needs to be installed. Now a Canton one piece oil pan gasket is laid down. It has compression stops to ensure the pan is not overtightened. Finally we can seal up the bottom end by setting the pan on the block's pan rail. Our go to fasteners will cinch it down, none other than ARP's. We had some good gaskets on one of the parts shelves and a set of inexpensive aluminum heads. The gaskets are our favorite, Cometic MLS'. These have a 27 thousandths compressed thickness and 4.155 bore.
(Pat)>> The cylinder heads are made by Flowtech. They are designed for entry level street performance. These are the 180cc intake version. They have a 58cc combustion chamber and a 62cc exhaust port volume. Valve sizes are 1.940 on the intake and 1.550 on the exhaust. You can get a set for less than $900 bucks for the pair at Summit Racing. We even flow tested them and Flowtech's numbers are accurate. A spark plug is a spark plug right? You wait and see!
(Mike)>> How to check push rod length is the subject of today's tech tip.
(Steve)>> Push rod length is critical to valvetrain geometry. Things like rocker arm type, block height, milled cylinder heads, longer valves, and camshaft base circle can alter push rod length from factory dimensions. Trick Flow's Pro calibrated push rod length checkers are among the most accurate available. Each full rotation equals 500ths of an inch of length. Grooves are placed every 500ths of an inch on the inner sleeve, and a laser etched alignment line on the body identifies the position of each rotation. Here's an example of using a pro calibrated push rod checker that measures length from 6.8 inches to 7.8 inches. Twist the checker apart one full rotation. The length increases to 6.85 inches. Trick Flow pro calibrated push rod length checkers are available in multiple length ranges.
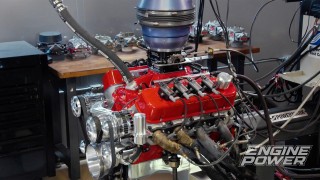
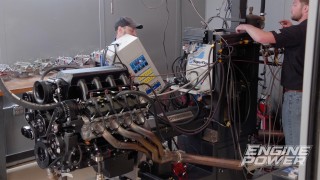
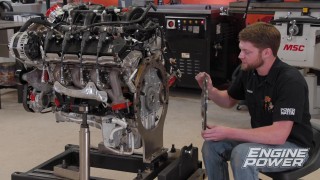
(Mike)>> We're in the dyno room to revisit a cool little build we did a while back. Now it was a true salvage yard refresh using minimal parts to bring a worn out engine back to performance level potential. Now we ball honed the cylinders, replaced the lifters, the cam shaft, and the main bearings only. Then we strapped it to the dyno. With a dual plane manifold and carburetor bolted up here's the results of our low buck Vortec refresh. [ engine revving ]
(Pat)>> According to what you might read on the internet the stock LS short blocks are good to around 1,000 horsepower. So we thought it would be fine to spray it to lay down some big power and torque numbers. Here's what happened. [ engine revving ]
(Mike)>> We're going to use this engine as a test bed to do a little scientific testing. Now we want to see if we can pull more power and efficiency out of this engine by changing 8 small parts that don't involve cracking it open.
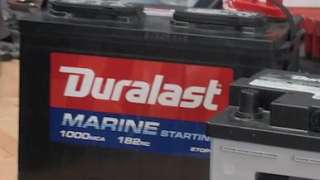
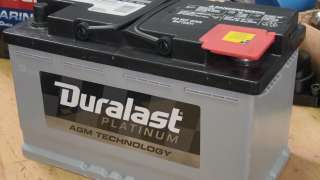
(Pat)>> For the last few years we've had the same battery installed in our dyno room, and what it does is power all of our 12 volt sources like our starter, our ignition box, and our switched and constant 12 volt power sources, but like everything else a battery has a service life. So before we get started today we are going to install a new one. The Duralast name comes to mind when it's time to buy a new battery. They have a bunch of different applications for different purposes, and this Pro Power AGM is a beast. AGM stands for absorbed glass mat, and this battery is designed to provide big starting power. It has advanced technology for vehicles with accessories that demand greater power. Another feature it has is deep cycle capabilities. It also cycles more and recharges faster. It has two times the cycle life of a conventional battery. This one has 850 cold cranking amps at zero degrees and 1,000 at 32 degrees. Since we need a marine style terminal for the dyno connections we decided to order this Duralast Marine starting battery. It has 1,000 cranking amps as well and will give us years of worry free service just like the last one.
(Mike)>> Now it's time to get started with the testing. Finding the power and efficiency I mentioned earlier will be based strictly on changing the spark plugs. Now for the baseline pulls we're gonna run a factory replacement AC Delco plug. So let's get started.
(Pat)>> Now this engine currently has 30 degrees of ignition timing and it's running on 93 octane pump gas, but we did change out that dual plane intake for a single plane one and topped it off with our QFT Black Diamond 950 c-f-m carb. So it's time to listen to this thing make some power. [ engine revving ]
(Pat)>> Look at that, 399.9. I'm gonna go ahead and call that 400.
(Mike)>> I would give it that.
(Pat)>> That's nice and smooth.
(Mike)>> Good torque.
(Pat)>> Good everything, look how smooth the graph is.
(Mike)>> Let's back it up. [ engine revving ]
(Pat)>> It actually made a little bit more, 403.
(Mike)>> Broke the 400 mark.
(Pat)>> Must have got a good molecule of air go through it.
(Mike)>> I say that's a very good starting point for what we're gonna do. That's the AC Delco stock replacement plug. Now we're gonna put an E-3 54 in this thing.
(Pat)>> And we're gonna see what it does now. With the Diamond Fire technology hopefully it'll increase a little bit of combustion efficiency, might make a little more power. The efficiency is the big deal. It's how much fuel it uses. If it uses less fuel and makes the same power it's more efficient combustion.
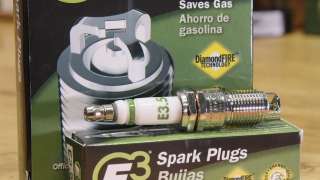
(Mike)>> Here's a look at a cutaway E-3 plug, the plug that's going in next, and the AC Delco we just made pulls with. Notice the ground strap design on the E-3 compared to the AC Delco. The E-3 plug utilizes a patented edge to edge electrode, which is the best way to direct a spark as it leaves the electrode surface. The results are better combustion for more efficiency, which should result in more power. Let the second part of the test begin. [ engine revving ]
(Pat)>> 390, 408!
(Mike)>> 408!
(Pat)>> 408 for peak, wow! I'll tell you the truth that's more than I expected.
(Mike)>> That is impressive.
(Pat)>> Before we look at anything else make one more run just to verify that number.
(Mike)>> If that's the case I'm going to buy a set today and put them in my truck. [ engine revving ]
(Pat)>> Yep 406, 390, okay. I'll take that. That's 100 percent legit.
(Mike)>> Back to back runs. Alright I'm gonna shut this thing down. Let's look at some data. With the AC Delco plugs the Vortec average 401.5 horsepower and 382.5 pound feet of torque. With the E-3 plugs the average was 407 horsepower and 390 pound feet of torque. That's an average gain of 5.5 horsepower and 7.5 pound feet of torque with the E-3 plugs.
(Pat)>> Average fuel consumption in pounds per hour was almost identical with the AC Delco and E-3 plugs, but since the E-3 plugs made noticeably more horsepower and torque they clearly have better combustion efficiency.
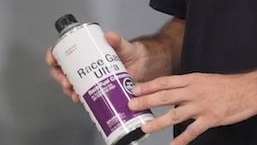
(Mike)>> We used nitrous on this engine before and we want to do it again. We're installing Holley's Sniper nitrous system and put the 210 horsepower jets in. We're installing some colder range E-3 108 plugs to accommodate the extra cylinder pressure. Since we're going to have some fun with nitrous we want to make sure we have excellent fuel to avoid any issues. So we're going to mix some of our 93 octane pump gas with Race Gas Ultra, which is an additive that'll increase the octane rating by 4 points. Race Gas Ultra is designed for high compression, boosted, or nitrous engines. When mixed with pump gas it will create a 108 to 112 octane race fuel. Not only does it increase the octane, it also increases the chemical oxygen and chemical energy to equal commercially available distilled race fuels. It's being mixed to create 112 octane race fuel. So we will pour in one can in four gallons of 93 octane pump gas. [ engine revving ] [ MUSIC ]
(Pat)>> 633 horse, 726 pound feet of torque.
(Mike)>> Dude this is a true junkyard refresh. I don't like making pulls on this thing that way with the nitrous. I just don't like being the guy pushing the lever.
(Pat)>> I like you being the guy. To make sure we didn't hurt this junkyard Vortec with a big shot of nitrous we made several N/A runs. The engine performed flawlessly. [ engine revving ]
(Pat)>> Up next the small block Ford gets a new valvetrain and induction. Then we see just what this mystery engine can do.
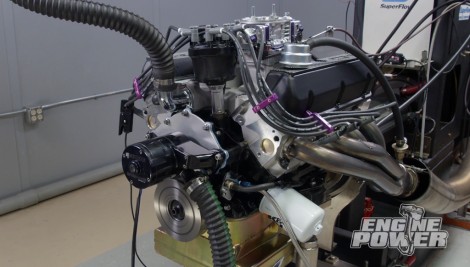
(Pat)>> We're continuing the build of our 302 small block Ford focusing now on the valvetrain. These are stock replacement hydraulic flat tappet lifters, which are installed after they're coated with cam shaft specific break-in lube. The lube helps the cam and lifters establish the correct break-in pattern. When installing the lifter make sure the bore is clean and the lifter is free to rotate. The push rods are Comp chro-moly ones with a five-sixteenths diameter, 80 thousandths wall thickness, and a total length of 6.750. [ MUSIC ] Finishing up the valvetrain is a set of 1.6 ratio roller rocker arms. The valve adjustment is one half turn past zero lash. [ MUSIC ] To seal the intake manifold we're using Permatex's The Right Stuff One Minute Gasket Maker. Unlike other products with a 24 hour cure time it lets you return your engine to service immediately. The intake manifold is a Weiand Street Warrior dual plane that was in a pile of old parts. It's a solid choice for a street machine setup. [ MUSIC ] A set of cast aluminum Ford Racing tall valve covers seals everything up. We found them next to the short block and thought they looked racy. So on they go. Keeping the water circulating is our Maziere electric water pump. It's a mainstay in our dyno cell. [ MUSIC ] Now we're off to the cell block where we'll complete the engine with everything to get it running, which includes our 750 c-f-m Holley Brawler dyno carb, an MSD Pro Billet distributor, MSD's 8.5 millimeter superconductor wires, along with purple wire separators for a touch of panache, and Trick Flow one and seven-eighths primary mid length headers. Because this engine has a flat tappet cam shaft we have to do a break in cycle with it. Normally you don't have to do that with a roller cam. This one's a flat tappet. So we have to run the engine, it has to start immediately, and vary the r-p-m between 2,500 and 3,500 for around 15 minutes. That establishes wear patterns on all the parts, and then we will drain the oil, check the filter, and then we're ready for some dyno, but first we do have to break it in. Our Superflow Power Mark has some extraordinary capabilities, like having a break-in cycle where we can program the engine to run at our specified range for however long we want. We did two sets of 50 cycles between 2,500 and 3,500 r-p-m at partial load. Then we drained the break-in oil and checked it and the oil filter for any sign of engine damage like debris or water. Looks clean! [ engine revving ]
(Pat)>> Up next we have some fun in the dyno cell. Plus we clear up a common misconception about carburetors.
(Pat)>> Alright we are all systems go to start making some pulls. Now what we're gonna do is I'm gonna start at 30 degrees timing and I'm gonna go from 2,500 to 5,500 at 600 r-p-m per second to see if it keeps its guts. [ engine revving ]
(Pat)>> A little chunky. 335 pound feet of torque at 3,800, not bad, 297.9 horsepower at 5,300. After some more pulls and some timing adjustments we ended up at 36 degrees total timing. Condensation on the outside of the carburetor is normal. It stems from the cooling effect of the fuel passing through the venturi. [ engine revving ]
(Pat)>> 337 pound feet of torque and 323 horsepower, that's decent. I figured this one would make in the mid-320's with that cam. So it should be interesting to see what it does with a different one. Our second hydraulic flat tappet cam is definitely more on the racier side of the street. Duration at 50 thousandths lift is 234 degrees on the intake and 244 degrees on the exhaust with 114 degrees of lobe separation. Lift with a 1.6 rocker ratio is 520 thousandths on the intake and 542 thousandths on the exhaust. Our cam was installed at 112 degrees of intake centerline. Any time you install a new flat tappet cam new lifters are a must. Alright we're all broke in. Timing is right back to where it was, 36 degrees. So this is a direct cam comparison. [ engine revving ]
(Pat)>> She dropped a little bit of torque and dropped a little bit of power, which not surprising. 313 for horsepower, 318 for torque. Now this is pretty interesting. It starts to flat line up top for whatever reason. Now that could be a whole bunch of different things. That could be valve spring, that could be intake manifold because we have a larger cam that's not as advanced as far as where it's degreed in. The smaller cam traps air earlier and it's gonna make more torque. This cam is more suited for a better manifold, which we're not gonna put on right now, but what we can do is put our racy 950 on and just see what it does. We're gonna pull it to the same r-p-m and we're gonna go from there.
(Mike)>> Let's do it!
(Pat)>> The carb swap will increase the cubic feet per minute by 200 but this brings up a common misconception about running a carburetor that is considered too big.
(Mike)>> Pat isn't that gonna flood the engine?
(Pat)>> That is not how that works. C-f-m doesn't flood the engine. Too much fuel floods the engine. Just cause you have a larger carburetor on does not mean it's going to flood the engine, and that's what you have to understand about how barometric pressure works and how your venturi works. How everything that the carb has in it is setup. Alright! [ engine revving ]
(Pat)>> Yeah figures as much. A larger cam that is installed not as advanced as a smaller cam will not build cylinder pressure in the lower r-p-m. That way it works with this dual plane manifold a little bit better. This other cam, which is bigger and racier, where it wants to run it runs on a manifold and you can put a bigger carburetor on it. It didn't flood it. Know what it did, it made more power. So this intrigues me to do even more to this. Put a manifold on it. We need to get some sort of single plane manifold for it. We'll start there and maybe even do a different ratio rocker.
(Mike)>> Success!
(Pat)>> I don't know what we learned but it was fun. If we can dyno engines it's fun and it's a success, especially if nothing comes apart.
(Mike)>> For more information on today's show check out our website at Powernation TV dot com.
Show Full Transcript
(Pat)>> We found this 302 small block Ford hidden away in the corner of the building. We don't know anything about it but we're gonna fill it with parts we've got lying around the shop and see what happens. [ MUSIC ]
(Mike)>> Hey everybody. When Pat and I got to the shop this morning we had to switch gears on a project we originally had planned because we're waiting on parts for it. So we took a little walk around our shop and found an engine that was stashed with all the others. Now really don't know anything about it except it came from one of the other projects in the other shows, and it seems to have very little run time.
(Pat)>> Being it's just a short block we need some parts to get this engine running. So we searched around on the shelves and we think we have enough parts to get it together, and maybe even do a little bit of tech with some different intake manifolds and cam shafts. So we decided to call this Scavenged Small Block Ford.
(Mike)>> Some of these parts are leftovers from other projects that were not used or new parts that have been floating around for a while. We're not going to get everything done today but here is what we will be doing to this engine over time. It will get a couple of different flat tappet cam shafts. We'll show the difference between a standard manifold and a high ram, which we are excited about, and even swap out a carburetor for e-f-i. This engine has a little something for everyone even if you are not a Ford guy. It's all tech that can be used on any engine.
(Pat)>> This block's casting number is an E-7-TE, making it a 1987 model. It's been bored and honed 40 thousandths over and has a cast piston that is 28 thousandths in the hole. It turns over nicely, and by looking at it we think it has only been started and ran for a couple of minutes. It's missing some crucial components like the cam shaft, valvetrain, and the rest of the induction. So let's get it together so we can start some dyno time. Having one that you don't know anything about to me is kinda fun.
(Mike)>> Yes.
(Pat)>> The FE was like that, the 300 was like that.
(Mike)>> The 5-3 LS we got.
(Pat)>> You don't know what's been done. This one has ran for like...
(Mike)>> That's what puzzles me about it.
(Pat)>> It ran, now it's apart.
(Mike)>> This is how clean it was when...
(Pat)>> This was some sort of either crate engine. I don't know what it is. [ MUSIC ]
(Mike)>> There's not much oil in the engine but the little that's in there looks good. The rotating assembly turns over easily with no binding or interference, another good sign.
(Pat)>> We're gonna scrape off the gaskets. [ compressed air hissing ]
(Pat)>> Blow out the debris, clean the cylinders with some lacquer thinner, and continue with the build.
(Mike)>> We're using what we have. So that's why we're running a flat tappet cam shaft. This first one we will use is for a Windsor and is pretty mild. It has 213 degrees of intake duration and 219 degrees on the exhaust at 50 thousandths lift. Lift at the valve with a 1-600 rocker arm is 483 on the intake and 499 on the exhaust. Lobe separation angle is 112 degrees.
(Pat)>> A factory cam retaining plate keeps the cam in place. This timing set was in an oil pan in our parts cage. After a little searching we found out it's a Summit Racing heavy duty double roller with an iron gear and sprocket. It is not adjustable. The cam was degreed and it comes in 105.5 degrees intake centerline, which is 6.5 degrees advanced. Remember it has 112 degree lobe separation angle. The pan that we removed was not the correct one for the pickup that is bolted to the oil pump. So a bonus scavenger hunt ensued and it led us to the correct Canton pan. It has oil control baffles and a built in crank scraper.
(Mike)>> Before it goes on the timing cover needs to be installed. Now a Canton one piece oil pan gasket is laid down. It has compression stops to ensure the pan is not overtightened. Finally we can seal up the bottom end by setting the pan on the block's pan rail. Our go to fasteners will cinch it down, none other than ARP's. We had some good gaskets on one of the parts shelves and a set of inexpensive aluminum heads. The gaskets are our favorite, Cometic MLS'. These have a 27 thousandths compressed thickness and 4.155 bore.
(Pat)>> The cylinder heads are made by Flowtech. They are designed for entry level street performance. These are the 180cc intake version. They have a 58cc combustion chamber and a 62cc exhaust port volume. Valve sizes are 1.940 on the intake and 1.550 on the exhaust. You can get a set for less than $900 bucks for the pair at Summit Racing. We even flow tested them and Flowtech's numbers are accurate. A spark plug is a spark plug right? You wait and see!
(Mike)>> How to check push rod length is the subject of today's tech tip.
(Steve)>> Push rod length is critical to valvetrain geometry. Things like rocker arm type, block height, milled cylinder heads, longer valves, and camshaft base circle can alter push rod length from factory dimensions. Trick Flow's Pro calibrated push rod length checkers are among the most accurate available. Each full rotation equals 500ths of an inch of length. Grooves are placed every 500ths of an inch on the inner sleeve, and a laser etched alignment line on the body identifies the position of each rotation. Here's an example of using a pro calibrated push rod checker that measures length from 6.8 inches to 7.8 inches. Twist the checker apart one full rotation. The length increases to 6.85 inches. Trick Flow pro calibrated push rod length checkers are available in multiple length ranges.
(Mike)>> We're in the dyno room to revisit a cool little build we did a while back. Now it was a true salvage yard refresh using minimal parts to bring a worn out engine back to performance level potential. Now we ball honed the cylinders, replaced the lifters, the cam shaft, and the main bearings only. Then we strapped it to the dyno. With a dual plane manifold and carburetor bolted up here's the results of our low buck Vortec refresh. [ engine revving ]
(Pat)>> According to what you might read on the internet the stock LS short blocks are good to around 1,000 horsepower. So we thought it would be fine to spray it to lay down some big power and torque numbers. Here's what happened. [ engine revving ]
(Mike)>> We're going to use this engine as a test bed to do a little scientific testing. Now we want to see if we can pull more power and efficiency out of this engine by changing 8 small parts that don't involve cracking it open.
(Pat)>> For the last few years we've had the same battery installed in our dyno room, and what it does is power all of our 12 volt sources like our starter, our ignition box, and our switched and constant 12 volt power sources, but like everything else a battery has a service life. So before we get started today we are going to install a new one. The Duralast name comes to mind when it's time to buy a new battery. They have a bunch of different applications for different purposes, and this Pro Power AGM is a beast. AGM stands for absorbed glass mat, and this battery is designed to provide big starting power. It has advanced technology for vehicles with accessories that demand greater power. Another feature it has is deep cycle capabilities. It also cycles more and recharges faster. It has two times the cycle life of a conventional battery. This one has 850 cold cranking amps at zero degrees and 1,000 at 32 degrees. Since we need a marine style terminal for the dyno connections we decided to order this Duralast Marine starting battery. It has 1,000 cranking amps as well and will give us years of worry free service just like the last one.
(Mike)>> Now it's time to get started with the testing. Finding the power and efficiency I mentioned earlier will be based strictly on changing the spark plugs. Now for the baseline pulls we're gonna run a factory replacement AC Delco plug. So let's get started.
(Pat)>> Now this engine currently has 30 degrees of ignition timing and it's running on 93 octane pump gas, but we did change out that dual plane intake for a single plane one and topped it off with our QFT Black Diamond 950 c-f-m carb. So it's time to listen to this thing make some power. [ engine revving ]
(Pat)>> Look at that, 399.9. I'm gonna go ahead and call that 400.
(Mike)>> I would give it that.
(Pat)>> That's nice and smooth.
(Mike)>> Good torque.
(Pat)>> Good everything, look how smooth the graph is.
(Mike)>> Let's back it up. [ engine revving ]
(Pat)>> It actually made a little bit more, 403.
(Mike)>> Broke the 400 mark.
(Pat)>> Must have got a good molecule of air go through it.
(Mike)>> I say that's a very good starting point for what we're gonna do. That's the AC Delco stock replacement plug. Now we're gonna put an E-3 54 in this thing.
(Pat)>> And we're gonna see what it does now. With the Diamond Fire technology hopefully it'll increase a little bit of combustion efficiency, might make a little more power. The efficiency is the big deal. It's how much fuel it uses. If it uses less fuel and makes the same power it's more efficient combustion.
(Mike)>> Here's a look at a cutaway E-3 plug, the plug that's going in next, and the AC Delco we just made pulls with. Notice the ground strap design on the E-3 compared to the AC Delco. The E-3 plug utilizes a patented edge to edge electrode, which is the best way to direct a spark as it leaves the electrode surface. The results are better combustion for more efficiency, which should result in more power. Let the second part of the test begin. [ engine revving ]
(Pat)>> 390, 408!
(Mike)>> 408!
(Pat)>> 408 for peak, wow! I'll tell you the truth that's more than I expected.
(Mike)>> That is impressive.
(Pat)>> Before we look at anything else make one more run just to verify that number.
(Mike)>> If that's the case I'm going to buy a set today and put them in my truck. [ engine revving ]
(Pat)>> Yep 406, 390, okay. I'll take that. That's 100 percent legit.
(Mike)>> Back to back runs. Alright I'm gonna shut this thing down. Let's look at some data. With the AC Delco plugs the Vortec average 401.5 horsepower and 382.5 pound feet of torque. With the E-3 plugs the average was 407 horsepower and 390 pound feet of torque. That's an average gain of 5.5 horsepower and 7.5 pound feet of torque with the E-3 plugs.
(Pat)>> Average fuel consumption in pounds per hour was almost identical with the AC Delco and E-3 plugs, but since the E-3 plugs made noticeably more horsepower and torque they clearly have better combustion efficiency.
(Mike)>> We used nitrous on this engine before and we want to do it again. We're installing Holley's Sniper nitrous system and put the 210 horsepower jets in. We're installing some colder range E-3 108 plugs to accommodate the extra cylinder pressure. Since we're going to have some fun with nitrous we want to make sure we have excellent fuel to avoid any issues. So we're going to mix some of our 93 octane pump gas with Race Gas Ultra, which is an additive that'll increase the octane rating by 4 points. Race Gas Ultra is designed for high compression, boosted, or nitrous engines. When mixed with pump gas it will create a 108 to 112 octane race fuel. Not only does it increase the octane, it also increases the chemical oxygen and chemical energy to equal commercially available distilled race fuels. It's being mixed to create 112 octane race fuel. So we will pour in one can in four gallons of 93 octane pump gas. [ engine revving ] [ MUSIC ]
(Pat)>> 633 horse, 726 pound feet of torque.
(Mike)>> Dude this is a true junkyard refresh. I don't like making pulls on this thing that way with the nitrous. I just don't like being the guy pushing the lever.
(Pat)>> I like you being the guy. To make sure we didn't hurt this junkyard Vortec with a big shot of nitrous we made several N/A runs. The engine performed flawlessly. [ engine revving ]
(Pat)>> Up next the small block Ford gets a new valvetrain and induction. Then we see just what this mystery engine can do.
(Pat)>> We're continuing the build of our 302 small block Ford focusing now on the valvetrain. These are stock replacement hydraulic flat tappet lifters, which are installed after they're coated with cam shaft specific break-in lube. The lube helps the cam and lifters establish the correct break-in pattern. When installing the lifter make sure the bore is clean and the lifter is free to rotate. The push rods are Comp chro-moly ones with a five-sixteenths diameter, 80 thousandths wall thickness, and a total length of 6.750. [ MUSIC ] Finishing up the valvetrain is a set of 1.6 ratio roller rocker arms. The valve adjustment is one half turn past zero lash. [ MUSIC ] To seal the intake manifold we're using Permatex's The Right Stuff One Minute Gasket Maker. Unlike other products with a 24 hour cure time it lets you return your engine to service immediately. The intake manifold is a Weiand Street Warrior dual plane that was in a pile of old parts. It's a solid choice for a street machine setup. [ MUSIC ] A set of cast aluminum Ford Racing tall valve covers seals everything up. We found them next to the short block and thought they looked racy. So on they go. Keeping the water circulating is our Maziere electric water pump. It's a mainstay in our dyno cell. [ MUSIC ] Now we're off to the cell block where we'll complete the engine with everything to get it running, which includes our 750 c-f-m Holley Brawler dyno carb, an MSD Pro Billet distributor, MSD's 8.5 millimeter superconductor wires, along with purple wire separators for a touch of panache, and Trick Flow one and seven-eighths primary mid length headers. Because this engine has a flat tappet cam shaft we have to do a break in cycle with it. Normally you don't have to do that with a roller cam. This one's a flat tappet. So we have to run the engine, it has to start immediately, and vary the r-p-m between 2,500 and 3,500 for around 15 minutes. That establishes wear patterns on all the parts, and then we will drain the oil, check the filter, and then we're ready for some dyno, but first we do have to break it in. Our Superflow Power Mark has some extraordinary capabilities, like having a break-in cycle where we can program the engine to run at our specified range for however long we want. We did two sets of 50 cycles between 2,500 and 3,500 r-p-m at partial load. Then we drained the break-in oil and checked it and the oil filter for any sign of engine damage like debris or water. Looks clean! [ engine revving ]
(Pat)>> Up next we have some fun in the dyno cell. Plus we clear up a common misconception about carburetors.
(Pat)>> Alright we are all systems go to start making some pulls. Now what we're gonna do is I'm gonna start at 30 degrees timing and I'm gonna go from 2,500 to 5,500 at 600 r-p-m per second to see if it keeps its guts. [ engine revving ]
(Pat)>> A little chunky. 335 pound feet of torque at 3,800, not bad, 297.9 horsepower at 5,300. After some more pulls and some timing adjustments we ended up at 36 degrees total timing. Condensation on the outside of the carburetor is normal. It stems from the cooling effect of the fuel passing through the venturi. [ engine revving ]
(Pat)>> 337 pound feet of torque and 323 horsepower, that's decent. I figured this one would make in the mid-320's with that cam. So it should be interesting to see what it does with a different one. Our second hydraulic flat tappet cam is definitely more on the racier side of the street. Duration at 50 thousandths lift is 234 degrees on the intake and 244 degrees on the exhaust with 114 degrees of lobe separation. Lift with a 1.6 rocker ratio is 520 thousandths on the intake and 542 thousandths on the exhaust. Our cam was installed at 112 degrees of intake centerline. Any time you install a new flat tappet cam new lifters are a must. Alright we're all broke in. Timing is right back to where it was, 36 degrees. So this is a direct cam comparison. [ engine revving ]
(Pat)>> She dropped a little bit of torque and dropped a little bit of power, which not surprising. 313 for horsepower, 318 for torque. Now this is pretty interesting. It starts to flat line up top for whatever reason. Now that could be a whole bunch of different things. That could be valve spring, that could be intake manifold because we have a larger cam that's not as advanced as far as where it's degreed in. The smaller cam traps air earlier and it's gonna make more torque. This cam is more suited for a better manifold, which we're not gonna put on right now, but what we can do is put our racy 950 on and just see what it does. We're gonna pull it to the same r-p-m and we're gonna go from there.
(Mike)>> Let's do it!
(Pat)>> The carb swap will increase the cubic feet per minute by 200 but this brings up a common misconception about running a carburetor that is considered too big.
(Mike)>> Pat isn't that gonna flood the engine?
(Pat)>> That is not how that works. C-f-m doesn't flood the engine. Too much fuel floods the engine. Just cause you have a larger carburetor on does not mean it's going to flood the engine, and that's what you have to understand about how barometric pressure works and how your venturi works. How everything that the carb has in it is setup. Alright! [ engine revving ]
(Pat)>> Yeah figures as much. A larger cam that is installed not as advanced as a smaller cam will not build cylinder pressure in the lower r-p-m. That way it works with this dual plane manifold a little bit better. This other cam, which is bigger and racier, where it wants to run it runs on a manifold and you can put a bigger carburetor on it. It didn't flood it. Know what it did, it made more power. So this intrigues me to do even more to this. Put a manifold on it. We need to get some sort of single plane manifold for it. We'll start there and maybe even do a different ratio rocker.
(Mike)>> Success!
(Pat)>> I don't know what we learned but it was fun. If we can dyno engines it's fun and it's a success, especially if nothing comes apart.
(Mike)>> For more information on today's show check out our website at Powernation TV dot com.
