
Engine Power Featured Projects


Engine Power Builds


Want more content like this?
Join the PowerNation Email Newsletter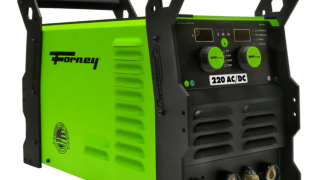
Video Transcript
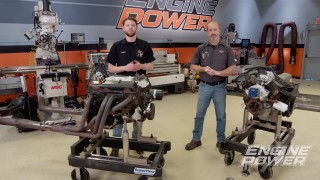
(Pat)>> You're watching Powernation!
(Frankie)>> Today on Engine Power we start with a bone stock Mustang and turn it into a track ready weekend racer. We'll start with safety and performance modifications and test them out on the chassis dyno. [ Music ]
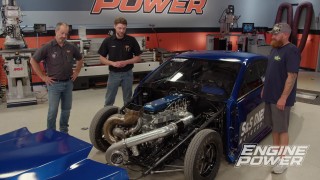
(Pat)>> Stop! Hey everyone, welcome to Engine Power. Today we are gonna take a detour from our normal work to embark on a new journey. We have partnered with Summit Racing Equipment to build up our newly acquired hot rod for an exciting new spec class in the SCCA. We think it's pretty cool.
(Frankie)>> If you're not familiar a spec class is a form of racing that's based around a certain body style or chassis of vehicle so that it has a nice, even, level playing field for all the drivers. Usually an entry level class. It's an easy way for people to get into racing. The class we're gonna be entering in is based off a Mustang, specifically the S-197 Mustang, which is from 2005 to 2009 in the first generation. These are the ones with the 4.6-liter mod motor in them. This is gonna be a really fun class cause this is a pretty performance oriented car, and the one that we got is a 2008 Mustang GT. This is actually a pretty lucky find. We found this locally here in Middle Tennessee at a used car dealership. This one only has 34,000 miles on the clock. So it's in great condition. The paint has the normal wear and tear. It's got dings, and scratches, and things like that. The tires are pretty old. It's probably the only set of tires that's ever been put on the car. It has some questionable modifications under the hood, but all in all it doesn't leak. It's not rusty. It seems to run and function pretty well. It's got a nice interior, five-speed manual. So it should be a fun car to drive and easy to modify. [ Music ] Take this thing for a little rip here and see what it feels like. So far pretty good.
(Pat)>> Got pretty lucky getting a low mileage car because not saying people really beat on these things and trash them out early, cause they do, but this is one of those cars it's affordable. A lot of people can get into one. This is a lot of people's first car.
(Frankie)>> Suspension feels good. Everything feels stock.
(Pat)>> Interesting that you can take mostly a stock car, change a couple of things, and then you're out pounding on a track all day long. Not only doing that, driving it to the track, running it, and then driving it home. Did you learn how to drive on a 5-speed? Your driver's ed have an automatic in it?
(Frankie)>> I learned to drive before driver's ed.
(Pat)>> Like eight years ago.
(Frankie)>> One, two, three, yes, eight years ago when I got my learner's permit. Having a manual one for a track car makes it way more fun. It's easy because if you know the parts that you're gonna do you can go on Summit Racing's website, find all the parts, and buy them cause you know those are for that car, and you know they're gonna be legal. Then you can just get them, put them on, and race. Let's see what this thing can do.
(Pat)>> Whoa! [ Music ]
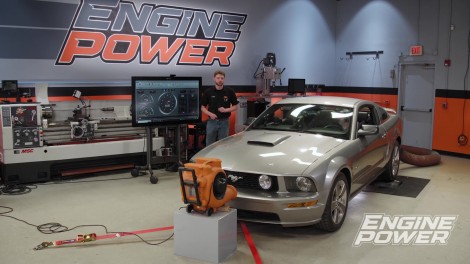
(Frankie)>> So we're back from our test drive and we have strapped our 2008 Mustang GT onto the chassis dyno because we want to see how much power it's gonna make at the wheels before we start doing our upgrades. You ready? Start her up, let's do this thing!
(Pat)>> Brake is off.
(Frankie)>> Alright, let her rip tater chip.
(Pat)>> This is way different than the Test Sled.
(Frankie)>> I don't have a lot of expectation but we're gonna find out.
(Pat)>> Let me get her up around 2,000-ish. [ engine revving ]
[ engine revving ] [ engine winding down ]
(Frankie)>> Not bad, 244 for power, 270-pound feet. I'm not actually sure what these things are supposed to make. That's probably about right for a 4-6.
(Pat)>> We could do one more if you want to?
(Frankie)>> All the fluids and stuff are warm. But yeah, back it up real quick and we'll see what it does.
(Pat)>> Make another one here. [ gears shifting ]
(Pat)>> It's so nice and quiet.
(Frankie)>> For no mufflers it's actually not bad.
(Pat)>> Get her up around two and we'll whack it again here. [ engine revving ]
[ engine winding down ]
(Frankie)>> So that's probably more realistic, 278 horsepower and 283-pound feet. That's not a bad graph. It trends right. It's got ups and downs, which that could be from the not stock exhaust. All in all that's not horrible.
(Pat)>> We know it has no mufflers.
(Frankie)>> No mufflers and it's got some kind of weird intake system on it. With those numbers I doubt it has a tune or anything. So that's not a big deal, and it seems to run fine. It drove fine on the street.
(Pat)>> Doesn't smell weird, doesn't act weird, doesn't sound weird, and nothing has caught on fire. We're gonna call that base line.
(Frankie)>> Get her unstrapped and start doing upgrades.
(Pat)>> Easy peasy!
(Frankie)>> Up next on Engine Power we get rolling on our Mustang project. So grab a seat and stay tuned.
(Pat)>> What he said! Mine still needs some work.
(Pat)>> After a successful chassis dyno session we know exactly what our Mustang makes at the tire, and that's a number we're gonna try and improve on a little bit later. But first off we are gonna focus on the safety aspect of this car. We are gonna make some changes inside here that not only make the car safer, they make it function better as a race car on the track. To get that done I am gonna stay out of the way and let Frankie handle all of that.
(Frankie)>> Move it or lose it. First thing we're gonna do is get these really nice but not very practical leather seats out of the way so we can start our modifications. We'll unbolt the seat from the floor and tip it back, allowing us to access the power seat and air bag connectors. We did unhook the battery prior to starting any work, and with those unplugged we can pull the seat completely out of the car. The passenger side follows pretty much the same process. We will continue stripping the interior by removing the lower and upper seat back sections, removing the B-pillar and rear quarter trim, and gently unplugging and unbolting the front seat belts. With the carpet rolled up out of the way we can remove the bolts from these side body braces. They are heavily seam sealed to the body of the car. So a thin scraper and a hammer can break through the adhesive. Then we pry them out to finish our interior removal. Now that we have most of the interior out of our Mustang we can show you why we took it out. That's because we're gonna be installing a roll bar from Maximum Motorsports. They supplied this kit, which is for a 2005 to 2014 Mustang, and this is a robust bolt-in roll bar that makes it really easy to install. It's made of one and three quarter inch .134-wall tubing. It has a bolt-in harness bar, a diagonal brace to make it legal. It bolts right where the supports we took out of the car go, and it only needs these rear braces to be welded mostly just to make it easy to ship. This should be pretty easy to install, should fit our Mustang great, and give us the safety we need.
(Pat)>> To start the install we'll bolt in these fabricated body braces that will be the front mounts for the roll bar. The roll bar can be carefully snaked into the car, and these two rear braces can be slid on before it's laid in place. With the bolts in the front mounts we can mark out the area where the rear mounts meet the wheel well and remove the rear braces. This way we can heat up and scrape away the sound deadening. With rear bars mocked up again we will carefully drill starting holes through the threads in the bracket and through the wheel well.
(Frankie)>> To get to the outside wheel well the car goes up on the lift and the rear wheels are removed. We'll increase the size of the holes we drilled to accept some three-eighths bolts supplied with the kit and install the backing plates for the rear mounts. Now that everything is fully bolted in mockup mode we will use our Forney tig welder to tack the rear supports in place. Then the assembly can be unbolted and removed in one piece, and the rear braces can be fully mig welded in place.
(Pat)>> To give it a clean look and protect it from corrosion we will paint all the pieces in our prep booth. After wiping everything down with lacquer thinner a coat of primer will give a great adhesive base before laying down a few coats of matt black paint to give it a nice, clean look.
(Frankie)>> When the paint dries everything gets installed for the final time including the original panels that have been notched for the rear support bars so we can keep the stock interior and have a clean appearance inside the car. So we have our roll bar reinstalled for real in our Mustang and we have put together some of the back seat. So the next thing we're gonna do in the safety department is seats because to be legal for the class we need a fixed back racing seat. We already have the driver's side figured out and installed for real, and the way we did it is we actually used the stock seat mounting locations by building some brackets out of eighth inch steel. We gusseted them up and bent them up so we can put them in the stock locations in case we ever want to put this car back with the stock seats. All we have to do now is mount up the passenger seat and get it bolted down.
(Pat)>> This Summit Racing bucket seat gets placed on top of the mounts, and we can use some locking clamps to hold it in position. Once we have it exactly where we want we can drill four mounting holes through the seat and bracket to bolt it in with some 10-millimeter hardware.
(Frankie)>> So we did get a set of matching seat covers for these Summit Racing seats, and with that we're pretty much there on safety modifications. We will add some belts, but for safety I think we're good. So we're gonna move on to performance modifications. That's my favorite part.
(Pat)>> With all of our safety and interior upgrades complete it's time to shift gears to adding more performance, and that will include some engine tuning and getting those spent exhaust gases out more efficiently.
(Frankie)>> We are back on our 2008 Mustang, and we are moving on to performance modifications. Like we mentioned before there are some questionable upgrades under the hood and this is what we're talking about. This car previously had a cold air intake put on it. It was on there when we bought it but there are some pieces missing. Mainly there's supposed to be a divider wall that goes here and separates the filter from the hot engine bay air, and the filter clearly has not been maintained. It looks like it's been beat up in a bar fight or something. The last piece is this connection that's supposed to go to the crankcase ventilation but honestly someone just drove a pipe plug in there. So all that is really not good for business.
(Pat)>> Rather than mess with all that stuff we decided to get a whole new kit from Summit Racing Equipment. It's a brand new cold air kit and best of all it comes with a flash tuner. Once we get our new cold air kit installed we'll run the flash tuner and hopefully pick up a few more horsepower at the wheels. Best of all this is super easy to install.
(Frankie)>> With all the missing pieces it's pretty easy to remove the old system. All we have to do is unplug the map sensor, loosen the hose clamps, and the whole assembly can come out as one piece. These two bolts in the left valve cover get removed and then reinstalled with this clamp bracket sandwiched beneath them. Then a bolt in the radiator shroud can be removed and the air divider can be bolted in the same space with the hardware from the kit. The air tube gets slid over the throttle body, the crankcase ventilation is hooked up correctly to make it carb compliant, and finally the inlet cone and filter can be installed simple as that.
(Pat)>> We are taking a bit of a break to get out of the way for the guys from Wrapped Up to come in and lay down some sweet custom graphics to make our weekend race car a bit racier. They are laying down some matt black racing stripes from front to back, a side stripe above the rocker along with some custom branded graphics.
(Frankie)>> Now we have this awesome decal package on this car and it really looks like a performance car, but we still have some performance upgrades to go. Namely the next one we're gonna tackle is the shifter because if you're building one of these cars you're limited on what you can do but there are things you can do to up the performance feel of the car, and one of those is a short throw shifter. That is an easy task that we're gonna handle right now. Removing the stock shifter knob and boot is simple, and we will also remove this cover panel just to get it out of the way. Only three fasteners have to be removed to get the shifter loose and then a single nut holds on the shifter linkage. Then the car goes back down and we go back up. Getting the shifter out takes some patience but it can be snaked up through the trans tunnel hole. After switching a few bushings onto the new Hurst shifter it can slide into the same position. Now back underneath the car.
(Pat)>> We go back underneath to bolt in the new shifter assembly and reattach the linkage. Then everything is done so we can go back in the car and install the new polished shifter stick. The trim piece can be reinstalled, and then this included boot retainer gets slid on the stick to hold the stock shifter boot in place. The final piece d' resistance is the white shifter ball that gets aligned and tightened down. Next up for our Mustang project is the exhaust system. As per the SCCA rules for this class it requires the car to have a full exhaust system including cats and mufflers. So we picked up this new one from Summit Racing equipment and it's gonna work great. It fits an '05 through '09 Mustang and it's a bolt in operation. It's made out of 304 stainless for rust resistance because keep in mind this still is a street car. Remember, our car already has some sort of whacky aftermarket exhaust on it. So we're gonna have to get it up in the air, get it cut off, and see what it takes to fit this one up. We'll use an impact to loosen the rusty clamps. Then our handy dandy reciprocating saw chops the old exhaust into pieces so we can slide it out from under the car in sections.
(Frankie)>> So we have the entire kit mocked up in the car from mufflers forward, and like Pat said, we're gonna have to do some modification to make the old stuff work with the new stuff. We cut out everything someone else had done before. The way we're gonna connect everything is with a set of V-band clamps welded directly to the stock cats because we do have to keep those to be legal in the class. We have a set of V-bands tacked there, and that will allow us to run the three inch unrestricted from there to the back of the car. We'll get these fully welded and then we can tighten everything for real.
(Pat)>> With everything positioned exactly where we want it we'll finish weld both sides of the V-bands and then we can cinch down all of the clamps.
(Frankie)>> With that our exhaust is completely sealed up and done. All we have to do is get this car down off the lift and over to the chassis dyno.
(Pat)>> Coming up, we get our Mustang project back up on the dyno rollers to see what our upgrades translate to power at the tires.
(Frankie)>> Alright we have our 2008 Mustang GT strapped to the chassis dyno. It is time to figure out what all our upgrades are gonna add up to for power at the wheel. If you remember we did a cold air intake but we have a less restrictive air filter and a divider wall to keep the hot air from going into it, and we went from a two and a half inch straight through exhaust to a three inch stainless with straight through mufflers. There is one last thing we have to do and that is the flash tuner that came with the air intake.
(Pat)>> This flash tuner came with our cold air kit as a Summit Racing combo. Flash tuners are very intuitive to use. You just plug them in and follow the easy prompts and it loads a specific tune that's set up for our cold air kit. So all we've got to do is plug it in. Key on! We're gonna program the vehicle. Summit package, that's the one we want and we send it. After it saves the stock data then it's gonna go in and put the tune in. Data is saved. Preparing the new data. Turn the key off. Download is complete. Tune has been programmed successfully to vehicle. Turn key off. I guess we're good to go.
(Frankie)>> It's actually a little bit quieter.
(Pat)>> I don't know?
(Frankie)>> Sometimes the straight pipe is a little loud and maybe a little obnoxious.
(Pat)>> I think I like that a little better. We want to be legal.
(Frankie)>> Go ahead and make a rip and see what happens.
(Pat)>> I like that shifter.
(Frankie)>> Nice, short throw.
(Pat)>> Alright, let's see what we got here.
[ engine revving ] [ engine winding down ]
(Frankie)>> I might have seen over 300-pound feet. Yep, 307-pound feet and 283.49 horsepower. That's actually a pretty big improvement for just bolt-on, especially on torque.
(Pat)>> The graph looks really nice comparatively speaking.
(Frankie)>> Let me overlay it. There's the before and then the after is the red line. You can see meat in the curve. That's a huge jump. Over 20-pound feet in torque. I'd call that two and a half, three hours worth of work. That's pretty solid.
(Pat)>> Let's do another while we've got her all warmed up here.
(Frankie)>> Back it up there and see what it does.
(Pat)>> Here we go! [ engine revving ] [ engine winding down ]
(Frankie)>> Solid rip! 289 and 306! That's a solid graph too. Nice and smooth, carries power.
(Pat)>> I'm very impressed on how smooth the graph looks.
(Frankie)>> We didn't get deep into the engine. It's basically just bolt-ons.
(Pat)>> Keep in mind we actually put mufflers on it. They're straight through mufflers. The pipe is bigger. Little bit of tuneage on the handheld there and solid improvement.
(Frankie)>> I actually like it a little bit quieter. It still has that throaty sound but it's not obnoxious. I think that's win, win, win all the way around. For bolt-ons can't really ask for much more. That gives you a nice, easy power band that you can play with on track but you're not gonna get yourself in trouble. If you're a starting driver you don't need 500 at the wheel cause you're gonna put it in the ditch pretty quick. For that power range you can go out and thrash on it super hard and not have to worry about it.
(Pat)>> That's a great tune. It's still a street car.
(Frankie)>> Yeah, easy peasy. The clutch is nice to drive, car's easy to drive still.
(Pat)>> We have other improvements to do but that's gonna come up very, very soon.
(Frankie)>> This is gonna be where we stop for today. We got safety and power, two important things. Now we need handling and stopping, which are also pretty important. Tackle those next time, but for now I think that's solid.
(Pat)>> Great success.
Show Full Transcript
(Frankie)>> Today on Engine Power we start with a bone stock Mustang and turn it into a track ready weekend racer. We'll start with safety and performance modifications and test them out on the chassis dyno. [ Music ]
(Pat)>> Stop! Hey everyone, welcome to Engine Power. Today we are gonna take a detour from our normal work to embark on a new journey. We have partnered with Summit Racing Equipment to build up our newly acquired hot rod for an exciting new spec class in the SCCA. We think it's pretty cool.
(Frankie)>> If you're not familiar a spec class is a form of racing that's based around a certain body style or chassis of vehicle so that it has a nice, even, level playing field for all the drivers. Usually an entry level class. It's an easy way for people to get into racing. The class we're gonna be entering in is based off a Mustang, specifically the S-197 Mustang, which is from 2005 to 2009 in the first generation. These are the ones with the 4.6-liter mod motor in them. This is gonna be a really fun class cause this is a pretty performance oriented car, and the one that we got is a 2008 Mustang GT. This is actually a pretty lucky find. We found this locally here in Middle Tennessee at a used car dealership. This one only has 34,000 miles on the clock. So it's in great condition. The paint has the normal wear and tear. It's got dings, and scratches, and things like that. The tires are pretty old. It's probably the only set of tires that's ever been put on the car. It has some questionable modifications under the hood, but all in all it doesn't leak. It's not rusty. It seems to run and function pretty well. It's got a nice interior, five-speed manual. So it should be a fun car to drive and easy to modify. [ Music ] Take this thing for a little rip here and see what it feels like. So far pretty good.
(Pat)>> Got pretty lucky getting a low mileage car because not saying people really beat on these things and trash them out early, cause they do, but this is one of those cars it's affordable. A lot of people can get into one. This is a lot of people's first car.
(Frankie)>> Suspension feels good. Everything feels stock.
(Pat)>> Interesting that you can take mostly a stock car, change a couple of things, and then you're out pounding on a track all day long. Not only doing that, driving it to the track, running it, and then driving it home. Did you learn how to drive on a 5-speed? Your driver's ed have an automatic in it?
(Frankie)>> I learned to drive before driver's ed.
(Pat)>> Like eight years ago.
(Frankie)>> One, two, three, yes, eight years ago when I got my learner's permit. Having a manual one for a track car makes it way more fun. It's easy because if you know the parts that you're gonna do you can go on Summit Racing's website, find all the parts, and buy them cause you know those are for that car, and you know they're gonna be legal. Then you can just get them, put them on, and race. Let's see what this thing can do.
(Pat)>> Whoa! [ Music ]
(Frankie)>> So we're back from our test drive and we have strapped our 2008 Mustang GT onto the chassis dyno because we want to see how much power it's gonna make at the wheels before we start doing our upgrades. You ready? Start her up, let's do this thing!
(Pat)>> Brake is off.
(Frankie)>> Alright, let her rip tater chip.
(Pat)>> This is way different than the Test Sled.
(Frankie)>> I don't have a lot of expectation but we're gonna find out.
(Pat)>> Let me get her up around 2,000-ish. [ engine revving ]
[ engine revving ] [ engine winding down ]
(Frankie)>> Not bad, 244 for power, 270-pound feet. I'm not actually sure what these things are supposed to make. That's probably about right for a 4-6.
(Pat)>> We could do one more if you want to?
(Frankie)>> All the fluids and stuff are warm. But yeah, back it up real quick and we'll see what it does.
(Pat)>> Make another one here. [ gears shifting ]
(Pat)>> It's so nice and quiet.
(Frankie)>> For no mufflers it's actually not bad.
(Pat)>> Get her up around two and we'll whack it again here. [ engine revving ]
[ engine winding down ]
(Frankie)>> So that's probably more realistic, 278 horsepower and 283-pound feet. That's not a bad graph. It trends right. It's got ups and downs, which that could be from the not stock exhaust. All in all that's not horrible.
(Pat)>> We know it has no mufflers.
(Frankie)>> No mufflers and it's got some kind of weird intake system on it. With those numbers I doubt it has a tune or anything. So that's not a big deal, and it seems to run fine. It drove fine on the street.
(Pat)>> Doesn't smell weird, doesn't act weird, doesn't sound weird, and nothing has caught on fire. We're gonna call that base line.
(Frankie)>> Get her unstrapped and start doing upgrades.
(Pat)>> Easy peasy!
(Frankie)>> Up next on Engine Power we get rolling on our Mustang project. So grab a seat and stay tuned.
(Pat)>> What he said! Mine still needs some work.
(Pat)>> After a successful chassis dyno session we know exactly what our Mustang makes at the tire, and that's a number we're gonna try and improve on a little bit later. But first off we are gonna focus on the safety aspect of this car. We are gonna make some changes inside here that not only make the car safer, they make it function better as a race car on the track. To get that done I am gonna stay out of the way and let Frankie handle all of that.
(Frankie)>> Move it or lose it. First thing we're gonna do is get these really nice but not very practical leather seats out of the way so we can start our modifications. We'll unbolt the seat from the floor and tip it back, allowing us to access the power seat and air bag connectors. We did unhook the battery prior to starting any work, and with those unplugged we can pull the seat completely out of the car. The passenger side follows pretty much the same process. We will continue stripping the interior by removing the lower and upper seat back sections, removing the B-pillar and rear quarter trim, and gently unplugging and unbolting the front seat belts. With the carpet rolled up out of the way we can remove the bolts from these side body braces. They are heavily seam sealed to the body of the car. So a thin scraper and a hammer can break through the adhesive. Then we pry them out to finish our interior removal. Now that we have most of the interior out of our Mustang we can show you why we took it out. That's because we're gonna be installing a roll bar from Maximum Motorsports. They supplied this kit, which is for a 2005 to 2014 Mustang, and this is a robust bolt-in roll bar that makes it really easy to install. It's made of one and three quarter inch .134-wall tubing. It has a bolt-in harness bar, a diagonal brace to make it legal. It bolts right where the supports we took out of the car go, and it only needs these rear braces to be welded mostly just to make it easy to ship. This should be pretty easy to install, should fit our Mustang great, and give us the safety we need.
(Pat)>> To start the install we'll bolt in these fabricated body braces that will be the front mounts for the roll bar. The roll bar can be carefully snaked into the car, and these two rear braces can be slid on before it's laid in place. With the bolts in the front mounts we can mark out the area where the rear mounts meet the wheel well and remove the rear braces. This way we can heat up and scrape away the sound deadening. With rear bars mocked up again we will carefully drill starting holes through the threads in the bracket and through the wheel well.
(Frankie)>> To get to the outside wheel well the car goes up on the lift and the rear wheels are removed. We'll increase the size of the holes we drilled to accept some three-eighths bolts supplied with the kit and install the backing plates for the rear mounts. Now that everything is fully bolted in mockup mode we will use our Forney tig welder to tack the rear supports in place. Then the assembly can be unbolted and removed in one piece, and the rear braces can be fully mig welded in place.
(Pat)>> To give it a clean look and protect it from corrosion we will paint all the pieces in our prep booth. After wiping everything down with lacquer thinner a coat of primer will give a great adhesive base before laying down a few coats of matt black paint to give it a nice, clean look.
(Frankie)>> When the paint dries everything gets installed for the final time including the original panels that have been notched for the rear support bars so we can keep the stock interior and have a clean appearance inside the car. So we have our roll bar reinstalled for real in our Mustang and we have put together some of the back seat. So the next thing we're gonna do in the safety department is seats because to be legal for the class we need a fixed back racing seat. We already have the driver's side figured out and installed for real, and the way we did it is we actually used the stock seat mounting locations by building some brackets out of eighth inch steel. We gusseted them up and bent them up so we can put them in the stock locations in case we ever want to put this car back with the stock seats. All we have to do now is mount up the passenger seat and get it bolted down.
(Pat)>> This Summit Racing bucket seat gets placed on top of the mounts, and we can use some locking clamps to hold it in position. Once we have it exactly where we want we can drill four mounting holes through the seat and bracket to bolt it in with some 10-millimeter hardware.
(Frankie)>> So we did get a set of matching seat covers for these Summit Racing seats, and with that we're pretty much there on safety modifications. We will add some belts, but for safety I think we're good. So we're gonna move on to performance modifications. That's my favorite part.
(Pat)>> With all of our safety and interior upgrades complete it's time to shift gears to adding more performance, and that will include some engine tuning and getting those spent exhaust gases out more efficiently.
(Frankie)>> We are back on our 2008 Mustang, and we are moving on to performance modifications. Like we mentioned before there are some questionable upgrades under the hood and this is what we're talking about. This car previously had a cold air intake put on it. It was on there when we bought it but there are some pieces missing. Mainly there's supposed to be a divider wall that goes here and separates the filter from the hot engine bay air, and the filter clearly has not been maintained. It looks like it's been beat up in a bar fight or something. The last piece is this connection that's supposed to go to the crankcase ventilation but honestly someone just drove a pipe plug in there. So all that is really not good for business.
(Pat)>> Rather than mess with all that stuff we decided to get a whole new kit from Summit Racing Equipment. It's a brand new cold air kit and best of all it comes with a flash tuner. Once we get our new cold air kit installed we'll run the flash tuner and hopefully pick up a few more horsepower at the wheels. Best of all this is super easy to install.
(Frankie)>> With all the missing pieces it's pretty easy to remove the old system. All we have to do is unplug the map sensor, loosen the hose clamps, and the whole assembly can come out as one piece. These two bolts in the left valve cover get removed and then reinstalled with this clamp bracket sandwiched beneath them. Then a bolt in the radiator shroud can be removed and the air divider can be bolted in the same space with the hardware from the kit. The air tube gets slid over the throttle body, the crankcase ventilation is hooked up correctly to make it carb compliant, and finally the inlet cone and filter can be installed simple as that.
(Pat)>> We are taking a bit of a break to get out of the way for the guys from Wrapped Up to come in and lay down some sweet custom graphics to make our weekend race car a bit racier. They are laying down some matt black racing stripes from front to back, a side stripe above the rocker along with some custom branded graphics.
(Frankie)>> Now we have this awesome decal package on this car and it really looks like a performance car, but we still have some performance upgrades to go. Namely the next one we're gonna tackle is the shifter because if you're building one of these cars you're limited on what you can do but there are things you can do to up the performance feel of the car, and one of those is a short throw shifter. That is an easy task that we're gonna handle right now. Removing the stock shifter knob and boot is simple, and we will also remove this cover panel just to get it out of the way. Only three fasteners have to be removed to get the shifter loose and then a single nut holds on the shifter linkage. Then the car goes back down and we go back up. Getting the shifter out takes some patience but it can be snaked up through the trans tunnel hole. After switching a few bushings onto the new Hurst shifter it can slide into the same position. Now back underneath the car.
(Pat)>> We go back underneath to bolt in the new shifter assembly and reattach the linkage. Then everything is done so we can go back in the car and install the new polished shifter stick. The trim piece can be reinstalled, and then this included boot retainer gets slid on the stick to hold the stock shifter boot in place. The final piece d' resistance is the white shifter ball that gets aligned and tightened down. Next up for our Mustang project is the exhaust system. As per the SCCA rules for this class it requires the car to have a full exhaust system including cats and mufflers. So we picked up this new one from Summit Racing equipment and it's gonna work great. It fits an '05 through '09 Mustang and it's a bolt in operation. It's made out of 304 stainless for rust resistance because keep in mind this still is a street car. Remember, our car already has some sort of whacky aftermarket exhaust on it. So we're gonna have to get it up in the air, get it cut off, and see what it takes to fit this one up. We'll use an impact to loosen the rusty clamps. Then our handy dandy reciprocating saw chops the old exhaust into pieces so we can slide it out from under the car in sections.
(Frankie)>> So we have the entire kit mocked up in the car from mufflers forward, and like Pat said, we're gonna have to do some modification to make the old stuff work with the new stuff. We cut out everything someone else had done before. The way we're gonna connect everything is with a set of V-band clamps welded directly to the stock cats because we do have to keep those to be legal in the class. We have a set of V-bands tacked there, and that will allow us to run the three inch unrestricted from there to the back of the car. We'll get these fully welded and then we can tighten everything for real.
(Pat)>> With everything positioned exactly where we want it we'll finish weld both sides of the V-bands and then we can cinch down all of the clamps.
(Frankie)>> With that our exhaust is completely sealed up and done. All we have to do is get this car down off the lift and over to the chassis dyno.
(Pat)>> Coming up, we get our Mustang project back up on the dyno rollers to see what our upgrades translate to power at the tires.
(Frankie)>> Alright we have our 2008 Mustang GT strapped to the chassis dyno. It is time to figure out what all our upgrades are gonna add up to for power at the wheel. If you remember we did a cold air intake but we have a less restrictive air filter and a divider wall to keep the hot air from going into it, and we went from a two and a half inch straight through exhaust to a three inch stainless with straight through mufflers. There is one last thing we have to do and that is the flash tuner that came with the air intake.
(Pat)>> This flash tuner came with our cold air kit as a Summit Racing combo. Flash tuners are very intuitive to use. You just plug them in and follow the easy prompts and it loads a specific tune that's set up for our cold air kit. So all we've got to do is plug it in. Key on! We're gonna program the vehicle. Summit package, that's the one we want and we send it. After it saves the stock data then it's gonna go in and put the tune in. Data is saved. Preparing the new data. Turn the key off. Download is complete. Tune has been programmed successfully to vehicle. Turn key off. I guess we're good to go.
(Frankie)>> It's actually a little bit quieter.
(Pat)>> I don't know?
(Frankie)>> Sometimes the straight pipe is a little loud and maybe a little obnoxious.
(Pat)>> I think I like that a little better. We want to be legal.
(Frankie)>> Go ahead and make a rip and see what happens.
(Pat)>> I like that shifter.
(Frankie)>> Nice, short throw.
(Pat)>> Alright, let's see what we got here.
[ engine revving ] [ engine winding down ]
(Frankie)>> I might have seen over 300-pound feet. Yep, 307-pound feet and 283.49 horsepower. That's actually a pretty big improvement for just bolt-on, especially on torque.
(Pat)>> The graph looks really nice comparatively speaking.
(Frankie)>> Let me overlay it. There's the before and then the after is the red line. You can see meat in the curve. That's a huge jump. Over 20-pound feet in torque. I'd call that two and a half, three hours worth of work. That's pretty solid.
(Pat)>> Let's do another while we've got her all warmed up here.
(Frankie)>> Back it up there and see what it does.
(Pat)>> Here we go! [ engine revving ] [ engine winding down ]
(Frankie)>> Solid rip! 289 and 306! That's a solid graph too. Nice and smooth, carries power.
(Pat)>> I'm very impressed on how smooth the graph looks.
(Frankie)>> We didn't get deep into the engine. It's basically just bolt-ons.
(Pat)>> Keep in mind we actually put mufflers on it. They're straight through mufflers. The pipe is bigger. Little bit of tuneage on the handheld there and solid improvement.
(Frankie)>> I actually like it a little bit quieter. It still has that throaty sound but it's not obnoxious. I think that's win, win, win all the way around. For bolt-ons can't really ask for much more. That gives you a nice, easy power band that you can play with on track but you're not gonna get yourself in trouble. If you're a starting driver you don't need 500 at the wheel cause you're gonna put it in the ditch pretty quick. For that power range you can go out and thrash on it super hard and not have to worry about it.
(Pat)>> That's a great tune. It's still a street car.
(Frankie)>> Yeah, easy peasy. The clutch is nice to drive, car's easy to drive still.
(Pat)>> We have other improvements to do but that's gonna come up very, very soon.
(Frankie)>> This is gonna be where we stop for today. We got safety and power, two important things. Now we need handling and stopping, which are also pretty important. Tackle those next time, but for now I think that's solid.
(Pat)>> Great success.