
Engine Power Featured Projects


Engine Power Builds


Want more content like this?
Join the PowerNation Email Newsletter

Video Transcript
[ Frankie ] You're watching Powernation!
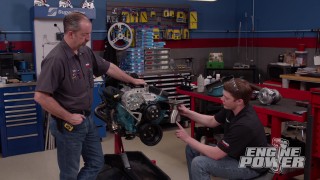
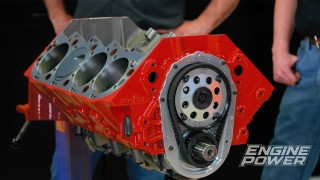
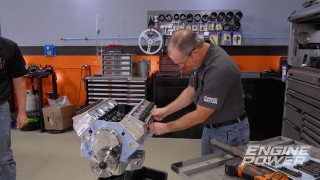
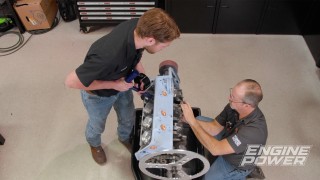
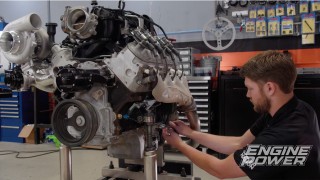
[ Frankie ] Today on Engine Power we ditch the boost, ditch our stock heads, and let our 460 big block Ford breathe naturally. [ Music ] [ Pat ] Hey everyone, welcome to Engine Power! Today we are gonna revisiting a project we did a while back that was a lot of fun. This is our 460 big block Ford. This was a fun project that was relatively easy to do and it cranked out some great power, but like a lot of projects around here we're gonna reuse it for another project. So it is time to get it reconfigured. [ Frankie ] What he means by reconfigured is we're actually gonna be taking the boost off of this engine. We're gonna be taking the turbo off. Obviously we're gonna give up some power but the main requirement for the project that this is going in is that it be naturally aspirated so it goes in nice and easy. So we're gonna be making some upgrades today on the induction side to help up the n/a power but we know what it makes as it sits. If you forgot here's a quick look at all the upgrades this 460 has gotten already. [ Pat ] This engine started out as a bone stock 460 that we stuck a 76-millimeter turbo on to make a budget based 494.5 horsepower and 724.3-pound feet before we brought it in for the first round of upgrades. We wanted to improve the durability of the engine by swapping out some of the stock internal components for some heavier duty options including a set of forged Summit Racing H-beam rods and a set of forged pistons. [ Frankie ] We also converted the engine to a mild hydraulic roller cam, installed a deep four by four oil pan, a set of roller rockers, and topped it off with an Edelbrock Air Gap intake manifold. Naturally aspirated it picked up to 379.1 horsepower and 480-pound feet, and with our tougher parts we felt comfortable putting the turbo back and making 568 horsepower and 769-pound feet on nine and a half p-s-i of boost with pump gas. First up, and to the chagrin of all lovers of boost, the turbo system is being removed, starting with the waste gates followed closely by the dyno specific custom crossover pipe. [ drill humming ] [ Music ] [ Frankie ] Next up, to get better access to the turbo our serpentine accessory setup is taken off. This VS Racing 76-millimeter turbo worked awesome for this application but it is going back on the parts shelf to be used another day. [ Pat ] The plug wires and distributor will be removed and reused later on. [ Music ] Our stock cast iron exhaust manifolds are relieved of their service and will be stuck in the reuse at a later date pile. Moving on to the top side of the engine the Edelbrock dual plane intake is chiseled free from the adapters. We will be reusing it on the new combo. Speaking of those adapters they were necessary to put the older style intake on the newer style e-f-i iron heads. So we removed the bolts and once again wedged some sharp gasket scrapers in between them and the head to pry them off. These adapters will stay with the iron heads along with the valley plate. [ Music ] [ Frankie ] To gain access to the valve train our valve covers get unbolted, and to make the engine easier to turn over we zip out all the spark bolts. The only part of the valvetrain that will be reused are the hydraulic roller lifters, and we keep them and everything else in order as they come out. We remove everything at t-d-c compression stroke per cylinder in the engine's firing order. This makes it easy to keep it in order and to minimize the load on parts as they're taken off. [ Pat ] Before we can get to the head bolts the valve cover adapters have to go away. They were necessary to be able to run our cool old school valve covers. Like the head adapters, they were sealed on super good. Next the massive ARP head bolts are broken loose and zipped out so the heavy stock cast iron heads can come off. A quick tip. Don't assume the dowels are holding the head on. Frankie almost had a bad day if it wasn't for his cat-like reflexes. [ Frankie ] Moving on to the front of the engine the water pump is unbolted and the balancer is taken off along with the external front counterweight so we can get to the front timing cover. Initially we had planned on carefully removing the cover to save the oil pan gasket underneath but it didn't work out. The timing set and cam thrust plate comes off. Then while Pat is draining the oil to remove the oil pan to change the gasket we now have to change. The slightly used roller cam is gently slid out of the block. With that we are pretty much ready to start the reassembly of our 460. [ Pat ] Up next, our stripped 460 starts going back together with a bigger bump stick, free flowing heads, and a brand new e-f-i system.
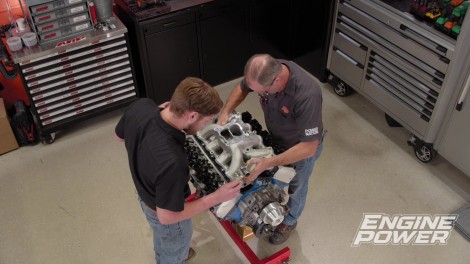
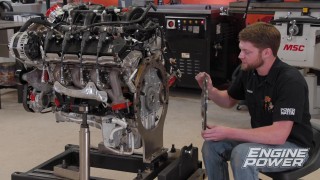
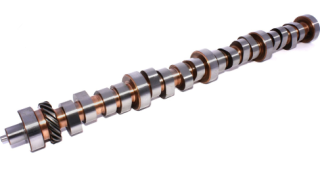
[ Frankie ] Now we can move on to the reassembly of our 460 starting with our new hydraulic roller camshaft. The cam we had before worked great but it was really geared towards low r-p-m torque. So we're gonna make a little bit of a change on the cam. Something a little bit more aggressive so it compliments the high flowing cylinder heads we're gonna be using, which we'll show you in a little bit. This cam has a little bit more duration on the intake and a lot more duration on the exhaust. It has specs at 50 for the intake of 227 degrees. On the exhaust it is 241 degrees at 50. The lobes are set on a 107-degree lobe separation angle, and lift at the valve is 580 thousandths on the intake with a one-eight rocker, and lift at the valve on the exhaust is 562 with a one-eight rocker. We'll get this slid in and then we can degree it. We're gonna set our intake center line at 105.75, which is one and a quarter degrees advanced. [ Pat ] With the camshaft and timing set ready to rock we reinstall the front timing cover. We use the external counterweight to center the cover before the fasteners are tightened up. That gets followed by the installation of the water pump assembly. [ Music ] [ ratchet clicking ] [ Music ] [ Pat ] The stock balancer gets put back in place with the proper tool, not a hammer. [ Music ] [ Frankie ] For our new head gaskets we chose Cometic m-l-s with a 4-500 bore and a 27 thousandths compressed thickness. [ Pat ] Aside from the camshaft the other significant upgrade on our combination is a set of Edelbrock Performer RPM cylinder heads we picked up from Summit Racing Equipment. These feature a 292cc intake port and 100cc exhaust port. They also have a 75cc combustion chamber. Keep in mind our old iron heads had a 100cc combustion chamber. Our new ones are 75cc. So that gives us a significant bump in compression. From the iron heads having an 8.49 to one compression ratio to our new ones have a calculated compression of 10.59 to one, over two points, and these are set up to run right out of the box. Setup for our hydraulic roller valvetrain with these springs and also they have a 2-190 intake valve, 1-760 exhaust valve, significantly increasing the flow. Also to make it even better these save 25 pounds apiece. So they're significantly lighter than our iron ones, keeping us and our engine a little bit lighter. [ Music ] [ drill humming ] [ Frankie ] Since we have a new set of cylinder heads we also needed a new set of cylinder heat bolts because these Edelbrock heads have different column heights than the stock ones. So we reached out ARP and got a new head bolt kit. This is part number #1553603. This is a head bolt kit specific for the Edelbrock heads but it's made of the same material. It is an 87-40 chro-moly material that has a really high strength. It is 180,000 p-s-i of tensile strength, which is way higher than the stock fasteners or even a grade eight that you would find from the hardware store. The best part is ARP has done all the research to make sure that these are dimensionally correct and have the correct amount of thread engagement with the block when they stick out of the heads. Now these have very specific instructions for getting them ready and for torquing them. So we've gone ahead and cleaned them with lacquer thinner and prepped them with their ARP Ultra Torque Lubricant on the threads and between the washer and the head of the bolt. We're gonna torque them in sequence to the recommended value that ARP has, which is 140-pound feet. It's not the stock recommendation. It is ARP's recommendation so we get the correct amount of clamp load it is consistent. So we'll get these in and get them torqued up. [ Pat ] It is important to follow the included instructions from ARP to get accurate clamping force. [ drill humming ] [ Music ] [ torque wrench beeping ] [ Music ] [ torque wrench beeping ] [ Music ] [ torque wrench beeping ] [ Music ] [ Pat ] Excellent! [ Frankie ] Big torque, big clamp. [ Pat ] Coming up, we top off our upgraded 460 build to see if we can top our previous naturally aspirated numbers on the dyno.
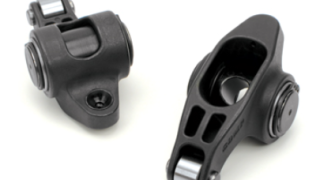
[ Frankie ] We're continuing on with our 460 build. We're gonna start getting the valve train in and finish up the assembly. The next order of operations is to install the previously run hydraulic roller lifters along with a new set of Trick Flow chor-moly three-eighths diameter push rods that are 8-100 long with an 80 thousandths wall thickness. [ Music ] That is followed by a new set of 1.8 ratio Comp Cams Pro Magnum XD steel rocker arms. [ Music ]
After that the rockers are adjusted in the firing order to one half turn past zero lash. [ Music ] [ ratchet clicking ] [ Music ]
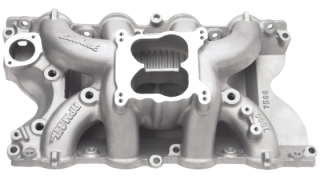
[ Music ] [ Pat ] Time to reinstall the induction, which consists of an Edelbrock Performer RPM Air Gap. It is torqued down in multiple stages for complete gasket compression to 35-pound feet. [ torque wrench clicking ] [ Music ] [ Pat ] Wrapping up we put on our old school chrome valve covers, followed closely by the rest of the front accessory drive. [ Music ] [ torque wrench clicking ] [ Music ]
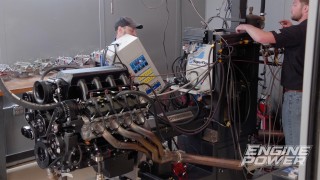
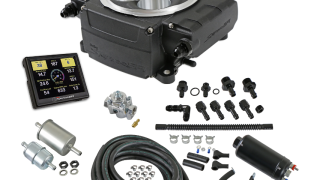
[ Pat ] With all that done we are now ready to make some naturally aspirated power on the dyno. [ Frankie ] Since we are just running this engine naturally aspirated this time it gives us a great opportunity to try out something new from Holley, and that is their Sniper-2 e-f-i unit. This is very similar to the first generation but has some improvements that Holley has made to make it better for the user. Namely they have done a ton to improve the r-f noise interference around the e-c-u. It has a very clean wiring layout where all wires come out of the rear of the unit. All of the wiring connections are made into a single connector. It has an improved u-s-b connector. So it has a screw type connector that's much more positive when you're engaging it. It has the same simple wiring harness. It only takes four wires to hook it up and getting it running. It comes included with an oxygen sensor that you can put in the exhaust, and you can do all the setup and tuning with the standard three and a half inch screen with unit. If you really wanted to Holley has come out with something brand new and that is a Bluetooth module that plugs into the unit so you can do all the setup, wizard, all the tuning, and monitor all the vitals of the engine right on your phone or tablet. That's super cool and we're really excited to try it. We're gonna get it on this engine and get this thing running. Coming up, we get big power, big torque, and big gains out of our big block Ford.
[ Frankie ] So we have our 460 on the dyno and running the Sniper-2 on top. Fired right up. Been letting it learn, doing some preliminary pulls, just trying to get it to learn the fuel. Been monitoring it on my cellular device here, which is pretty cool. It has all the stuff that you want to look at. You can monitor all the sensors, monitor all the fueling, and all that. So this is gonna be pretty cool to see how fast this thing learns during wide open throttle. You ready to make a pull? [ Pat ] Ready to rock 'n roll here. I've upped the upper limit of the dyno pull to 6,000 because we've got a little bit better spring. I think the heads are a little bit better, I know they're better. So we're gonna go from 2,500 to 6,000. What I love about these fuel injection units like this particular Sniper-2, when you're diving into it it doesn't have any stumble, any anything. They just work immediately. The actual part where it's learning takes a little bit of time, but initially they are hot to trot right out of the box here. Here we go! [ engine revving ] [ Pat ] Smooth as glass. [ Frankie ] Way up on torque. [ engine revving ] [ Pat ] Just glides right through the pull like nothing. Now that's 30 degrees of timing. [ Frankie ] AFRs were tracking awesome. Look at that! 554.8-pound feet and 519.1 horsepower. So peak power at 5,900 and peak torque right at 3,800. [ Pat ] That's super nice! [ Frankie ] Originally when we did all the turbo stuff it was a low r-p-m towing engine. It kinda still is that. Now this is the n/a version because what it's going in doesn't have room for the turbos and it's a lot of fab work. So they just wanted something more simple. I would still consider this a relatively low r-p-m engine, and it makes way more torque than it did naturally aspirated with the stock head. I'm pretty happy with that. This is a mild engine. It's not a high compression engine. It's now a large duration camshaft. It's not a very large c-c head. Sized appropriately for the r-p-m range that we're gonna be running it in. Those are just good all around numbers. [ Pat ] We're not building a Comp Eliminator engine. This is a dual plane and a Sniper on it. We'll do a little bit of tweaking. [ Frankie ] Put some timing in it. [ Music ] [ engine idling ] [ Music ] [ Frankie ] I put two degrees of timing in it. Now we're at 32 total. We'll see what that does. Nothing was leaking, nothing fell off the engine. [ Pat ] This is like grandma's station wagon right here. [ engine revving ] [ Frankie ] Just throw it right in there. [ Pat ] Good oil pressure. [ engine revving ] [ Frankie ] I think I might have saw some numbers. [ Pat ] Like a walk in the park here. [ Frankie ] Oh yeah, 560-pound feet and 523.5 horsepower. That is improvement! [ Pat ] Air/fuels are spot on. I like it when you're targeting something and it actually hits it. These type of operations. Okay we've got to put a jet in or two. We're doing it from the convenience of your phone. [ Frankie ] Right now this is a pretty conservative tune cause we're still in 93 octane pump gas. So it's targeting 13-0 for an air/fuel but we have vacuum in the crankcase from those evacs, which is awesome. [ Pat ] Two inches of vacuum in the pan just from running evacs. I'm a huge fan of the evacuation system. We'll keep going. The normal way we do it is we keep sticking timing in it until it levels off. You can get into a think with pump gas where you start overtiming it. It'll start detonating immediately because the gas is bad. [ Frankie ] Right now we're still picking up power. I say we keep going until it stops picking up power. [ Pat ] Two more degrees. [ engine idling ] [ Frankie ] We have 34 degrees of timing now. Let's see what happens. It'll make more, the same, or less. [ engine revving ]
[ engine revving ] [ Pat ] Notice how I left my glasses on. [ Frankie ] So you could see the numbers! [ Pat ] We actually picked up a little bit. 533 on horse pressures and 565 on torque. [ Frankie ] 565 at 3,900, 533.6 at 5,900. That's a big jump too. [ Pat ] Everything is starting to learn up nice. The graph is getting nice and smooth. You want to keep going we can. [ Frankie ] I say we kinda have to cause we have to go until it stops making more. I'm gonna go put another two in it and we'll see. [ engine idling ] [ Pat ] Two more degrees. So we're at 36 degrees of timing, and that's normally about what an aluminum headed deal stops at. There's some things depending on what kind of piston's in it, depending what kind of manifold's on, depending on what kind of induction's on it. They all do different things. Typically when you're into the over 35-degree range that's when things, one will be a little better than the other depending on how much timing's in it. What we're gonna do is we're gonna find out right. [ engine revving ]
[ Pat ] That was too close to call. We're watching oil pressure. That is pretty much it. That one made the same. Made 533 for horsepower, 565-pound feet. So I think we're right there. Air/fuels look good, oil pressure looks fantastic. [ Frankie ] That's probably gonna be it for timing. [ Pat ] We like doing all kinds of stuff just to show people what you can do with parts. There's a hundred different iterations we could do with this. The one that we've just completed with the cam, headers, that intake and that e-f-i, which works spectacular by the way. I think this is a win all the way around. [ Frankie ] I would agree. For more high power engine builds like this one you can find Engine Power on Powernation.
Show Full Transcript
[ Frankie ] Today on Engine Power we ditch the boost, ditch our stock heads, and let our 460 big block Ford breathe naturally. [ Music ] [ Pat ] Hey everyone, welcome to Engine Power! Today we are gonna revisiting a project we did a while back that was a lot of fun. This is our 460 big block Ford. This was a fun project that was relatively easy to do and it cranked out some great power, but like a lot of projects around here we're gonna reuse it for another project. So it is time to get it reconfigured. [ Frankie ] What he means by reconfigured is we're actually gonna be taking the boost off of this engine. We're gonna be taking the turbo off. Obviously we're gonna give up some power but the main requirement for the project that this is going in is that it be naturally aspirated so it goes in nice and easy. So we're gonna be making some upgrades today on the induction side to help up the n/a power but we know what it makes as it sits. If you forgot here's a quick look at all the upgrades this 460 has gotten already. [ Pat ] This engine started out as a bone stock 460 that we stuck a 76-millimeter turbo on to make a budget based 494.5 horsepower and 724.3-pound feet before we brought it in for the first round of upgrades. We wanted to improve the durability of the engine by swapping out some of the stock internal components for some heavier duty options including a set of forged Summit Racing H-beam rods and a set of forged pistons. [ Frankie ] We also converted the engine to a mild hydraulic roller cam, installed a deep four by four oil pan, a set of roller rockers, and topped it off with an Edelbrock Air Gap intake manifold. Naturally aspirated it picked up to 379.1 horsepower and 480-pound feet, and with our tougher parts we felt comfortable putting the turbo back and making 568 horsepower and 769-pound feet on nine and a half p-s-i of boost with pump gas. First up, and to the chagrin of all lovers of boost, the turbo system is being removed, starting with the waste gates followed closely by the dyno specific custom crossover pipe. [ drill humming ] [ Music ] [ Frankie ] Next up, to get better access to the turbo our serpentine accessory setup is taken off. This VS Racing 76-millimeter turbo worked awesome for this application but it is going back on the parts shelf to be used another day. [ Pat ] The plug wires and distributor will be removed and reused later on. [ Music ] Our stock cast iron exhaust manifolds are relieved of their service and will be stuck in the reuse at a later date pile. Moving on to the top side of the engine the Edelbrock dual plane intake is chiseled free from the adapters. We will be reusing it on the new combo. Speaking of those adapters they were necessary to put the older style intake on the newer style e-f-i iron heads. So we removed the bolts and once again wedged some sharp gasket scrapers in between them and the head to pry them off. These adapters will stay with the iron heads along with the valley plate. [ Music ] [ Frankie ] To gain access to the valve train our valve covers get unbolted, and to make the engine easier to turn over we zip out all the spark bolts. The only part of the valvetrain that will be reused are the hydraulic roller lifters, and we keep them and everything else in order as they come out. We remove everything at t-d-c compression stroke per cylinder in the engine's firing order. This makes it easy to keep it in order and to minimize the load on parts as they're taken off. [ Pat ] Before we can get to the head bolts the valve cover adapters have to go away. They were necessary to be able to run our cool old school valve covers. Like the head adapters, they were sealed on super good. Next the massive ARP head bolts are broken loose and zipped out so the heavy stock cast iron heads can come off. A quick tip. Don't assume the dowels are holding the head on. Frankie almost had a bad day if it wasn't for his cat-like reflexes. [ Frankie ] Moving on to the front of the engine the water pump is unbolted and the balancer is taken off along with the external front counterweight so we can get to the front timing cover. Initially we had planned on carefully removing the cover to save the oil pan gasket underneath but it didn't work out. The timing set and cam thrust plate comes off. Then while Pat is draining the oil to remove the oil pan to change the gasket we now have to change. The slightly used roller cam is gently slid out of the block. With that we are pretty much ready to start the reassembly of our 460. [ Pat ] Up next, our stripped 460 starts going back together with a bigger bump stick, free flowing heads, and a brand new e-f-i system.
[ Frankie ] Now we can move on to the reassembly of our 460 starting with our new hydraulic roller camshaft. The cam we had before worked great but it was really geared towards low r-p-m torque. So we're gonna make a little bit of a change on the cam. Something a little bit more aggressive so it compliments the high flowing cylinder heads we're gonna be using, which we'll show you in a little bit. This cam has a little bit more duration on the intake and a lot more duration on the exhaust. It has specs at 50 for the intake of 227 degrees. On the exhaust it is 241 degrees at 50. The lobes are set on a 107-degree lobe separation angle, and lift at the valve is 580 thousandths on the intake with a one-eight rocker, and lift at the valve on the exhaust is 562 with a one-eight rocker. We'll get this slid in and then we can degree it. We're gonna set our intake center line at 105.75, which is one and a quarter degrees advanced. [ Pat ] With the camshaft and timing set ready to rock we reinstall the front timing cover. We use the external counterweight to center the cover before the fasteners are tightened up. That gets followed by the installation of the water pump assembly. [ Music ] [ ratchet clicking ] [ Music ] [ Pat ] The stock balancer gets put back in place with the proper tool, not a hammer. [ Music ] [ Frankie ] For our new head gaskets we chose Cometic m-l-s with a 4-500 bore and a 27 thousandths compressed thickness. [ Pat ] Aside from the camshaft the other significant upgrade on our combination is a set of Edelbrock Performer RPM cylinder heads we picked up from Summit Racing Equipment. These feature a 292cc intake port and 100cc exhaust port. They also have a 75cc combustion chamber. Keep in mind our old iron heads had a 100cc combustion chamber. Our new ones are 75cc. So that gives us a significant bump in compression. From the iron heads having an 8.49 to one compression ratio to our new ones have a calculated compression of 10.59 to one, over two points, and these are set up to run right out of the box. Setup for our hydraulic roller valvetrain with these springs and also they have a 2-190 intake valve, 1-760 exhaust valve, significantly increasing the flow. Also to make it even better these save 25 pounds apiece. So they're significantly lighter than our iron ones, keeping us and our engine a little bit lighter. [ Music ] [ drill humming ] [ Frankie ] Since we have a new set of cylinder heads we also needed a new set of cylinder heat bolts because these Edelbrock heads have different column heights than the stock ones. So we reached out ARP and got a new head bolt kit. This is part number #1553603. This is a head bolt kit specific for the Edelbrock heads but it's made of the same material. It is an 87-40 chro-moly material that has a really high strength. It is 180,000 p-s-i of tensile strength, which is way higher than the stock fasteners or even a grade eight that you would find from the hardware store. The best part is ARP has done all the research to make sure that these are dimensionally correct and have the correct amount of thread engagement with the block when they stick out of the heads. Now these have very specific instructions for getting them ready and for torquing them. So we've gone ahead and cleaned them with lacquer thinner and prepped them with their ARP Ultra Torque Lubricant on the threads and between the washer and the head of the bolt. We're gonna torque them in sequence to the recommended value that ARP has, which is 140-pound feet. It's not the stock recommendation. It is ARP's recommendation so we get the correct amount of clamp load it is consistent. So we'll get these in and get them torqued up. [ Pat ] It is important to follow the included instructions from ARP to get accurate clamping force. [ drill humming ] [ Music ] [ torque wrench beeping ] [ Music ] [ torque wrench beeping ] [ Music ] [ torque wrench beeping ] [ Music ] [ Pat ] Excellent! [ Frankie ] Big torque, big clamp. [ Pat ] Coming up, we top off our upgraded 460 build to see if we can top our previous naturally aspirated numbers on the dyno.
[ Frankie ] We're continuing on with our 460 build. We're gonna start getting the valve train in and finish up the assembly. The next order of operations is to install the previously run hydraulic roller lifters along with a new set of Trick Flow chor-moly three-eighths diameter push rods that are 8-100 long with an 80 thousandths wall thickness. [ Music ] That is followed by a new set of 1.8 ratio Comp Cams Pro Magnum XD steel rocker arms. [ Music ]
After that the rockers are adjusted in the firing order to one half turn past zero lash. [ Music ] [ ratchet clicking ] [ Music ]
[ Music ] [ Pat ] Time to reinstall the induction, which consists of an Edelbrock Performer RPM Air Gap. It is torqued down in multiple stages for complete gasket compression to 35-pound feet. [ torque wrench clicking ] [ Music ] [ Pat ] Wrapping up we put on our old school chrome valve covers, followed closely by the rest of the front accessory drive. [ Music ] [ torque wrench clicking ] [ Music ]
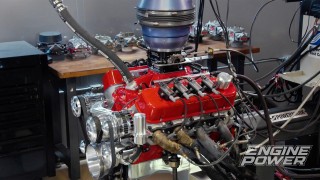
[ Pat ] With all that done we are now ready to make some naturally aspirated power on the dyno. [ Frankie ] Since we are just running this engine naturally aspirated this time it gives us a great opportunity to try out something new from Holley, and that is their Sniper-2 e-f-i unit. This is very similar to the first generation but has some improvements that Holley has made to make it better for the user. Namely they have done a ton to improve the r-f noise interference around the e-c-u. It has a very clean wiring layout where all wires come out of the rear of the unit. All of the wiring connections are made into a single connector. It has an improved u-s-b connector. So it has a screw type connector that's much more positive when you're engaging it. It has the same simple wiring harness. It only takes four wires to hook it up and getting it running. It comes included with an oxygen sensor that you can put in the exhaust, and you can do all the setup and tuning with the standard three and a half inch screen with unit. If you really wanted to Holley has come out with something brand new and that is a Bluetooth module that plugs into the unit so you can do all the setup, wizard, all the tuning, and monitor all the vitals of the engine right on your phone or tablet. That's super cool and we're really excited to try it. We're gonna get it on this engine and get this thing running. Coming up, we get big power, big torque, and big gains out of our big block Ford.
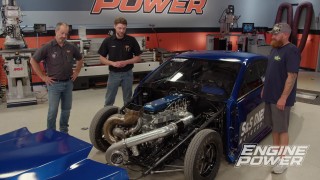
[ Frankie ] So we have our 460 on the dyno and running the Sniper-2 on top. Fired right up. Been letting it learn, doing some preliminary pulls, just trying to get it to learn the fuel. Been monitoring it on my cellular device here, which is pretty cool. It has all the stuff that you want to look at. You can monitor all the sensors, monitor all the fueling, and all that. So this is gonna be pretty cool to see how fast this thing learns during wide open throttle. You ready to make a pull? [ Pat ] Ready to rock 'n roll here. I've upped the upper limit of the dyno pull to 6,000 because we've got a little bit better spring. I think the heads are a little bit better, I know they're better. So we're gonna go from 2,500 to 6,000. What I love about these fuel injection units like this particular Sniper-2, when you're diving into it it doesn't have any stumble, any anything. They just work immediately. The actual part where it's learning takes a little bit of time, but initially they are hot to trot right out of the box here. Here we go! [ engine revving ] [ Pat ] Smooth as glass. [ Frankie ] Way up on torque. [ engine revving ] [ Pat ] Just glides right through the pull like nothing. Now that's 30 degrees of timing. [ Frankie ] AFRs were tracking awesome. Look at that! 554.8-pound feet and 519.1 horsepower. So peak power at 5,900 and peak torque right at 3,800. [ Pat ] That's super nice! [ Frankie ] Originally when we did all the turbo stuff it was a low r-p-m towing engine. It kinda still is that. Now this is the n/a version because what it's going in doesn't have room for the turbos and it's a lot of fab work. So they just wanted something more simple. I would still consider this a relatively low r-p-m engine, and it makes way more torque than it did naturally aspirated with the stock head. I'm pretty happy with that. This is a mild engine. It's not a high compression engine. It's now a large duration camshaft. It's not a very large c-c head. Sized appropriately for the r-p-m range that we're gonna be running it in. Those are just good all around numbers. [ Pat ] We're not building a Comp Eliminator engine. This is a dual plane and a Sniper on it. We'll do a little bit of tweaking. [ Frankie ] Put some timing in it. [ Music ] [ engine idling ] [ Music ] [ Frankie ] I put two degrees of timing in it. Now we're at 32 total. We'll see what that does. Nothing was leaking, nothing fell off the engine. [ Pat ] This is like grandma's station wagon right here. [ engine revving ] [ Frankie ] Just throw it right in there. [ Pat ] Good oil pressure. [ engine revving ] [ Frankie ] I think I might have saw some numbers. [ Pat ] Like a walk in the park here. [ Frankie ] Oh yeah, 560-pound feet and 523.5 horsepower. That is improvement! [ Pat ] Air/fuels are spot on. I like it when you're targeting something and it actually hits it. These type of operations. Okay we've got to put a jet in or two. We're doing it from the convenience of your phone. [ Frankie ] Right now this is a pretty conservative tune cause we're still in 93 octane pump gas. So it's targeting 13-0 for an air/fuel but we have vacuum in the crankcase from those evacs, which is awesome. [ Pat ] Two inches of vacuum in the pan just from running evacs. I'm a huge fan of the evacuation system. We'll keep going. The normal way we do it is we keep sticking timing in it until it levels off. You can get into a think with pump gas where you start overtiming it. It'll start detonating immediately because the gas is bad. [ Frankie ] Right now we're still picking up power. I say we keep going until it stops picking up power. [ Pat ] Two more degrees. [ engine idling ] [ Frankie ] We have 34 degrees of timing now. Let's see what happens. It'll make more, the same, or less. [ engine revving ]
[ engine revving ] [ Pat ] Notice how I left my glasses on. [ Frankie ] So you could see the numbers! [ Pat ] We actually picked up a little bit. 533 on horse pressures and 565 on torque. [ Frankie ] 565 at 3,900, 533.6 at 5,900. That's a big jump too. [ Pat ] Everything is starting to learn up nice. The graph is getting nice and smooth. You want to keep going we can. [ Frankie ] I say we kinda have to cause we have to go until it stops making more. I'm gonna go put another two in it and we'll see. [ engine idling ] [ Pat ] Two more degrees. So we're at 36 degrees of timing, and that's normally about what an aluminum headed deal stops at. There's some things depending on what kind of piston's in it, depending what kind of manifold's on, depending on what kind of induction's on it. They all do different things. Typically when you're into the over 35-degree range that's when things, one will be a little better than the other depending on how much timing's in it. What we're gonna do is we're gonna find out right. [ engine revving ]
[ Pat ] That was too close to call. We're watching oil pressure. That is pretty much it. That one made the same. Made 533 for horsepower, 565-pound feet. So I think we're right there. Air/fuels look good, oil pressure looks fantastic. [ Frankie ] That's probably gonna be it for timing. [ Pat ] We like doing all kinds of stuff just to show people what you can do with parts. There's a hundred different iterations we could do with this. The one that we've just completed with the cam, headers, that intake and that e-f-i, which works spectacular by the way. I think this is a win all the way around. [ Frankie ] I would agree. For more high power engine builds like this one you can find Engine Power on Powernation.