HorsePower Builds
Want more content like this?
Join the PowerNation Email NewsletterVideo Transcript
Well, here we go. A brand new season and a new year. Hey, it's a whole new millennium
and we've got some new tricks for an old flathead. So, stay with us
today on horsepower TV.
The Ford flathead, one of history's most monumental motors.
They're hot again and we'll build one with some nifty nostalgia pieces and some high tech bolt ons like a super charger. Then we'll test our build ups benefits on a state of the art D
and a hot rod face off featuring a live window coup from the last millennium versus a modern rod from the new one.
So, hang on for horsepower TV.
Hey, man, what you got here? Well,
everybody who's been around hot rods long enough knows that anything old
becomes new again.
I guess this prowler is uh Plymouth's high tech approach to our hobby.
Might be for the guys who have time to write the check but don't have time to spin wrenches. We'll play with this thing a little bit later on.
But first check this out rods like this are what got it all started. Now, this is a nostalgic 34 Ford that was actually built back in the fifties
up front.
It's got a full house flathead Ford with a brace of Stromberg 97 sitting on that Fenton intake.
Now, the old flatheads enjoyed a comeback thanks to new technology
and today we're gonna combine the old and new and build our own with a kit for motor city flathead. That's right. Now, we're gonna help out both the reliability and the power by strapping on this blower and a high tech electronic ignition.
But first, what do you say? We take a trip to Dundee Michigan. We're machining that kit is what's gonna make it easy for you
to build a better flathead.
The flathead wasn't called a flathead until after its production run from 1935 until 1952.
That's when it powered the first real hot rods of America from coast to coast from the dry lakes to the drag strips.
With the advent of muscle cars in the sixties, flatheads practically faded away,
but today they're hotter than ever. The power plant of choice of street riders who want the nostalgic look and feel of a real flathead.
No one appreciates that more than Mark Kirby. So a lot of those guys are uh reliving their childhood. I mean, they just
cut their teeth on this and everybody wants to stay young. You know,
as owner and founder of Motor City flatheads, Mark's become known nationwide as the flathead guru from his turnkey engines like the one he built for Tim Allen
to his vast line of improved flathead parts.
We spent a couple of days here and learned some secrets to overcoming common flathead problems like overheating.
Now, this core sand was extracted from one old block sand which could settle into water jackets and obstruct flow
mark makes sure every vintage block machine here is not only baked but also carefully cleaned of this core sand.
So getting a clean block and having the gas concealed pretty much eliminates any overheating problems,
torque plates are used and all boring. And here he's disproved some old flathead folklore
that said thick cylinder walls were needed to avoid overheating.
Well, remember the thicker cylinder wall acts like a heat sink.
It retains the heat,
so thinner walls really cool fine. Another flathead problem was in the oil filtering system
or lack of
these things didn't have an oil filter system on it.
And in later years, they added a canister up here, but Ford called it a partial flow filter. They didn't call it a full flow.
So when you take these apart, a lot of times you'll pull the intake and you'll have sludge this thick on the intake.
Mark has developed this full flow system. You'll see more of later
that re
routes oil to a remote filter than back to the block.
Poor breathing was another notorious
nemesis at Mark's airflow research has yielded power producing porting techniques.
The real downfall on a flat head is the ports, obviously, I mean, they just don't breathe and they don't make horse power.
So what we have to do is go in and do an extensive amount of work to make any kind of power.
We know that we want a big fat flat floor
flows the best air
and we go to about a 17 valve on the intake stock is 15.
The result of Motor city flatheads mission of building a better flathead is a parts line that includes everything from a main cap strap to prevent broken mains
to an aluminum three ring piston, replacing the original that had four,
the oversized valve guides. He uses help prevent oil leaks. Another
fable of the old flathead
and Mark makes his own crank shaft with a four inch stroke just like in the old Mercy's.
He's got everything from improved heads to wire looms
to give this classic monumental motor even better looks and much more horsepower. I just remember one thing
real high rise don't have valve covers.
Now we're gonna start putting together our retro
tech flathead right after this. So stay with us
for the latest news on horsepower TV. Check us out online at horsepower tv.com.
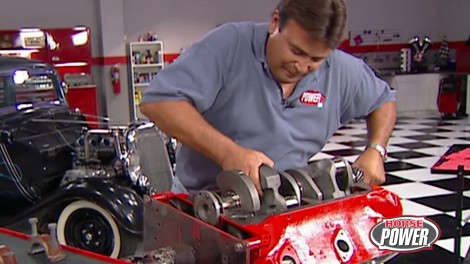
All right. Welcome back to the show. Well, here's our block back from the machine shop. I'm ready for assembly now. This thing started out with 239 cubic inches. But after our board stroke combination, of course, we've got 305.
That's right. Now, the first step we wanna do is drop in the crank shaft and we're gonna leave the rear main seal out.
This way, we can check everything for straightness.
Install the main caps
to
the bolts down and give the crank a spin.
Well, that checked out fine. Now we can install the camshaft
before installing the camshaft though. Give the bearings a good coat of assembly lube and don't forget to install the oil galley plug.
Now, you'll notice that without the crank shaft in the way. Well,
this camshaft is a whole lot easier to install.
The original flathead used a rope style seal like this when you had to soak in oil overnight and it still leaked. So to solve that problem, Mark Kirby's come up with this new Kevlar seal. It's been impregnated with graphite. Now it fits inside this case here
and after a good liberal coating of silicone,
just drop it in,
make sure it's good snug
dab of oil and we're ready for the crank.
Hey, I got those mains lube,
man. You're good to go.
We're gonna go ahead and drop in this crank shaft.
There we go. And then I'm gonna show you a piece of hardware that's gonna buy us a little bit of extra bottom end insurance.
As you can see, there are only three main supporting that flathead crank shaft. So we're gonna add this billet steel strap
to the center cap to help bolster things up a bit. Now, the cap and the strap
bolt in together as a unit
torque, all the main bearing bolts to 100 ft pounds,
then just finger, tighten the center bolt
and stake it to keep it from backing out.
Now, remember our flathead is gonna be supercharged. So the kit we ordered comes with these rods
and Ross forged pistons. Now we have to assemble them with these wrist pins that go through the piston
then
through the rod itself
and we use these spiral locks
to keep them in place
for rings. We're using a total seal set that includes this Molly top ring,
a unique two piece second ring set that's machine to fit together and really contain compression
for oil rings. We're using the standard scrapers on top of an expander
while Joe finishes up with those rings, I'm gonna go ahead and time the cam. Now on a flathead, it's pretty simple. The cam is actually index so that the cam gear can only go on one way
simply line up the dots on the cam and crank gear.
And here's a little tip for you.
Some of the earlier flatheads used a fiber cam gear
and it's still available today.
But for performance applications, well, you wanna make sure that you use an aluminum one, like the one we have
a small bore engine like this one uses pretty tight end gaps on the rings. We set ours at 14,000. Now, make sure you give these pistons a good shot of oil before you compress them and send them home,
slide, the piston in the Boar
square up the ring compressor,
then send it home.
Here's a pretty fascinating flathead innovation to clear the small bore, the rod and bolt were forged as one and machine later. In fact, this end cap here
is a good bit wider.
Now, a lot of you guys probably have never seen a flathead before and,
well, you probably don't know why they're even called that. Well, here's the reason why it's because of the way the cylinder head is shaped. Now, you won't see any valves or ports inside of here.
In fact, all that stuff is actually contained inside the block. Now, the cylinder head really just kind of acts as a cap for the combustion chamber. Now, we said we go over here and talk with Joe for a minute.
Hey, Joe, how you doing over here pretty good? Just putting together the valve tray
and it pretty much goes together here on the bench then drops into the engine as a complete assembly
start with your valve
slip on the valve
guine
chims for proper spring. He
spray
retainer
and
finally the locks and that's it.
Wow, that was pretty simple.
What do you say? We go to the engine and slip them in place?
Now, before we can install the valve assemblies into the block first, we have to lube the lifters.
There we go
and slide them down into the lifter bores.
There we go.
Then keeping everything together.
The whole assembly drops in through the valve opening. Now, once it's in place, we use this special bar
to compress the spring
and slide the horseshoe clip into a groove on the valve guide
timing cover can go on next and that's gonna help keep the cam from walking out of the block while we lash the valves.
Now to do that, adjust each cylinder individually at top dead center,
insert an Allen wrench to lock the lifter in place.
Then use the wrench to turn the adjusting nut on each lifter until you have 12,000 on the intake 14 on the exhaust.
Well, we're just about ready to button up the bottom end. Now we're gonna use the Motor city oil pump and filter kit that we saw earlier.
Now, it just slides into place like this
and it attaches with one bolt
that we're gonna torque to 25 ft pounds
for the oil pan. We'll use a couple of more of these Kevlar seals. Now, here's a little tip for you.
Once you get it in place like this,
go ahead and crypt the lip of the pan
that'll put some pressure on the seal, make sure you don't get any leaks.
Well, I've already laid the gaskets in place and really the only secret here is to put a dab of silicone at each of the four corners to really help seal up that oil pan.
Ok. Before we can both this pan up though, need to run a line through it for the oil filter. You got it. Yeah, I've got it right here. It's a bit lower. All right.
Stick this screwdriver in
now. Flatheads might be forever, but we can't go for that long without taking a break. So we'll be back to finish up our full house flathead right after this.
All right, let her down through the oil pump.
All right, welcome back to the shop and to our Ford flathead engine build up. Well, while you were gone, we bolted up our water pumps. Now, we're gonna install this Patrick Mallory electronic distributor. Now, it only goes on one way. In fact, this offset key here lines up with an offset slot on the camshaft
that blower is gonna pump up our cylinder pressure considerably. So we're gonna have to lower our compression ratio to about 7 to 1. Now, we're gonna do it with these motor city heads here.
And as you can see, the combustion chambers are a lot larger than stock. In fact, 35 ccs larger, plus they're gonna unshod
the valves and, well, that's gonna make our motor breathe a little bit better.
All right,
let me get this head on here.
Here we go. Now
we're gonna go ahead and start with the head bolts.
They project down into the water jacket. So they're gonna be a little bit of thread sealant. We'll talk them to 55 ft pounds.
Hey, here's a hot new item from Holly.
They're in the super charger business now and Motor city mounts one up with their own special intake manifold and drive system.
Now we'll pump our motor up with about eight pounds of boost and top everything off with this Holly 750 CFM double pumper car.
The intake manifold goes on first.
Then the blower attaches with four big bolts,
a six rib bribe pulley attaches to the crank hub and installs as a unit.
The belt is installed next and this spring loaded idler keeps the right tension on the belt.
Well, finally, we're ready for that. Holly, we told you about
while Joe was mounting up that carb,
I went ahead and routed our Taylor wires through these cool stainless wire looms. Now, they're the only ones that'll handle those fat eight millimeter wires and
they just attach with a couple of header bolts. Hey, speaking of which, how about these jet hot coated Fenton headers? Hey, that's all right. Hang this stuff, man. I'm anxious to get this uh nostalgic flathead on the
Dino.
Me too. Let me get this out of your way. All right,
there we go.
We met Mark at
Rush racing in Livonia, Michigan to Dino
our flathead.
It doesn't get any better than this. It's a place where R and D has led to championship trophies in just about every category of racing from SCC A
to the Winston Cup Series.
And we got the first class treatment as they strapped our engine to the same state of the art. Dino used to fine tune the rush
race cars
and you need to have repeatability. That's the most important.
The numbers have to be accurate every time. So when you do a test and you make a change
after you've made that change, you need to know if you made a better change or
if it's gone the other way,
repeatability is vital for a street rod motor too.
And after over a dozen pulls our flatheads peak torque to 300 ft pounds, almost flattens out, which is perfect for an engine like this.
You got it right at 260 horsepower too. Are you happy with that? Just what we want? Four or five pounds of boot on those rods. We make 250 60 horsepower, 300 ft pounds of torque right where we want to be for street R
and we got that Boulevard Gru.
Ok.
Ok. Sounds great. That's neat.
And stay with us. We'll be back with more horsepower TV, right after this.
For more horsepower. Join us online at Horsepower tv.com.
No, no, no, this is the one. No. Uh I think I hear your stockbroker calling there, Mr Yuppie. This is the real deal.
Oh, hi. Welcome back. You know, you're just in time to help settle an argument. Now, my partner and I have been having a little discussion about which of these two rods would be the coolest one to take on a cruise night. Yeah. Some purists might argue whether this prowler is even a hot rod or not.
I say it is and they're just jealous. I mean, with cruel styling like this.
Well, you could turn heads as fast as you turn RPM.
Oh, no. Now this is the hot rod. I wanna be seen cruising in. It's an all steel 34 that's built just like they did back in the fifties. And when it comes to styling, well, who cares about turning heads when you can turn tires instead?
Well, I got something that'll turn tires. How about a high
tech fuel injected V6 that makes 250 horsepower?
Yeah, but I've got a low tech flathead with four Stromberg 90 sevens. Now, they may not be much more than a sophisticated fuel league, but I bet I can make 250 horsepower on these in carbs alone.
Oh, yeah. Well, I can cruise and covered in this prowler. It's got leather bucket seats, air conditioning and surround sound stereo.
Uh, big deal. I got a canvas covered bench
and my air conditioning works every time I crank the window out decides who needs a stereo when you can listen to this sweet flathead instead.
Oh, well, at least I crank up the stereo
with its high tech suspension. The Prowler takes corners like it's on rails.
Well, the 34 has got an ancient suspension and when it goes around corners it does it on its door handles.
Whenever I go out cruising in this prower, we always attract a crowd of admirers.
Well, whenever we're out cruising, well, being the 34 we got our own following too.
This Prowler is a lot of fun,
but I hate to admit it.
There's something about that classic 34 that really spins my crane
and you know what, as much as I hate to admit it,
that prowler there looks pretty good going down the road too, but it's got one feature that I wish this 34 had. What's that stereo? No,
a cup holder. Oh, no.
Looks like I gotta hang my partner out to dry for a minute. Well, you're pretty good at that anyway. Tell you what. We'll be back with hot parts and a dry pants right after this.
I sure hope that wasn't hot.
And now hot parts brought to you by car parts.com, everything for your car, truck van or SUV.
They say what goes around comes around whether you're talking about trends or tires.
Well, here's some retro rubber from Coker tire company. Now they put a classic spin on a modern radio by adding wide white walls and red lines. So they're the perfect match for your retro rod or your restoration. Now, they're available in all popular sizes and prices start at about 100 and 30 bucks.
Edelbrock has been an industry leader for many years and now they're staying ahead of the nostalgia craze by re popping their famous cylinder heads for flathead Fords
cast from lightweight aluminum, the fit 1948 and up 24 stud motors and give them an 8 to 1 compression ratio.
They also have extra cooling fans. So for a cool 480 A pair,
you can have the hottest ride on the block.
Of course, you can have the coolest mailbox on your block too with these retro repositories from the California car cover company.
Now they come in a variety of really cool designs like this classic 57 Chevy look or check out this fantastic flame job over here.
Well, now you can put a smile on your postman's face and make sure all your deliveries are special with prices starting at under 60 bucks. Cool. We have a first class delivery for you next week. Make it a priority.
It's the stock car of the future and we'll go inside an A S A racers, fuel injected small block engine and take you through its high tech undercarriage before we put it on the chassis,
Dino for the ultimate power test.
We'll also take you to one of the nation's top Winston Cup tracks for a white knuckle hands on the wheel driving experience,
plus a look at how cool wheels and tires can change your rod's personality.
And remember high performance fun is what this show is all about.
I gotta
go
for information about the products used in today's show and more. Check us out online at Horsepower tv.com
Horsepower TV is an RTM production.
Show Full Transcript
and we've got some new tricks for an old flathead. So, stay with us
today on horsepower TV.
The Ford flathead, one of history's most monumental motors.
They're hot again and we'll build one with some nifty nostalgia pieces and some high tech bolt ons like a super charger. Then we'll test our build ups benefits on a state of the art D
and a hot rod face off featuring a live window coup from the last millennium versus a modern rod from the new one.
So, hang on for horsepower TV.
Hey, man, what you got here? Well,
everybody who's been around hot rods long enough knows that anything old
becomes new again.
I guess this prowler is uh Plymouth's high tech approach to our hobby.
Might be for the guys who have time to write the check but don't have time to spin wrenches. We'll play with this thing a little bit later on.
But first check this out rods like this are what got it all started. Now, this is a nostalgic 34 Ford that was actually built back in the fifties
up front.
It's got a full house flathead Ford with a brace of Stromberg 97 sitting on that Fenton intake.
Now, the old flatheads enjoyed a comeback thanks to new technology
and today we're gonna combine the old and new and build our own with a kit for motor city flathead. That's right. Now, we're gonna help out both the reliability and the power by strapping on this blower and a high tech electronic ignition.
But first, what do you say? We take a trip to Dundee Michigan. We're machining that kit is what's gonna make it easy for you
to build a better flathead.
The flathead wasn't called a flathead until after its production run from 1935 until 1952.
That's when it powered the first real hot rods of America from coast to coast from the dry lakes to the drag strips.
With the advent of muscle cars in the sixties, flatheads practically faded away,
but today they're hotter than ever. The power plant of choice of street riders who want the nostalgic look and feel of a real flathead.
No one appreciates that more than Mark Kirby. So a lot of those guys are uh reliving their childhood. I mean, they just
cut their teeth on this and everybody wants to stay young. You know,
as owner and founder of Motor City flatheads, Mark's become known nationwide as the flathead guru from his turnkey engines like the one he built for Tim Allen
to his vast line of improved flathead parts.
We spent a couple of days here and learned some secrets to overcoming common flathead problems like overheating.
Now, this core sand was extracted from one old block sand which could settle into water jackets and obstruct flow
mark makes sure every vintage block machine here is not only baked but also carefully cleaned of this core sand.
So getting a clean block and having the gas concealed pretty much eliminates any overheating problems,
torque plates are used and all boring. And here he's disproved some old flathead folklore
that said thick cylinder walls were needed to avoid overheating.
Well, remember the thicker cylinder wall acts like a heat sink.
It retains the heat,
so thinner walls really cool fine. Another flathead problem was in the oil filtering system
or lack of
these things didn't have an oil filter system on it.
And in later years, they added a canister up here, but Ford called it a partial flow filter. They didn't call it a full flow.
So when you take these apart, a lot of times you'll pull the intake and you'll have sludge this thick on the intake.
Mark has developed this full flow system. You'll see more of later
that re
routes oil to a remote filter than back to the block.
Poor breathing was another notorious
nemesis at Mark's airflow research has yielded power producing porting techniques.
The real downfall on a flat head is the ports, obviously, I mean, they just don't breathe and they don't make horse power.
So what we have to do is go in and do an extensive amount of work to make any kind of power.
We know that we want a big fat flat floor
flows the best air
and we go to about a 17 valve on the intake stock is 15.
The result of Motor city flatheads mission of building a better flathead is a parts line that includes everything from a main cap strap to prevent broken mains
to an aluminum three ring piston, replacing the original that had four,
the oversized valve guides. He uses help prevent oil leaks. Another
fable of the old flathead
and Mark makes his own crank shaft with a four inch stroke just like in the old Mercy's.
He's got everything from improved heads to wire looms
to give this classic monumental motor even better looks and much more horsepower. I just remember one thing
real high rise don't have valve covers.
Now we're gonna start putting together our retro
tech flathead right after this. So stay with us
for the latest news on horsepower TV. Check us out online at horsepower tv.com.
All right. Welcome back to the show. Well, here's our block back from the machine shop. I'm ready for assembly now. This thing started out with 239 cubic inches. But after our board stroke combination, of course, we've got 305.
That's right. Now, the first step we wanna do is drop in the crank shaft and we're gonna leave the rear main seal out.
This way, we can check everything for straightness.
Install the main caps
to
the bolts down and give the crank a spin.
Well, that checked out fine. Now we can install the camshaft
before installing the camshaft though. Give the bearings a good coat of assembly lube and don't forget to install the oil galley plug.
Now, you'll notice that without the crank shaft in the way. Well,
this camshaft is a whole lot easier to install.
The original flathead used a rope style seal like this when you had to soak in oil overnight and it still leaked. So to solve that problem, Mark Kirby's come up with this new Kevlar seal. It's been impregnated with graphite. Now it fits inside this case here
and after a good liberal coating of silicone,
just drop it in,
make sure it's good snug
dab of oil and we're ready for the crank.
Hey, I got those mains lube,
man. You're good to go.
We're gonna go ahead and drop in this crank shaft.
There we go. And then I'm gonna show you a piece of hardware that's gonna buy us a little bit of extra bottom end insurance.
As you can see, there are only three main supporting that flathead crank shaft. So we're gonna add this billet steel strap
to the center cap to help bolster things up a bit. Now, the cap and the strap
bolt in together as a unit
torque, all the main bearing bolts to 100 ft pounds,
then just finger, tighten the center bolt
and stake it to keep it from backing out.
Now, remember our flathead is gonna be supercharged. So the kit we ordered comes with these rods
and Ross forged pistons. Now we have to assemble them with these wrist pins that go through the piston
then
through the rod itself
and we use these spiral locks
to keep them in place
for rings. We're using a total seal set that includes this Molly top ring,
a unique two piece second ring set that's machine to fit together and really contain compression
for oil rings. We're using the standard scrapers on top of an expander
while Joe finishes up with those rings, I'm gonna go ahead and time the cam. Now on a flathead, it's pretty simple. The cam is actually index so that the cam gear can only go on one way
simply line up the dots on the cam and crank gear.
And here's a little tip for you.
Some of the earlier flatheads used a fiber cam gear
and it's still available today.
But for performance applications, well, you wanna make sure that you use an aluminum one, like the one we have
a small bore engine like this one uses pretty tight end gaps on the rings. We set ours at 14,000. Now, make sure you give these pistons a good shot of oil before you compress them and send them home,
slide, the piston in the Boar
square up the ring compressor,
then send it home.
Here's a pretty fascinating flathead innovation to clear the small bore, the rod and bolt were forged as one and machine later. In fact, this end cap here
is a good bit wider.
Now, a lot of you guys probably have never seen a flathead before and,
well, you probably don't know why they're even called that. Well, here's the reason why it's because of the way the cylinder head is shaped. Now, you won't see any valves or ports inside of here.
In fact, all that stuff is actually contained inside the block. Now, the cylinder head really just kind of acts as a cap for the combustion chamber. Now, we said we go over here and talk with Joe for a minute.
Hey, Joe, how you doing over here pretty good? Just putting together the valve tray
and it pretty much goes together here on the bench then drops into the engine as a complete assembly
start with your valve
slip on the valve
guine
chims for proper spring. He
spray
retainer
and
finally the locks and that's it.
Wow, that was pretty simple.
What do you say? We go to the engine and slip them in place?
Now, before we can install the valve assemblies into the block first, we have to lube the lifters.
There we go
and slide them down into the lifter bores.
There we go.
Then keeping everything together.
The whole assembly drops in through the valve opening. Now, once it's in place, we use this special bar
to compress the spring
and slide the horseshoe clip into a groove on the valve guide
timing cover can go on next and that's gonna help keep the cam from walking out of the block while we lash the valves.
Now to do that, adjust each cylinder individually at top dead center,
insert an Allen wrench to lock the lifter in place.
Then use the wrench to turn the adjusting nut on each lifter until you have 12,000 on the intake 14 on the exhaust.
Well, we're just about ready to button up the bottom end. Now we're gonna use the Motor city oil pump and filter kit that we saw earlier.
Now, it just slides into place like this
and it attaches with one bolt
that we're gonna torque to 25 ft pounds
for the oil pan. We'll use a couple of more of these Kevlar seals. Now, here's a little tip for you.
Once you get it in place like this,
go ahead and crypt the lip of the pan
that'll put some pressure on the seal, make sure you don't get any leaks.
Well, I've already laid the gaskets in place and really the only secret here is to put a dab of silicone at each of the four corners to really help seal up that oil pan.
Ok. Before we can both this pan up though, need to run a line through it for the oil filter. You got it. Yeah, I've got it right here. It's a bit lower. All right.
Stick this screwdriver in
now. Flatheads might be forever, but we can't go for that long without taking a break. So we'll be back to finish up our full house flathead right after this.
All right, let her down through the oil pump.
All right, welcome back to the shop and to our Ford flathead engine build up. Well, while you were gone, we bolted up our water pumps. Now, we're gonna install this Patrick Mallory electronic distributor. Now, it only goes on one way. In fact, this offset key here lines up with an offset slot on the camshaft
that blower is gonna pump up our cylinder pressure considerably. So we're gonna have to lower our compression ratio to about 7 to 1. Now, we're gonna do it with these motor city heads here.
And as you can see, the combustion chambers are a lot larger than stock. In fact, 35 ccs larger, plus they're gonna unshod
the valves and, well, that's gonna make our motor breathe a little bit better.
All right,
let me get this head on here.
Here we go. Now
we're gonna go ahead and start with the head bolts.
They project down into the water jacket. So they're gonna be a little bit of thread sealant. We'll talk them to 55 ft pounds.
Hey, here's a hot new item from Holly.
They're in the super charger business now and Motor city mounts one up with their own special intake manifold and drive system.
Now we'll pump our motor up with about eight pounds of boost and top everything off with this Holly 750 CFM double pumper car.
The intake manifold goes on first.
Then the blower attaches with four big bolts,
a six rib bribe pulley attaches to the crank hub and installs as a unit.
The belt is installed next and this spring loaded idler keeps the right tension on the belt.
Well, finally, we're ready for that. Holly, we told you about
while Joe was mounting up that carb,
I went ahead and routed our Taylor wires through these cool stainless wire looms. Now, they're the only ones that'll handle those fat eight millimeter wires and
they just attach with a couple of header bolts. Hey, speaking of which, how about these jet hot coated Fenton headers? Hey, that's all right. Hang this stuff, man. I'm anxious to get this uh nostalgic flathead on the
Dino.
Me too. Let me get this out of your way. All right,
there we go.
We met Mark at
Rush racing in Livonia, Michigan to Dino
our flathead.
It doesn't get any better than this. It's a place where R and D has led to championship trophies in just about every category of racing from SCC A
to the Winston Cup Series.
And we got the first class treatment as they strapped our engine to the same state of the art. Dino used to fine tune the rush
race cars
and you need to have repeatability. That's the most important.
The numbers have to be accurate every time. So when you do a test and you make a change
after you've made that change, you need to know if you made a better change or
if it's gone the other way,
repeatability is vital for a street rod motor too.
And after over a dozen pulls our flatheads peak torque to 300 ft pounds, almost flattens out, which is perfect for an engine like this.
You got it right at 260 horsepower too. Are you happy with that? Just what we want? Four or five pounds of boot on those rods. We make 250 60 horsepower, 300 ft pounds of torque right where we want to be for street R
and we got that Boulevard Gru.
Ok.
Ok. Sounds great. That's neat.
And stay with us. We'll be back with more horsepower TV, right after this.
For more horsepower. Join us online at Horsepower tv.com.
No, no, no, this is the one. No. Uh I think I hear your stockbroker calling there, Mr Yuppie. This is the real deal.
Oh, hi. Welcome back. You know, you're just in time to help settle an argument. Now, my partner and I have been having a little discussion about which of these two rods would be the coolest one to take on a cruise night. Yeah. Some purists might argue whether this prowler is even a hot rod or not.
I say it is and they're just jealous. I mean, with cruel styling like this.
Well, you could turn heads as fast as you turn RPM.
Oh, no. Now this is the hot rod. I wanna be seen cruising in. It's an all steel 34 that's built just like they did back in the fifties. And when it comes to styling, well, who cares about turning heads when you can turn tires instead?
Well, I got something that'll turn tires. How about a high
tech fuel injected V6 that makes 250 horsepower?
Yeah, but I've got a low tech flathead with four Stromberg 90 sevens. Now, they may not be much more than a sophisticated fuel league, but I bet I can make 250 horsepower on these in carbs alone.
Oh, yeah. Well, I can cruise and covered in this prowler. It's got leather bucket seats, air conditioning and surround sound stereo.
Uh, big deal. I got a canvas covered bench
and my air conditioning works every time I crank the window out decides who needs a stereo when you can listen to this sweet flathead instead.
Oh, well, at least I crank up the stereo
with its high tech suspension. The Prowler takes corners like it's on rails.
Well, the 34 has got an ancient suspension and when it goes around corners it does it on its door handles.
Whenever I go out cruising in this prower, we always attract a crowd of admirers.
Well, whenever we're out cruising, well, being the 34 we got our own following too.
This Prowler is a lot of fun,
but I hate to admit it.
There's something about that classic 34 that really spins my crane
and you know what, as much as I hate to admit it,
that prowler there looks pretty good going down the road too, but it's got one feature that I wish this 34 had. What's that stereo? No,
a cup holder. Oh, no.
Looks like I gotta hang my partner out to dry for a minute. Well, you're pretty good at that anyway. Tell you what. We'll be back with hot parts and a dry pants right after this.
I sure hope that wasn't hot.
And now hot parts brought to you by car parts.com, everything for your car, truck van or SUV.
They say what goes around comes around whether you're talking about trends or tires.
Well, here's some retro rubber from Coker tire company. Now they put a classic spin on a modern radio by adding wide white walls and red lines. So they're the perfect match for your retro rod or your restoration. Now, they're available in all popular sizes and prices start at about 100 and 30 bucks.
Edelbrock has been an industry leader for many years and now they're staying ahead of the nostalgia craze by re popping their famous cylinder heads for flathead Fords
cast from lightweight aluminum, the fit 1948 and up 24 stud motors and give them an 8 to 1 compression ratio.
They also have extra cooling fans. So for a cool 480 A pair,
you can have the hottest ride on the block.
Of course, you can have the coolest mailbox on your block too with these retro repositories from the California car cover company.
Now they come in a variety of really cool designs like this classic 57 Chevy look or check out this fantastic flame job over here.
Well, now you can put a smile on your postman's face and make sure all your deliveries are special with prices starting at under 60 bucks. Cool. We have a first class delivery for you next week. Make it a priority.
It's the stock car of the future and we'll go inside an A S A racers, fuel injected small block engine and take you through its high tech undercarriage before we put it on the chassis,
Dino for the ultimate power test.
We'll also take you to one of the nation's top Winston Cup tracks for a white knuckle hands on the wheel driving experience,
plus a look at how cool wheels and tires can change your rod's personality.
And remember high performance fun is what this show is all about.
I gotta
go
for information about the products used in today's show and more. Check us out online at Horsepower tv.com
Horsepower TV is an RTM production.