HorsePower Builds
Want more content like this?
Join the PowerNation Email NewsletterVideo Transcript
What a busy day in the shop. We're putting high tech brakes on Chuck Chevelle
and putting my firebird on the bottle
today on horsepower TV.
Blue Thunder's back and we'll put it through a suspension and break upgrade,
including everything from motors and sway bar to springs and a new steering box.
Plus we'll pump up the power in our project Firebird by installing a one shot Nitra setup that ought to be good for 100 30 extra horsepower. All right, I think we're ready.
So, hang on for horsepower TV.
Hi and welcome to the horsepower shop. You know, it's been a while since we did any work to Old Blue Thunder here and in case you missed it. Well, we've already installed a fuel injected GM, performance parts 502 under the hood and backed it with a B and M turbo 400 trans and a nine inch curry rear end.
No doubt about it. This thing will run with the best of them. Yeah, but today we gotta put the brakes on literally.
Now this thing came from the factory in 71 with disc brakes, but those 11 inch rotors and 30 year old technology just aren't up to the task. So today we'll upgrade Blue Thunder's binders with a 13 inch bear claw system.
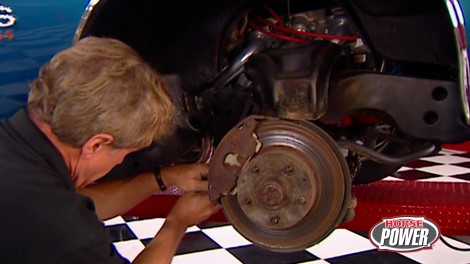
Yeah. But first we've got to finish disassembling this front suspension. I tell you what, I gotta get this thing up in the air a little bit further. Ok. While he handles that, let's look at the hardware
beer makes its track system for most applications.
They all come with 13 inch rotors and aluminum PB R two piston calipers. Now we ordered ours
with the taller B car spindles here to increase camera game and to help us maintain maximum tire contact patch.
Now
make that tall spindle system work. The kid also comes with these new tie rod ends and ball joints
that have been machined to fit in the stock Chevelle lower control arm.
Of course, while we've got the lower control arms out, we're gonna replace those rubber bushings with these urethane pieces that we got from performance suspension.
Now, the upper control arms are some tubular pieces that we got from Hotchkiss performance and they're shorter to work with that tall spindle. Of course, they also come with the right ball joint and urethane bushings already installed.
All right.
Now, before you start taking things apart
as always, make sure your vehicle is supported on jack stands,
then you can begin by taking off his caliper,
then the tie rods
and links
and shocks.
Then after knocking the ball joint loose and strapping a chain around the spring for safety.
You can remove the spindle and rotor as an assembly,
finally remove the spring
at the lower control arm.
And
here's the upper control arm,
man. You and your old Chevelles. What a dirty job. Well, I haven't been exactly loafing on my side over there besides, it's about time you got your hands dirty on this job too.
Now, I'm gonna grab these lower control arms, take them down to the machine shop, get the bushings and ball joints pressed in. It'll take me that long to get cleaned up. Now, I get to work on some nice new parts.
This stock rubber bumper here gets replaced by this new urethane drop stop. Of course, we need to replace it while the springs are out.
These new Hotchkiss upper control arms are direct replacements for our stock pieces
and you can mount them up using the original hardware.
Well, they sure did a nice job on these control arms.
Hey, man,
red light, red light.
Just as I thought you've been laying down on the job again. Hey, I'm just waiting on you. After all. It's time you spun a few wrenches around this place. Don't mind if I do. Uh, wait me when it's over. I will
just a little bit more. There we go.
Ok. With a lower control arm installed. We're ready for our Hotchkiss springs. Now, these have a higher spring rate and they're gonna drop the car about an inch for a lower center of gravity and improved handling.
Hey, no packing wheel bearings for this job. Our track system comes with the rotor and spindle all pre assembled and ready to hang. In fact, we just drop it on the ball joint.
We torque the upper nuts to 60 ft pounds, lower ones to 80.
Then we're ready to install the steel braided brake lines.
27
28 29
3031.
Now, the taper on that tall spindle steering arm is different than the one on the Chevelle. So bear includes a new tie rod end
here. Let me let you get a look at the difference there. Now, the best way to install that new tie rod end is to screw it into the tie rod
count. The number of turns make it the same as the old one that ought to get you close enough to get to the alignment shop.
Ok. While Chuck gets ready to install those tie rod ends, uh, we're gonna tie up some loose ones with our sponsors that is, stay with us. We'll be right back
for the latest news on horsepower TV. Check us out online at Horsepower tv.com.
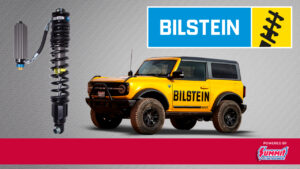
Hi, welcome back to the shop and our breaking suspension upgrade on Blue Thunder. These bills. Stein gas shocks will be a replacement for the hydraulic ones on our Chevelle. Now, they've got a high pressure design which means they react quickly to a wide range of road conditions.
Plus we think they're the perfect high tech compliment for our suspension upgrades.
While Joe's bolting up our shocks, I'm gonna show you our new sway bar.
That is as soon as I get this old one off.
A few weeks ago, we located the rear end in Blue Thunder using Hotchkiss control arm springs
and sway bar. Now, today we're gonna finish the job by adding their front sway bar that measures a hefty inch and a quarter compared to this puny one inch stalker. Now, it's held in place with these urethane end links and these bushings. Now, here's a really neat idea. These bushings are grez to
keep them from squeaking.
You can't get the most out of a high tech suspension if you're still using a low tech steering box. So we'll upgrade ours with this quick response box from Lee manufacturing. It's got a 12.7 ratio and only two and three quarter turns lock to lock. Now, to keep your turning radius tight,
the internal stops are set for each application.
All right, there it goes.
Now, a
lot of guys neglect this rag joint here, but you know, a lot of time, oil and constant steering take their toll. So
we're gonna upgrade ours with this steel reinforced piece from Lee. Maybe you can see those layers of steel mesh there. This will give us quicker steering response and more road feedback. Now it just slips over the end of the steering box. Here.
There we go.
Now we put this thing up.
Hey, partner, if you're about done with that box under there,
how about give me a hand with this bar? Oh, what timing?
Great.
Why don't you start your side first? Ok.
I'll hold it up here.
All right,
you might remember last week we showed you how to bend and flare brake line tubing.
Well, today that information is gonna come in handy
because we're gonna re plumb the system and we'll get started by forming this tubing over the rear end.
Then we're gonna finish the job
with this preform tubing from classic tube. Now, it's made to replace the originals perfectly.
And since it's stainless steel, well, it's a job, we won't have to worry about redoing anytime soon.
The track system comes with a new master cylinder with the correct capacity to match our new setup.
Now, we're hanging ours on a dual diaphragm brake booster. We got for master power.
It's gonna give us more power assist than the stock one and still maintain low pedal pressure. Oh, and you guys with roller rockers will be glad to know this because of this smaller diameter.
It'll even clear your tall valve covers.
Ok.
When we get this bolted up, we can hook up the brake pedal.
Well, here's something that's gonna help us get the most out of our new brakes and suspension
for rubber. We're using Dunlop's sp 8000. Now, we've got 280 fives out back to 50 fives up front.
The 40 series side wall on this 18 inch rim is gonna help reduce side wall flex and see this massive tread. That's gonna give us one heck of a contact patch.
We mounted them on the center line billet wheels. So our old Chevelle will turn heads while we're turning the tires. Now, we used eight inches up front nines in the back. Ok, I guess we ought to talk cash for a second.
You can expect to spend about 700 for the suspension pieces, another 400 for the shocks and the break up grade. Well, that'll be about 1300 less, of course
without the tall spindle option. Oh, and don't forget the wheels and tires. Now, our set us back about two grand and you can plan on spending the better part of the day out in the driveway or the better part of a weekend if you got a partner like mine. Hey, ok, enough about your car. Let me show you what I got for mine and I'm gonna let you help me put it on. You're such a nice guy, but
that's a fair trade.
All right. Where is it? Wait a minute before we reveal our big plans for today. What do you say? We bring them up to date on what we've done on my 91 Firebird so far,
we gave it a bolt on build up by adding a new chip
intake,
power pulleys headers and the cat back exhaust
on our
dyno Jet. We were able to spin it up to 100 and 83 horsepower.
And of course, that was at the rear wheel. Well, today we're gonna get a lot more throttle thanks to this bottle. Now, I think I've got this deal figured out. You want me to install this Ns Nitrous kit
in your firebird, right. I just want you to help me. Yeah. Right.
Well, at any rate it shouldn't take us more than a couple of hours to do the job. After all, this nitrous plate just bolts beneath the throttle body.
We have to do a little bit of electrical work including wiring up this activation switch. Then we'll throw the bottle in the trunk and then connect it all with these stainless lines and solenoids. Now, it's so simple. Even you could do it
in a couple of hours. I bet. I know. But I'd have to get my hands dirty twice in one day
anyway, before we put the squeeze on our firebird. Let's squeeze in a few words from our sponsors. We'll be right back.
Hi, welcome back to the shop as we get ready to boat the bottle under this 91 Firebird.
But before we can put our new nitrous system on, we gotta take a few things off.
After we disconnect the battery,
we remove the air cleaner
linkage,
vacuum and fuel lines,
electrical connections,
and finally the throttle body.
Well, now we need to install a new center stud for the throttle body.
This one's a little bit longer to compensate for the thickness of that nitrous plate.
The gasket goes on next, followed by that nitrous plate,
make sure the nitrous bar is facing down. So you're spraying nitrous into the motor not upward,
then we can install the other gasket
followed by the throttle body.
Now, the kit also includes these two longer bolts
that install right back here.
Of
course, once they're tight,
we can go ahead and reconnect the linkage and vacuum lines.
Well, I just attached our mounting brackets to the fuel and nitrous solenoids. We decided to mount them here on the manifold. Now, once we get them mounted,
we'll bend some of this feed line so that we can connect them to the plate. By the way, they're color coded reds for fuel blues, for nitrous.
We're gonna get some extra fuel by tapping into this main line that goes to the throttle body
using this T connection that comes with our kit.
Then we'll connect it to this braided steel line that goes right to the fuel solenoid.
The activation switch is used to turn the system on only under full throttle.
We mounted ours down here on the intake next to the throttle arm,
then adjusted it.
So the micro switch only makes contact when we map the gas,
the system relay installs here by the battery. We'll connect this orange wire to our positive terminal. Now, we've already splashed together two wires from our solenoids. We'll connect both of those to this blue wire, this green wires for the activation switch. And finally, this red one goes to our arming switch inside.
Now, since we kind of like the element of surprise, we're gonna hide this arming switch under the dash here,
then we can run our red lead from the relay to here. A wire from a 12 volt source that's on with the keys on only here. And this third one. Well, that's for a ground.
We decided to put the bottle back here in the trunk and I've already bolted it to the trunk pen. Now, one thing you want to remember is to have easy access to the valve here so you can turn the nitrous off and on.
I've also drilled a hole back here in the corner of the trunk so that we can feed our line through
and routed along the driver's side frame rail.
Now, when you're routing the nitrous line, make sure that you use grommets wherever it passes through sheet metal to keep it from chafing.
Now, you also want to keep it away from any heat, moving suspension parts or rotating components and of course time and place with these tie wraps.
The system is tunable with these different size jets and they install right here. On the nitrous plate,
they've got them from 50 to 100 and 35 horsepower. We decided to go with 100 on our Firebird. Now, before you hook up this Nitrous line, make sure you purge the system first.
Go ahead and crack the valve chuck.
All right. I think we're ready
when you connect the lines. Remember not to over tighten these A N fittings
or you can damage them.
All right. that's it.
Hey, man, I told you it was an easy job. Yeah, but we ain't done yet.
Let's take her for a pass. Well, since it's your car, I'm gonna let you empty the first bottle. How about that? You're a pal. Come on
and alive. That won't be enough squeeze to please about anybody. Stay with us. We'll be right back
next. Some old hot rod technologies. We learned how to use an English wheel to make a perfect compound curve.
Welcome back. And here's a welcome sight. A street rod modified for ultimate coolness with a top that's been chopped
as you can imagine chopping the top. Not only requires a lot of experience, but at least a couple of weeks of cutting welding and well matching compound curves like the sail panel.
How is it done?
Well with patience practice and a piece of hardware that goes back more than a century
Doug Larue has been building rods and chopping tops for many years and now passes on his expertise to students at Wyoming Technical Institute.
As he shows us, the first step in creating a compound curve is making a paper pattern
complete with pleats of the shape you want to recreate.
Then after tracing the pattern onto 20 gauge cold road steel, you cut the pattern out with a plasma cutter or set up Beverly shears,
you hand shape the piece to get it started, then turn to the traditional English wheel to perform your real metal magic.
After the right shaped wheel is selected, uh you're ready to apply your talents.
Let's start with the number two wheel.
There's a wheel on the bottom that will put tension on the metal
and by putting more tension
on that lower wheel,
uh you're gonna see a compound shape come a little bit quicker.
Uh Mostly the English wheel does stretching, but
whether you know it or not, you're actually on the ends, you gotta come back and actually bunch the metal back together, which is shrinking.
Very important to keep your tracking as close as possible to keep from putting grooves in the panel and to make the compound curve appear faster.
It's a back and forth process, working the metal test fitting and working at some more
for Doug. Of course, the goal is to pass the rare yet valuable skill of mastering an English wheel to a new generation of car crafters,
I suppose, maybe somewhat of a dying art in a way. But it, it's great to help share
that knowledge and to uh
have them know that and understand compound curves and how to work with compound curves
because overall, it gives you a better finish
on your project
with less filler work. Uh
Overall, it gives you just better craftsmanship,
man. It looks like you guys did a perfect job on that piece. Thanks Joe.
And that's how you build a sail panel or make any kind of compound curve. Of course to do it. You
gotta have one of these. Stay with us. Hot parts is next
and now hot parts brought to you by car parts.com, everything for your car, truck van or SUV.
These white faced instruments from auto gauge will help you save face next time something goes wrong under the hood.
The two and 58 inch diameter gauges are available in either a two or three gauge pod to monitor anything from water temperature to oil pressure. Plus they have a matching three and three quarter inch tack. Now, the pricing is also pretty engaging at 50 bucks for the tack or the triple set up.
Well, here's the hot new set up for you drag racers running power glides. It's a new case from Deen Bear that's two pounds lighter and a whole lot stronger than the stocker. Now, it accepts all high performance power glide parts
has improved oiling passages and an extra thick pan plans for added strength.
Now it's SF I certified. So you won't need a flex plate or a case shield, but you will need $865 to put a whole shot on your competition.
Well, speaking of that competition, engineering has just released their new slide link traction device to help you get that whole shot. Now, it bolts on with no suspension modifications at all. And the adjustable bar allows you to change both preload and pinion angle.
Now, they're claiming about a half 1/10 reduction in 60 ft times over a typical slapper bar set up and you can expect about a $300 reaction time out of your wallet.
Well, that's it for hot parts for this week. Here's a look at next week's show.
Take cover for a small block. Shoot out. We'll explore the new Chevy and Ford crate engines before we bolt them to our new engine dyno
to see who's got the hottest horsepower numbers
and a shoe box. Bonanza as we go back to the days of the 49 through 51 Fords and Mercury
plus a tip on how to use carb spacers to get more power out of your car.
And remember high performance fun is what this show is all about
for information about the products used in today's show and more. Check us out online at horsepower tv.com
Horsepower TV is an RTM production.
Show Full Transcript
and putting my firebird on the bottle
today on horsepower TV.
Blue Thunder's back and we'll put it through a suspension and break upgrade,
including everything from motors and sway bar to springs and a new steering box.
Plus we'll pump up the power in our project Firebird by installing a one shot Nitra setup that ought to be good for 100 30 extra horsepower. All right, I think we're ready.
So, hang on for horsepower TV.
Hi and welcome to the horsepower shop. You know, it's been a while since we did any work to Old Blue Thunder here and in case you missed it. Well, we've already installed a fuel injected GM, performance parts 502 under the hood and backed it with a B and M turbo 400 trans and a nine inch curry rear end.
No doubt about it. This thing will run with the best of them. Yeah, but today we gotta put the brakes on literally.
Now this thing came from the factory in 71 with disc brakes, but those 11 inch rotors and 30 year old technology just aren't up to the task. So today we'll upgrade Blue Thunder's binders with a 13 inch bear claw system.
Yeah. But first we've got to finish disassembling this front suspension. I tell you what, I gotta get this thing up in the air a little bit further. Ok. While he handles that, let's look at the hardware
beer makes its track system for most applications.
They all come with 13 inch rotors and aluminum PB R two piston calipers. Now we ordered ours
with the taller B car spindles here to increase camera game and to help us maintain maximum tire contact patch.
Now
make that tall spindle system work. The kid also comes with these new tie rod ends and ball joints
that have been machined to fit in the stock Chevelle lower control arm.
Of course, while we've got the lower control arms out, we're gonna replace those rubber bushings with these urethane pieces that we got from performance suspension.
Now, the upper control arms are some tubular pieces that we got from Hotchkiss performance and they're shorter to work with that tall spindle. Of course, they also come with the right ball joint and urethane bushings already installed.
All right.
Now, before you start taking things apart
as always, make sure your vehicle is supported on jack stands,
then you can begin by taking off his caliper,
then the tie rods
and links
and shocks.
Then after knocking the ball joint loose and strapping a chain around the spring for safety.
You can remove the spindle and rotor as an assembly,
finally remove the spring
at the lower control arm.
And
here's the upper control arm,
man. You and your old Chevelles. What a dirty job. Well, I haven't been exactly loafing on my side over there besides, it's about time you got your hands dirty on this job too.
Now, I'm gonna grab these lower control arms, take them down to the machine shop, get the bushings and ball joints pressed in. It'll take me that long to get cleaned up. Now, I get to work on some nice new parts.
This stock rubber bumper here gets replaced by this new urethane drop stop. Of course, we need to replace it while the springs are out.
These new Hotchkiss upper control arms are direct replacements for our stock pieces
and you can mount them up using the original hardware.
Well, they sure did a nice job on these control arms.
Hey, man,
red light, red light.
Just as I thought you've been laying down on the job again. Hey, I'm just waiting on you. After all. It's time you spun a few wrenches around this place. Don't mind if I do. Uh, wait me when it's over. I will
just a little bit more. There we go.
Ok. With a lower control arm installed. We're ready for our Hotchkiss springs. Now, these have a higher spring rate and they're gonna drop the car about an inch for a lower center of gravity and improved handling.
Hey, no packing wheel bearings for this job. Our track system comes with the rotor and spindle all pre assembled and ready to hang. In fact, we just drop it on the ball joint.
We torque the upper nuts to 60 ft pounds, lower ones to 80.
Then we're ready to install the steel braided brake lines.
27
28 29
3031.
Now, the taper on that tall spindle steering arm is different than the one on the Chevelle. So bear includes a new tie rod end
here. Let me let you get a look at the difference there. Now, the best way to install that new tie rod end is to screw it into the tie rod
count. The number of turns make it the same as the old one that ought to get you close enough to get to the alignment shop.
Ok. While Chuck gets ready to install those tie rod ends, uh, we're gonna tie up some loose ones with our sponsors that is, stay with us. We'll be right back
for the latest news on horsepower TV. Check us out online at Horsepower tv.com.
Hi, welcome back to the shop and our breaking suspension upgrade on Blue Thunder. These bills. Stein gas shocks will be a replacement for the hydraulic ones on our Chevelle. Now, they've got a high pressure design which means they react quickly to a wide range of road conditions.
Plus we think they're the perfect high tech compliment for our suspension upgrades.
While Joe's bolting up our shocks, I'm gonna show you our new sway bar.
That is as soon as I get this old one off.
A few weeks ago, we located the rear end in Blue Thunder using Hotchkiss control arm springs
and sway bar. Now, today we're gonna finish the job by adding their front sway bar that measures a hefty inch and a quarter compared to this puny one inch stalker. Now, it's held in place with these urethane end links and these bushings. Now, here's a really neat idea. These bushings are grez to
keep them from squeaking.
You can't get the most out of a high tech suspension if you're still using a low tech steering box. So we'll upgrade ours with this quick response box from Lee manufacturing. It's got a 12.7 ratio and only two and three quarter turns lock to lock. Now, to keep your turning radius tight,
the internal stops are set for each application.
All right, there it goes.
Now, a
lot of guys neglect this rag joint here, but you know, a lot of time, oil and constant steering take their toll. So
we're gonna upgrade ours with this steel reinforced piece from Lee. Maybe you can see those layers of steel mesh there. This will give us quicker steering response and more road feedback. Now it just slips over the end of the steering box. Here.
There we go.
Now we put this thing up.
Hey, partner, if you're about done with that box under there,
how about give me a hand with this bar? Oh, what timing?
Great.
Why don't you start your side first? Ok.
I'll hold it up here.
All right,
you might remember last week we showed you how to bend and flare brake line tubing.
Well, today that information is gonna come in handy
because we're gonna re plumb the system and we'll get started by forming this tubing over the rear end.
Then we're gonna finish the job
with this preform tubing from classic tube. Now, it's made to replace the originals perfectly.
And since it's stainless steel, well, it's a job, we won't have to worry about redoing anytime soon.
The track system comes with a new master cylinder with the correct capacity to match our new setup.
Now, we're hanging ours on a dual diaphragm brake booster. We got for master power.
It's gonna give us more power assist than the stock one and still maintain low pedal pressure. Oh, and you guys with roller rockers will be glad to know this because of this smaller diameter.
It'll even clear your tall valve covers.
Ok.
When we get this bolted up, we can hook up the brake pedal.
Well, here's something that's gonna help us get the most out of our new brakes and suspension
for rubber. We're using Dunlop's sp 8000. Now, we've got 280 fives out back to 50 fives up front.
The 40 series side wall on this 18 inch rim is gonna help reduce side wall flex and see this massive tread. That's gonna give us one heck of a contact patch.
We mounted them on the center line billet wheels. So our old Chevelle will turn heads while we're turning the tires. Now, we used eight inches up front nines in the back. Ok, I guess we ought to talk cash for a second.
You can expect to spend about 700 for the suspension pieces, another 400 for the shocks and the break up grade. Well, that'll be about 1300 less, of course
without the tall spindle option. Oh, and don't forget the wheels and tires. Now, our set us back about two grand and you can plan on spending the better part of the day out in the driveway or the better part of a weekend if you got a partner like mine. Hey, ok, enough about your car. Let me show you what I got for mine and I'm gonna let you help me put it on. You're such a nice guy, but
that's a fair trade.
All right. Where is it? Wait a minute before we reveal our big plans for today. What do you say? We bring them up to date on what we've done on my 91 Firebird so far,
we gave it a bolt on build up by adding a new chip
intake,
power pulleys headers and the cat back exhaust
on our
dyno Jet. We were able to spin it up to 100 and 83 horsepower.
And of course, that was at the rear wheel. Well, today we're gonna get a lot more throttle thanks to this bottle. Now, I think I've got this deal figured out. You want me to install this Ns Nitrous kit
in your firebird, right. I just want you to help me. Yeah. Right.
Well, at any rate it shouldn't take us more than a couple of hours to do the job. After all, this nitrous plate just bolts beneath the throttle body.
We have to do a little bit of electrical work including wiring up this activation switch. Then we'll throw the bottle in the trunk and then connect it all with these stainless lines and solenoids. Now, it's so simple. Even you could do it
in a couple of hours. I bet. I know. But I'd have to get my hands dirty twice in one day
anyway, before we put the squeeze on our firebird. Let's squeeze in a few words from our sponsors. We'll be right back.
Hi, welcome back to the shop as we get ready to boat the bottle under this 91 Firebird.
But before we can put our new nitrous system on, we gotta take a few things off.
After we disconnect the battery,
we remove the air cleaner
linkage,
vacuum and fuel lines,
electrical connections,
and finally the throttle body.
Well, now we need to install a new center stud for the throttle body.
This one's a little bit longer to compensate for the thickness of that nitrous plate.
The gasket goes on next, followed by that nitrous plate,
make sure the nitrous bar is facing down. So you're spraying nitrous into the motor not upward,
then we can install the other gasket
followed by the throttle body.
Now, the kit also includes these two longer bolts
that install right back here.
Of
course, once they're tight,
we can go ahead and reconnect the linkage and vacuum lines.
Well, I just attached our mounting brackets to the fuel and nitrous solenoids. We decided to mount them here on the manifold. Now, once we get them mounted,
we'll bend some of this feed line so that we can connect them to the plate. By the way, they're color coded reds for fuel blues, for nitrous.
We're gonna get some extra fuel by tapping into this main line that goes to the throttle body
using this T connection that comes with our kit.
Then we'll connect it to this braided steel line that goes right to the fuel solenoid.
The activation switch is used to turn the system on only under full throttle.
We mounted ours down here on the intake next to the throttle arm,
then adjusted it.
So the micro switch only makes contact when we map the gas,
the system relay installs here by the battery. We'll connect this orange wire to our positive terminal. Now, we've already splashed together two wires from our solenoids. We'll connect both of those to this blue wire, this green wires for the activation switch. And finally, this red one goes to our arming switch inside.
Now, since we kind of like the element of surprise, we're gonna hide this arming switch under the dash here,
then we can run our red lead from the relay to here. A wire from a 12 volt source that's on with the keys on only here. And this third one. Well, that's for a ground.
We decided to put the bottle back here in the trunk and I've already bolted it to the trunk pen. Now, one thing you want to remember is to have easy access to the valve here so you can turn the nitrous off and on.
I've also drilled a hole back here in the corner of the trunk so that we can feed our line through
and routed along the driver's side frame rail.
Now, when you're routing the nitrous line, make sure that you use grommets wherever it passes through sheet metal to keep it from chafing.
Now, you also want to keep it away from any heat, moving suspension parts or rotating components and of course time and place with these tie wraps.
The system is tunable with these different size jets and they install right here. On the nitrous plate,
they've got them from 50 to 100 and 35 horsepower. We decided to go with 100 on our Firebird. Now, before you hook up this Nitrous line, make sure you purge the system first.
Go ahead and crack the valve chuck.
All right. I think we're ready
when you connect the lines. Remember not to over tighten these A N fittings
or you can damage them.
All right. that's it.
Hey, man, I told you it was an easy job. Yeah, but we ain't done yet.
Let's take her for a pass. Well, since it's your car, I'm gonna let you empty the first bottle. How about that? You're a pal. Come on
and alive. That won't be enough squeeze to please about anybody. Stay with us. We'll be right back
next. Some old hot rod technologies. We learned how to use an English wheel to make a perfect compound curve.
Welcome back. And here's a welcome sight. A street rod modified for ultimate coolness with a top that's been chopped
as you can imagine chopping the top. Not only requires a lot of experience, but at least a couple of weeks of cutting welding and well matching compound curves like the sail panel.
How is it done?
Well with patience practice and a piece of hardware that goes back more than a century
Doug Larue has been building rods and chopping tops for many years and now passes on his expertise to students at Wyoming Technical Institute.
As he shows us, the first step in creating a compound curve is making a paper pattern
complete with pleats of the shape you want to recreate.
Then after tracing the pattern onto 20 gauge cold road steel, you cut the pattern out with a plasma cutter or set up Beverly shears,
you hand shape the piece to get it started, then turn to the traditional English wheel to perform your real metal magic.
After the right shaped wheel is selected, uh you're ready to apply your talents.
Let's start with the number two wheel.
There's a wheel on the bottom that will put tension on the metal
and by putting more tension
on that lower wheel,
uh you're gonna see a compound shape come a little bit quicker.
Uh Mostly the English wheel does stretching, but
whether you know it or not, you're actually on the ends, you gotta come back and actually bunch the metal back together, which is shrinking.
Very important to keep your tracking as close as possible to keep from putting grooves in the panel and to make the compound curve appear faster.
It's a back and forth process, working the metal test fitting and working at some more
for Doug. Of course, the goal is to pass the rare yet valuable skill of mastering an English wheel to a new generation of car crafters,
I suppose, maybe somewhat of a dying art in a way. But it, it's great to help share
that knowledge and to uh
have them know that and understand compound curves and how to work with compound curves
because overall, it gives you a better finish
on your project
with less filler work. Uh
Overall, it gives you just better craftsmanship,
man. It looks like you guys did a perfect job on that piece. Thanks Joe.
And that's how you build a sail panel or make any kind of compound curve. Of course to do it. You
gotta have one of these. Stay with us. Hot parts is next
and now hot parts brought to you by car parts.com, everything for your car, truck van or SUV.
These white faced instruments from auto gauge will help you save face next time something goes wrong under the hood.
The two and 58 inch diameter gauges are available in either a two or three gauge pod to monitor anything from water temperature to oil pressure. Plus they have a matching three and three quarter inch tack. Now, the pricing is also pretty engaging at 50 bucks for the tack or the triple set up.
Well, here's the hot new set up for you drag racers running power glides. It's a new case from Deen Bear that's two pounds lighter and a whole lot stronger than the stocker. Now, it accepts all high performance power glide parts
has improved oiling passages and an extra thick pan plans for added strength.
Now it's SF I certified. So you won't need a flex plate or a case shield, but you will need $865 to put a whole shot on your competition.
Well, speaking of that competition, engineering has just released their new slide link traction device to help you get that whole shot. Now, it bolts on with no suspension modifications at all. And the adjustable bar allows you to change both preload and pinion angle.
Now, they're claiming about a half 1/10 reduction in 60 ft times over a typical slapper bar set up and you can expect about a $300 reaction time out of your wallet.
Well, that's it for hot parts for this week. Here's a look at next week's show.
Take cover for a small block. Shoot out. We'll explore the new Chevy and Ford crate engines before we bolt them to our new engine dyno
to see who's got the hottest horsepower numbers
and a shoe box. Bonanza as we go back to the days of the 49 through 51 Fords and Mercury
plus a tip on how to use carb spacers to get more power out of your car.
And remember high performance fun is what this show is all about
for information about the products used in today's show and more. Check us out online at horsepower tv.com
Horsepower TV is an RTM production.