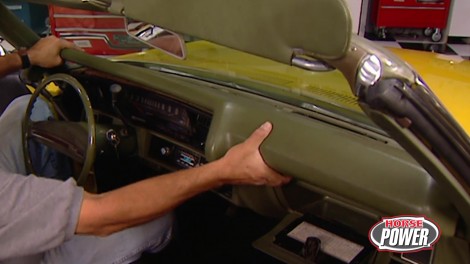
HorsePower Builds

Video Transcript

Hey, are you up for an upholstery project today? Well, if you are, we got you covered

today on horsepower TV.

It's a muscle car makeover. As we show you how to install new carpet, recover the front and back seats and replace all the trim. Plus we'll show you how to dye at the dash and other old pieces for a brand new look

on top of that. We'll jump up the juice on our budget Honda with a high performance ignition system.

So hang on for horsepower TV.

Hi, welcome to Horsepower TV. Well, how do you like Chuck's latest project? It's a 1971 Chevelle convertible and, well, like many he gets in. It's a little rough around the edges. Now, this original sunflower yellow paint, it's not too bad, but well, inside,

that's a different story. Yeah. Now this car came from California,

so the body is rust free and it's pretty straight.

But with that top down, well, the California sun is fried. This interior like a piece of well done chicken.

Just check it out. The seats are splitting and where the foam is popping out. And we'll be quite honest with you. I'm not too crazy about that avocado color either.

Well, even if you don't have a Chevelle, a convertible or a funky green color to change

the procedure for redecorating your interior is pretty much the same.

Now, today we're gonna show you how to recover the seats Recarpet the floor and replace the door panels. Oh, plus we'll dye some of the original parts to match our new ones. Well, let's get started by pulling out some of this old stuff.

First, we un both the seats

and remove them,

then remove the seal plates,

seat belts

and the carpet.

You see any money down there.

It is. It's mine.

Now

you can remove our door panels,

the water shields behind them.

Finally

quarter trim.

Before you start a project like this. It's always a good idea to order all the parts you need to do the job. Right. And that means everything from window cranks to pedal pads. Now, we ordered all of this from the National Parts Depot and they've got all the popular cars covered from Camaros and Mustangs to Chevelle.

Now, any project like this, you have to start from the ground up. And in this case, that means the floor coverings.

Now, we've already unpacked our carpeting and laid it out to help get rid of the wrinkles. In the meantime, though, we're gonna replace the Sound Denner that's already on the floor with these die cut pieces. They're gonna replace the originals perfectly

Well, now it's about time to lay on the carpet. But first, here's a little trick that'll make that job a lot easier.

Go ahead and reinstall your hardware. Like the seatbelt boats first, then lay in the carpet.

All right, you got things looking pretty good here.

Let's lay the rug in,

then

cut an ax on the boat head

and slept the carpet around it.

Next, we can trim the carpet

once this is done, we'll fasten everything down with our seal plates

since we're replacing the seat covers. Anyway, I've gone ahead and cut the old ones off and we'll get rid of this old foam as well.

Now, when you take the old seat covers off, you're gonna find these wires inside of them, make sure you keep them because you're gonna need them later on.

Well, now we've got a bare seat frame and it's a great time to go ahead and inspect for any broken springs or missing hardware. Now, this thing looks like it's in pretty good shape. But if you've got some broken springs, you can pick up these replacements that pop in pretty easily.

Here's a special tool you'll need for any upholstery work. It's called a hog ring plier. And of course, you're gonna need plenty of these hog rings to hold everything in place. Now, we're gonna get started by attaching this new foam to the seat frame,

put the hall ring in the pliers

and go ahead and find a suitable place to attach the foam to the frame

and squeeze it

until it's secure.

Hey, good work there. I think you missed your calling. Hey, this is an easy job for an old hog head like me.

Well, now that Chuck's got the foam installed, it's time to cover it.

Now, this is an exact reproduction we got from NPD and the original Chevelle pattern.

Oh, remember those wires we told you to save earlier. Well, this one here is gonna go in the back of the bottom seat cover here to serve as our main anchoring point.

Just thread it up there. There.

The trick for the hardware under the carpet works here too.

Attach the bolts and screws to the frame,

then cover the frame

line it up,

getting the seams as straight as possible and smooth it out.

Then using hog rings, start anchoring it to the back of the frame.

Then after you flip it over, attach the cover to the front of the frame, followed by the sides.

Once the cover is completely attached,

make your slits to reveal the hardware.

Yeah.

All right. Now that we got our bottoms built, we can start to work on the backs. Hey, this looks pretty good. Let me get it out of your way. Thanks.

Now, the first step here is to reattach the stiffening cardboard to the foam and we'll do that using some of this spray adhesive.

Attach the seat back to the foam

using a few hog rings to keep it in place.

Here's a little tip that'll make slipping these backs on a lot easier for you first turn them inside out like this,

then spray them and the foam with some silicone lubricant,

then work the cover down and into place over the seat back.

It smooth out all the wrinkles

and attach everything with hog rings.

Hey, it looks like you're getting a pretty good hang on those hog rings yourself. But you hang with us and we're gonna take a little bit of a break, but we'll be back with more of our interior restoration right after this.

Hey, do you body piercing too?

Sure. Come on

later. We'll cap off the show with an ignition upgrade on our budget Honda project. So you stay tuned.

Hi. Welcome back to the shop and more of our interior restoration project. Well, we got the front seat of Chuck Chevelle covered now while I repeat the process on the rear seat. Well, he's got some tips for you that you'll be just dying to try at home. Oh, man, you're killing me with your lame jokes. But you know, there's still plenty of life left in these quarter trim pieces. Of course, the only problem is they're green and well, we wanna make them black. So we went down to the local park store and got some dye made, especially for plastic and vinyl pieces

after washing the pieces that you want to dye with some soap and water. Go ahead and wipe them down

with some lacquer thinner,

then spray on a thin coat and let it dry

and repeat it till you get the coverage that you want.

Hey, well, I got the door panel situation covered too. These are pre assembled to make the job a lot easier. Plus the right color

now to do this thing, right? You also need some new water shields,

new window cranks,

door handles and well, even new log knobs, plus we ordered new armrest bases and pads.

Of course, the water shields go on first,

they die cut left and right with this shiny black side going toward the door,

duct tape is water resistant.

So make sure you use it

to hold them in place,

then transfer the clips from the old door panels to the new ones,

position the panel

and push the clips into the plastic receivers.

Now we're ready for the lock knobs,

door handles and window cracks.

Well, I preassembled the armrest pad to the base with a couple of screws here. This whole assembly attaches to the door with these three longer screws.

Hey, man,

I really adore your work here. Oh,

no, here we go again.

In fact, it looks like you really got a handle on things, but don't let your arm rest. I need some help with these quarter trim pieces. Yeah. Well, if you don't stop it with the puns. I'm gonna let my arm rest where it'll do the most good.

Well, it looks like my partner kind of slammed the door on that idea. But, hey, it's ok. I can do this by myself. Now, all this trim just attaches with the old original hardware and,

well, there you go.

Hey, I gotta admit that doesn't look too bad. I think you can handle this by yourself. No, but what I can handle is a little bit of a break right now. Ok. Well, uh we reinstall the seats, you keep yours. We'll be back to finish up right after this.

Here you

go.

Hey, welcome back to the shop where we're just about to put the finishing touches on my Chevelle interior. Now we've got it looking pretty good with new carpet seat covers, door panels and new hardware. But

man, we gotta do something about that green dash.

Of course, it's nothing that a little bit more dye won't take care of. And while we're at it, we're also gonna swap out these pillar posts and the sun visors

to

remove the dash pad. You first have to locate the screws that hold it in place.

Now, in

a Chevelle, there are several located right here above the speedometer

and a couple more here inside the glove box.

Once the screws are out,

lift the pad up and pull it towards you.

Like with the other trim pieces, we're gonna wash this thing down with a good soapy solution, then wipe it down

with lacquer thinner and we can go ahead and give it a few thin coats of dye.

Just three screws. Hold this original pillar pad in place.

Yeah. Well, that one out of the way

are new and just pops right into its place. Once I get this tightened up, we'll get on those sun visors.

These original sun visors are not only putrid green, but, uh, as you can see, they're pretty beat up. Our replacements also come from National Parks Depot and hey, while we're at it here, we'll remove this header trim which is metal and we'll have to paint it,

but the strip in front of it's vinyl, so we'll just mask it off and put the dye to it.

Now, green might be the color of money, but when it comes to dashes, I like this black a lot better. I have to agree with you. Well, these metal pieces are ready, ready to do the honors. You bet my pleasure. Ok.

Now we can get our sun visors back on too. But before we install them,

we put these new rubber tips on and then they'll be good to go.

Well, these Chevelle floor mats will be the perfect final touch to our project.

All right.

Well, what do you think their partner? Uh, think I'm either going color blind or you have a two tone color scheme going here, man. What are you gonna do? About the steering wheel and dash housing. Well, that steering wheel is no problem. I can get another one of those at a swap meet but to pull a dash out and dye it. Well, it's a little bit more of a project but I think we can handle it some other time. Maybe. Right now we have to take a break, move some cars and we'll come back with an ignition upgrade. So stay tuned.

We set out to build up a hot tar car on a tepid budget. Now we're wired up to show you the next phase coming right up.

Hey, welcome back to horsepower TV, where it's time for us to get back on our budget. Honda build up.

Now, Tuna cars are hot with younger guys these days and a few weeks ago, well, we decided to get in the game

now for 3500 bucks, we picked up this 94 Honda Civic and

well, it's a little bit rough around the edges, but hey, you get what you pay for and we've got plenty of plans for this thing

so far with the help of our guest Chris Roden, we added a new cold air intake

header

and cat back exhaust.

We picked up another 10 horsepower over our baseline of 87 which is about a 12% increase. Today, we're gonna be replacing the ignition on our Honda to give us more firepower for an upcoming upgrade. I'm gonna give you a little bit of a hint comes in a bottle.

I wonder what that could be. And we have another guest gear we had today who's gonna get down, get dirty and help us out. Matt Taylor is a college student at Middle Tennessee State University

and he feeds his car habit by working at a local speed shop. Hot Rods of Murfreesboro.

Matt works the counter and back in the shop helping to improve the performance and looks of all kinds of sport compacts.

Hey, Matt, we really appreciate you coming by to help us out today. It's my pleasure. How long have you been messing around with cars? About three years? Just three years. You must be a fast learner. Where'd you pick everything up? Pick us up from the shop, from friends and from the magazines.

Ok. Well, before we bear down and get to work, you have one cool 94 civic here yourself. What has it done to this thing?

Well, after blowing up the 1.6 with too much juice

swapped it out for the GSR 1.8 dual overhead cam,

we did that. We had to do all new internals from the bottom up.

Did most of the bolt ons as you see here, the intake, the header, the ignition

as far as the outside goes, set a 17 by seven A RS

and aluminum wing on the back. It looks good and I bet you make lots of power that V

tech. It does,

but I'm always looking for more. Well, I guess some things never change,

you know, hopping up imports is relatively new, but some of the parts come from companies as older guys have been using for years, MS D is one of them and today we're gonna install their sport compact ignition box. There you go. Matt

plus their blaster SS coil distributor cap and a set of 8.5 millimeter superconductor wires.

OK. Matt. This is your game. What's the first move? First thing we wanna do

is find a place to mount this box.

We want to be someplace that's

out in the open. So it gets plenty of air.

We wanna keep away from any belts, pulleys,

keep away from that header heat.

You know what

right in here looks like it might be a good place.

Yeah, I'll buy that. Of course, we'll have to fab up some brackets to hang it on. Then we can mount our coil right here on the shock tower. Of course, we've got to get this tube out of the way.

Great job, Matt.

Now, this is the bracket that we told you about that we fab to mount the SC I box and as you can see it's held in place with a couple of sheet metal screws. Now, we can go ahead and mount the SC I box, which by the way is a capacitive discharge system with multiple sparks that last for 20 degrees of crankshaft rotation. Now that's gonna mean more complete combustion and of course, more horsepower as well.

It'll work with point electronic and even magnetic pickup ignitions. And, well, the best part is it's 50 state legal,

then mount the coil,

the new distributor cap

and wire the system according to the instructions.

Since we're gonna be adding a nitrous system later on,

we're gonna go ahead and screw in a set of these XX plugs. Now, they're made especially for turbo and nitrous applications. They've got these triple ground electrodes and a projected tip to help put the spark right where it'll do the most good

Chuck. In order to get the extra spark to those plugs,

we're gonna need a good set of wires.

I like these because they only have 40 to 50 arms resistance per foot

and they're custom made for this Honda. So it's a simple plug and play operation. Great. Well, let's keep on plugging then.

Ok. Matt, great job. And thanks a lot for your help. It was a blast.

We're gonna have a rock solid ignition when we put this pocket rocket on the bottle now. Ok, let's look at our budget, which was 8500, including the price of the car. We had about four grand. When we started today, we just spent 300. Wait until you see how we spend the rest of our Honda budget

horsepower TV S hot parts is brought to you by Wyotech,

the nation's premier technical training school,

say you'd have to be off your rocker. Not to like this affordable shaft mounted system from Jessel, their SS series bars, technology from their NASCAR hardware, including CNC bullet rocker bodies. Now they eliminate the need for guide plates, girdles or poly locks and, well, you can get these things for big and small block, Chevy, small block Fords and even the popular LS one.

So now you can, uh get the shaft for yourself for just under $700.

Let's shift gears for just a minute and take a look at this reproduction horseshoe shifter from original parts group

that'll fit the consoles of all 68 to 72 Chevelles. And it features the correct floor mounting bracket, shifter D tens and even the right chrome handle with the correct grain on it.

Now it'll install using an original style control cable and well, to get one, you'll just have to shift about $200 out of your wallet.

If you've got one of these vtech

engines under the hood of your Honda, here's a way to change the RPM at which it kicks in.

This performance amplifier controller comes from Jackson racing and wires right into your electronics and it changes the point of engagement with the turn of a knob.

Now, the electronics are fully potted for reliability and this thing works equally well with blown and naturally aspirated engines to get one well you'll have to blow about $280. Hey, that's a pretty cool piece. Now, before we blow out of here, here's a look at next week's show.

It's a rumbling Rambler build up starting with an A MC machine. 401 block

hydraulic flat topic. Can forged 10 to 1 pistons single plane intake at 950 CFM car

with the goal of hitting 500 horsepower on pump gas

and meet a father and four. So racing team that turned their passion for racing into an amazing high performance parts Distribution center.

It makes you feel kind of good knowing that there's, you know, thousands or even millions of people out there that like to do what you like to do and that we are a part of helping them to achieve what they wanna achieve. Again, that, that, that makes me feel pretty good. That's

pretty gratifying.

Hello,

it's back to horsepower basics as we show you an easy way to bolt on more horsepower with the performance intake

and an 850 CFM car.

We'll put our budget Honda on the bottle Nitrous. That is, it's the cheapest tuber horsepower you can get and we'll prove it on the

dyno Jack.

Plus it's your celebration time in Tennessee as we take you to the largest gathering of America's favorite, mid size muscle machine.

Well, that's what these cars are made to do

just to get out and run a little bit.

Gotta see how it goes

for information about the products used in today's show and more. Check us out online at Horsepower tv.com

Horsepower TV is an RTM production.
Show Full Transcript