HorsePower Builds

Video Transcript

It's Mustang time here at the horsepower corral. Stay tuned for our latest project

today on horsepower TV.

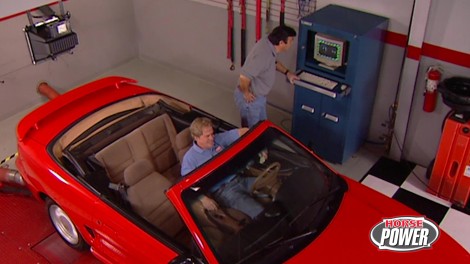
Meet the Scarlet Stallion, our 1994 Mustang project car that's getting a much needed cat back exhaust

and a deep breathing cold air kit,

plus a bigger throttle body adjustable fuel regulator and even a high performance ignition.

So, hang on for horsepower TV.

Hi, welcome to the shop where today we've got a pair of bad blue ovals to play with and we'll dig into my latest project in a minute. But right now get a load of this 63 Pro Street Falcon. Now, this lightweight sedan's got the right stats and some mile wide rubber under the rear

inside. Well, you'll find a full competition cage and racing buckets. Plus, look at the way the owners incorporated that original hood trim with a functional all metal scoop. Hey, you gotta appreciate the craftsmanship that's gone into something like that. But what I like is what's under the hood

surprise. Now, a small block Chevy is not what you'd expect to find under here, but this one's been warmed up for respectable street performance and dressed up for respect down at the local cruise.

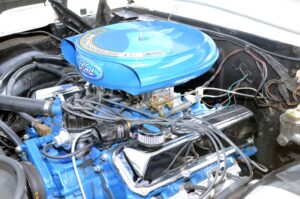
Yeah. Well, you won't find any bow ties under this blue Os hood, this 94 GTs all Ford. And I like it because it has the current body style yet. The old reliable 5 L push ride motor. And of course, there's a parcel of parts out there for these things to pump up the performance and personality. Also, best part is I got it for six grand. Oh, man, I can't believe you stole it for that price. Now, when we get done with this pony, it's gonna be a full on ground pounding stallion and

hey, I ain't Shetland you

before we start bolting on any parts though. What do you say? We get this thing on the

dyno

Baseline it and then we'll see what we've got to work with.

What's the verdict there? Judge? Well, we cranked out about 100 and 65 horse which is actually pretty good for stock 50, especially for one with 100 and 25,000 miles on the clock. But you know, I was listening this thing. That exhaust sounds pretty nasty. Yeah, I noticed that too. What can we do about it, man? Well, I don't guess we'll know until we get in the air and take a look. All right, I'll get the straps off.

No wonder my nine inch nail CD only sounded like a bricher.

No mufflers man. That's gotta be rough on a trip. But you know what, I've got the remedy

right over here on the bench.

Now, once we get that old exhaust system off, we're gonna replace it with this American thunder system from Flowmaster.

Now, it's a cat back system that will replace the original pieces perfectly and check this out. The head pipe and the muffler are pre welded from the factory.

The tail pipes are made from free flowing 2.5 inch man

bent steel with the stainless steel polished tips on the end. Oh, check this out. They even use the factory style hooks to work with the original rubber hangers.

Now, we've used American thunder systems before and well, we like them because they bolt up easy and fit. Right.

Yeah. And that metal rumble is gonna be a big improvement over the mobile earache I've been putting up with.

Now the first step is to get the old stuff out of the way and or if you're doing this at home in your driveway, be sure to use jack stands to support your vehicle safely.

It's dogs help Ives first by slipping them up over the axle

and let them hang loose,

then slip the tail pipe into the muffler outlet.

They loosely both the flange from the muffler here

to the flange on the head pipe,

followed by the tail pipe hanger.

Then use the clamps from the kit to support the back of the muffler

and just snug the nuts down.

Well, with the system in place. Now, we just need to check to make sure that we have at least a half inch clearance between it

and any suspension or drive train components plus any fuel or brake lines. Now, everything looks pretty good under here.

So we're just gonna tighten this clamp to hold everything in place till we can weld up our slip joints.

Alright, I can't wait to get this thing on the ground and see how it sounds.

Ok. Now, that's a big improvement.

Of course, we have other improvements planned for under the hood as well, but with a free flowing exhaust. What do you say? We turn our attention to freeing up the intake side of the engine. Now we're gonna start with this BBK Cold Air kit that's gonna replace all that restrictive factory ducting with these free flowing tubes

that attached to this reusable cotton gauze

element.

Yeah. Well, we got everything apart. We're gonna swap out the stock throttle body for the 65 millimeter piece we got from Edelbrock. Now that's gonna prove the flow plus it's engineered to boat right up to the original intake. But first we gotta get that stock air cleaner assembly out of the way.

First, unclamp the stock inlet from the throttle body,

remove this bolt attaching the air box to the inner fender. Well,

then after disconnecting a hose and some wiring,

just pull the box out of the fender. Well,

but now we need to remove this mass air sensor from the original filter box here

and

attach it to our new filter mount using hardware from the kit. Oh, by the way, make sure this electrical plug is at the top position,

attach the two studs from the kit to the filter mount,

slide it into place.

Now, I want to take one of these couplers and slide it over the mass air sensor.

There. We are.

We'll secure it with a clamp.

Hey, good job there, partner. Thanks. Now, before we go any further, we're gonna install our new throttle body and it just bolts up right here on the stock intake manifold.

Now take the other coupler tube and install it between the mass airflow sensor and the throttle body.

Once the clamps are tight, we can go ahead and reinstall the hoses.

Here we go.

And the wiring.

Well, there's only one piece left to install to complete our cold air installation and it's the filter. Now, it just installs through this hole here in the bottom of the fender,

kind of like that. And of course, once you get it up in there, make sure that you tighten the clamp to secure everything.

Yeah, while Chuck finishes that up, I think we need to take us a little break. Hey, hey, you've been on break. What do you mean? Hey, watch it. We'll be back with more of this mustang build up right after this

later. We'll shed some light on our budget Honda project up front and in the rear with an easy upgrade for better looks and illumination.

Welcome back to the shop and more power mods on Joe's Mustang here. Now, so far we've helped it breathe a whole lot better with the addition of a BBK cold air kit and Edelbrock throttle body and an American thunder exhaust system from Flowmaster. Of course, with

the additional air in and out of the engine, we're gonna want to throw a little more fuel on the fire by installing this mallory adjustable fuel regulator. Now, this little piece is going to allow us to fine tune our fuel pressure so we can match that fuel delivery to our increased airflow,

remove the two bolts that hold the factory regulator in place,

then lubricate the O rings on the new regulator with a dab of petroleum jelly

and slip it into place

and secure it with the original boat

and finally install the vacuum hose.

The stock Ford regulator is preset at 35 P si at wide open throttle. Now, the mallory piece however, is preset at 45 P SI and it can be adjusted up to 75 P SI depending on your engines needs.

Now, even with 45 P SI, a Stalker like Joe's engine here should see a moderate power increase.

Yeah, but here's a little tip for you. If you need more than 60 P si to optimize power,

you might wanna consider a set of high flow injectors

like these from Excel. Now, these are 100% flow tested balanced and matched to their flow rating,

which is always indicated here in pounds of fuel per hour.

These flow 21

you know, there's no such thing as free horsepower, but you can free up a few ponies with an underdrive pulley system. Now, we got this one from Mr Gasket and it includes replacements for the crank shaft

water pump and alternator. Now, together, they're gonna slow the accessory drive system down by about 20%. So it's gonna take less power to spin things over and it's gonna let you put more power to the pavement

just to make the deal sweeter.

They're pretty easy to install,

start by loosening the nut on the alternator pulley,

but leave the belt in place,

then loosen four bolts from the water pump pulley,

four bolts from the crank shaft pulley.

And finally, you can remove the belt.

Well, here's a quick look at the difference between the stock pulleys

and the Mr gasket pieces. Now, we're gonna install this crank shaft pulley first, but because of its small diameter, you need to use the cap screws that come in the kit.

Now, the water pump and alternator pulleys both install using the stock hardware, but be sure to give the bolts a little dab of this thread lock to help them keep their torque

the final step in this job is to reinstall the original belt. Some kits require the use of a shorter belt because of the smaller diameter pulleys. Just check your instructions to see which one's right for you.

Meanwhile, check out these messages. We'll be back with more mustang mods right after this.

Later on, we've got a bright idea for our budget Honda. That is after we punch up a spark on our Scarlet stallion. So stay tuned.

Hi, welcome back to horsepower TV. Where today we're pumping up the power on this 94 GT of mine. Now, so far we've added a cat back exhaust throttle body and cold air kit. Plus we bolted on an adjustable fuel regulator and a set of under drive pulleys. Well, now for this final phase, we turn our attention to ignition. That's right now. Any street machine with 100 and 25,000

1000 miles on the clock is bound to need some attention and it looks like Joe's GT here still has the original cap coil and wires on it. If you can believe that.

Now, we're gonna go ahead and upgrade them with these replacements from Mallory.

The cap uses brass terminals and a closed tolerance fit between them and the rotors for maximum voltage transfer. And of course, we're gonna need a solid energy path to carry the additional volts

that's generated by our how put coil good point there. Well, the last link in this power transfer package

plugs and wires. These mallory pro side winders are an eight millimeter suppression wire for static free stereo sound

plus the silicone jackets and boots resist header heat and allow full voltage transfer to the plugs. Oh, speaking of plugs, we're gonna screw in a set of these a

lu grooves

begin by removing the old cap wires and rotor,

then install the new rotor

distributor cap,

spark plugs

and plug wires.

Ok. There goes the original coil. Now, this mallory coil uses the same electrical connection and mounts as the original. So it's a direct bolt in.

Just takes you a minute to install it.

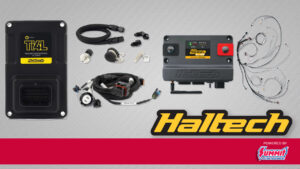
We're gonna complete our mallory ignition upgrade with one of their high fire six A L boxes. Now, this is a multi strike ignition that uses a digital microprocessor for high output with low power draw.

Now, it's got a built in rev limiter right here that you can access through this window.

That way you don't have to buy a bunch of expensive chips to get the settings that you want. Oh, and one more thing, you can also get one of these cool adapter harnesses here to make it a real easy plug and play installation.

Yeah, that looks pretty good. Now, we're using a couple of L brackets to mount the box right here to the inner fender.

That way it'll get plenty of air and it'll be out of the way.

Plus we'll still have access to our rev limiter and the wiring that goes to the rest of the system.

Yeah,

I can hear a difference. Now, let's see how much difference we made in horsepower on the dyno

Jet.

Hey, how about it? Well, we got about 100 and 84 horsepower or 19 more than our baseline. Plus you gotta remember those a rear wheel horsepower.

Now, the parts that we added not only add horsepower but you know, they also add reliability. That's a very good point. So for about a grand and a day under the hood, I got a pony here with more power and appeal. Oh, plus I can even hear the stereo.

I heard that. Now you're gonna wanna stick around because we're getting ready to shed a little light on our budget Honda build up. Stay with us.

Now, this is a cool little car.

Hey, welcome back to the shop where it's time for us to shift gears from powering up Joe's pony to tricking out our little Honda project.

Hey, bring that thing in here, Joe.

Now, chances are you've already caught some of our budget Honda build up. We set out to build a respectable street performer using $8500 for our budget. And of course, that also includes the 3500 that we laid out for this 94 Honda Civic.

Yeah, that left us with about five grand to pop for some cool parts and well, so far we've used it on a nitrous set up free flowing exhaust and ignition improvements. Plus we added a short throw shifter, a cool over lowering kit and 17 inch hoops and rubber. Now, according to my calculations, we got about 1225 left to play with.

Yeah, and we're gonna spend some of that money on some parts that are gonna help out the looks and lighting of our little civic.

Now, we placed an order with jegs for some of these Euro projection headlights and taillights from A PC and of course, just to make sure that everything matched, we also pop for a set of their clear corner lenses.

Now, these projection headlights are engineered to be direct bolt ends using the factory mounts and check this out. They'll even plug right into your factory rewiring harness.

Here's a pretty good reason for a taillight swab. We got one busted and you know what the cost of stock replacements was about the same for our cool trick ones from A PC. So the decision was a no brainer. Now, like the headlamps, they're direct bolt in their dot legal and once you get them in, they use the original style clear bulbs. Oh, in case you're interested, you can also get them in a cool carbon fiber finish.

Removing the old headlight assembly is no problem. You just get the corner lamp out of the way and then there are two top mounts

and outside mount. Then one here on the inside

of course, installing, the new one should be just as easy

start by placing the headlight assembly in the opening,

then securing the two top mounts.

Then the outer mount using the stock hardware,

followed by the inner mount.

The corner lamp installs by first inserting the bulb,

then engage these two studs in the fender slots

and that's all there is to it

back here. What do you say? We get rid of that busted taillight first.

Now, all the screws for it

are accessed inside the truck

after removing all the nuts

and disconnecting the wiring,

the whole assembly should pull right out.

Well, what do you think looks better already, doesn't it?

Now, the civic also uses inside tail lights that mount here on the deck lid and, well, the installation is just the same for the others. Only takes you a few minutes for each 10, Chuck could even do this.

Well, that's a pretty quick and easy upgrade. That's gonna change the looks and the lighting of our little pocket rocket here.

Hey, I'll buy that now to do some quick math. We spent 500 bucks today on this project and that leaves us with about 700 in our budget, no doubt. Now, this thing is really starting to look pretty hot.

Speaking of which

horsepower TV S hot parts is brought to you by Wyotech,

the nation's premier technical training school.

Here's something you'll get a rise out of. Well, I'm talking about these universal seat risers from

Langdon seating systems

that allow you to mount just about any seat in your car truck or street ride. Now, they're stamped from heavy gauge steel that's been powder coated

and you can get them in either two

or four inch rises. Now, they're fully adjustable for elevation and tilt and well, to get a set,

you'll just need to elevate about $100 out of your wallet.

Finding the right transmission fluid for your street machine isn't automatic, but B and M just made the choice a lot easier for you with their synthetic trick ship. Now, this is suitable for any street machine application or high performance use like drag racing or even towing.

It can be mixed with other types of a TF but it works best by itself. It also exceeds Merron

and Dextro

three requirements and to get a bottle, you're gonna have to pull about nine bucks out of your pocket.

Here's something that's a real gasp for you mustang guys. It's a power fuel door from classic design concept.

It's a heavy aluminum casting with a brushed finish

and the boats right up in place of the original. Now, it adds cool looks and a lot of security. Of course, the kit comes with everything you need from installation hardware to this actuator that connects right up to your factory harness. Now, to uh close the door on this deal, you'll only need about 295.

Well, we've got a deal for you. In fact, it's next week's show.

The stallion comes galloping back this time for a set of massive brake rotors and four piston calipers

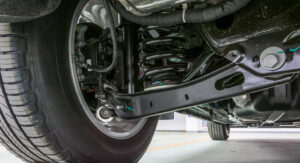
plus high performance shocks all the way around and improve control arms in the rear.

In addition to cobra rims and new wide rubber,

for information about the products used in today's show and more. Check us out online at horsepower tv.com

Horsepower TV is an RTM production.
Show Full Transcript