HorsePower Builds

Video Transcript

Hey, we're gonna spray our way to more power with this late model Camaro coming right up

today on horsepower TV.

We'll show you how to spray your way to more horsepower in your late model FB with a 125 horse nitrous kit. Of course, we'll mash the gas on our dyno

Jet to see how much power we get at the rear wheels. We'll close the lid on our budget Honda project with the front face lift

before we wing it out back for a truly trick new look hot wings.

There you go. Thinking about food again.

So hang on for horsepower TV.

All right.

All right. Welcome to the horsepower shop.

There are plenty of ways to pump up the power in your street machine. Now, this fine 69 Camaro uses a couple of them, a 502 big block with a B DS aluminum lung strapped to the top of it.

Of course, supercharging introduces more air and fuel into your engine sometimes doubling the horsepower. Now, the owner of this Pro Streeter claims numbers in excess of 800 horsepower at the crank.

Yeah. Now, late model Camaros have plenty of power too, right off the showroom floor.

But they take a little bit different approach. Fuel injection and electronics play a big part in pumping up the power on this LS one plus it's also been treated to a set of port matched manifolds, a cat back exhaust, some power pulleys and a tweak computer. Now, you might be saying to yourself, hey, that ought to be enough power. But I don't think so. If too much is just enough, well, then even more is even better.

Well, one of the better ways to make more powers with a little whiff of nitrous, by the way, the LS one responds very well to this on demand kind of power adder.

So today we're gonna install this power wing kit from Nitrous works. It's a wet system which means of course, it introduces nitrous and fuel at the same time. Now, here's a cutaway of the power wing that shows you the passages for each.

Now the kit is tunable by installing different size jets. You make up to 100 25 horsepower.

Now, that's a pretty cool feature. Of course, the kit also comes with a 10 pound nitrous bottle brackets, lines, solenoids and of course, all the hardware that you need to bolt the kit right up and the installation is pretty simple too. Now, this power wing installs right in the inlet track just before the throttle body. But before we start bolting any parts up what do you say? We make a power check first on our

dyno Jet?

All right there. How about it? Well, we got 285.

That's a pretty stout LS one I'd say. Yeah, not bad at all. But tell you what, I bet we could add some more. What do you think?

That's good.

Now, the first thing that we wanna do after we get the battery disconnected is remove this ducting right here that's located between the throttle body and the air box. That way we can go ahead and install our nozzle

once it's removed, drill a half inch hole about mid point in the duct,

then install the nozzle bushing from the kit

and the nozzle itself.

Now you wanna make sure the openings point toward the throttle body

and finally you can reinstall the duct.

All right. Well, that seemed easy enough. Now, we can install our nitrous and fuel solenoids and I'll tell you why if

we slip this thing over the shock mount bolt here. Well, it's gonna be out of the way clear of any moving objects and close enough to this wing nozzle to run our lines.

And to make this work, we had to bend the bracket a bit and drill out this hole to make it fit over the bolt

with our solenoids mounted. We can run our lines from them to the wing nozzle and don't forget

it's red for fuel blue for nitrous.

Now, also, we wanna install our jets and I think we'll go with this 100 horse jet first. Now, here

it's nitrous up front

fuel in the rear.

This full throttle switch is gonna make sure that we add nitrous only when the throttle is wide open. Now, check this out, we're gonna mount it right here on the front of the cylinder head,

uh, something like that.

Now, we're probably gonna have to tweak this bracket a little bit and move the switch to make sure it comes in contact with this throttle arm whenever it's it wide open.

Yeah, that looks pretty good. Now, you wanna give everything one last check to make sure there's no interference between that switch and the throttle linkage and that there's no binding on that throttle cable. Hey, that's a good point. The last thing you want is to have that throttle, stuck it wide open.

Well, all right. Now, the wiring for the Solidos is next and it's pretty simple. Just join a red and blue wire like this for a ground and we'll probably tie it with this wire here.

Take the other red and blue wires and join them and they'll connect

to that wide open throttle switch over there

and we're burning another blue wire here from this common terminal on the throttle switch routed around the engine

and through a hole in the firewall,

we're gonna connect this wire to the back of our arming switch

along with this wire that comes from a switch 12 volt source inside the fuse box. Now, I think I'll mount the switch down here under the dash where we can get to it easily. But, oh, here's a tip for you before you start drilling. Make sure you're clear on the backside and not drilling into other wires, hoses or vacuum lines.

There we go.

Well, now's a good time to go ahead and mount up our bottle. You wanna make sure that you mount it in the trunk or the cargo area, not in the passenger compartment where it could become a dangerous projectile if you were involved in an accident.

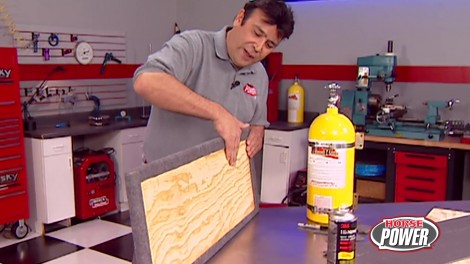
Now, since this is a T top car, I've gone ahead and fed up this mounting plate out of a piece of plywood and some extra carpet we had laying around here.

That way we'll be able to remove the bottle easily and still have a stowage spot for our T tops when we decide to go cruising.

Now, I've also gone ahead and mounted our brackets to the bottle here.

That way we can use it for a template for marking our mounting holes.

Hey, man, I think you missed your calling as a carpenter.

Well, um, but you would say that, but you know what, uh I, I saw you were busy so I went ahead and did this myself. Now, don't hammer me too hard, but we're gonna have to take a little bit of a break here.

I guess he hit the nail on the head. We'll be right back. That was the worst hit. I know it. I'm sorry.

Our budget, Honda gets a whole new look later in the show. Hang in there.

Hey, welcome back to the shop where we're just about to finish our Nitrous works kit installation

on this late model Camaro here. Now, before we drop in our bottle and our mounting plate, we first need to feed our Nitrous line through this grommet right here at the bottom of the cargo area.

And once we get the line fed through the bottom,

you just reach in here

and pull it into the cargo area,

then we can drop in the bottle

and the plate

and connect the line

then under the car, snap the line into the factory brackets that mount the fuel and brake lines to the frame.

Well, now all we have to do is pull the line up here into the engine compartment.

There we go

and connect it to the Nitrous solenoid

a great job. Well, we have one final line to hook up and it's this supplemental fuel feed line

that taps right into the fuel rail by first removing the schrader valve, which we've already done here.

This thing just threads right over the fitting. Now, the other end goes to our fuel solenoid.

That's about it. Well, this whole installation is taken us about two hours and

once we get everything tightened up here.

We'll be ready to see what our work was worth over on the

dyno Jet.

Wow. 370 horses. Now, that's about 86 more than what we started with. Of

course, the kit cost us about 550 bucks. So, uh, that's a little bit more than $6 per pony

at the rear wheel. Hey, good math. Now, of course, remember that was with the 100 horse set up. We've got another 125 horse jet in that kit we could use. But uh we got a Honda that needs help today too. Come on lead the way

if you've been following this build up, you know that we started with a budget of $8500 and that included the purchase price of the car.

Well, so far, most of our modifications have improved the performance and appearance of this Honda and well, today we're gonna take it to the next level. Now, even Ray Charles can see that the front end of this Honda is in bad need of a face lift. Sometime in the past, this front end has come in contact with an immovable object.

Now, the repair, if you want to call it, that

is half hearted at best. Well, I think it's best that we trash this thing and replace it with this. What we've got here is a new front air dam from a PC and it'll not only improve the front end of this Honda, it'll also improve the aerodynamics as well.

Now, some time ago, we lowered this little tuna a bit and well, since this air dam is made of urethane, it'll come right back into shape. Should we bump into a curb or even one of his Chevelle? Hey, I heard that. Now, you're gonna be happy to hear that the front end on this Honda

comes off pretty easily.

Start by removing the five screws along the top here.

A

couple more in the wheel. Well,

and a few more that you'll find underneath.

Well, we're just about ready to test fit our new front air dam and market for any holes we need to drill. But here's a little tip for you

lay down masking tape along any edges that might come in contact with the body.

After all, we just got this thing painted. We wanna protect our investment.

Ok. Let's see what we got here. All right. Fit it up around the headlight there. That looks pretty good. Uh Oh,

what do you got? Look,

remember the cold air kit we installed

interference problem, man. That thing's gotta go. I'll tell you what, I'll replace it with a filter up and fender. W

All right. Now, while Joe is removing that cold air kit, I'm gonna go ahead and use our original stiffener here as a template

to mark our top holes.

Hot Dam.

I'll say it is and

gives us Honda a whole hot new killer look. Well, speaking of that, we want you to look at this for a while. We'll be right back after a short break,

Jud's gonna change a distributor to a more efficient he I when horsepower continues next,

hey, welcome back to the shop where we just improved the appearance of our budget Honda

with an ABC front air dam. Now to balance things out, we're also gonna bolt up one of their street metal wings and I want you to check out this design

ought to make a big statement on the street. And well, since it's adjustable, you can change the amount of down force to suit your driving style. Uh, speaking of style,

now, I want you to check this out. Now, this is a single element wing that's actually a formed aluminum extrusion

and it's supported by a pair of billet aluminum brackets. Now you're also gonna get a pair of end caps that will improve the spoiler's function by providing some directional stability. Of course, the kit also comes with all the hardware that you need to mount and attach it. And

even the Allen wrenches

first assemble the four attaching lugs to the wing,

then both the vertical mounts to the lugs,

next, the 4 ft attached to the vertical mounts

and finally secure the end caps to the wing.

Well, the kid also comes with these little rubber pads that attach right here

to the feet

to help protect your paint.

Now once we get them all on here,

we can go ahead and mount this thing up to the rear deck.

Yeah. But first we need to find the exact center of this deck lid. So we'll measure from outside

to outside

and it looks like about 44.5 inches.

So we'll make our market 22 and a quarter.

Now, we'll measure from outside to outside on the feet

and we get 17.5 inches. Now, half of that is eight and three quarters. That's the distance we'll use to measure from the center line out.

All right. Now, I'm gonna lay down some masking tape to provide a marking surface and to protect the paint while we're drilling.

Now, let's position this wing on the lid

and we'll use the feet as templates

for drilling our mounting hose.

It looks pretty good.

Now, make sure that those holes are accessible on the other side and that you're not drilling into any wire bundles or their lines.

Ok. With our four holes drilled, we can remove the tape and start installing our wing. Of course, it's gonna bow to the feet from inside the lid here.

All right. That's it.

Hot wing.

There you go. Thinking about food again.

All seriousness aside though, this thing does look cool and

well, I guess this puts the wraps on our budget Honda build up. But did we break the bank? Well, you know, not by much. We've got about 5.5 tied up in the wing and the air dam and another couple 100 dollars in paint. So we busted the budget by about $30.

I'd say it was money well spent though. We took this little street beater and turned it into a pretty respectable street heater

so that we did. Well, the heat's on for us to take a little break. We'll be right back.

Pretty nice work.

This is you.

Oh,

hey, welcome back. You know whether you're delivering a punch line, proposing to your girlfriend or trying to get that last little bit of performance out of your engine. Timing is everything.

Now, the he I ignition like this one from Mallory is a rugged piece that's been used in thousands of cars over the years. And well, today we're gonna try and give you a few tips on how to tune one up.

Now, even though we're using the he I as our example here, all the principles apply to other distributors as well. The ignition curve in your distributor advances or retard the delivery of the spark can, can have a huge impact on your engine's performance. Now, too much advance can lead to detonation and too little can cost you valuable horsepower. Of course, changing the curve in your he I for optimum performance is pretty simple to do

companies like Mr Gasket offer kits like this that include a new timing cam

weights, springs and advanced bushings. Now, the cam weights and springs work together to determine your rate of advance and changing. It is as easy as swapping out the springs. Now, the lighter the springs, the quicker your rate of advance.

After getting the rotor out of the way, the first step is to remove the stock spring weights and cam

and replace the cam with the one from the kit.

Now install the nylon bushings on the weight pins

before sliding the weights into place.

The instructions include a graph like this one to show you the rate of advance and the total timing with the different springs. Now your compression ratio camshaft and other variables will help determine what's best for your engine. But generally most performance engines like to have 36 to 38 degrees of total timing with all of it in by 24 to 2600 RPM.

Now go back to the graph and find the springs that'll give you the rate that's best for your engine.

Once the springs are installed, go ahead and unplug your vacuum advance, then check your timing with a light to verify your results.

If your engine doesn't have a degree balancer like this one, you can always install a timing tape on your stock balancer and of course, that'll give you an accurate readout on your total timing.

Of course, the he I comes with a vacuum advance two and under light loads. It advances the timing as much as 50 degrees to help you get better mileage. Now, this one's adjustable by inserting this Allen Wrench right here in the end of the opening

and you turn it clockwise until you hear detonation under light throttle,

then back it off until the detonation goes away. And, well, that ought to be your best vacuum advanced setting.

Well, now that you've gone to the trouble of setting your mechanical and vacuum advance, you wanna make sure that your settings stay put. Hey, this is a stock Chevy distributor. Hold down and, well, this one comes from Mr Gasket and you can see the design is much more rigid than the stocker. Plus the clamping end here engages the distributor more fully.

Well, that's it for a quick tech and speaking of timing, I've got to keep things advancing. Check this out

horsepower TV S Hot Hearts is brought to you by Wyotech.

The nation's premier technical training school.

Hey, are you tired of the performance of your street machines? Rubber. Well, check out this extreme drag radio from

NTO.

It's a dot Approved drag racing radio that'll help your machine hook up as well as it handles. Now, it also gives you up to 15,000 miles of street driven tread life. Now, it uses a special soft compound for maximum traction

and it's available in those popular 1516 and 17 inch sizes with prices that vary accordingly.

I bet not many of you have a tender spot for a dead battery. But how about a battery tender? That'll help keep it alive. Now, the smart charger from Delran monitors your battery and switches from a amp and a quarter trickle charge to a half amp float charge automatically

runs on normal 110 house current and comes with the connectors that you need to hook it right up to your battery. Of course, it's ideal for show cars, race cars and even motorcycles that don't see much road use. Of course, getting used to the price won't be too bad either. It's about 60 bucks.

Say if the pressure is on to keep your fuel injected motor running. Right. Well, a fuel system pressure kit from standard motor products will help you do just that.

Now, this one comes with a precision pressure gauge plus all the hoses, adapters and fittings. You'll need to monitor the fuel pressure in just about any engine. Now, it's self contained in this little box that will stash pretty easily into your tool kit. And,

well, the only stash of cash you're gonna need is about 65 bucks and up.

Well, the pressure is on us to get out of here, but not before a look at next week's show.

The Scarlet Stallion is back for a new light bar,

a performance cover

our hood, a road ready tano cover and even some sexy new seats.

We'll have a quick tech on the best ways to get your rear and gear and a profile of the legendary first lady of top wheel drag racers,

Shirley Mow.

For information about the products used in today's show and more. Check us out online at horsepower tv.com

Horsepower TV is an RTM production.
Show Full Transcript