HorsePower Builds
Want more content like this?
Join the PowerNation Email NewsletterVideo Transcript
Today, we're gonna make this 94 mustang dress to thrill. We'll show you how right now hang with us
today on Horsepower TV.
The Scarlet Stag in his back for a new light bar, a performance co
R hood, a road ready Tano cover and even some sexy new seats.
We'll have a quick tech on the best ways to get your rear and gear and a profile of the legendary first lady of top fuel drag racers,
Shirley Mow.
So hang on for horsepower TV.
Hi, welcome to Horsepower TV. Where today we got a whole shop full of stallions,
including this 68 Shelby GT 500 Kr convertible, man. This thing is gorgeous
and with a 428 big block and classic muscle car styling. Well, we're talking about a cool combination of power and
panache.
Now, chances are you followed the build up on my 90
we Scarlett Stagg in here and, well, you know, we've added some power today.
It's time for the panache,
panache.
You're gonna have to define that for me later on. I don't even think that's part of the English language. Now, today we've got a whole
parcel of parts that are easy to bolt on and they'll transform even the most mundane late model mustang into a real show pony. Now, check these things out.
For instance, I wanted to take a good look at this light bar that we're gonna install. Now, it's got a high mounted led stop light here and it bolts right up to the B pillar to give it some additional strength. Now, that's really important on a convertible like Joe's there because it's gonna help eliminate some had body flex and help the handling out at the same time. Now, once we get this thing bolted up, we're gonna cap off the rear seat with the Speedster
Tano
cover. It's gonna give that old pony a really cool two seat roaster look and of course, both these items came from classic design concepts.
Of course, we took that Tano cover to the paint shop to have it color matched
along with this Servini Coar
hood. We're gonna vote on today, but hey, hey, more about this thing later, right now, we gotta remove our seats and trim panels. So we're gonna install that light bar.
We're getting the front seats out of the way. First, give us more room to work. Plus we're gonna replace these later.
Then after you locate each rear seat retainer, use a flat tip screwdriver to release it
and the seat should pop right out
next, remove the top speaker grill
and this little tea trail
then remove this screw and pin in the back of the panel.
There we go
before popping these two pins loose in the front.
The rocker seal cover comes off next,
remove a couple of pins from each side of the back seat
that will allow you to pull the panel forward.
There we go. And that gives access to this torque fastener
that retains the seat belt. Of course, we're gonna remove it too.
Ok. That gets the panel out of the way.
Now, we have three hex fasteners holding the speaker assembly in place and we need to remove them too.
Now, that speaker is simply out of the way,
use a putty knife
to pry this plastic cover here away from the body.
OK? Just let this thing out of the way, repeat on the other side and we're good to go, man. You're a real wonder with that putty knife. Now, there are a couple of brackets that come in the kit. We're gonna use them as templates
to drill a couple of holes. Now, eventually they're gonna end up behind this B pillar right here. So we have to use the left bracket as a template on the right side and vice versa.
Of course, they are mark. But if that doesn't work for you, you can always use my method.
This one's in my left hand. So it must be for the right side,
match the hole on the bracket with the one on the B pillar, then use a rivet
to line them both up.
Now, you can move the bracket over until the edge of the bracket is parallel with the edge on the B pillar
and center punch a location through these nuts on the bracket.
Now, we can drill through those locations with an eight inch bit.
We need to drill some three quarter inch holes. Now, using this hole saw and of course, we're gonna use those eight inch holes as guides to keep things centered up.
Yeah.
Well, we're ready to install the brackets now and don't forget to switch them. Right goes to right now and of course, left goes to left. We're gonna put these things right in behind the B pillar.
Now, once we get these eight inch holes lined up,
we can pop rivet everything into place.
Well, now we can reinstall those quarter trim covers
and remount the speakers.
We have to cut some holes in our trim panels before we can bolt up that light bar, but don't sweat it. The kit comes with these templates that
make locating and cutting the holes pretty easy.
Ok. Now that we've got our eight inch pilot holes drilled,
we can finish the job with our whole saw.
Ok. Our trim panel is back in place. Looks like we're ready for the bar. Yeah. And I didn't even know it was happy hour.
I guess you mean this bar?
Hey, what we're doing this? Tell me something
long ago when you were talking about that, uh, left hand, right bracket deal.
What do you mean by that?
I didn't figure you'd get it. So I'll draw you a picture later.
It looks good.
Install all four boats, but leave them loose until the bar is properly positioned,
then tighten the bolts
and install the caps to cover the holes.
The final step is to wire up the brake light according to the instructions.
All right. Now, the moment of truth, press the brake pedal and see what we got.
How about it?
Hey, that thing works great.
Well, speaking of breaks, we're gonna take a short one here, but we'll be back with more bolt ons for the Scarlet Stallion right after this.
It's a
lot to live
up to.
I try my best to do that as best I can. She's the best lady drag racer in history. You'll meet her on the road doing what she does best later in the show.
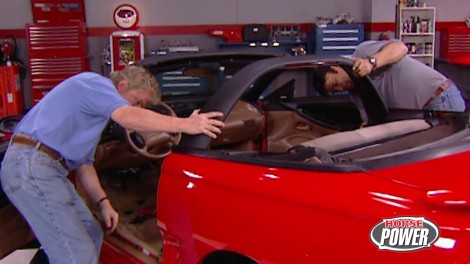
Hey, welcome back to the shop where we're turning Joe's Monday mustang into a real show pony. Now, after bolting up that light bar from Classic design industries. Well, we're ready to slip one of their speed ser Tano covers into place, but you know, this is a two man job. So let me see if I can get Joe to give me a hand after all. It is his car.
Hey, man, what are you doing over here? Well, I'm not gonna reuse those ratty stock seeds. So I'm checking out my options.
You know, I like riding high in the saddle. But, uh, this is kind of ridiculous. You bet you gotta see how ridiculous it makes you look.
But you know, that chair needs to go back in your kitchen. I've got something a whole lot better for later on.
But right now, give me a hand with this tunnel cover,
man. I'm sure glad this thing is made out of lightweight fiberglass. Well, me too. It's a lot lighter than it looks and it ought to be a essential to install. You bet. But first we gonna add a little bit of this weather stripping right here along this edge to help protect the paint and then of course, the straps
they'll go right here and of course they'll hold everything down once it's in place,
we just peel his adhesive backing off, then stick the strip to the edge.
All right. Slipper right in. How you looking over there pretty good.
Now, we got three tabs here that slip under the molding to hold the rear down.
There we go.
And the buckles just snap right into the rear seatbelt receptacles.
All right. What do you think of that?
This is really cool and you know what
that color match is dead on.
Sure is. But you know, now that we got this thing covered, let's go check out your seating situation.
Let's face it, your seats are where you spend all your time whenever you're in the car. And so it just makes good sense to spend a few dollars for a good place to plant your aspirations. Now for Joe's Mustang, we're gonna go ahead and install a set of these Xr sports seats from Carillo.
They have a tubular frame and they use multiple density foam to give you excellent support over the long haul.
Yeah. Check this out too. They also recline
and tilt forward.
And what do you think about the vinyl tan covering we got with the optional red stitching?
That is a nice touch. What's even nicer though are these brackets we ordered that allow us to bolt them up to the original mounts? Well, so you're already worked.
It is,
hey man. Now, what are you doing?
I'm just seeing how my aspirations fit in this seat and I like what I feel.
Well, how do you feel about give me a hand with your hood over here?
We gave you a glimpse of this thing earlier. What we got here is a Servini Cober R hood with an extra 3.5 inches of clearance just in case we wanna add a taller intake or blower later. Now, back here, we've got air vents that keep the engine cooler by allowing hot air to escape.
But the best part is it uses the original hinges and latching hardware. So bolting it up should be a breeze
if I can get my wind bag partner over there to help me.
Hey, well, there you go. Not bad for an easy day's work, huh?
And I tell you what, we've totally changed the personality of the old Scarlett stallion here. In fact, um,
I think you've got a real nag magnet here on your hands, Joe.
But you gotta look out, man. You're gonna have every one of them in your neighborhood trotting after you. Yeah. Well, I don't want to call a Stampede. Let's put this pony in the corral and take a break. We'll be right back after this nag magnet.
The right rear end can put you at the head of the pack. We'll take a quick look at differential differences next on horsepower TV, and later meet the first lady of top fuel drag racing. Shirley Muldowney.
It'll go away.
Hi. Welcome back to the shop. No matter how much power you're making up front in your engine if you can't transfer that power to the pay. But out back. Well,
you're just spinning your wheels literally
today. We thought we'd look at some of the options you have for transferring the torque and well, that way you can make up your mind which one's best for you right now? You're probably sitting at home on the couch asking yourself, hey, what's the diff
you know, that's not a bad question. Differentials come in three basic styles. You have the open
limited slip and of course the locker.
Now, whenever you go around a corner or a sharp curve,
the outer wheel is always gonna spin at a faster rate than the inner wheel. So no matter which differential you're using,
uh the whole purpose of it is to transfer power to both wheels while allowing
one to spin at a different rate than the other.
The most common differential is the open. It uses two side gears here inside the case and each one is blind to accept an axle shaft.
Now, the side gears are driven by these spider gears that are pinned right here to the carrier.
Of course, the carrier is driven by a ring gear that bolts right up here to this flange and in turn,
it's engaged with
the pinion, which is where the power energy rear end from the drive shaft. Now, this is a simple and reliable design, but it has a major shortcoming
under normal driving circumstances, power is transmitted equally to both wheels. But
when you have a situation where one wheel has more traction than the other, the power is gonna find the path of least resistance and it's gonna go to the wheel with the least traction.
Now, that's not an ideal situation if you're racing or off roading,
not at all. So the next step up is a limited slip like this Eaton unit.
It uses preloaded clutches that transmit some of the power to the side gears. Now, when power is applied, there's an increase in clutch pressure and friction.
While this differential still lets the wheels rotate at different speeds, it also allows more equal distribution of power to both wheels. Even the one that has the most traction,
a limited slip is a good choice for dual duty on the street and strip because it's inexpensive, simple to install and you get a traction improvement without losing the differential action.
A more serious performance upgrade is the locker that uses a pair of these dog clutches like these to transmit the power. Now around corners, one or the other will automatically disengage
to allow one wheel to rotate faster than the other because of
is ratcheting action.
The operation isn't going to be as smooth as with a limited slip. On the other hand, the locker automatically directs power to the wheel with the greatest traction.
Now, even if one wheels off the ground, power still goes to the one that's maintaining contact
if you need maximum traction at the track or off road, but you still need to go around corners. Well, then the locker is the key to your performance.
Now, of course, we can't forget about the spool which puts everything in a locked up mode regardless of the situation, both wheels spin at the same rate. In other words, no redistribution of power.
That's great for drag racing where you want a direct power path, but forget it if you need any kind of differential action
in the past. We've built several rear ends here in the shop using the open limited slip and even the locker designs based on what we thought was best for the application. Well, now you can make your choice. Hey, we wanna thank the folks from DTs for loaning us these cool cutaways.
They've been helping people put their rears and gears for years. Say that twice. Now we're gonna put ours in park for a little break. We'll be right back
and now a horsepower happening, celebrating the people places and events of the high performance lifestyle.
Tell me what happens when you take a soy bean field in the middle of the south, build a drag strip next to it. Then bring in the first lady of top fuel drag racing.
Well, I'd say you got the hottest road show ever to hit the state of Alabama.
It does give the fans that can't afford to go to national events or aren't close enough to the big events. A chance to see
one of the big cars.
Shirley M
three time N hr A champion is here in Huntsville for a special summer holiday event
where in addition to bracket racing fans get to see the jet cars go.
They get to see Danny OJ in his wheel standing 34 coup
and they get a chance to be a legend who now loves traveling to match races at smaller tracks around the country to put on a show that the fans will always remember. I just kind of do my own thing and worry about the fans and make sure that they're taken care of and then
get ready to do the
best job out there. And it's certainly the easiest job out there drive the race car.
Shirley learned to race on the back roads of upstate New York
before becoming the first woman to earn an N hr A, a dragster license.
Her amazing story has been enjoyed by movie goers around the world. Thanks to the heart, like a wheel which shows her triumphs and tragedies in both bunny car competition
and the ultimate top fuel where she won the first of three championships back in 1977.
Since then, she's paved the way for countless competitive women
who used to never dream of racing in the big time.
It's a lot to live up to.
I try my best to do that as best I can.
Uh, I know that there are a lot of women getting involved in the sport and I know that they're aspiring top fuel drivers.
I'd like to see them all. Each and every one of them get their chance and opportunity. The best advice I can give the little ones and the ones growing, getting, getting there are, uh, stay in school. Pay attention.
Uh,
you know, it's not just driving the car today, it's learning how to sell it,
keep your promises.
And again, give the fans what they pay to sit.
Shirley sees a tough road ahead for any aspiring top fueler in an age when big money and big sponsors are prerequisites to competing
drag racing and Nitro methane are still in her blood.
And the first lady of drag racing loves bringing the top fuel thrill that tracks anywhere she can trap.
I
love
it more than anything in the world.
I can't imagine myself doing anything other than driving the race car.
Uh When I don't drive the race car any longer, uh I think that I will be somewhat lost
horsepower TV S hot parts is brought to you by Wyotech.
The nation's premier technical training school
to get the most power from your engine. You've got to have compatible components and well, Edelbrock, new Eps intake manifold for small block Chevys is engineered specifically to work with their square flan performer series carbs. Now, the runners and the floor here have been engineered to fatten up the power band right in the mid range where you need it the most, of course, you can get this thing in either natural or polished finish with price.
This is starting at 100 and 30 bucks. Well,
how about this polished pipe from Super Trap? It's their new wave tech muffler that uses sound diffusion technology to bring the decibels down while you keep the horsepower up.
Now, the sound and flow are tunable by adding or subtracting these internal disk. But what makes the wave tech new is the new stainless bell shaped case and the HP C coated trap cap that you can get in several colors. Of course, it takes the color of green to get one about 100 $80.
Well, speaking of color, what's black, white and has tread all over? Well, a tire, of course, so check out this new A VSES 100 from Yokohama.
Now it's an affordable high performance tire that's designed for crisp handling, durability and good looks. Now, the tread lends itself to both dry and wet handling. Thanks to these two grooves here that forced the water out to help prevent aqua planting. Of course, it's available in three different speed ratings HV, and W with sizes from 15 inches and up and of course prices to match the sizes.
Well, I'm afraid it's time for us to retire this edition of horsepower TV. But we'll be back with more high performance fun next week. See you then
crates are cool and we've got one for Chuck's newest grocery Getter. It's a small block Chevy and we'll show you how to drop one in and a five speed tranny,
a new clutch set up drive shaft headers, exhaust and more before we fire it up and take it for a test drive.
Horsepower TV is an RTM production
Show Full Transcript
today on Horsepower TV.
The Scarlet Stag in his back for a new light bar, a performance co
R hood, a road ready Tano cover and even some sexy new seats.
We'll have a quick tech on the best ways to get your rear and gear and a profile of the legendary first lady of top fuel drag racers,
Shirley Mow.
So hang on for horsepower TV.
Hi, welcome to Horsepower TV. Where today we got a whole shop full of stallions,
including this 68 Shelby GT 500 Kr convertible, man. This thing is gorgeous
and with a 428 big block and classic muscle car styling. Well, we're talking about a cool combination of power and
panache.
Now, chances are you followed the build up on my 90
we Scarlett Stagg in here and, well, you know, we've added some power today.
It's time for the panache,
panache.
You're gonna have to define that for me later on. I don't even think that's part of the English language. Now, today we've got a whole
parcel of parts that are easy to bolt on and they'll transform even the most mundane late model mustang into a real show pony. Now, check these things out.
For instance, I wanted to take a good look at this light bar that we're gonna install. Now, it's got a high mounted led stop light here and it bolts right up to the B pillar to give it some additional strength. Now, that's really important on a convertible like Joe's there because it's gonna help eliminate some had body flex and help the handling out at the same time. Now, once we get this thing bolted up, we're gonna cap off the rear seat with the Speedster
Tano
cover. It's gonna give that old pony a really cool two seat roaster look and of course, both these items came from classic design concepts.
Of course, we took that Tano cover to the paint shop to have it color matched
along with this Servini Coar
hood. We're gonna vote on today, but hey, hey, more about this thing later, right now, we gotta remove our seats and trim panels. So we're gonna install that light bar.
We're getting the front seats out of the way. First, give us more room to work. Plus we're gonna replace these later.
Then after you locate each rear seat retainer, use a flat tip screwdriver to release it
and the seat should pop right out
next, remove the top speaker grill
and this little tea trail
then remove this screw and pin in the back of the panel.
There we go
before popping these two pins loose in the front.
The rocker seal cover comes off next,
remove a couple of pins from each side of the back seat
that will allow you to pull the panel forward.
There we go. And that gives access to this torque fastener
that retains the seat belt. Of course, we're gonna remove it too.
Ok. That gets the panel out of the way.
Now, we have three hex fasteners holding the speaker assembly in place and we need to remove them too.
Now, that speaker is simply out of the way,
use a putty knife
to pry this plastic cover here away from the body.
OK? Just let this thing out of the way, repeat on the other side and we're good to go, man. You're a real wonder with that putty knife. Now, there are a couple of brackets that come in the kit. We're gonna use them as templates
to drill a couple of holes. Now, eventually they're gonna end up behind this B pillar right here. So we have to use the left bracket as a template on the right side and vice versa.
Of course, they are mark. But if that doesn't work for you, you can always use my method.
This one's in my left hand. So it must be for the right side,
match the hole on the bracket with the one on the B pillar, then use a rivet
to line them both up.
Now, you can move the bracket over until the edge of the bracket is parallel with the edge on the B pillar
and center punch a location through these nuts on the bracket.
Now, we can drill through those locations with an eight inch bit.
We need to drill some three quarter inch holes. Now, using this hole saw and of course, we're gonna use those eight inch holes as guides to keep things centered up.
Yeah.
Well, we're ready to install the brackets now and don't forget to switch them. Right goes to right now and of course, left goes to left. We're gonna put these things right in behind the B pillar.
Now, once we get these eight inch holes lined up,
we can pop rivet everything into place.
Well, now we can reinstall those quarter trim covers
and remount the speakers.
We have to cut some holes in our trim panels before we can bolt up that light bar, but don't sweat it. The kit comes with these templates that
make locating and cutting the holes pretty easy.
Ok. Now that we've got our eight inch pilot holes drilled,
we can finish the job with our whole saw.
Ok. Our trim panel is back in place. Looks like we're ready for the bar. Yeah. And I didn't even know it was happy hour.
I guess you mean this bar?
Hey, what we're doing this? Tell me something
long ago when you were talking about that, uh, left hand, right bracket deal.
What do you mean by that?
I didn't figure you'd get it. So I'll draw you a picture later.
It looks good.
Install all four boats, but leave them loose until the bar is properly positioned,
then tighten the bolts
and install the caps to cover the holes.
The final step is to wire up the brake light according to the instructions.
All right. Now, the moment of truth, press the brake pedal and see what we got.
How about it?
Hey, that thing works great.
Well, speaking of breaks, we're gonna take a short one here, but we'll be back with more bolt ons for the Scarlet Stallion right after this.
It's a
lot to live
up to.
I try my best to do that as best I can. She's the best lady drag racer in history. You'll meet her on the road doing what she does best later in the show.
Hey, welcome back to the shop where we're turning Joe's Monday mustang into a real show pony. Now, after bolting up that light bar from Classic design industries. Well, we're ready to slip one of their speed ser Tano covers into place, but you know, this is a two man job. So let me see if I can get Joe to give me a hand after all. It is his car.
Hey, man, what are you doing over here? Well, I'm not gonna reuse those ratty stock seeds. So I'm checking out my options.
You know, I like riding high in the saddle. But, uh, this is kind of ridiculous. You bet you gotta see how ridiculous it makes you look.
But you know, that chair needs to go back in your kitchen. I've got something a whole lot better for later on.
But right now, give me a hand with this tunnel cover,
man. I'm sure glad this thing is made out of lightweight fiberglass. Well, me too. It's a lot lighter than it looks and it ought to be a essential to install. You bet. But first we gonna add a little bit of this weather stripping right here along this edge to help protect the paint and then of course, the straps
they'll go right here and of course they'll hold everything down once it's in place,
we just peel his adhesive backing off, then stick the strip to the edge.
All right. Slipper right in. How you looking over there pretty good.
Now, we got three tabs here that slip under the molding to hold the rear down.
There we go.
And the buckles just snap right into the rear seatbelt receptacles.
All right. What do you think of that?
This is really cool and you know what
that color match is dead on.
Sure is. But you know, now that we got this thing covered, let's go check out your seating situation.
Let's face it, your seats are where you spend all your time whenever you're in the car. And so it just makes good sense to spend a few dollars for a good place to plant your aspirations. Now for Joe's Mustang, we're gonna go ahead and install a set of these Xr sports seats from Carillo.
They have a tubular frame and they use multiple density foam to give you excellent support over the long haul.
Yeah. Check this out too. They also recline
and tilt forward.
And what do you think about the vinyl tan covering we got with the optional red stitching?
That is a nice touch. What's even nicer though are these brackets we ordered that allow us to bolt them up to the original mounts? Well, so you're already worked.
It is,
hey man. Now, what are you doing?
I'm just seeing how my aspirations fit in this seat and I like what I feel.
Well, how do you feel about give me a hand with your hood over here?
We gave you a glimpse of this thing earlier. What we got here is a Servini Cober R hood with an extra 3.5 inches of clearance just in case we wanna add a taller intake or blower later. Now, back here, we've got air vents that keep the engine cooler by allowing hot air to escape.
But the best part is it uses the original hinges and latching hardware. So bolting it up should be a breeze
if I can get my wind bag partner over there to help me.
Hey, well, there you go. Not bad for an easy day's work, huh?
And I tell you what, we've totally changed the personality of the old Scarlett stallion here. In fact, um,
I think you've got a real nag magnet here on your hands, Joe.
But you gotta look out, man. You're gonna have every one of them in your neighborhood trotting after you. Yeah. Well, I don't want to call a Stampede. Let's put this pony in the corral and take a break. We'll be right back after this nag magnet.
The right rear end can put you at the head of the pack. We'll take a quick look at differential differences next on horsepower TV, and later meet the first lady of top fuel drag racing. Shirley Muldowney.
It'll go away.
Hi. Welcome back to the shop. No matter how much power you're making up front in your engine if you can't transfer that power to the pay. But out back. Well,
you're just spinning your wheels literally
today. We thought we'd look at some of the options you have for transferring the torque and well, that way you can make up your mind which one's best for you right now? You're probably sitting at home on the couch asking yourself, hey, what's the diff
you know, that's not a bad question. Differentials come in three basic styles. You have the open
limited slip and of course the locker.
Now, whenever you go around a corner or a sharp curve,
the outer wheel is always gonna spin at a faster rate than the inner wheel. So no matter which differential you're using,
uh the whole purpose of it is to transfer power to both wheels while allowing
one to spin at a different rate than the other.
The most common differential is the open. It uses two side gears here inside the case and each one is blind to accept an axle shaft.
Now, the side gears are driven by these spider gears that are pinned right here to the carrier.
Of course, the carrier is driven by a ring gear that bolts right up here to this flange and in turn,
it's engaged with
the pinion, which is where the power energy rear end from the drive shaft. Now, this is a simple and reliable design, but it has a major shortcoming
under normal driving circumstances, power is transmitted equally to both wheels. But
when you have a situation where one wheel has more traction than the other, the power is gonna find the path of least resistance and it's gonna go to the wheel with the least traction.
Now, that's not an ideal situation if you're racing or off roading,
not at all. So the next step up is a limited slip like this Eaton unit.
It uses preloaded clutches that transmit some of the power to the side gears. Now, when power is applied, there's an increase in clutch pressure and friction.
While this differential still lets the wheels rotate at different speeds, it also allows more equal distribution of power to both wheels. Even the one that has the most traction,
a limited slip is a good choice for dual duty on the street and strip because it's inexpensive, simple to install and you get a traction improvement without losing the differential action.
A more serious performance upgrade is the locker that uses a pair of these dog clutches like these to transmit the power. Now around corners, one or the other will automatically disengage
to allow one wheel to rotate faster than the other because of
is ratcheting action.
The operation isn't going to be as smooth as with a limited slip. On the other hand, the locker automatically directs power to the wheel with the greatest traction.
Now, even if one wheels off the ground, power still goes to the one that's maintaining contact
if you need maximum traction at the track or off road, but you still need to go around corners. Well, then the locker is the key to your performance.
Now, of course, we can't forget about the spool which puts everything in a locked up mode regardless of the situation, both wheels spin at the same rate. In other words, no redistribution of power.
That's great for drag racing where you want a direct power path, but forget it if you need any kind of differential action
in the past. We've built several rear ends here in the shop using the open limited slip and even the locker designs based on what we thought was best for the application. Well, now you can make your choice. Hey, we wanna thank the folks from DTs for loaning us these cool cutaways.
They've been helping people put their rears and gears for years. Say that twice. Now we're gonna put ours in park for a little break. We'll be right back
and now a horsepower happening, celebrating the people places and events of the high performance lifestyle.
Tell me what happens when you take a soy bean field in the middle of the south, build a drag strip next to it. Then bring in the first lady of top fuel drag racing.
Well, I'd say you got the hottest road show ever to hit the state of Alabama.
It does give the fans that can't afford to go to national events or aren't close enough to the big events. A chance to see
one of the big cars.
Shirley M
three time N hr A champion is here in Huntsville for a special summer holiday event
where in addition to bracket racing fans get to see the jet cars go.
They get to see Danny OJ in his wheel standing 34 coup
and they get a chance to be a legend who now loves traveling to match races at smaller tracks around the country to put on a show that the fans will always remember. I just kind of do my own thing and worry about the fans and make sure that they're taken care of and then
get ready to do the
best job out there. And it's certainly the easiest job out there drive the race car.
Shirley learned to race on the back roads of upstate New York
before becoming the first woman to earn an N hr A, a dragster license.
Her amazing story has been enjoyed by movie goers around the world. Thanks to the heart, like a wheel which shows her triumphs and tragedies in both bunny car competition
and the ultimate top fuel where she won the first of three championships back in 1977.
Since then, she's paved the way for countless competitive women
who used to never dream of racing in the big time.
It's a lot to live up to.
I try my best to do that as best I can.
Uh, I know that there are a lot of women getting involved in the sport and I know that they're aspiring top fuel drivers.
I'd like to see them all. Each and every one of them get their chance and opportunity. The best advice I can give the little ones and the ones growing, getting, getting there are, uh, stay in school. Pay attention.
Uh,
you know, it's not just driving the car today, it's learning how to sell it,
keep your promises.
And again, give the fans what they pay to sit.
Shirley sees a tough road ahead for any aspiring top fueler in an age when big money and big sponsors are prerequisites to competing
drag racing and Nitro methane are still in her blood.
And the first lady of drag racing loves bringing the top fuel thrill that tracks anywhere she can trap.
I
love
it more than anything in the world.
I can't imagine myself doing anything other than driving the race car.
Uh When I don't drive the race car any longer, uh I think that I will be somewhat lost
horsepower TV S hot parts is brought to you by Wyotech.
The nation's premier technical training school
to get the most power from your engine. You've got to have compatible components and well, Edelbrock, new Eps intake manifold for small block Chevys is engineered specifically to work with their square flan performer series carbs. Now, the runners and the floor here have been engineered to fatten up the power band right in the mid range where you need it the most, of course, you can get this thing in either natural or polished finish with price.
This is starting at 100 and 30 bucks. Well,
how about this polished pipe from Super Trap? It's their new wave tech muffler that uses sound diffusion technology to bring the decibels down while you keep the horsepower up.
Now, the sound and flow are tunable by adding or subtracting these internal disk. But what makes the wave tech new is the new stainless bell shaped case and the HP C coated trap cap that you can get in several colors. Of course, it takes the color of green to get one about 100 $80.
Well, speaking of color, what's black, white and has tread all over? Well, a tire, of course, so check out this new A VSES 100 from Yokohama.
Now it's an affordable high performance tire that's designed for crisp handling, durability and good looks. Now, the tread lends itself to both dry and wet handling. Thanks to these two grooves here that forced the water out to help prevent aqua planting. Of course, it's available in three different speed ratings HV, and W with sizes from 15 inches and up and of course prices to match the sizes.
Well, I'm afraid it's time for us to retire this edition of horsepower TV. But we'll be back with more high performance fun next week. See you then
crates are cool and we've got one for Chuck's newest grocery Getter. It's a small block Chevy and we'll show you how to drop one in and a five speed tranny,
a new clutch set up drive shaft headers, exhaust and more before we fire it up and take it for a test drive.
Horsepower TV is an RTM production