HorsePower Builds
Want more content like this?
Join the PowerNation Email NewsletterVideo Transcript
All right, welcome to the horsepower shop.
No doubt about it today. The trend in street machines is to combine form and function in one potent package. Well, like this 1970 Chevelle that was built by Good Mark Industries for a sweepstakes giveaway.
And I tell you what this thing is a winner all the way from the new Ram Jet 350 under the hood to the lower suspension and 17 inch rims. Of course, it's also got
a killer show stop and paint job and sure stopping. Four wheel disc brakes. You're right, Joe. That is one beautiful
Chael and you know, it's kind of the same theme that we've been trying to apply to my old 72 silver bullet wagon here. Now, if you recall the last time we had this thing in the shop, we built an A LDF I injection set up to that 502 big block and we cranked out about 408 horsepower at the rear wheel.
Of course, more power means more speed
and when you combine more speed with the extra weight of this wagon, bigger better brakes are a must.
Now, right from the factory. The old bullet here came with a set of 11 inch rotors up front and some puny 9.5 inch drums out back that were barely adequate, even with the stock 307.
And especially so when I got this thing loaded up with a week's worth of groceries.
Now, today we've got the right hardware to take this hauler to a halt.
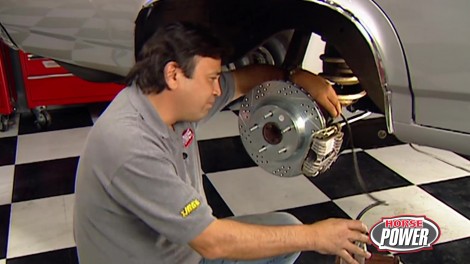
That's right. Well, today's brake technology usually involves bigger rotors that are drilled and slotted like these that helps keep the rotors cooler and helps release gasses generated by brake pads. Without these features, the gasses would prevent contact between the rotors and pads and of course, decrease your efficiency. Now, our bear kit involves two different sizes. We've got 12 inch rotor for the rear
and these 13 inch rotors were up front. Now, you want the bigger rotors up front because deceleration shifts the weight of the car to the front and increases the workload. Good point. Of course, to get the most out of our braking system, we needed calipers that would complement those big rotors. We ordered the bear track system for the front and the turing system for the rear.
They both use aluminum PB R calipers with carbon metallic pads already loaded in
up front. You're gonna find a dual piston floating design that's held in place with a rigid iron bracket to help minimize deflection out
back. You got essentially the same setup except it's smaller of course, and it only uses one piston
to clamp the pads plus a similar iron mounting bracket. Oh, and check this out. It also has an integral parking brake assembly.
Well, you'll be glad to know with both kits. You get all the mounting hardware you need including brackets and bolts and
even new parking brake cables. Now, the advantage of this system is you get the larger rotors but you keep your stock spindles. That means steering geometry stays the same and you don't get those tire wear problems often associated with tall spindle conversions.
Yeah, that tall spindle will change your camera curve and give you some improved handling, which is great for the road course.
And if you have an unlimited budget for tires,
but you know, I drive this thing about 15,000 miles a year and I just don't have that kind of money. So I'll gladly give up a little bit of handling for improved tire wear
here in the shop. We've got the benefit of this Eagle Mobile Man lift. But if you're doing this upgrade in your driveway, make sure to support your car on level ground with jack stands
starting up front, remove the wheel
loosen the front brake line at the frame,
remove the caliper,
then the rotor
and finally remove the backing plate
and caliper played together
with that old brake hardware out of the way we're now ready for our new caliber bracket.
If your car came from the factory with drum brakes, you can just bolt the bracket on the way it comes out of the box. But if your car came with factory disc brakes like the silver bullet did here, well, you're gonna have to add this spacer between the bracket
and the spin will at the upper mounting point,
torque, the lower bolt to 85 ft pounds
and the upper bolt to 100 and 10.
Now we're gonna install these new hubs from the kit. These are made of aluminum and they come with new bearings and seals already packed with grease.
There we go,
get the washer on
and I wanna turn the nut
finger tight.
Well, I spin the hub just to make sure those bearings are properly seated.
After this, we can install the cotter pin and the dust cap.
These drilled rotors are directional so they're marked left and right now before we bolt these things up though, I want to show you the difference between them
and the stalker that we just took off. Now, that is a dramatic difference.
Not only do these new rotors give you about 30% more swept area, but they also move the caler further out from the hub center and that's gonna give you more leverage and improved mechanical advantage.
Install the rotors using a lug nut to hold them in place,
install a caliper next,
using the bolt supplied in the kit to attach it
to the bracket
torque them to 100 and 10 ft pounds.
This flexible stainless line replaces the stalker. And since it doesn't expand like the rubber one can,
it's gonna give you a good solid pedal and a lot better feel whenever you have to modulate the brakes. Now you wanna make sure to use these little copper washers on either side of this banjo fitting here and that's gonna help you prevent any fluid leaks.
Now, once you get it in place, torque it down to about 20 ft pounds. Oh, and here's another little tip for you. This banjo bolt is designed to break if you over toque it. So make sure you take it easy.
Now, once we get this thing in place here,
we can go ahead and start on the back brakes.
Yeah. Well, I might be pulling up the rear, but I'm way ahead of the game here. Now to install the rear brakes, we gotta pull the axles. So I had to remove the rear brake drums,
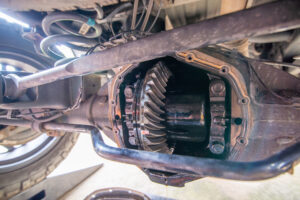
the differential cover and of course, drain the gear loop.
Now, if I get my partner to push in on that axle there,
I can use this magnet to pull the sea clip, holding it in place,
then slide the axle out of the housing,
disconnect the parking brake cable.
And after disconnecting the brake line, remove the four bolts holding the backing plate in place and the plate assembly comes right off.
Well, now is a good time to install a new set of axle seals and bearings. But I'll tell you what, I wanna clean off these axle
FLS first, if any break, dust or rust. So our caliber brackets will see up square against them.
Well, while Joe takes care of those
FLS, we're gonna take a break of a different kind. Now, this one is for our sponsors. So stay where you are.
Hey, great job cleaning his flans. That bracket sits nice and flat on there. Now, Joe,
nice of you to notice. I'll put it on your bill. Thanks. All right. Welcome back to the shop where Chuck and I are in the middle of a bare four wheel disc upgrade on his silver bullet here. Now, we just finished the front brakes with the massive 13 inch rotors and PB R calipers. We just installed new axle bearings and seals to get us ready for the rear brakes.
That's right. Now, the first order of business is to attach this new bracket caliper to the axle flange using the original hardware.
These brackets have a dual bolt pattern, so they'll work on either side,
just position them. So the caliper mounts down and to the front.
All right. Well, now we can slide the axle back into place. Oh, by the way,
we had to install some half inch longer studs here to compensate for those thicker rotors. Now, this way,
we'll get full engagement of the lugs when we install the wheels
with the axle in place, install the sea cliff,
reinstall, the rear cover
and fill the differential with gear loop.
Finally install the rotor onto the axle.
Well, now the calipers and I don't think we mentioned this when we were up front, but when you mount these, make sure the bleeder valves on top where the air tends to rise.
That way, you'll be sure to purge all the air out when you bleed the brakes. Well, after we get these mounted, we can install those new brake cables. We showed you
you'll have to reposition the original brake line using this relocation bracket that comes in the kit.
Then you can connect everything up. And once that's done, we just attach this flex line to the caliper
using this banjo bolt. Oh, and don't forget to torque that banjo bolt to 20 ft pounds.
Four wheel disc require a master cylinder with additional capacity to move more fluid and
operate the calipers.
Plus they require more pedal pressure to actuate them.
Now, this one comes with our kit and it's matched to our application.
But we also ordered this optional dual diaphragm booster to make sure that the power brakes operate easily.
First step is to disconnect the brake lines at the master cylinder.
Then inside the car, remove the pin, holding the booster crevice to the brake pedal.
Finally unbolt and remove the booster assembly from the firewall.
Hey, it's about time you got that thing out of there here, man, you're a slave driver.
Now you just reverse the process to mount the new master cylinder and booster. And once that's done, we can install this new adjustable proportioning valve.
It allows you to adjust for front and rear bias to optimize your braking under all kinds of load, weather and track conditions. Now, once you mount it in an accessible secure place, you just plumb a line from the master cylinder to the import here
and from the out port, run a line to your rear brakes
to set the brake bias, turn this knob about 4.5 times to mid point
before you test drive to find the lock up point for your rear brakes.
Now, this should happen just after the front brakes lock up and make sure you do this in a safe place where you got lots of room.
Yeah, you don't wanna test out these new brakes on a public highway. Now, we're also gonna have to bleed this system and to do that, we'll start at the right rear here, which is the furthest from the master cylinder. Then once we're done, we'll move across to the left rear,
the right front and finally to the left front, which is the closest to the mass cylinder.
Now, you're gonna have to keep that master cylinder filled with fluid. Otherwise you'll be pumping air into the system and
well, you'll have to start all over again.
While we finish bleeding the brakes, check out these messages. When we come back, we'll have some tips for you on how to break in your new brakes.
Welcome back to the shop in the final phase of our bear break upgrade on my old silver bullet.
So far we've installed our 12 inch rotor touring system out back and their 13 inch rotor track system up front.
Plus we added a dual diaphragm booster,
a master cylinder matched to the system and an adjustable proportioning valve to help fine tune the brakes.
No way those bigger brakes are gonna fit inside the original 15 inch rims. So to keep the silver bullet on target, we're going with these 17 inch rollers from billet specialties and we chose the Vin Tech design that combines classic looks
with high tech construction. Now, I don't know about you but I've never seen polished bullet wheels that look this shiny
because of their modular design. You get them with the right backspace to suit your application in our case, eight inches up front here, 4.5 inch backspace out back. We've got 9.5 inches with a five and a quarter inch back space
man.
Those rims make the old wagon look fast even when it's standing still. But you know, a speeding bullet needs some speed rated rubber. So we wrapped these rims in some middle 555 extreme ZRS.
A lot of testing went into their design. They use these three grooves here to efficiently evacuate water to help prevent hydroplaning.
And you combine that with an aggressive tread design and, well, you've got some reliable handling in wet or dry weather.
Now, up front here we used a 2 55 45 17 and out back we used the 2 85 40 17. Both of them speck out right at about 26 inches.
Here's a little tip for you with any aluminum wheels, make sure you ret
toque them after about 100 miles or so.
And the reason is this aluminum is a lot softer than the steel lugs. Those lugs need a chance to see properly into the wheels.
Speaking of seeding in that also applies to your brakes. For instance, you wouldn't take a freshly built engine and run it wide open without breaking it in first. So it stands to reason that your rotors need to be seasoned and your pads need to be bedded in properly to get the best performance out of your brakes.
To do that, drive the car normally for about four or 500 miles before making a series of stops from about 65 miles an hour.
Use increasing pedal pressure for each series starting with about 40% pedal pressure and working your way up just short of locking up the brakes or activating the A BS.
Be sure to allow the brakes to cool between each series. And after this break in procedure, you'll be able to stop on a dime
and give nine cents change.
We'll need all the change we can get. We're heading to Las Vegas next for a look at some hot new high performance hardware.
Want the latest on horsepower, check out our website at horsepower tv.com.
Welcome to Las Vegas where we're attending the annual S
A
show. Now, this thing got started over 30 years ago with a handful of hardcore high performance parts purveyors today. And it's grown into the largest most radical performance show on earth.
I
I
I
while the cars are the stars, it's people who make the high performance industry what it is today.
People like Vic Edelbrock junior who received Wild
Tech's Annual Leadership Award for a
family tradition of inspiring young people to pursue high performance careers.
And it's a great pleasure to present this to you. Thank you very much. Well, thank you very very much.
You know, Vic really is one of the people who is responsible for helping grow the show into something that covers more than 2 million square feet
and speaking of feet, mine are really tired. Yeah, starting to smell that way too, you know,
no way we can cover all this for you. But here is our special list of the coolest
hottest, most radical reasons to see semen
the
show got its start peddling high performance parts and well, today it's still the same story.
Now, get a load of this 41 Willie's coop here.
The owner calls it the Frantic Frog and here's why
the blown and injected
hemi
displaces 540 cubic inches
and pounds out over 1000 horsepower.
That's the frantic part.
The frog part comes from the color
and the interior which is stitched up to include 16 Asian bull frog skins.
This Willie's gets my vote for the most radical street ride. You know what else? It's got me green with envy.
You might be green with envy, but I could go plumb bananas over this yellow and purple Un Civic drag car. This thing's gotta get my vote as most radical sport compact. And uh here's a big reason why.
Well, how about a 3.2 L Nsx V6 with Quin Turbos? This thing cranks out 1000 horsepower. Now, un report guys might be asking
where's the inner cooler? Well, forget it.
This pocket rocket uses Methanol to make its way down the track.
That's pretty cool. But you know, here's another school of thought
one that has its roots in earliest rotting. Now, this cool custom started out as a 38 Lincoln Zephyr. But as you can see, it's had more plastic surgery than Michael Jackson.
This thing's been chopped, channeled and stretched. Plus it's got a grill from a 40 zephyr
and headlights from a 39 Ford.
The windshield and dash have both been Pirated from a 50 Studebaker
and out back, you'll find a pair of 64 C ad taillights with a 57 elbow rear bumper.
Those classic styling cues have given way to a thoroughly modern drive train. How about a Chevy 454 backed by a four L 80 E over drive automatic.
Now, no matter how you look at it, this is one zephyr
that blows me away and hey, it gets my boat for the most radical custom.
Well, speaking of Big Motors, here's one that will help get your kids to school on time. And it's part of our pick of the most radical bus here at sa
the official bus of short cut high and
here comes some of the students and the driver.
Yeah.
Oh man, what are you doing here? You can't handle this bus, man.
I thought you rode the short bus. What's he doing here?
From low riders to the high seas, man. There's plenty of power at this year's. See a show including this 44 ft victory super cat. Let me show you around
this custom built boat has a pair of 557 cubic inch big block Chevys topped by a pair of 1471 blowers. Now, these things crank out 1050 horsepower a piece and they do it on pump gas.
Now, once you get up in the cockpit, this thing's got more gauges and levers and switches than the space shuttle. And it's definitely my kind of boat because this thing will run better than 100 and 30 miles an hour.
Uh
Oh, my goodness. Oh, hi.
You know, let's face it guys. The most radical and ravishing thing about
Simba is of the models Stacy Lindy. Here.
It's my pick. It's the top of the list. Well, thank you.
This doesn't ruffle your feathers. I don't know what it does
see you next year.
Horsepower TV S hot parts is brought to you by jags. One call gets it all. One click, gets it quick.
You four speed racers know how the right shifter can go a long ways towards putting you in the winner circle. And that's why this BJ 1000 pistol grip shifter from long is just the ticket for you drag racers and serious streeters.
Now, it's made from billet aluminum with a clear
anodized finish
and it uses the stainless steel tubular rods with high
ends for precise shifts. Every time
the pistol grip handle has a built in button right here so you can control your line, lock your ignition or even activate your nitrous system. Now, if you think this set up pushes your buttons, well, be prepared to shift about 540 out of your savings.
Well, if you're building a Ford 351 Windsor for racing, here's a way to keep your valve train running efficiently for better track times. It's a high
tech belt drive timing system from comp cams
to absorb harmonics from your crank shaft and stabilize your valve train.
Now, it features this idler to reduce belt flap. Plus it accepts your oe cam plate or mechanical pump with an optional adapter. Now, cam shaft timing is adjustable as well, but you'll have to belt out about a grand for this belt drive system.
Well, speaking of drives, vintage airs frontrunner drive system will convert any small block Chevy to a serpentine setup.
It mounts all driven accessories tightly on this CNC mounted Truss uses a spring loaded tensioner and it'll clear most aftermarket and GM fuel injections.
Now, this setup is available with a variety of finishes and it's compatible with just about any Chevy cylinder head, including those without accessory mounting holes. Of course, it's gonna punch a little hole in your budget too with prices starting at about nine and a quarter. Well, it seems like we just started this edition of horsepower TV, but already time for us to get out of here. See you next time.
Great hot parts this week. But Joe, you told me you were working at the, see Michelle looks like those girls were working. You
Show Full Transcript
No doubt about it today. The trend in street machines is to combine form and function in one potent package. Well, like this 1970 Chevelle that was built by Good Mark Industries for a sweepstakes giveaway.
And I tell you what this thing is a winner all the way from the new Ram Jet 350 under the hood to the lower suspension and 17 inch rims. Of course, it's also got
a killer show stop and paint job and sure stopping. Four wheel disc brakes. You're right, Joe. That is one beautiful
Chael and you know, it's kind of the same theme that we've been trying to apply to my old 72 silver bullet wagon here. Now, if you recall the last time we had this thing in the shop, we built an A LDF I injection set up to that 502 big block and we cranked out about 408 horsepower at the rear wheel.
Of course, more power means more speed
and when you combine more speed with the extra weight of this wagon, bigger better brakes are a must.
Now, right from the factory. The old bullet here came with a set of 11 inch rotors up front and some puny 9.5 inch drums out back that were barely adequate, even with the stock 307.
And especially so when I got this thing loaded up with a week's worth of groceries.
Now, today we've got the right hardware to take this hauler to a halt.
That's right. Well, today's brake technology usually involves bigger rotors that are drilled and slotted like these that helps keep the rotors cooler and helps release gasses generated by brake pads. Without these features, the gasses would prevent contact between the rotors and pads and of course, decrease your efficiency. Now, our bear kit involves two different sizes. We've got 12 inch rotor for the rear
and these 13 inch rotors were up front. Now, you want the bigger rotors up front because deceleration shifts the weight of the car to the front and increases the workload. Good point. Of course, to get the most out of our braking system, we needed calipers that would complement those big rotors. We ordered the bear track system for the front and the turing system for the rear.
They both use aluminum PB R calipers with carbon metallic pads already loaded in
up front. You're gonna find a dual piston floating design that's held in place with a rigid iron bracket to help minimize deflection out
back. You got essentially the same setup except it's smaller of course, and it only uses one piston
to clamp the pads plus a similar iron mounting bracket. Oh, and check this out. It also has an integral parking brake assembly.
Well, you'll be glad to know with both kits. You get all the mounting hardware you need including brackets and bolts and
even new parking brake cables. Now, the advantage of this system is you get the larger rotors but you keep your stock spindles. That means steering geometry stays the same and you don't get those tire wear problems often associated with tall spindle conversions.
Yeah, that tall spindle will change your camera curve and give you some improved handling, which is great for the road course.
And if you have an unlimited budget for tires,
but you know, I drive this thing about 15,000 miles a year and I just don't have that kind of money. So I'll gladly give up a little bit of handling for improved tire wear
here in the shop. We've got the benefit of this Eagle Mobile Man lift. But if you're doing this upgrade in your driveway, make sure to support your car on level ground with jack stands
starting up front, remove the wheel
loosen the front brake line at the frame,
remove the caliper,
then the rotor
and finally remove the backing plate
and caliper played together
with that old brake hardware out of the way we're now ready for our new caliber bracket.
If your car came from the factory with drum brakes, you can just bolt the bracket on the way it comes out of the box. But if your car came with factory disc brakes like the silver bullet did here, well, you're gonna have to add this spacer between the bracket
and the spin will at the upper mounting point,
torque, the lower bolt to 85 ft pounds
and the upper bolt to 100 and 10.
Now we're gonna install these new hubs from the kit. These are made of aluminum and they come with new bearings and seals already packed with grease.
There we go,
get the washer on
and I wanna turn the nut
finger tight.
Well, I spin the hub just to make sure those bearings are properly seated.
After this, we can install the cotter pin and the dust cap.
These drilled rotors are directional so they're marked left and right now before we bolt these things up though, I want to show you the difference between them
and the stalker that we just took off. Now, that is a dramatic difference.
Not only do these new rotors give you about 30% more swept area, but they also move the caler further out from the hub center and that's gonna give you more leverage and improved mechanical advantage.
Install the rotors using a lug nut to hold them in place,
install a caliper next,
using the bolt supplied in the kit to attach it
to the bracket
torque them to 100 and 10 ft pounds.
This flexible stainless line replaces the stalker. And since it doesn't expand like the rubber one can,
it's gonna give you a good solid pedal and a lot better feel whenever you have to modulate the brakes. Now you wanna make sure to use these little copper washers on either side of this banjo fitting here and that's gonna help you prevent any fluid leaks.
Now, once you get it in place, torque it down to about 20 ft pounds. Oh, and here's another little tip for you. This banjo bolt is designed to break if you over toque it. So make sure you take it easy.
Now, once we get this thing in place here,
we can go ahead and start on the back brakes.
Yeah. Well, I might be pulling up the rear, but I'm way ahead of the game here. Now to install the rear brakes, we gotta pull the axles. So I had to remove the rear brake drums,
the differential cover and of course, drain the gear loop.
Now, if I get my partner to push in on that axle there,
I can use this magnet to pull the sea clip, holding it in place,
then slide the axle out of the housing,
disconnect the parking brake cable.
And after disconnecting the brake line, remove the four bolts holding the backing plate in place and the plate assembly comes right off.
Well, now is a good time to install a new set of axle seals and bearings. But I'll tell you what, I wanna clean off these axle
FLS first, if any break, dust or rust. So our caliber brackets will see up square against them.
Well, while Joe takes care of those
FLS, we're gonna take a break of a different kind. Now, this one is for our sponsors. So stay where you are.
Hey, great job cleaning his flans. That bracket sits nice and flat on there. Now, Joe,
nice of you to notice. I'll put it on your bill. Thanks. All right. Welcome back to the shop where Chuck and I are in the middle of a bare four wheel disc upgrade on his silver bullet here. Now, we just finished the front brakes with the massive 13 inch rotors and PB R calipers. We just installed new axle bearings and seals to get us ready for the rear brakes.
That's right. Now, the first order of business is to attach this new bracket caliper to the axle flange using the original hardware.
These brackets have a dual bolt pattern, so they'll work on either side,
just position them. So the caliper mounts down and to the front.
All right. Well, now we can slide the axle back into place. Oh, by the way,
we had to install some half inch longer studs here to compensate for those thicker rotors. Now, this way,
we'll get full engagement of the lugs when we install the wheels
with the axle in place, install the sea cliff,
reinstall, the rear cover
and fill the differential with gear loop.
Finally install the rotor onto the axle.
Well, now the calipers and I don't think we mentioned this when we were up front, but when you mount these, make sure the bleeder valves on top where the air tends to rise.
That way, you'll be sure to purge all the air out when you bleed the brakes. Well, after we get these mounted, we can install those new brake cables. We showed you
you'll have to reposition the original brake line using this relocation bracket that comes in the kit.
Then you can connect everything up. And once that's done, we just attach this flex line to the caliper
using this banjo bolt. Oh, and don't forget to torque that banjo bolt to 20 ft pounds.
Four wheel disc require a master cylinder with additional capacity to move more fluid and
operate the calipers.
Plus they require more pedal pressure to actuate them.
Now, this one comes with our kit and it's matched to our application.
But we also ordered this optional dual diaphragm booster to make sure that the power brakes operate easily.
First step is to disconnect the brake lines at the master cylinder.
Then inside the car, remove the pin, holding the booster crevice to the brake pedal.
Finally unbolt and remove the booster assembly from the firewall.
Hey, it's about time you got that thing out of there here, man, you're a slave driver.
Now you just reverse the process to mount the new master cylinder and booster. And once that's done, we can install this new adjustable proportioning valve.
It allows you to adjust for front and rear bias to optimize your braking under all kinds of load, weather and track conditions. Now, once you mount it in an accessible secure place, you just plumb a line from the master cylinder to the import here
and from the out port, run a line to your rear brakes
to set the brake bias, turn this knob about 4.5 times to mid point
before you test drive to find the lock up point for your rear brakes.
Now, this should happen just after the front brakes lock up and make sure you do this in a safe place where you got lots of room.
Yeah, you don't wanna test out these new brakes on a public highway. Now, we're also gonna have to bleed this system and to do that, we'll start at the right rear here, which is the furthest from the master cylinder. Then once we're done, we'll move across to the left rear,
the right front and finally to the left front, which is the closest to the mass cylinder.
Now, you're gonna have to keep that master cylinder filled with fluid. Otherwise you'll be pumping air into the system and
well, you'll have to start all over again.
While we finish bleeding the brakes, check out these messages. When we come back, we'll have some tips for you on how to break in your new brakes.
Welcome back to the shop in the final phase of our bear break upgrade on my old silver bullet.
So far we've installed our 12 inch rotor touring system out back and their 13 inch rotor track system up front.
Plus we added a dual diaphragm booster,
a master cylinder matched to the system and an adjustable proportioning valve to help fine tune the brakes.
No way those bigger brakes are gonna fit inside the original 15 inch rims. So to keep the silver bullet on target, we're going with these 17 inch rollers from billet specialties and we chose the Vin Tech design that combines classic looks
with high tech construction. Now, I don't know about you but I've never seen polished bullet wheels that look this shiny
because of their modular design. You get them with the right backspace to suit your application in our case, eight inches up front here, 4.5 inch backspace out back. We've got 9.5 inches with a five and a quarter inch back space
man.
Those rims make the old wagon look fast even when it's standing still. But you know, a speeding bullet needs some speed rated rubber. So we wrapped these rims in some middle 555 extreme ZRS.
A lot of testing went into their design. They use these three grooves here to efficiently evacuate water to help prevent hydroplaning.
And you combine that with an aggressive tread design and, well, you've got some reliable handling in wet or dry weather.
Now, up front here we used a 2 55 45 17 and out back we used the 2 85 40 17. Both of them speck out right at about 26 inches.
Here's a little tip for you with any aluminum wheels, make sure you ret
toque them after about 100 miles or so.
And the reason is this aluminum is a lot softer than the steel lugs. Those lugs need a chance to see properly into the wheels.
Speaking of seeding in that also applies to your brakes. For instance, you wouldn't take a freshly built engine and run it wide open without breaking it in first. So it stands to reason that your rotors need to be seasoned and your pads need to be bedded in properly to get the best performance out of your brakes.
To do that, drive the car normally for about four or 500 miles before making a series of stops from about 65 miles an hour.
Use increasing pedal pressure for each series starting with about 40% pedal pressure and working your way up just short of locking up the brakes or activating the A BS.
Be sure to allow the brakes to cool between each series. And after this break in procedure, you'll be able to stop on a dime
and give nine cents change.
We'll need all the change we can get. We're heading to Las Vegas next for a look at some hot new high performance hardware.
Want the latest on horsepower, check out our website at horsepower tv.com.
Welcome to Las Vegas where we're attending the annual S
A
show. Now, this thing got started over 30 years ago with a handful of hardcore high performance parts purveyors today. And it's grown into the largest most radical performance show on earth.
I
I
I
while the cars are the stars, it's people who make the high performance industry what it is today.
People like Vic Edelbrock junior who received Wild
Tech's Annual Leadership Award for a
family tradition of inspiring young people to pursue high performance careers.
And it's a great pleasure to present this to you. Thank you very much. Well, thank you very very much.
You know, Vic really is one of the people who is responsible for helping grow the show into something that covers more than 2 million square feet
and speaking of feet, mine are really tired. Yeah, starting to smell that way too, you know,
no way we can cover all this for you. But here is our special list of the coolest
hottest, most radical reasons to see semen
the
show got its start peddling high performance parts and well, today it's still the same story.
Now, get a load of this 41 Willie's coop here.
The owner calls it the Frantic Frog and here's why
the blown and injected
hemi
displaces 540 cubic inches
and pounds out over 1000 horsepower.
That's the frantic part.
The frog part comes from the color
and the interior which is stitched up to include 16 Asian bull frog skins.
This Willie's gets my vote for the most radical street ride. You know what else? It's got me green with envy.
You might be green with envy, but I could go plumb bananas over this yellow and purple Un Civic drag car. This thing's gotta get my vote as most radical sport compact. And uh here's a big reason why.
Well, how about a 3.2 L Nsx V6 with Quin Turbos? This thing cranks out 1000 horsepower. Now, un report guys might be asking
where's the inner cooler? Well, forget it.
This pocket rocket uses Methanol to make its way down the track.
That's pretty cool. But you know, here's another school of thought
one that has its roots in earliest rotting. Now, this cool custom started out as a 38 Lincoln Zephyr. But as you can see, it's had more plastic surgery than Michael Jackson.
This thing's been chopped, channeled and stretched. Plus it's got a grill from a 40 zephyr
and headlights from a 39 Ford.
The windshield and dash have both been Pirated from a 50 Studebaker
and out back, you'll find a pair of 64 C ad taillights with a 57 elbow rear bumper.
Those classic styling cues have given way to a thoroughly modern drive train. How about a Chevy 454 backed by a four L 80 E over drive automatic.
Now, no matter how you look at it, this is one zephyr
that blows me away and hey, it gets my boat for the most radical custom.
Well, speaking of Big Motors, here's one that will help get your kids to school on time. And it's part of our pick of the most radical bus here at sa
the official bus of short cut high and
here comes some of the students and the driver.
Yeah.
Oh man, what are you doing here? You can't handle this bus, man.
I thought you rode the short bus. What's he doing here?
From low riders to the high seas, man. There's plenty of power at this year's. See a show including this 44 ft victory super cat. Let me show you around
this custom built boat has a pair of 557 cubic inch big block Chevys topped by a pair of 1471 blowers. Now, these things crank out 1050 horsepower a piece and they do it on pump gas.
Now, once you get up in the cockpit, this thing's got more gauges and levers and switches than the space shuttle. And it's definitely my kind of boat because this thing will run better than 100 and 30 miles an hour.
Uh
Oh, my goodness. Oh, hi.
You know, let's face it guys. The most radical and ravishing thing about
Simba is of the models Stacy Lindy. Here.
It's my pick. It's the top of the list. Well, thank you.
This doesn't ruffle your feathers. I don't know what it does
see you next year.
Horsepower TV S hot parts is brought to you by jags. One call gets it all. One click, gets it quick.
You four speed racers know how the right shifter can go a long ways towards putting you in the winner circle. And that's why this BJ 1000 pistol grip shifter from long is just the ticket for you drag racers and serious streeters.
Now, it's made from billet aluminum with a clear
anodized finish
and it uses the stainless steel tubular rods with high
ends for precise shifts. Every time
the pistol grip handle has a built in button right here so you can control your line, lock your ignition or even activate your nitrous system. Now, if you think this set up pushes your buttons, well, be prepared to shift about 540 out of your savings.
Well, if you're building a Ford 351 Windsor for racing, here's a way to keep your valve train running efficiently for better track times. It's a high
tech belt drive timing system from comp cams
to absorb harmonics from your crank shaft and stabilize your valve train.
Now, it features this idler to reduce belt flap. Plus it accepts your oe cam plate or mechanical pump with an optional adapter. Now, cam shaft timing is adjustable as well, but you'll have to belt out about a grand for this belt drive system.
Well, speaking of drives, vintage airs frontrunner drive system will convert any small block Chevy to a serpentine setup.
It mounts all driven accessories tightly on this CNC mounted Truss uses a spring loaded tensioner and it'll clear most aftermarket and GM fuel injections.
Now, this setup is available with a variety of finishes and it's compatible with just about any Chevy cylinder head, including those without accessory mounting holes. Of course, it's gonna punch a little hole in your budget too with prices starting at about nine and a quarter. Well, it seems like we just started this edition of horsepower TV, but already time for us to get out of here. See you next time.
Great hot parts this week. But Joe, you told me you were working at the, see Michelle looks like those girls were working. You