HorsePower Builds

Video Transcript

Hey, welcome to horsepower. Well, today is the big day. Later, we're gonna announce the pick of our real ride challenge. But first we're gonna swap out the accessory drive system on the small block here in my wagon. Then we're gonna put the supernova here on a diet by dumping that heavy deck lid and bumpers and replacing them with some lightweight fiberglass. We're also gonna show you how to design and install a compressed air system for your garage. But first, what do you say? We take a little bit of a trip to a horsepower happening? That's got something for everyone.

It was awesome.

And also the event why there's something for every Carlo

guy or gal with a passion for hot performance and cool looks.

It's the annual Bristol Bash started in 01 by the folks at year one

since then. You know, it's grown tremendously and uh everybody's coming out and having a good time with this beautiful facility.

You know, Mike, we go to a lot of car shows around the country, but for an enthusiast, this thing's got to be one of the coolest because it's real hands on. Yeah, Joe speaking. Of hands on. I can't wait to get behind the wheel of one of the rouse. 380 R mustangs. I'm gonna head on over to the auto cross track and check it out. See you later, dude.

A lot of muscle car guys and, uh, late model performance car guys are drag racers, you know? But

auto Cross is an awfully, a lot of fun and anybody that comes in and, and gets a race ticket can go down and, and, uh, try to run over a few cones

going.

Yeah.

No.

What a great time that was in the cones. Improved times. And we're all done for the day.

Hey, not so fast. There's still a lot more to do such as pick a winner for the

Cove year one cup award,

the best of the best.

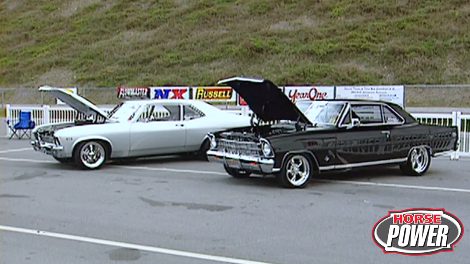
I'm not voting, but the first two winners were both Chevy Novas. I think it's time for a change

now. Cadillacs are cool in anybody's book and who wouldn't love this 49 sedan that came all the way from Oregon and well, like a lot of street machines today. It combines the best of old world looks with tons of new technology.

Those Harvey Earl design fins look super fine surrounding the shaved trunk

and it's been fitted with one off void wheels inside the original dash is totally intact, but the seats are custom leather buckets for butt hug and comfort

up front. A blueprinted 502 big block keeps this caddy on the fast track.

Now, if it had to be a Chevy, it'd have to be this one in my book.

What is this one?

Would you believe a 1948 coup?

It's been chopped a channel that reshaped to make a distinctive styling statement, to say the least 17 inch wheels up front twenties out back and inside. How about that dash that was handcrafted by the owner

with a chassis and power from a late model vet. This retro coop could get anybody's heart pounding.

Now, this year, why not a Mustang?

Now, if I were boating, I might have to go for this 95 GT with that cool ocean paint complete body kit. Oh, and the best part is under the hood.

How about a chromed out supercharged 347 that helps this thing make over 600 horses at the rear wheels.

We'll discover who the real winner is after a trip to the track.

Here. Visitors can compete in several classes of drag racing including this one which is called fast standing for factory appearing stock tires.

Terry Perry's Orange 69 Camaro is a hot contender with over 600 rear wheel horsepower planted on bone stock rubber and it runs in the low levels.

There's a fine line between um

being able to drop the throttle and, and maybe walking into it a little bit. Basically see that your pants feel is, is what it is.

For the fun of it. How about a race between a wheel standing fire truck and school bus?

The driver sees nothing but sky, the chassis has a much better view.

Then there's the ever popular jets, perhaps the least fuel efficient cars on the planet. But some of the most exciting,

particularly at night when they literally light up the skies,

a scary ride for the driver. Uh, what do you think

every time you get in the car you're scared and you should be scared. If you're not scared, you shouldn't be driving these cars.

Uh When the parachutes come out is actually the worst. It will uh pull a negative 4.5 to 5 Gs where the parachutes hit

and that's pretty violent.

Finally, the big moment

announcing the newest year one cup winner with tough competition in the top three. A sweet 70 Super Bird, a 69 hurst Bulls and the winner.

Beautiful 68 Camaro

Mr

T.

Thank

you.

Thank you, buddy.

It took me almost two years, six months.

Uh, the first car I've ever stole

pretty good. First effort, huh?

And a pretty good way to wind up an annual celebration of the almighty American muscle machine.

Well, we're back in the horsepower shop, no doubt. You remember Chuck's red wagon from a few weekends ago? Well, today we're gonna use it to show you how to install a serpentine drive system that'll modernize your muscle car and clean up the front end of the engine. Now, it's a system that will work on old and late model motors. So you don't need accessory hose in the heads.

Now, the first step though is to drain the radiator, disconnect the battery and remove the old accessories, including the water pump and

looks like my partner's about. Got that handled.

You bet. Now, what we're working with today is the front runner accessory drive system from Vintage Air. It includes this bracket that attaches to the front of the motor using only four water pump studs. Of course, all the accessories attached to it.

Now, the kid includes pulleys brackets, a dry belt and all the hardware that you need to bolt it up to the block. Plus you'll also get a one wire polished 100 amp alternator and a sand and mini compressor for the air conditioning system.

Now, the real secret to making this all work though is a reverse flow high performance water pump from Stewart. And the first thing we wanna do is test fit the pump and the bracket to the block.

Once the water pumps in place you can install the spacers over the studs,

then install the main bracket.

What you want to do now is check for any interference between the heater hose and clamp and also check those spacers out, make sure they're sitting flush between the main bracket and the water pump. Now, we can go ahead and remove the main bracket.

Now you can go ahead and bolt up the air conditioner compressor

and the alternator

next, install a power steering bracket

and bolt the crank Shap pulley to the harmonic bouncer.

Once that's done, slide the assembled main bracket over the studs and secure it with two nuts on the driver side. Only.

Now, we can install a belt tensioner bracket over the passenger side, water pump studs and attach the lower part to the block using the spacers and bolts from the kit.

Finally attach a belt tensioner to the bracket.

Now, that kit doesn't include a power steering pump. So you have to buy that separately. We got this high performance mini pump from Detroit Speed and engineering and it's been modified to work with the front runner system

as an integral reservoir and a hard

anodized pulley already installed. Oh, we also stepped up for one of their line and fitting kits that's been made for the Chevelle,

the power steering pump attaches to the bracket using two bolts.

Then the lines connect from the pub

to the steering box.

We're finally ready for that serpentine belt. Now, what I've done is put a half inch ratchet down in the tension and I'll rotate it clockwise until it stops and then we can thread this belt into place.

You might remember earlier, we told you that the water pump is a reverse rotation piece. So if you're gonna drive the fan off of the serpentine system, you need to find a reverse rotation fan, but you can take the easy way out like we did and use an electric. Now, this one is from spa

and the kit includes all the mounting brackets you need, plus the wiring relays and even the sensor to get the job done.

Well, that was pretty easy. Now, we have to do is fill the power steering reservoir with some fluid, refill the radiator and of course, reconnect the battery and hoses. By the way, since that new compressor is totally different from the original. Well, you're gonna have to get some new hoses

fed up to connect it to the rest of the system. Your local ac shop can handle that for you.

Yeah. But anyway, you look at it, that job's gonna take you about three hours and the front runner setup is gonna cost you about 1500 bucks more if you want plated and polished components. Now, if you've got power steering, well, you can plan on laying out about another buck and a half for the pump. And speaking of that, we're pumped up about our next project. We're gonna get on it right after the break. So, come back and see us.

Hey, let's face it. Sometimes when you're working on a big project in your shop,

air tools are definitely worth the money,

but they're not worth much

without air.

Well, that was our old system, but right now we're gonna take you through the paces of designing and installing a state of the art compressed air system like the one we just installed here in the horsepower shop.

The first thing you wanna do is come up with a budget that includes the best compressor that you could buy. Now, this is gonna save you money in the long run in terms of work capacity, maintenance, and downtime. Now most home shops can get by with a five horse two stage compressor with a 60 gallon tank like this Quincy compressor from patents. Now, this thing will crank out 17 CFM at 100 and 75 P si

that's enough to run most air tools, even an air sucking D A like this,

it's also enough to operate a medium sized blast cabinet. Now, as far as power goes, don't even think of 110

a compressor like we're talking about, it's gotta have a single phase 220. So put an electrician in your budget,

a reciprocating compressor is the most common type

and it's a lot like a car engine. This two stage unit has a crank shaft, connecting rods and a pair of pistons that move up and down the bores. Now, this is the low pressure piston, which as you can see is considerably larger than the high pressure piston over here.

Well, if you look up here, this is the intake port and once the air gets past the valve here, it's compressed on the low side before traveling up the exhaust side and through this thin inner cooler tube

to the high side piston. Now this is gonna compress the air to about 100 and 75 P si before it's dumped into the tank.

A

compressor like this is probably a little bit of an overkill for a shop like ours with 100% duty cycle. Now, remember what we told you about buying the best that you can afford. This thing's got a cast iron block pressure oiling system with a filter and the best thing, the head and the valves are rebuildable. So this thing should last forever.

Let's say you got a big shop or even a factory to run where you need lots of air. Well, in that case, you might wanna go with one of the screw type compressors that looks like a super charger because it is

air comes in here. These helical rotors compress it as they move it down toward the discharge port. Now, a compressor like this is designed to run continuously with a high output volume and low noise

like a supercharger. Huh? Now, that's pretty impressive. Of course, our system was designed and installed by patents who have shared a few tips with us that'll work as well in your installation as they did in ours, start by designing your system on paper

and determine the location of your compressor,

dryer and air outlets.

Now you're ready to plumb the system using the diagram you created. And here's where new technology has made the job. A lot easier patents uses a Legree transair system consisting of aluminum pipe

with quick connectors for the valves, air drops. And even the hangers

start by cutting the pipe to length.

Bendy Burritt inside and out,

slide the pipe into the fitting

and twist the collar to tighten the fitting,

to add a drop place, the pipe in the special vice,

then place a ha

saw in the guide

to make an opening,

then add the quick connect drop

and add a clamp close to the drop to keep it supported

for most home shops. A dead end system is more than adequate because chances are you're only gonna be using one outlet at a time

and it's gonna help you live within the confines of your budget.

That's a good point. Now, let's talk about where you're gonna place the compressor if you put it outside. Well, you'll need a solid level pad and some kind of shelter to protect it from the weather. If you put it inside, you can avoid those extra cost, but you'll have to live with the noise

regardless of the location. Make sure you have 3 ft of clear space around the compressor for cooling and servicing.

Use a flex coupler to isolate the compressor's vibration from the rest of the system

and install pads under the compressor's feet to dampen vibration and keep it from walking

we also had them install a high temp dryer to keep our system free of moisture. Water in your system causes rust and corrosion that can damage your hand tools and even contaminate spray materials like glue and paint.

This thing cools the incoming air causing the moisture to condense. Then it's separated from the air and drained away.

You'll also need a line filter to eliminate oil and other contaminants from your system.

And here's something to help reduce the noise. It's an intake muffle like this one. Now, believe it or not, most of the noise you hear comes from the intake pulses, not the reciprocating components.

Finally, here's a cool option to complete your system.

We've got several of these reels around our shop and that way the hose is there and convenient when we need it and

out of the way when it's not in use. Plus we've added several of these valves around the shop to give us more complete control of our air supply. Well, you need to try and keep yourself controlled because we got some big news coming up. We're gonna tell you who's gonna get treated to the real ride makeover right after the break. Stay with us.

We get questions all the time about the checkered tile floor here in our horsepower shop. And well, it's cool to look at man. It's a pain to clean and don't even ask about replacing tiles. Well, now you can get the same look without the hassle with a modular flooring system from race deck, it's resistant to chemicals and petroleum products. Easy to install. You just snap together the squares

like that

and lay them on a flat surface. Now, you can get them in a variety of colors. They're easy to clean. You just hose them off and durable

enough to handle your heavy rolling loads. The price, well, 349 a square, even less if you order 500 square feet or more,

if you want more horsepower out of your fuel injected engine, check out these three new throttle bodies from Excel DF I.

Now they're all made to fit a square flamed

intake and they're available in the 1200

A 1350

this monstrous 1550 CFM.

Now they all feature a progressive throttle linkage, brass butterflies and the stainless steel throttle shaft. They've also been engineered with a thinner profile to give you a little more under hood clearance. Plus all the sensors and connectors are of oe quality. So if you wanna get your hands on one of these prices start at 550 bucks,

man. It's been a busy one in the shop today in,

in fact, we're gonna have to wait and put the Nove on a diet another day. But now is the big moment that a lot of you have been waiting on. And the big question is

whose car is gonna get picked for the Horsepower Real Ride challenge. Of course, it wasn't a contest or a sweepstakes. Just an invitation for you to send a picture of you and your ride

and a message about why it should come here for a makeover. Now, I gotta tell you, we were amazed at the thousands of letters and pictures we received and we wanna thank each and every one of you who sent one, it took a whole team from the power block to go through these some pretty awesome rides

and some pretty interesting ones too.

Everything from a Plymouth prowler to a 53 Chevy police car from an 82 checker cab in need of a big block to this underpowered 83 DeLorean.

Now these kids wanted us to put some go in their old go Kart

and one guy wrote, just pick any car from my front yard.

Another one wrote and said, please bring my horse to life with some cool flames.

Well, we could only pick one and this is the one that seemed to catch everybody's eye.

It's a 1969 Oldsmobile Cutlass owned by Ernest Smith from Florida.

His car is not a classic 442 but it wants to be and we're gonna help. It needs a little bit of everything,

especially some power and we're gonna do our best to turn this stalker into a true rocker. Congratulations Ernest. We'll have him and his old here soon to get started

once again. Thanks for sharing those pictures and information about your rides. We'll see you next week.
Show Full Transcript