HorsePower Builds

Video Transcript

Joe's out picking up a car with the news for a project later on today. But in the meantime, I've got some unfinished business to take care of on our 69 supernova.

Now, you know, we love getting the emails from you guys, but it seems that everyone's asking the same question.

When are you guys gonna take this car back out to the track and actually race it?

Granted, we've added the right motor for drag racing

and the right transmission

plus a rear end that can plant the power.

We've even back halfed it to make it go straight with big slicks

and we've added a full roll cage

and then we had a blast when we took it out for some test in tune shakedown runs.

But the real answer to your question is this thing's still not quite ready to race, but after today, maybe that'll all change.

Now, the first thing I'm gonna do is go ahead and finish up the Nova's exhaust system, which only has a set of headers so far. So I'm gonna finish it up by running these monster four inch pipes that we got from flow masters.

And since a lot of race tracks and sanctioning bodies require mufflers to race. I'm installing a set of these Delta Flow 40 series race mufflers. Now inside are three deflectors to help improve exhaust scavenging and the end result, more horsepower and more torque.

These pipes are not a kit, so you will have to cut and design them as you go.

And these two bends will help me put the muffler right where I want them

with everything loose, start piecing it all together,

then determine where you want the exhaust to exit. You can go either out the back or I always thought it was pretty cool right in front of the rear slick.

I know what you're thinking.

This 572 sounded awesome with open exhaust,

but trust me, you won't be disappointed.

See, I told you it'd sound great. Now let's get the Nova's oiling system a little more race ready

drag racing. A dry start up can spell disaster to a high compression high horsepower engine.

Also, any loss of oil pressure during a race could quickly put your car back on a trailer.

So we're gonna help De Nova's motor with this oil accumulator from or

roso. Now, it uses compressed air to force its oil reserve into the engine anytime the oil pressure drops below normal. And with this lever, you can pre lube your engine for a safe start up.

This oil filter adapters where oil will travel to and from the accumulator. It's a universal piece designed for small blocks but will fit a big block with a little modification

with it bolted to the block. You can now run your high pressure oil line from the accumulator and reattach your oil filter

before we installed this, we've already added our additional two quarts of oil to it. All that's left now is to pressurize it to 100 P si

now that everything is installed and pressurized, I can prime the system by opening the valve, releasing the two quarts of oil and starting the engine

rev the engine

until the gauge on the accumulator reaches A P SI

and then shut the bell

with the accumulator pressurized from the engine. It's ready to lubricate it on its next start up.

Now, this install only took about an hour and a half and it's money well spent when you've invested in a serious race engine like our 572. Now, I've got one more bolt on for the Nova, but that'll have to wait until after the break.

Hey, welcome back to the shop. Now, I'm adding the finishing touches to our supernova so I can take it back out to the track. Now, if you've just joined us, I've already added some Flowmaster four inch pipes with their delta flow race mufflers and the Miros oil accumulator set up. Now it's time for a little kit that can make a big difference in how well you launch off of the line.

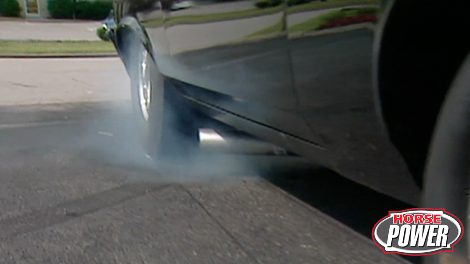
Even a weekend bracket racer needs a good short burn out to get the tires hot and sticky enough to prevent wheel spin during a launch.

With that in mind, I picked up this roll control kit from Hearst to install in the Nova. Now, some of you may call it a line lock, but that's ok.

It's all the same thing. Now, the kit, we have features a solenoid valve that's activated from a switch inside the car. After you depress the brake pedal, that'll lock the front brakes and allow you to do your smoky burnout, then release the switch and pull into the staging lanes

first, find a good mounting location for the solenoid,

then disconnect the driver side, front brake line from the distribution block

and install a steel plug

measure cut and run a new line from the passenger side

to the

Cleoid.

Now join the original lines with a T

and connect those to the

Cleoid as well.

Next hook up to a good 12 volt source and a good ground

and install your activation switch

with the brakes bled

and no leaks. This thing's ready for the burnout box. Now, these three projects weren't that difficult and they brought us a whole lot closer to the racetrack.

Our project supernova is almost history now,

but you don't like all of our horsepower project cars. We get pretty attached to them

kind of like old friends

even though that kind of attachment can be painful sometimes.

For example, we named this 94 Mustang Gt of mine, the Scarlet Stallion.

And after several appearances on the show, we had her looking sharp

and running strong.

Then luck made a U turn

one day. It was stolen, stripped and left for death,

the end of a friendship.

Or was it?

Well, flash forward to the Mustang 40th anniversary event in Nashville.

Now we were cruising by the rows of late model show cars when

I couldn't believe my eyes.

Oh, my God,

that's it. That's it.

It looks a lot better than the last time I saw it.

The new owner, James Reed had recently bought the plundered pony from a bone yard and given it new life with a bunch of new parts and a whole lot of work.

I looked in the, uh, glove box looking for, you know, trying to find out whose car it was, find out any, any history on it could.

And, uh, I looked through it and I seen the, uh, paperwork where you had, had it where you had to had it serviced at

the, uh,

I guess the local loo

never thought I'd see the thing.

Yeah, especially looking this good.

That makes me feel a lot better.

You like, hear it?

Yeah.

All right. Sounds better than it did.

You've done a great job

and you've done it. I appreciate it. You've done it. Right. I appreciate it.

And so ends a little true car story

with a happy ending

and a happy beginning.

I

said

again,

you need to take it for a drive.

Ok. You've seen our 69 Nova go from bone stock to a serious competition car, but that was after a

lot of major surgery to the body, the frame and even the drive train.

But let's say you want a serious good riding street machine, but you don't wanna hack it up like we did that. Nova. Well, this 63

Aala here is pretty much original except for things like the wheels and tires and one other major difference.

Now, I know a lot of you guys when you think of air suspensions, think of a low rider or some kind of car built just for show. Right?

Well, today we're gonna explore a system that's designed to give your old muscle car a modern day ride and handling without major modifications. We got this Roland chassis from Air Ride technologies to show you how their newest kid installs. And later we'll take the impala out and put it to a real test on the road.

Now,

here's some of the stock suspension pieces that come off in the original 63. We have all of our upper and lower control arms springs pan hard barn, especially our shocks. Now, this stuff was up to date for its time and so was the ride, but there's a lot to be desired out back. We're gonna install this tubular lower and upper control arm kit.

It also comes with an adjustable pan art bar to help locate that rear end.

Of course, we'll also install some of their air spring

with upper mouths and a set of these billet aluminum shocks. Now, most of these pieces come out of the box powder coated black, but we decided to add some colored hours.

Normally, we'd only swap out one control arm at a time to help keep the rear end suspended, so you can do this in your driveway.

But since we're working with a bear chassis,

it'll be quicker

and easier to do it all at once. So I went ahead and got the rear control arms already installed.

The air spring attaches to the upper mount using a couple of bolts from the kit.

Now, we can take them as an assembly

and attach them to the rear control arm using another piece of hardware from the kit,

no host to drill. It's a simple bolt on in the truest sense.

Next, we're gonna install this bump stop, which also helps keep the spring map properly aligned.

Then the upper control arm can go on.

Now, we're gonna install the pan art bar which comes with this new stud to mount it to the rear end

shocks are the last thing to go on. And these are an upgrade from air ride that have 12 way adjustment

so you can tune your ride to suit your particular taste

up front. We're using air rides, new strong arm pieces made from dom thick wall tubing. Now, they've been designed to give you the correct ball joint alignment and angle. That way you can achieve that lower stance without running into a problem with misalignment. Now, they come with all your cross bars, bushings and ball joints for direct bolt on application and just like out back, we already got started by bolting on the lower control arm first.

Well, next we can bolt up this new shock wave air spring. And let me show you what makes the design so unique

inside the spring itself is a special shock that makes for an easy, neat and compact installation.

And of course, you get adjustable valving on the shock. And oh, the spring itself uses new patented ceiling technology to prevent any possibility of a leak

with our upper control arm mounted in our air spring bolted in place. We can go ahead and reinstall the stock spindle mount, our wheel and the front suspension is all finished.

Of course, this is the heart of the system and basically how it works. A 12 volt compressor keeps this tank filled with air, the solenoids control the amount of air going in and out of the system. And these sensors here will tell you how much air is in each air spring at any given time. And here's the new and improved part, all the membrane switches and digital readouts are packed

this handy little case and this ride pro E computer has an air pressure preset. Now, that'll get your car to a safe driving height every time you fire up the engine.

That's a cool feature. Now, this kit is compact enough to put it wherever you want. This one's mounted here in the trunk. Now, like we told you, the Impala has the same exact kit we installed on our Bear chassis earlier, but the real proof is out on the road. So let's go cut some curves, find some bumpy roads and see what kind of pavement pounder this thing really is.

Yeah, we took those bumpy roads straight to Nashville superspeedway

where after a couple of high speed laps, it was time to give this Chevy a serious handling test.

All right, Mike, you know the drill, get it up to 60

good luck

with a cone spaced exactly 50 ft apart. Mike put the Impala through the paces making several runs.

Now, imagine doing this with the original 63 suspension

after this contest was in the bag, so to speak. We were all pleasantly surprised with this performance,

try that with your stock suspension. Now, this big old car handles well, has limited body roll and even goes down the road pretty smooth.

I don't know about you, but I'm pretty impressed. Meanwhile, stay tuned. We'll be right back.

Horsepower T V's Quick Tech is brought to you by

Wyotech

Hey, how you like my new wheels?

Yeah, I wish

today we're gonna take you through a little ignition history to a system that's strong enough and smart enough to fire off the ZO six.

Our history guide is

W

tech's Ken Hoffman whose collection begins with the old and sometimes trusty points type distributor.

Uh Some of the disadvantages with this distributor

was over time, the uh, points would wear, the striker would wear and our dwell would actually change

as the points wore and our gap got shorter, our ignition timing would retard.

And uh that was a major downfall with this type of distributor.

Another thing with this distributor are uh output voltage depending on the type of coal was around 15 to 20,000 volts.

What happened in? He I was,

the points were eliminated actually at electronic control module, there's a little

switching transistor in it.

No mechanical parts in there to wear didn't have to worry about or dwell changing or anything. One advantage with this distributor was that we kicked the voltage up to 50,000 volts. Now,

that's a big difference.

Well, that was a big leap but it seems like just a few years later, there was no distributor at all.

Yeah, that's right, Joe,

what they came out with is we completely eliminated the distributor and we came out with dis

theer

condition systems.

What they used is a reluctant ring on the vibration dampener and a hall effect switch

the hall effect which replaced the points.

That's what actually pulled our ignition coil.

This system could put out around 80,000 volts compared to our 50,000 on our he I

then we have our latest and greatest design,

our coil over ignition system.

This system is also very, very similar to our 06 that has coil and ear plug design. All right, I've been waiting for that. Let's go look at it. Ok.

This is a coil and E plug design.

What we have is

each cylinder has its own individual coil.

And another advantage with this is we have a very short plug wire with less resistance so we can get a harder spark to each cylinder.

And with today's technology, we can install scan tool into this system. Go into the PC M and see if it has any ignition DT CS. Good deal, Ken. And with up to 100,000 votes, I'd say this ignition is more than up to the task of firing off 405 horses.

Yeah,

I really hate to blow my cover, but even a Ford guy can appreciate these fabricated sheet metal valve covers for small block Chevys for pro form.

They only weigh 3.5 pounds of pair.

They have extra thick mounting flanges to prevent leaks and internally lots of room. So you can use them with roller rockers or even stud girdles. You can get a plate or baffle for the street or strip powder coated black like this or in neck

aluminum.

The price? Well, we got you covered there too. 100 and 40 bucks. Do you like to put on a good front? Well, here's a way to put one on your truck and give it that whole new nostalgia. Look this 52 front end conversion from nostalgia bolts right up to any 88 through 98 Chevy or GMC truck suburban or Tahoe. Now, it's made from hand laid fiberglass and replacement hood, uses your stock hinge and latch

and it bolts right up to your stock fenders.

The kit comes prewired with headlights. All you do is add your turn signals and parking lamps that is after you fork out about $1995.

Well, that's it for this week and, you know, we made a lot of progress on the Nova today and we got a little closer to getting it to the racetrack and getting you those numbers you've been begging for.

Keep watching. We'll see you next week.
Show Full Transcript