HorsePower Builds
Want more content like this?
Join the PowerNation Email NewsletterVideo Transcript
Hey, welcome to Horsepower. Where this week Project Stink Ray rides again.
No doubt you've seen our director's 76 Corvette in here before and well, if you haven't,
don't go judging a book by its corroded cover.
This thing has come a long way.
Oh,
man,
when was the last time this thing was moved? Remember, we first saved it from wasting away in the back lot of our shop
then filled up a 383 Stroker short block with new cylinder heads,
valve train
and intake before dropping it between the fender. Well,
next we bolted up a turbo 350 transmission
and we made it exhale better with a high flow exhaust system
and we upgraded the cooling system with an aluminum radiator and electric fans
and we even replaced the stock ignition with a new street race setup. Finally, a fuel system upgrade including a new pump and filter.
Now, there was one fuel system upgrade. We didn't plan on the gas tank. It was totally trash. So we ordered a new replacement from year one
that Mike installed a few days ago
with that, a major part of the Stink Ray's transformation. Was a done deal.
Well, no doubt about it. Old project stink Ray, there has got a lot more power than don's ever had to deal with before.
So it only makes good sense that we match the engine's performance with upgrades to the brakes and suspension as well. Now, we're going to knock out the suspension first today, starting up front,
this trick set up that we got from bed brakes and products. Now, the kit includes new tubular front control arms, a huge front sway bar, a pair of Billstein shocks, new tire rods and of course a new spring now, more on that later on. But right now it's time for us to get back to work.
You know, the Corvettes got a pretty good reputation for its handling right from the factory.
But the technology and design here, well, it's more than 40 years old.
Now, the system we're going to use to upgrade this thing is probably like none you've ever seen before. And it's going to bring this old classic right into the 21st century.
Now, we're going to start up front here by removing all the suspension and brake pieces,
starting with the calipers,
the motors
and the shops.
Now before moving on had to get the car down a little bit
and this floor jack under it so we could support the lower control arm.
Now, at this point, there's a lot of compression in this spring here. So for safety's sake, always use a piece of chain
to prevent a bad accident.
Then remove the spindle
knots,
playbar
links
and the spindles themselves.
Then the springs, in this case, both pieces looks like this one's broken in two.
And finally the control arms come out.
All right. Well, now we can bolt up some new parts finally starting with these tubular control arms here.
Now check these out, they're made to mount right up in the stock locations and they're considerably lighter than the originals. Plus, they've been fitted with new bushings
and ball joints here. So that's going to take the hassle out of having to rebuild those originals. Now, the biggest feature though is this adjustable mount here that attaches right to the end of our new spring.
Now, if that doesn't make any sense to you yet, it will in just a minute. But right now let's bolt up these control arms.
It bolts up using the original 916 inch bolt in the back
and a pair of 7, 16 inch bolts that come in the kit
up front
and you use that with the original nut plate.
The upper control arm attaches using the original hardware,
finally
reinstall the spindle.
All right. Now, we can mount up that new spring I hinted about earlier. Now, this is a fiberglass mono leaf design that mounts transversely or from one control arm to the other. Now, one of the obvious benefits is that we don't have to worry about a broken coil. Like what Joe showed you a few minutes ago and it's also lightweight. So that means we're going to lose some uns sprung weight off the front end
with the mounting block loosely attached to the spring,
move it into position on the control arm.
Now, these four holes up here allow you to adjust the spring rate and the ride height
finally attach the spring to the control arm using the long bolt from the kit,
then we can bolt up the shocks.
Now, we told you that suspension set up from vet brakes was going to be a little bit out of the ordinary, but we did order some tie rods and a sway bar that are pretty much direct replacements with a couple of exceptions.
This new sway bar is going to cut out a lot of body roll since it measures a full inch and a quarter
compared to the stocker that only measures an inch and kind of looks like somebody's been using this for a tow hook.
Now, the tire rods use sleeves with extra thick walls to eliminate steering flex and get rid of all the slop. Finally, we got this new idler arm to complete our front suspension. Now we're going to both these up during the break but you stick around more. Project Stink Ray is just around the corner.
Welcome back to more of our suspension upgrade on Project Stink Ray here. Now during the break. We went ahead and bolted up the rest of the front suspension components on our director. Don's 76 Corvette.
Now, if you're just joining us though, what we've done so far is bolted up. A pretty cool suspension kit from vet brakes and products.
The kit includes a new sway bar, fiberglass mono, leaf spring shocks, tubular control arms and ty
rods.
Well, it looks like my partner Joe is already hard at work back here and as usual, he's bringing up the rear. Oh, you're real
commodious, aren't you?
Now, back here, we're using a similar mono
spring set up to take a place of this stock much heavier multi leave spring. Now, it's also going to be held in place with some of these adjustable mounting blocks like up front. However, back here
we go both these up to the car just about like this.
Now, something
that is pretty tricked. We're going to swap out the stock camera rods with this set up and it uses much heavier rods that are also adjustable so you can dial in your suspension for the best handling. Well, right now, I guess it's time for us to get down and dirty and get some of this stuff out of the way.
Here's something cool about this model Corvette. After loosening the shocks,
we disconnect the emergency brake
and the hard brake lines then on both the trailing arms
and after supporting the rear end of the jack,
we can vote the housing mount
and the main support.
Now, the entire rear actual assembly comes out from under the car.
Ok. Not exactly a walk in the park, but that was a lot easier than I thought it'd be. Now, we can start getting this whole assembly apart,
starting with the spring bolts,
then the axle shafts
and the camera rods that hold the trailing arms in place.
But now that we got this thing off the stand and upside down, we can get to the four bolts that hold this big heavy leaf spring in place.
Then we can remove the main support
and clean it up in the blast cabinet before we give it and the differential coat of paint,
we start the reassembly process by first drilling holes in the main support and voting up the spring brackets.
Then we can drop on our mono leaf spring
and secure it with these mounting blocks from the kit.
Next that adjustable camera rod assembly gets bolted up,
followed by a pair of these trone
axle shafts that we had
fed up for us at the drive line shop.
Here are the new trailing arms we picked up from bears. Now they come fully assembled and as you can see, they're engineered with an offset. This allows to run a bigger tire and wheel on the back of the Corvette.
Now, they also come with new hubs bearing assemblies and parking brake hardware
to bolt them up first. We'll need to attach the camera rod and the axle shafts.
Then we can transfer the parking brake cable,
install new spring bolts
and new brake lines. By the way, we got these hard lines from right stuff, detailing where they're pre bent on AC NC machine and made out of stainless steel to prevent any corrosion.
Now, they also come with the correct armor wrap to protect them and avoid any chafing
man. This thing is almost too pretty to put under the car where nobody can see it.
I agree. But you know, don might have a tough time driving without a rear end.
Let's get this thing out of the car.
And I got to tell you this assembly bolted up a lot easier than we imagined. You know what it is time for us to take a break though. When we come back, we'll put the brakes to project Stink Ray. So don't you go away?
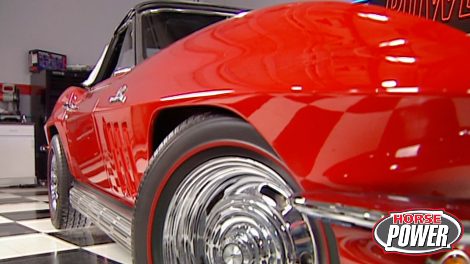
Hey, thanks for sticking with us. Now, before we get back to work on old project Stink Ray, I've got to give you a quick look at this gorgeous 66 Roadster that belongs to Mike and Deb Peed. Now
66 was the first year for Chevy's legendary 427 and this thing's got one plus it's backed by an M 22 rock pressure four speed.
This multi award winners got the correct rally, red paint
cast aluminum knockoff wheels and even the original side pipes.
Yeah, the look is totally original, but what you don't see are an awesome assortment of modifications like the big comp cam crane roller rockers that will help those Edelbrock heads get the most out of that Barry Grant demon Carb.
Yeah. Well, all those parts add up to about 605 horsepower at the crank. And speaking of that, I think I'm going to crank this thing up. Take it for a short drive and
see if it runs as good as it looks.
I hope he's got good brakes on that 66 he might need them. Meanwhile, in case you're just joining us, we're all about putting new brakes and suspension on project stink ray there. Well, part of the job is to remove these factory rivets
that hold the hubs and rotors together. That way we can reuse the hubs on these new rotors that we got from VB and P. Now these are slotted to allow the brake pad gasses to escape
and they're also cryogenically treated to stabilize the metals so they'll resist warpage and reduce wear.
Once the hubs are separated from the old rotors, we install our bearings with fresh grease
and of course, the seal
then put the hub on the spindle
and sit you down.
Now we can slide the new rotors into place
out back, the rotor slips into place over the axle.
Now let me show you the force 10 calipers we got from stainless steel brakes. Now, there are four piston designed for more consistent pad pressure and we even went as far to load them with some ferro carbon pads from Hawk performance. Now, since they're aluminum, they are lighter than the originals and they bolt up in the stock location.
We even went a little bit further to get them powder coated red.
You know, that powder coating might actually be a pretty good idea for these wheels too. It will help us match the paint job
that we've got planned for project stink rape. But check these out, they look pretty good just the way they are. Now, these are the hoopsters from American racing. We like them because of this classic open window design, but you can also get them in contemporary sizes all the way up to 20 inches.
We specked ours at 17 by eight inches with a four inch back space. Then we mounted them on these NTO NT 555 tires. Now, this is a Z rated tire and we're running 275 4017 s
at all four corners.
Man, you've got to love that stance and when you think about it, we've come a long way on this project, new engine transmission, rear end brakes to mention a few.
Now we gotta do something about its uh pathetic aesthetics. Uh I guess what you're trying to say is that even after all that work, I think still looks like a turd
uh correct. And we will do something about that in a few weeks. Meanwhile, you stick with us. There's a lot more show ahead.
You do have a way with words,
horsepower T V's Quick Tech is brought to you by Wyotech.
A suspension upgrade can turn your ride into one that hooks and handles like a true performance car.
The front suspension work we just handled on the 76 vette included everything from springs to control arms.
But before you can have some fun with that upgraded suspension out on the street,
you need to finish the job. Not your garage though, down at the alignment shop. Why is that important, Brian? Well, it's really important due to tire wear and also drivability concerns. You drop the suspension, you've changed all the angles, you're not going to be able to do this at home. You're going to have to definitely take it to someone that knows what they're doing
among the three most popular alignment terms is camber. The angle of the wheel when viewed from the front of the car.
If the top leans out from the center, the Camra is positive
in from the center and it's negative.
Now, castor is the angle of the steering pivot. When viewed from the side.
If the top of the pivot leans toward the rear. Castor is positive toward the front, it's negative
tow end is the difference in the distance between the front and back of the tires measured in fractions of an inch
tow end means the front tires are actually closer to each other. Tow out means just the opposite
to measure those and other alignment factors. Brian uses a piece of technology that takes all the guesswork out of the job. This is the Hunter DS P 400.
It's a computerized alignment system that takes pictures of heads that we mount to the car and it sends back information as to what the angles are on the wheels. This is pretty accurate compared to stuff in the old days. Very accurate. This machine uses software that automatically calculates tow and center
steer even tells the technician what shims, bushings and tools to use to do the job.
What are some of the things you can do to correct castor camera and so forth on a car like this. So you can actually add or remove shims from the upper control arms.
And this will change the angle at which your tires will sit
and correct for tire wear and also for drivability or steer ability concerns in the tire rod ends,
tire rod ends have adjusters on them to be able to set your toe settings. Speaking of tow end, there is a way to check it at home to see if you need it corrected. You see a little bit of tire wear, take your hand, rub it from the inside to the outside of the tire and then back again, the opposite direction in both directions, you should be able to feel
a slight leading edge or a sawtooth pattern on the tire that might indicate that you have a toe setting problem. Very interesting. Well, I guess the bottom line is
no matter if you put new springs on all the trick stuff,
it's got to be a line. Right. It definitely has to be a line. You do any modifications, it changes the angles that your car sits,
man. I'm pumped up about hot parts today and chances are you will be too once you check out this new fuel pump from race pumps. Now, this is a variable displacement design with a maximum flow of 204 gallons per hour.
It will feed anything from a 200 horse street engine up to a 25 horse race motor.
It works with either gasoline or Methanol and features dash eight and dash 10 and fittings and check it out. It'll bolt right up to the stock location and use a stock fuel pump rod.
Now you're going to get pumped up about the price too. You can pick up one of these cool pumps for under 280 bucks. We're living in a bling bling world today where 16 inch rims are all news. But if you've got a post war collectible car, Coker tire has some news that you can use.
They just introduced steel belted radials in 16 inch sizes. For your classic. Now, you can get them with a wide white wall or black wall for a classic look with modern handling. They're backed by a life of the tread warranty and prices start at 155 apiece.
How would you like to extend your oil change intervals to about 7500 miles? Well, that's the idea behind Mobile's clean 7500.
It's a synthetic formulated to prevent sludge and protect your internal engine components.
Now, it exceeds the warranty requirements of all the manufacturers. You get it in all the popular viscosity
and
it's available
at your local parts store. Well, we hope you're available for next week's horsepower. Got a great show for you and we'll see you then.
Show Full Transcript
No doubt you've seen our director's 76 Corvette in here before and well, if you haven't,
don't go judging a book by its corroded cover.
This thing has come a long way.
Oh,
man,
when was the last time this thing was moved? Remember, we first saved it from wasting away in the back lot of our shop
then filled up a 383 Stroker short block with new cylinder heads,
valve train
and intake before dropping it between the fender. Well,
next we bolted up a turbo 350 transmission
and we made it exhale better with a high flow exhaust system
and we upgraded the cooling system with an aluminum radiator and electric fans
and we even replaced the stock ignition with a new street race setup. Finally, a fuel system upgrade including a new pump and filter.
Now, there was one fuel system upgrade. We didn't plan on the gas tank. It was totally trash. So we ordered a new replacement from year one
that Mike installed a few days ago
with that, a major part of the Stink Ray's transformation. Was a done deal.
Well, no doubt about it. Old project stink Ray, there has got a lot more power than don's ever had to deal with before.
So it only makes good sense that we match the engine's performance with upgrades to the brakes and suspension as well. Now, we're going to knock out the suspension first today, starting up front,
this trick set up that we got from bed brakes and products. Now, the kit includes new tubular front control arms, a huge front sway bar, a pair of Billstein shocks, new tire rods and of course a new spring now, more on that later on. But right now it's time for us to get back to work.
You know, the Corvettes got a pretty good reputation for its handling right from the factory.
But the technology and design here, well, it's more than 40 years old.
Now, the system we're going to use to upgrade this thing is probably like none you've ever seen before. And it's going to bring this old classic right into the 21st century.
Now, we're going to start up front here by removing all the suspension and brake pieces,
starting with the calipers,
the motors
and the shops.
Now before moving on had to get the car down a little bit
and this floor jack under it so we could support the lower control arm.
Now, at this point, there's a lot of compression in this spring here. So for safety's sake, always use a piece of chain
to prevent a bad accident.
Then remove the spindle
knots,
playbar
links
and the spindles themselves.
Then the springs, in this case, both pieces looks like this one's broken in two.
And finally the control arms come out.
All right. Well, now we can bolt up some new parts finally starting with these tubular control arms here.
Now check these out, they're made to mount right up in the stock locations and they're considerably lighter than the originals. Plus, they've been fitted with new bushings
and ball joints here. So that's going to take the hassle out of having to rebuild those originals. Now, the biggest feature though is this adjustable mount here that attaches right to the end of our new spring.
Now, if that doesn't make any sense to you yet, it will in just a minute. But right now let's bolt up these control arms.
It bolts up using the original 916 inch bolt in the back
and a pair of 7, 16 inch bolts that come in the kit
up front
and you use that with the original nut plate.
The upper control arm attaches using the original hardware,
finally
reinstall the spindle.
All right. Now, we can mount up that new spring I hinted about earlier. Now, this is a fiberglass mono leaf design that mounts transversely or from one control arm to the other. Now, one of the obvious benefits is that we don't have to worry about a broken coil. Like what Joe showed you a few minutes ago and it's also lightweight. So that means we're going to lose some uns sprung weight off the front end
with the mounting block loosely attached to the spring,
move it into position on the control arm.
Now, these four holes up here allow you to adjust the spring rate and the ride height
finally attach the spring to the control arm using the long bolt from the kit,
then we can bolt up the shocks.
Now, we told you that suspension set up from vet brakes was going to be a little bit out of the ordinary, but we did order some tie rods and a sway bar that are pretty much direct replacements with a couple of exceptions.
This new sway bar is going to cut out a lot of body roll since it measures a full inch and a quarter
compared to the stocker that only measures an inch and kind of looks like somebody's been using this for a tow hook.
Now, the tire rods use sleeves with extra thick walls to eliminate steering flex and get rid of all the slop. Finally, we got this new idler arm to complete our front suspension. Now we're going to both these up during the break but you stick around more. Project Stink Ray is just around the corner.
Welcome back to more of our suspension upgrade on Project Stink Ray here. Now during the break. We went ahead and bolted up the rest of the front suspension components on our director. Don's 76 Corvette.
Now, if you're just joining us though, what we've done so far is bolted up. A pretty cool suspension kit from vet brakes and products.
The kit includes a new sway bar, fiberglass mono, leaf spring shocks, tubular control arms and ty
rods.
Well, it looks like my partner Joe is already hard at work back here and as usual, he's bringing up the rear. Oh, you're real
commodious, aren't you?
Now, back here, we're using a similar mono
spring set up to take a place of this stock much heavier multi leave spring. Now, it's also going to be held in place with some of these adjustable mounting blocks like up front. However, back here
we go both these up to the car just about like this.
Now, something
that is pretty tricked. We're going to swap out the stock camera rods with this set up and it uses much heavier rods that are also adjustable so you can dial in your suspension for the best handling. Well, right now, I guess it's time for us to get down and dirty and get some of this stuff out of the way.
Here's something cool about this model Corvette. After loosening the shocks,
we disconnect the emergency brake
and the hard brake lines then on both the trailing arms
and after supporting the rear end of the jack,
we can vote the housing mount
and the main support.
Now, the entire rear actual assembly comes out from under the car.
Ok. Not exactly a walk in the park, but that was a lot easier than I thought it'd be. Now, we can start getting this whole assembly apart,
starting with the spring bolts,
then the axle shafts
and the camera rods that hold the trailing arms in place.
But now that we got this thing off the stand and upside down, we can get to the four bolts that hold this big heavy leaf spring in place.
Then we can remove the main support
and clean it up in the blast cabinet before we give it and the differential coat of paint,
we start the reassembly process by first drilling holes in the main support and voting up the spring brackets.
Then we can drop on our mono leaf spring
and secure it with these mounting blocks from the kit.
Next that adjustable camera rod assembly gets bolted up,
followed by a pair of these trone
axle shafts that we had
fed up for us at the drive line shop.
Here are the new trailing arms we picked up from bears. Now they come fully assembled and as you can see, they're engineered with an offset. This allows to run a bigger tire and wheel on the back of the Corvette.
Now, they also come with new hubs bearing assemblies and parking brake hardware
to bolt them up first. We'll need to attach the camera rod and the axle shafts.
Then we can transfer the parking brake cable,
install new spring bolts
and new brake lines. By the way, we got these hard lines from right stuff, detailing where they're pre bent on AC NC machine and made out of stainless steel to prevent any corrosion.
Now, they also come with the correct armor wrap to protect them and avoid any chafing
man. This thing is almost too pretty to put under the car where nobody can see it.
I agree. But you know, don might have a tough time driving without a rear end.
Let's get this thing out of the car.
And I got to tell you this assembly bolted up a lot easier than we imagined. You know what it is time for us to take a break though. When we come back, we'll put the brakes to project Stink Ray. So don't you go away?
Hey, thanks for sticking with us. Now, before we get back to work on old project Stink Ray, I've got to give you a quick look at this gorgeous 66 Roadster that belongs to Mike and Deb Peed. Now
66 was the first year for Chevy's legendary 427 and this thing's got one plus it's backed by an M 22 rock pressure four speed.
This multi award winners got the correct rally, red paint
cast aluminum knockoff wheels and even the original side pipes.
Yeah, the look is totally original, but what you don't see are an awesome assortment of modifications like the big comp cam crane roller rockers that will help those Edelbrock heads get the most out of that Barry Grant demon Carb.
Yeah. Well, all those parts add up to about 605 horsepower at the crank. And speaking of that, I think I'm going to crank this thing up. Take it for a short drive and
see if it runs as good as it looks.
I hope he's got good brakes on that 66 he might need them. Meanwhile, in case you're just joining us, we're all about putting new brakes and suspension on project stink ray there. Well, part of the job is to remove these factory rivets
that hold the hubs and rotors together. That way we can reuse the hubs on these new rotors that we got from VB and P. Now these are slotted to allow the brake pad gasses to escape
and they're also cryogenically treated to stabilize the metals so they'll resist warpage and reduce wear.
Once the hubs are separated from the old rotors, we install our bearings with fresh grease
and of course, the seal
then put the hub on the spindle
and sit you down.
Now we can slide the new rotors into place
out back, the rotor slips into place over the axle.
Now let me show you the force 10 calipers we got from stainless steel brakes. Now, there are four piston designed for more consistent pad pressure and we even went as far to load them with some ferro carbon pads from Hawk performance. Now, since they're aluminum, they are lighter than the originals and they bolt up in the stock location.
We even went a little bit further to get them powder coated red.
You know, that powder coating might actually be a pretty good idea for these wheels too. It will help us match the paint job
that we've got planned for project stink rape. But check these out, they look pretty good just the way they are. Now, these are the hoopsters from American racing. We like them because of this classic open window design, but you can also get them in contemporary sizes all the way up to 20 inches.
We specked ours at 17 by eight inches with a four inch back space. Then we mounted them on these NTO NT 555 tires. Now, this is a Z rated tire and we're running 275 4017 s
at all four corners.
Man, you've got to love that stance and when you think about it, we've come a long way on this project, new engine transmission, rear end brakes to mention a few.
Now we gotta do something about its uh pathetic aesthetics. Uh I guess what you're trying to say is that even after all that work, I think still looks like a turd
uh correct. And we will do something about that in a few weeks. Meanwhile, you stick with us. There's a lot more show ahead.
You do have a way with words,
horsepower T V's Quick Tech is brought to you by Wyotech.
A suspension upgrade can turn your ride into one that hooks and handles like a true performance car.
The front suspension work we just handled on the 76 vette included everything from springs to control arms.
But before you can have some fun with that upgraded suspension out on the street,
you need to finish the job. Not your garage though, down at the alignment shop. Why is that important, Brian? Well, it's really important due to tire wear and also drivability concerns. You drop the suspension, you've changed all the angles, you're not going to be able to do this at home. You're going to have to definitely take it to someone that knows what they're doing
among the three most popular alignment terms is camber. The angle of the wheel when viewed from the front of the car.
If the top leans out from the center, the Camra is positive
in from the center and it's negative.
Now, castor is the angle of the steering pivot. When viewed from the side.
If the top of the pivot leans toward the rear. Castor is positive toward the front, it's negative
tow end is the difference in the distance between the front and back of the tires measured in fractions of an inch
tow end means the front tires are actually closer to each other. Tow out means just the opposite
to measure those and other alignment factors. Brian uses a piece of technology that takes all the guesswork out of the job. This is the Hunter DS P 400.
It's a computerized alignment system that takes pictures of heads that we mount to the car and it sends back information as to what the angles are on the wheels. This is pretty accurate compared to stuff in the old days. Very accurate. This machine uses software that automatically calculates tow and center
steer even tells the technician what shims, bushings and tools to use to do the job.
What are some of the things you can do to correct castor camera and so forth on a car like this. So you can actually add or remove shims from the upper control arms.
And this will change the angle at which your tires will sit
and correct for tire wear and also for drivability or steer ability concerns in the tire rod ends,
tire rod ends have adjusters on them to be able to set your toe settings. Speaking of tow end, there is a way to check it at home to see if you need it corrected. You see a little bit of tire wear, take your hand, rub it from the inside to the outside of the tire and then back again, the opposite direction in both directions, you should be able to feel
a slight leading edge or a sawtooth pattern on the tire that might indicate that you have a toe setting problem. Very interesting. Well, I guess the bottom line is
no matter if you put new springs on all the trick stuff,
it's got to be a line. Right. It definitely has to be a line. You do any modifications, it changes the angles that your car sits,
man. I'm pumped up about hot parts today and chances are you will be too once you check out this new fuel pump from race pumps. Now, this is a variable displacement design with a maximum flow of 204 gallons per hour.
It will feed anything from a 200 horse street engine up to a 25 horse race motor.
It works with either gasoline or Methanol and features dash eight and dash 10 and fittings and check it out. It'll bolt right up to the stock location and use a stock fuel pump rod.
Now you're going to get pumped up about the price too. You can pick up one of these cool pumps for under 280 bucks. We're living in a bling bling world today where 16 inch rims are all news. But if you've got a post war collectible car, Coker tire has some news that you can use.
They just introduced steel belted radials in 16 inch sizes. For your classic. Now, you can get them with a wide white wall or black wall for a classic look with modern handling. They're backed by a life of the tread warranty and prices start at 155 apiece.
How would you like to extend your oil change intervals to about 7500 miles? Well, that's the idea behind Mobile's clean 7500.
It's a synthetic formulated to prevent sludge and protect your internal engine components.
Now, it exceeds the warranty requirements of all the manufacturers. You get it in all the popular viscosity
and
it's available
at your local parts store. Well, we hope you're available for next week's horsepower. Got a great show for you and we'll see you then.