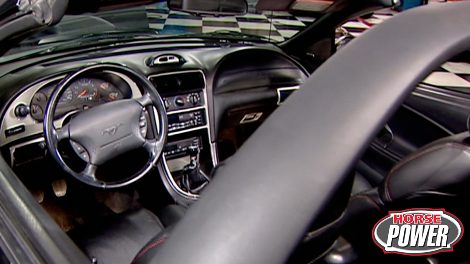
HorsePower Builds

Video Transcript

Hey, welcome to horsepower. After several weeks of bow ties tying up this shop, we're getting down to some serious Ford business today.

In fact, we're going to see how much modern muscle we can make in this two GT that belongs to a friend of ours.

You see the 99 and up models have an improved cylinder head design that really lends itself to improve flow and power output. 229 229 that's our baseline. Now, other than an X five aftermarket exhaust and better gearing.

This thing is bone stock under the hood.

We're gonna give that pony a little bit of a wake up call with crane cam's new Z cams and we're looking for the best possible street performance. So C

selection is pretty critical. Now, these things were designed to improve horsepower and torque while retaining good drive.

They spec out at 218 on the intake, 228 on the exhaust and that's set at 50,000 lift with both the

take an exhaust having a 550 valve lift. Now, that way we can reuse all the other factory valve train pieces.

There's no denying that these modular motors can look pretty intimidating, at least to a novice. But actually a cam swap is a pretty easy job.

And we took the hood off this GT to give you a better look at what we're doing.

Otherwise, the first step after disconnecting the battery is to get this cold air intake assembly out of the way.

Next disconnect the fuel line. And it's a good idea to use a rag under this thing because there's still some pressure gonna be in here.

Next, we gotta get these fuel rails out of the way

so we can remove our coil packs.

Then after moving a few bolts, we can get the power steering fluid reservoir out of the way,

the same goes for the cooling system reservoir.

Then we can pull the radiator fan,

remove the serpentine belt,

both valve covers

the water pump pulley

the harmonic balancer

and the passenger side idler puller.

Next, after we get the front of the car up on a pair of jack stands, we can evoke the ac compressor and move it

along with the power steering pump.

Finally, we can remove the timing cover

with the main tear down, taken care of. Now it's time to remove the stock cams and valve train. Now we told you this wasn't as crazy and complicated as you imagine.

Same goes for the next few steps.

And before the cam comes out here's one to follow,

we have to remove all the roller followers to relieve tension on the camshaft bearing caps.

Next, we remove the cam bolts and the sprockets.

Then we can unbolt the cam

bearing caps

and remove the stock cams.

Next, we pull out the lifters

and finally we remove the crank shaft sensor ring,

the tensioner arms

and the tensioner themselves.

And before we install our new cam shafts, I wanna show you something on this crane Z cam that comes in pretty handy. It's got this hex machine in it and that helps you have something to hold on to firmly

while you retort the

crocket.

Ok? After collapsing the lifters, we can drop them back in

before lubing and installing the cam shafts.

Next we reinstall the cam bearing caps and torque them to recommended specs.

Then we can reinstall the timing chain, keeping an eye on the timing marks for both the cams sprocket and crank.

Now the tensioner arms can go back in place before reinstalling the tensioner itself. We need to compress it in a vice,

then lock it in place with something like a small Allen bitch or even this pop rivet.

After bolting it back up, we can pull out the pop rivet to release the tension.

Finally, we can reinstall the rocker followers.

That's it for the C

installation from here on. It's mostly a matter of reversing the disassembly steps you saw earlier.

Now Ford workshop manual for your model here would be a wise investment though.

That's just to make sure you get every part and boat back in their proper place.

Yeah. Sounds pretty stout. And I tell you what, when we get this thing strapped down and warmed up,

you stay put. We'll see what happens on the

dyno

right after the break.

Hey, thanks for sticking with us. Well, we're ready for another

dyno run on this 02 GT

that is after we swapped the stock cams for a pair of crane Z cams with more aggressive lift and duration.

That should be good for more horsepower. Let's see how much,

don't forget we're working from a baseline of 229 rear wheel horsepower in this Mustang

with a basically stock 4.6 L engine.

Now we got 240. That's an 11 horsepower game. Not bad, but we can get more if we stuck with it. Yeah. And just as important, it paves the way for more power ADDers down the street

and it won't affect the factory computer. Now you've seen us give one a little more horsepower today. Let's go check out a familiar pony and give it a little more I appeal.

Yeah. You remember project nightmare here. In addition to giving them more power, we dressed it up with some chrome wheels shaker hood,

a roll bar and those cool cask and seats. But when you're driving down the road, all the driver sees is black, pretty boring.

Here's a cool kit we got from year one to help dress up the interior appearance of project nightmare.

Now, if you didn't know it, they also have catalogs for 65 and up mustangs. Now, this dash inlay kit we ordered comes in rosewood burl wood, carbon fiber and even brushed aluminum like this one. Now, the first step is to clean all the surfaces with this primer. The kit comes with three of these primer sticks and after you crush the dot to release the primer,

apply it to the area you're gonna cover.

Wait about five minutes,

you're ready to apply the piece

to apply one of the inlay pieces, just peel away the backing to reveal the sticky part,

set it in place, press

and move on to the next one.

The kid comes with a total of 16 pieces to go around the power window buttons,

the gauge cluster,

stereo

air conditioning vents and a lot more.

By the way, year one makes these kits for 87 models and up.

It's a pretty easy way to turn a fairly plain interior

into one that makes a pretty slick and pretty stylish statement.

Since we're all about the Mustangs today, here's a new development that'll help solve an old problem for high performance pony engines

running your engine under extreme loads can actually cause the block to twist

when that happens. You can destroy rods, pistons crank pretty much the whole motor,

especially if you've got a power adder like nitrous or a big blower. Now, as you Mustang guys know when the block twists, it actually cracks in half like this one from the mains

all the way to the Lifter Valley.

You know what they say about an ounce of prevention. Well, these valley girdle pros are the new solution to these crack blocks. What they do is strengthen and stabilize the block here at the Lifter Valley where the damage usually starts.

Now, they also prevent cylinder bore distortion which robs horsepower due to all the increased friction.

Each girdle installs here on these casting ears on the block. First, we need to bolt the girdle into place using the existing lift or hold down hole,

then drill a couple of quarter inch holes no deeper than three quarters of an inch,

remove the girdle and thoroughly clean the new holes.

Now, we can tap the roll pins from the kit into place.

The final step is reinstalling the girdle. Now, by the way, in recent test, a two bolt 302 survived 9200 RPM. S

that's more punishment than your Mustang will ever endure. Now, they're making these for five different Ford motors and more to come.

Now, we got more horsepower coming your way. Why don't you stick around

when it comes to really high horsepower? Does it get any better than Nitro funny car racing?

Well, while the big show is out on the strip, there's an equally important show here in the pits. And what gearhead wouldn't give anything to

hang out with a top team.

This team supports Cruz

Pedregon

H

hitting his stride. Thanks and far to an essential element of winning a committed sponsor.

They've been a company that stuck with me

our first two years where we weren't even in the top 10 and they were patient. They knew that we were building something strong here. Brick by brick. It's been a nice company to work with all the people are very friendly and like their slogan says, the best part is people. I really believe that Cruz and his brothers literally grew up in racing with his dad, Frank racing top fuel back in the sixties

today. He and brother Tony are part of a two car team that makes racing even more successful and fun. Tony and I had raced against each other for several years on different teams and we felt, you know, if we could ever get ourselves in a situation where we could own our own teams and actually work together,

man, how great would that be?

It's kind of funny. We share all the information, but when we have to raise each other,

it's, it's like we kind of draw that line. But I think it's, it's people's nature. It's the way that we're wired. We're just competitive and we challenge each other. So that, that's good internally that we can do that so we can try to go beat up on the other guys

before a qualifying round. Cruz gave me a little tour of his 8000 horse and Monte Carlo that he hopes to drive to a second championship.

This is my office here in, uh, pretty tight quarters here. I just,

you know, uh, don't move around much in here, but, but basically, it's just,

uh, uh, not your basic steering wheel, but you have your steering wheel here is my two way radio. This is my parachute lever here so I can keep my hands on the wheel, brake

fire bottles,

uh emergency kill switch, fuel pressure pump here.

This is the computer, but actually the fuel and clutch management box right here. That's all the controls for the clutch and the timers and everything that controls most of the functions on the engine.

Like I say, the clutch system and the fuel system

and then here's the fuel tank. People are amazed that these cars burn over 13 gallons in one quarter mile run. So

that's about a 17.5 gallon tank

when it's time to head to the line crew has to trust the team's done their job.

It's his job to make their work pay off,

do a burnout. Try to just really

do a nice, easy, smooth burnout. So I try to do the same thing every time. What I'm thinking is I'm thinking be smooth, be alert, be sharp, be focused.

I kind of get into this single thought process where my number one goal is to

get off the line really quick. And what I do is I just,

I just focus, I zero in on the light, I pull in there and everything else is automatic and now you have to drive the car so you just negotiate.

I just look at one point way down the racetrack.

After a few seconds of racing. It's time for almost an hour of frantic work by a team that has to work efficiently as well as fast

as we take the entire engine down to a bare block

and we disassemble the entire clutch and drive line of the car. We replace all eight rods and pistons, check all the main bearings,

reassemble, the cylinder heads, check all the valves. Basically, we do a complete engine rebuild and, and clutch rebuild

in about an hour. It's amazing how they can tear it down and put it back together and everything would be perfect to go out there and run a four second run at 300 miles an hour. It's amazing. I'd love to have their job.

And while Cruz always takes time to visit with his fans, his experience and instincts are vital to getting the car set up for the next pass, the computers will only tell you so much. You really need to have the human feel at the end of the day. We don't want these cars to be too mechanical

if I could have it my way. I'd like to have more input

all this work for another few seconds of,

but that's funny. Car drag racing for you.

And this is a team with a committed sponsor, some dedicated crew members and a talented driver who's passionate about earning another N

hr A A.

There was a point

where I wasn't winning a couple of years and I wasn't even close to winning. And, uh,

and I had to really think about

why I do this. I mean, of course, I do it because I love the sport, but at the same time,

I was exposed to winning early in my career. And so I want to keep doing that.

Horsepower TV S Quick Tech is brought to you by

Wyotech

and you won't find a more perfectly restored cool classic than this 56 Chevy Bel Air. I mean, every detail has been handled on this thing, including of course, replacing all the glass, you know, swapping the glass in your street machine can add a lot to the looks. And today we're gonna use this old Cha

Belle to show you how it's done the right way. It's this week's tech tale.

First thing we wanna do is we wanna remove the interior trim panels. We're gonna start with the armrest on this.

The next thing we wanna do when we're removing the door panel, we wanna remove the plastic clips.

You want to work your way up

and just squeeze your tool,

it'll pop them out as we go along.

Next, we want to remove the lock button,

then we want to remove the door panel.

Next step we wanna do is we wanna remove the interior paper liner.

We wanna roll the window down a little bit so we can remove the bolts for the stops for the window.

Then we wanna remove some of the,

the tracks for the regulator

so we can get the regulator out next

and this is the window, stop itself.

Ok. The last thing we wanna do

is remove the nuts

where it attaches to the window.

There we go a little bit of help. It'll,

it doesn't just slide out by the way.

Yeah,

we wanna come up here that

out with the old

and in with the new. All right,

of course, installing the new glass is just a reverse of what you saw. However, we've also got an important tip for you. As soon as we get this thing in position,

you wanna make sure that you have your window about halfway down

so you can access the nuts that bolted bolt your

track to the window.

You only wanna snug them down, just snug if you over tighten them, you might break the window

and then you tighten the front track nut.

Next we wanna reinstall or stop.

Ok. Now we need to

install the adjuster

so we can adjust the window in and out properly

and this bolt, this is for your up and down adjustment for your window.

What it does, it, it keeps your,

your window lined up parallel with your loop roof line.

You can raise and lower the height of your glass. So it fits

the rubber seals.

You wanna wind your

window up and down.

You wanna make sure there's nothing binding,

make sure the scissors in your regulator,

there's nothing catching on the tracks, everything's working properly.

All right, let's try it.

Door shuts. Hey, it fits perfectly good job. Walt.

You know, I got a Mustang with these new glass. So what are you doing tomorrow?

Uh Tomorrow, we're kind of busy

down here.

Say, how would you like to have your dashboard light up like the cockpit of a jet fighter? Well, these are auto meters new in the white face gauges with a pretty cool race look by day,

but at night

they give off a look like the inside of an F-16

that green led light shines through the white face to give you an easy reading at night with just a glance. Each one comes with a shock proof strap and mounting base and, well, all you provide is the cash about 55 bucks. And up

here's a new twist in wrenches from Matco. It's an electronic torque wrench with a swivel head design that allows you to read your torque specs at any angle with this L CD screen. All you do is turn it on, set your specs and the light turns from yellow to green when you reach your targeted limit. Now, if you go over, you'll get a buzzer and a red light. They're made of thick wall steel tubing and available in 3 8.5 inch drive with an automatic shut off. Now, if you want to add one of these to your tool collection prices will only set you back about 380 bucks

next time you customize one of your accessories. How about a retro look right from a can. That's what Dupa colors, high performance metal specs is all about.

It uses new paint technology and in the sunlight kind of looks like metal particles floating in color.

It's great for auto accessories, bikes and of course helmets, you can get it in several colors and should be able to pick up a can at your local parts store. Well, that's it for hot parts this time.

I thought we were done for today. But hey,

if you got a toy like this chassis dyno,

would you be playing with it too? See you next time.
Show Full Transcript