More Mustang LX Episodes
HorsePower Builds
Want more content like this?
Join the PowerNation Email NewsletterParts Used In This Episode
Alloy USA
31 spline 5-lug axles and 3.73 ring and pinion set.
BBK Performance
Intake Plenum titanium powder coat finish.
Bilstein
Front Struts.
Classic Tube
Factory style fuel and brake lines.
Delk Performance
New 8.8 housing for Fox
Eaton Corporation
Eaton posi set up for 31 spline axles.
Matco Tools
Double flaring hydraulic brake line tool.
Maximum Motorsports
Adjustable caster camber plate.
Maximum Motorsports
Adjustable aluminum panhard bar set-up.
Maximum Motorsports
Front coil springs.
Maximum Motorsports
Full length subframe connectors.
Maximum Motorsports
Swaybar end links
Maximum Motorsports
Tubular lower control arm with spherical rod ends.
Mickey Thompson
15x10 aluminum race wheel wrapped in 28x11.50 et street.
Mickey Thompson
Skinny front 15x3 wrapped in 26.0 4.5.
Trick Flow Specialties
Cast aluminum valve cover set.
Trick Flow Specialties
easing all trick flow parts for next mustang show.
Zoom Performance
Stage 2 clutch kit kevlar faced disc.
Video Transcript
It's time to take our Mustang LX to the next level as we beef up the suspension and drive train to make way for some more power.
Plus we party with the world's quickest 10 5 street fighters in some outrageous outlaw competition.
That's good.
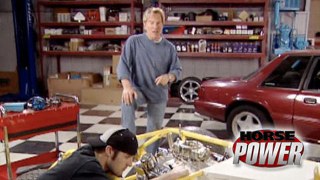
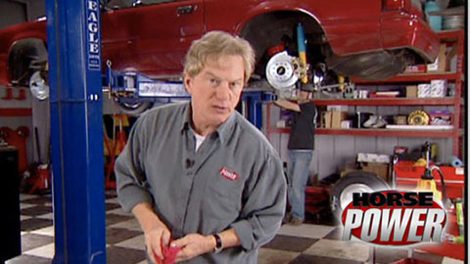
Hey, welcome to the horsepower shop again. A
couple of weeks ago, we got down to some horsepower basics with this 92 LX project car of ours.
The idea was to go through a whole list of popular power bolt ons you can do at home all on a pretty tight budget.
The idea was to keep the cost around 1400 bucks by improving the air flow in and out of the stock 5 L.
Then we tried some other tricks to free up a little extra horsepower.
All totaled. We added a little more than 30 horses at the rear wheels
in preparation of what we had planned next to B.
All right. We're not coughing up the cash for a turbo or a blower set up in our LX. However, after we swap out the stock heads valve train and intake, we plan on making a little over 300 horsepower at the rear wheels. Yeah. But in order to get that serious,
that Pony's first gonna need an upgrade and the suspension
rear end clutch and we'll even in the frame.
Well, that was our plan, but this thing is so corroded and there's so much material missing. It's really not worth it. Plus we don't want it coming apart on the street or during a launch at the track. So we're going to do the next best thing. Get a hold of our local junkyard and find a donor housing. Yeah, but we're not going to let that slow us down. We can move ahead to the clu
swap.
A
replacement kit is a stage two from Zoom that includes everything. New fly wheel, pressure plate, throw out bearing, of course, clutch cable and quadrant and this new disk that's steel backed and has Kevlar facing. Now Zoom claims because of that Kevlar,
this thing will last five times longer than a stock disk.
So there's the stock flywheel and clutch assembly. This one's not too bad of shape, but that Kevlar piece will handle the horsepower a lot longer.
After swapping out the pilot bearings, we got the new flywheel installed and torque down.
The kit includes an alignment tool to make bolting up the clutch easier. By the way, you need to break this thing in for about 500 miles before any hard launches.
Then after we install this new throw out bearing,
we can bolt the bell housing back up along with the stock transmission.
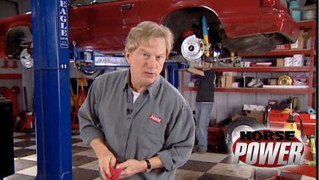
Meanwhile, up front, I've already got the spring strut sway bar and caster camber plates out of the way. Now, this whole suspension kit comes from maximum motor sports and includes these Bill Stein Struts.
Now, these things are specifically valve for the Fox body mustangs and the best part
direct replacements,
the top mounts in this adjustable caster camera plate that I have already installed on the strut tower.
Now, this allows us to get an accurate alignment. When we lower the car,
the new springs are shorter than the stock ones and they go in place along with new isolators.
Then after raising the lower control arm with a jack, we can connect the strut to the spindle.
Finally, we replace the sway bar and links with shorter ones to compensate for the lower ride height.
Chances are the stock brakes could haul down 300 plus horsepower or more. But with this conversion kit, we got from stainless steel brakes, we get to lose the rear drums in favor of disc brakes, which we'll have all the way around.
Plus we go from a four lug to a five lug wheel and that's good for 20% more holding power
upfront. We're just swapping out the pads and rotors,
by the way, these are the same size of stock. But in addition to the five lugs, they're also slotted
to help pass some of that gas from the pads that is,
don't let him fool you on who's passing gas around here. Now, before we move on to the rear end, we're going to do something to this LX to transfer more power to the rear wheels and make it handle a little better in case we decide to hit a road course. Now, nothing improves these Fox body chassis better than a set of good functioning Subra
connectors
and just like the rest of the suspension.
These also came from maximum motor.
We first install a pair of these braces that bolt right up to the stock rear seat bolts.
Then we weld up the connectors to the frame and to the braces.
At last, we got a good candidate for that rear end rebuild. We promised came from a local Mustang Bone yard and it's got an empty 8.8 housing.
What are we gonna fill it with?
We'll fill you in on that right after the break. Stay with us.
Hey, thanks for staying with us, but we're back with more upgrades for that Mustang back there
all with the goal of helping it plant the extra horsepower. We're gonna give it in a couple of weeks
now, so far we swapped out the clutch,
we handled suspension and brake upgrades up front and we even added Subra connectors to help stiffen the chassis.
Of course, a stout rear end is the key to planting all that power
and instead of springing for a new one. We're going to fill this new old stock housing with new components.
And the star of that show is this eating posse carrier we got from alloy USA.
It comes with carbon fiber clutches.
It is set up for 31 flying axles. Now to turn the tires, we've got their 373 ring and pinion set a good bit deeper than the original 308
first though. We got to press on the pin bearing to do this at home. You just heat it up really well and pop it right on.
Then of course, after cooling and slipping on a crush leave, we can drop it into the housing.
Then after tapping in the seal, we can reuse the factory drive flash
because it's still in pretty good shape
with the ring gear attached to the carrier along with pressed on bearings. We can drop it in next.
Now, we need to establish the proper gear pattern and lash using these shims that we slip in between the bearings and the housing.
I'm using the dial indicator to check backlash on the ring gear. We're shooting for 6 to 8 thousands. If it's too tight, it'll howl if it's too loose, it just won't last. After a couple of tries and adding a small shim, we're right on the money
with the housing field and this caliber bracket installed,
I can go ahead and send home this much stronger 31 flying five lug axle. By the way, we also got this from alloy USA
and hold them in place. We're gonna reuse the factory Sea cliffs.
Well, now we got a rear end that's virtually bulletproof and well, thanks to our locker in 373 gears,
this thing's gonna launch hard out of the hole. Oh, we didn't go in the hole financially. However, this rebuilt rear end, it's about a grand less than a new one. Now, while we've got the room, why don't we install the rest of the brakes? Now, this setup came from stainless steel and it's a rear disc conversion compared to our original drum setup. Now, we already had to install the caliber brackets before the axles went in. Now, we can go ahead and put the new 10 to quarter inch slotted rotors into place.
Now, we install our single piston calipers. We've loaded with new pads. These, by the way, have parking brake here already installed
before we hang the rear end. Let's go ahead and install these new lower control arms. Now, these are super strong tubular design. They use a billet spherical rod end and these urethane bushings up front to help keep dirt and debris out. The best part they install in the stock location.
The original fuel and brake lines were just about as rusted out as that rear end we took out of the Mustang.
So we ordered these pre
bent factory fit replacements from classic two.
Now because of that conversion we did on the rear disc brakes. Well, these rear lines are going to take a little tweaking
using a hydraulic double flare tool kit. Like this one from Matco first cut the tube to proper length.
Then you select the proper dye and bubble flare adapter.
Then after threading in the ram till it bottoms out. Start applying pressure.
See the bubble flare,
we next load up the cone shaped adapter,
thread it in
and apply more pressure
that should give you a perfect double flare.
I got pretty lucky but if it's your first time to make a flare better to practice on a piece of scrap first.
Well, now we can mount these things to the rear end, connect them to the calipers and this thing can go back under the mustang.
Of course, while we had the room, we installed our brake and fuel lines before jacking the rear up into place.
Now we can push the lower control arms into place on the frame.
We are reusing the stock upper control arms, but we replaced the rotted out upper bushings with new ones.
Now we can drop in our springs
then just like up front, we're using Bill Stein shocks built to specs for the fox body
but only bolt on the passenger side for. Now,
the factory simply relied on the control arms to locate the rear end, but we want ours to be a lot more stable. So we picked up this adjustable aluminum pan hard bar which will allow us to locate and center the rear end and keep it there under all types of loads
to install it. We use a longer lower control on bolt to attach the pan hard bracket. Here on the driver's side,
use another bolt to attach the bracket to the axle.
Then we can mount the shock in its new location
with the pan hard attached to the bracket. We need to put a load on the rear end.
Next, raise the main support bracket into place and attach the other end of the pan, hard bar.
Now mark the frame for the mounting location,
then drill out the holes. Now, we can run this sliding bracket through the frame for extra strength
and mount up the main bracket with bolts from the kit.
Finally using the rest of the hardware from the kit, we can bolt the pan hard bar to the main bracket.
Man, that's a nice set up. Now, so far we've done our rear disc conversion, rebuilt our rear end and added a pan hard bar to a car that just didn't have one. Now, we've got one more step to go and we'll show you that right after the break.
Hey, welcome back to the horsepower shop
in case you just joined us, we've been making this 92 Mustang a lot more horsepower ready by doing things like beefing up the rear end. We added a clutch and pan art bar.
We stepping up the frame and even upgraded the brakes and suspension.
Now, why did we do all this? Well, we're gonna make it a true street strip machine after next week. You see that's when we install these high performance heads,
valve train and intake manifold from trick flow. Plus
we got a little power adder up our sleeve, but uh we're not showing our hand on that yet.
Yeah, but to make it street and strip worthy, we've got one more job to take care of today. Now, as you remember, we swapped out our axles from 4 to 5 lug. So now we can bolt up a set of one piece aluminum race wheels from Mickey Thompson wrapped in a 28 1150 et street
up front. We're slamming on a set of Mickey Skinnies to take some weight off the front end, which of course you want for drag racing.
Now, I gotta remind you these aren't street legal, so you gotta wait till you get to the pits to swap your street tires for these
right. Now, what are you saying? We blow out of here and head to the pits and eight mile strip of an outrageous outlaw racing event full of some wild wheel standing heads up competition.
We're always on the hunt or horsepower harnessed on the drag strip,
cubic inches converted to quickness
as that never ending need for speed plays out in heads up competition.
Now we're at Huntsville Dragway where I want you to see the hottest thing I've found here.
Oh, it's not her.
It's actually those wheel standing high horsepower, bad boys of 10, 5 outlaw races.
See what I mean?
We can run any motor we want. And, uh, the big limiting factor is the 10.5 inch tires because you can only put so much tire on the car and then that limits the amount of horsepower you can put to the rear wheel. It's all about how you bring the power on. You know, you gotta be nice to the tire.
There's cars out here making
probably close to 3000 horsepower, but
you gotta get it down
the
outlaw racing street car association or, ors
for short sponsors events on eight mile tracks like this around the southeast
while pro mod competition was on the menu. This weekend, the mainstays are classes like 10, 5 out
easy street and Limited Street.
And if you love wheel standing drills, this is for you.
Now, here our camera follows the Camaro but watch for the yellow mustang.
Unbelievable.
Here it is again up on the wheelie bars. Then on one rear wheel down hard on the nose, up on two left tires and back down sideways and he never leaves the lane.
Now, let's meet some of the heavy hitters of 10, 5 hour hall. One of the hottest racing classes in the country like Jack Barfield who raced his 69 Camaro to one of the first series championships. This motor is 762 inch Fulton Motor
with four stages and not
44 stages. How did those come in when we actually let off the transport? We have one stage engaged then
and then we use a, a series of timers to, to bring the other stages on. We generally only run three stages, the four stages, we can turn one off and turn another one on depending on the track conditions.
Then there's Joey Martin
who brought both a Pro mod and a 10 5 race car to this power party.
This one's noisy and loud and goes fast. That one's, uh, a lot quieter and goes fast. That's on less than half the tire than this one and that one weighs 600 pounds more than the pro
mod. Now,
the outlaw 10, 5 guy to watch is Terry Roberts from Henrietta North Carolina
carry only needs a decent qualifying pass to win a championship, but he's got his eye on a more historic prize.
Well, we just got try to go
a race and, uh, get qualified. Good to start with. Then if we qualify good, we are gonna try to step it up a little bit and go for that record.
He has trouble hooking up on his first qualifying run.
Then on a cool Saturday night track Robbins runs a 450 to become the quickest 10 5 outlaw in history.
I can tell it's on a good pass. Uh
We had a real good 330. The back half was off some because we left the bottle pressure down slow, but
it's a good pass
in Sunday's first round of eliminations. Robbins puts too much power to the track on this by run.
Then against Tim Lynch's Turbo
charge must day the best and closest race of the weekend
as Terry runs an amazing 449 to become the 1st 10, 5 outlaw to run in the four.
I just wanted to beat him but I was worried about backing it up, but I was worried about him too.
We'd had trouble with this. A lifting too hard and that time it did good.
Terry went on to earn a spot in the finals but Mother Nature won that round when the event was officially rained out,
but the fans still got their money's worth witnessing a piece of horsepower history here in Huntsville,
the fastest car and driver to plant 2000 plus horsepower, a 10.5 inch tire.
Terry rocks
first in the forties.
Almost everyone loves the look of the new mustangs and here's a way to make them look just as good under the hood. It's AC NC machine intake cover from BBK. Now it's a direct bolton made from lightweight aluminum with a powder coated titanium finish.
It installs right over the stock intake in only a couple of minutes and it's sure to set your pony apart from the rest of the herd. Now, they're available in chrome with the Titanium finish starting out at 200 bucks.
If you want to give a straight shot of cool, unrestricted air to your racing or other off road vehicle, you might want to give one of these a shot.
It's KNNS air charger performance kit that replaces the factory air box frees up as much as 26 horsepower and made to
get the most of your engine modifications. Now, each one comes with this filter that has a grid that's made to straighten out incoming air and an accordion design that offers five times the filtering surface. How much for a kit? Well, that depends on your specific application.
Well, soon we resume application of rest to work on our firebird. But next week you got it more horsepower muscle for our Mustang. See you then.
Show Full Transcript
Plus we party with the world's quickest 10 5 street fighters in some outrageous outlaw competition.
That's good.
Hey, welcome to the horsepower shop again. A
couple of weeks ago, we got down to some horsepower basics with this 92 LX project car of ours.
The idea was to go through a whole list of popular power bolt ons you can do at home all on a pretty tight budget.
The idea was to keep the cost around 1400 bucks by improving the air flow in and out of the stock 5 L.
Then we tried some other tricks to free up a little extra horsepower.
All totaled. We added a little more than 30 horses at the rear wheels
in preparation of what we had planned next to B.
All right. We're not coughing up the cash for a turbo or a blower set up in our LX. However, after we swap out the stock heads valve train and intake, we plan on making a little over 300 horsepower at the rear wheels. Yeah. But in order to get that serious,
that Pony's first gonna need an upgrade and the suspension
rear end clutch and we'll even in the frame.
Well, that was our plan, but this thing is so corroded and there's so much material missing. It's really not worth it. Plus we don't want it coming apart on the street or during a launch at the track. So we're going to do the next best thing. Get a hold of our local junkyard and find a donor housing. Yeah, but we're not going to let that slow us down. We can move ahead to the clu
swap.
A
replacement kit is a stage two from Zoom that includes everything. New fly wheel, pressure plate, throw out bearing, of course, clutch cable and quadrant and this new disk that's steel backed and has Kevlar facing. Now Zoom claims because of that Kevlar,
this thing will last five times longer than a stock disk.
So there's the stock flywheel and clutch assembly. This one's not too bad of shape, but that Kevlar piece will handle the horsepower a lot longer.
After swapping out the pilot bearings, we got the new flywheel installed and torque down.
The kit includes an alignment tool to make bolting up the clutch easier. By the way, you need to break this thing in for about 500 miles before any hard launches.
Then after we install this new throw out bearing,
we can bolt the bell housing back up along with the stock transmission.
Meanwhile, up front, I've already got the spring strut sway bar and caster camber plates out of the way. Now, this whole suspension kit comes from maximum motor sports and includes these Bill Stein Struts.
Now, these things are specifically valve for the Fox body mustangs and the best part
direct replacements,
the top mounts in this adjustable caster camera plate that I have already installed on the strut tower.
Now, this allows us to get an accurate alignment. When we lower the car,
the new springs are shorter than the stock ones and they go in place along with new isolators.
Then after raising the lower control arm with a jack, we can connect the strut to the spindle.
Finally, we replace the sway bar and links with shorter ones to compensate for the lower ride height.
Chances are the stock brakes could haul down 300 plus horsepower or more. But with this conversion kit, we got from stainless steel brakes, we get to lose the rear drums in favor of disc brakes, which we'll have all the way around.
Plus we go from a four lug to a five lug wheel and that's good for 20% more holding power
upfront. We're just swapping out the pads and rotors,
by the way, these are the same size of stock. But in addition to the five lugs, they're also slotted
to help pass some of that gas from the pads that is,
don't let him fool you on who's passing gas around here. Now, before we move on to the rear end, we're going to do something to this LX to transfer more power to the rear wheels and make it handle a little better in case we decide to hit a road course. Now, nothing improves these Fox body chassis better than a set of good functioning Subra
connectors
and just like the rest of the suspension.
These also came from maximum motor.
We first install a pair of these braces that bolt right up to the stock rear seat bolts.
Then we weld up the connectors to the frame and to the braces.
At last, we got a good candidate for that rear end rebuild. We promised came from a local Mustang Bone yard and it's got an empty 8.8 housing.
What are we gonna fill it with?
We'll fill you in on that right after the break. Stay with us.
Hey, thanks for staying with us, but we're back with more upgrades for that Mustang back there
all with the goal of helping it plant the extra horsepower. We're gonna give it in a couple of weeks
now, so far we swapped out the clutch,
we handled suspension and brake upgrades up front and we even added Subra connectors to help stiffen the chassis.
Of course, a stout rear end is the key to planting all that power
and instead of springing for a new one. We're going to fill this new old stock housing with new components.
And the star of that show is this eating posse carrier we got from alloy USA.
It comes with carbon fiber clutches.
It is set up for 31 flying axles. Now to turn the tires, we've got their 373 ring and pinion set a good bit deeper than the original 308
first though. We got to press on the pin bearing to do this at home. You just heat it up really well and pop it right on.
Then of course, after cooling and slipping on a crush leave, we can drop it into the housing.
Then after tapping in the seal, we can reuse the factory drive flash
because it's still in pretty good shape
with the ring gear attached to the carrier along with pressed on bearings. We can drop it in next.
Now, we need to establish the proper gear pattern and lash using these shims that we slip in between the bearings and the housing.
I'm using the dial indicator to check backlash on the ring gear. We're shooting for 6 to 8 thousands. If it's too tight, it'll howl if it's too loose, it just won't last. After a couple of tries and adding a small shim, we're right on the money
with the housing field and this caliber bracket installed,
I can go ahead and send home this much stronger 31 flying five lug axle. By the way, we also got this from alloy USA
and hold them in place. We're gonna reuse the factory Sea cliffs.
Well, now we got a rear end that's virtually bulletproof and well, thanks to our locker in 373 gears,
this thing's gonna launch hard out of the hole. Oh, we didn't go in the hole financially. However, this rebuilt rear end, it's about a grand less than a new one. Now, while we've got the room, why don't we install the rest of the brakes? Now, this setup came from stainless steel and it's a rear disc conversion compared to our original drum setup. Now, we already had to install the caliber brackets before the axles went in. Now, we can go ahead and put the new 10 to quarter inch slotted rotors into place.
Now, we install our single piston calipers. We've loaded with new pads. These, by the way, have parking brake here already installed
before we hang the rear end. Let's go ahead and install these new lower control arms. Now, these are super strong tubular design. They use a billet spherical rod end and these urethane bushings up front to help keep dirt and debris out. The best part they install in the stock location.
The original fuel and brake lines were just about as rusted out as that rear end we took out of the Mustang.
So we ordered these pre
bent factory fit replacements from classic two.
Now because of that conversion we did on the rear disc brakes. Well, these rear lines are going to take a little tweaking
using a hydraulic double flare tool kit. Like this one from Matco first cut the tube to proper length.
Then you select the proper dye and bubble flare adapter.
Then after threading in the ram till it bottoms out. Start applying pressure.
See the bubble flare,
we next load up the cone shaped adapter,
thread it in
and apply more pressure
that should give you a perfect double flare.
I got pretty lucky but if it's your first time to make a flare better to practice on a piece of scrap first.
Well, now we can mount these things to the rear end, connect them to the calipers and this thing can go back under the mustang.
Of course, while we had the room, we installed our brake and fuel lines before jacking the rear up into place.
Now we can push the lower control arms into place on the frame.
We are reusing the stock upper control arms, but we replaced the rotted out upper bushings with new ones.
Now we can drop in our springs
then just like up front, we're using Bill Stein shocks built to specs for the fox body
but only bolt on the passenger side for. Now,
the factory simply relied on the control arms to locate the rear end, but we want ours to be a lot more stable. So we picked up this adjustable aluminum pan hard bar which will allow us to locate and center the rear end and keep it there under all types of loads
to install it. We use a longer lower control on bolt to attach the pan hard bracket. Here on the driver's side,
use another bolt to attach the bracket to the axle.
Then we can mount the shock in its new location
with the pan hard attached to the bracket. We need to put a load on the rear end.
Next, raise the main support bracket into place and attach the other end of the pan, hard bar.
Now mark the frame for the mounting location,
then drill out the holes. Now, we can run this sliding bracket through the frame for extra strength
and mount up the main bracket with bolts from the kit.
Finally using the rest of the hardware from the kit, we can bolt the pan hard bar to the main bracket.
Man, that's a nice set up. Now, so far we've done our rear disc conversion, rebuilt our rear end and added a pan hard bar to a car that just didn't have one. Now, we've got one more step to go and we'll show you that right after the break.
Hey, welcome back to the horsepower shop
in case you just joined us, we've been making this 92 Mustang a lot more horsepower ready by doing things like beefing up the rear end. We added a clutch and pan art bar.
We stepping up the frame and even upgraded the brakes and suspension.
Now, why did we do all this? Well, we're gonna make it a true street strip machine after next week. You see that's when we install these high performance heads,
valve train and intake manifold from trick flow. Plus
we got a little power adder up our sleeve, but uh we're not showing our hand on that yet.
Yeah, but to make it street and strip worthy, we've got one more job to take care of today. Now, as you remember, we swapped out our axles from 4 to 5 lug. So now we can bolt up a set of one piece aluminum race wheels from Mickey Thompson wrapped in a 28 1150 et street
up front. We're slamming on a set of Mickey Skinnies to take some weight off the front end, which of course you want for drag racing.
Now, I gotta remind you these aren't street legal, so you gotta wait till you get to the pits to swap your street tires for these
right. Now, what are you saying? We blow out of here and head to the pits and eight mile strip of an outrageous outlaw racing event full of some wild wheel standing heads up competition.
We're always on the hunt or horsepower harnessed on the drag strip,
cubic inches converted to quickness
as that never ending need for speed plays out in heads up competition.
Now we're at Huntsville Dragway where I want you to see the hottest thing I've found here.
Oh, it's not her.
It's actually those wheel standing high horsepower, bad boys of 10, 5 outlaw races.
See what I mean?
We can run any motor we want. And, uh, the big limiting factor is the 10.5 inch tires because you can only put so much tire on the car and then that limits the amount of horsepower you can put to the rear wheel. It's all about how you bring the power on. You know, you gotta be nice to the tire.
There's cars out here making
probably close to 3000 horsepower, but
you gotta get it down
the
outlaw racing street car association or, ors
for short sponsors events on eight mile tracks like this around the southeast
while pro mod competition was on the menu. This weekend, the mainstays are classes like 10, 5 out
easy street and Limited Street.
And if you love wheel standing drills, this is for you.
Now, here our camera follows the Camaro but watch for the yellow mustang.
Unbelievable.
Here it is again up on the wheelie bars. Then on one rear wheel down hard on the nose, up on two left tires and back down sideways and he never leaves the lane.
Now, let's meet some of the heavy hitters of 10, 5 hour hall. One of the hottest racing classes in the country like Jack Barfield who raced his 69 Camaro to one of the first series championships. This motor is 762 inch Fulton Motor
with four stages and not
44 stages. How did those come in when we actually let off the transport? We have one stage engaged then
and then we use a, a series of timers to, to bring the other stages on. We generally only run three stages, the four stages, we can turn one off and turn another one on depending on the track conditions.
Then there's Joey Martin
who brought both a Pro mod and a 10 5 race car to this power party.
This one's noisy and loud and goes fast. That one's, uh, a lot quieter and goes fast. That's on less than half the tire than this one and that one weighs 600 pounds more than the pro
mod. Now,
the outlaw 10, 5 guy to watch is Terry Roberts from Henrietta North Carolina
carry only needs a decent qualifying pass to win a championship, but he's got his eye on a more historic prize.
Well, we just got try to go
a race and, uh, get qualified. Good to start with. Then if we qualify good, we are gonna try to step it up a little bit and go for that record.
He has trouble hooking up on his first qualifying run.
Then on a cool Saturday night track Robbins runs a 450 to become the quickest 10 5 outlaw in history.
I can tell it's on a good pass. Uh
We had a real good 330. The back half was off some because we left the bottle pressure down slow, but
it's a good pass
in Sunday's first round of eliminations. Robbins puts too much power to the track on this by run.
Then against Tim Lynch's Turbo
charge must day the best and closest race of the weekend
as Terry runs an amazing 449 to become the 1st 10, 5 outlaw to run in the four.
I just wanted to beat him but I was worried about backing it up, but I was worried about him too.
We'd had trouble with this. A lifting too hard and that time it did good.
Terry went on to earn a spot in the finals but Mother Nature won that round when the event was officially rained out,
but the fans still got their money's worth witnessing a piece of horsepower history here in Huntsville,
the fastest car and driver to plant 2000 plus horsepower, a 10.5 inch tire.
Terry rocks
first in the forties.
Almost everyone loves the look of the new mustangs and here's a way to make them look just as good under the hood. It's AC NC machine intake cover from BBK. Now it's a direct bolton made from lightweight aluminum with a powder coated titanium finish.
It installs right over the stock intake in only a couple of minutes and it's sure to set your pony apart from the rest of the herd. Now, they're available in chrome with the Titanium finish starting out at 200 bucks.
If you want to give a straight shot of cool, unrestricted air to your racing or other off road vehicle, you might want to give one of these a shot.
It's KNNS air charger performance kit that replaces the factory air box frees up as much as 26 horsepower and made to
get the most of your engine modifications. Now, each one comes with this filter that has a grid that's made to straighten out incoming air and an accordion design that offers five times the filtering surface. How much for a kit? Well, that depends on your specific application.
Well, soon we resume application of rest to work on our firebird. But next week you got it more horsepower muscle for our Mustang. See you then.