More Stage 3 Episodes
HorsePower Builds
Want more content like this?
Join the PowerNation Email NewsletterParts Used In This Episode
Fidanza
Fidanza clutch kit.
Mr. Gasket
Hurst mustang shifter 83-01.
Powerblocktv Book Store
Motor Books.
Roush Performance
Stage 3 body kit.
Roush Performance
Stage 3 brakes up front.
Roush Performance
Stage 3 suspension (shocks,struts,swaybars,springs).
Video Transcript
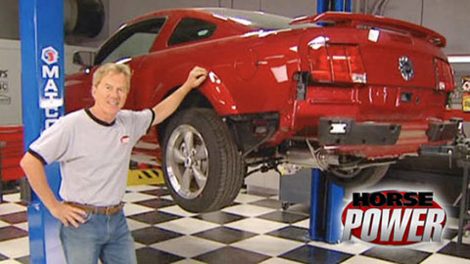
The 06 Mustang is back and today we make it look and perform more like a Ro
stage three plus a door slam at heads up competition and a legendary drag strip in Maryland.
Hey, welcome to the horsepower shop.
Last week, you might recall, we set out on a mission to transform the stock Mustang GT into a ruse
stage three in stages. Of course. Well, the first phase as you might have guessed,
make more horsepower,
we used a complete Ralph Charger kit that included a radiator intercooler
water pump for the radiator,
a new manifold with a built in inner cooler
and a polished root style charger unit.
We also handle the wiring
and modifications to components like the throttle body and air intake system.
Then after Rouse re flashed our power control by Joe, we made 358 horsepower 93 over the baseline.
However, we also bolted up a pair of their 304 stainless mufflers
and got a grand total of 369 horsepower.
Today, we're gonna pump up the appearance of this Mustang with the new body kit a little later on. But first we're gonna make this thing handle and break like a real stage three. Now, the suspension kit comes with all your sway bars, shops, struts and springs. The front brakes are new calipers and rotors,
plus a set of new rouse wheels and rubber to really set this thing off. Now, all we need to do is get rid of the stock suspension pieces
starting out back. We remove the stock sway bar
and unbolt the pan hard bar from the frame.
Next unbolt the shocks
and lower the rear end with a floor jack so you can remove the stock springs
finally from inside the trunk, unbolt the top shock nuts and let them drop.
Of course, we install the new springs first. But before we do check out the difference between this one and the stocker, we just removed, not only shorter for a better ride height but engineered for a much more progressive spring rate. In fact,
let's take this one over to the press and see how it behaves on the road.
The bigger diameter coils on bottom compress first. Then as the load increases the smaller diameter coils compress
bottom line is you get a stiffer sports car handling with a mild street car ride.
After we install our new shocks,
we can put the springs into place
and install the final piece of our rear suspension upgrade. A new sway bar.
Now, this one's a few millimeters thicker than the stock bar and comes with new end links and polyurethane bushings.
The stock 06 GT wheels don't look that bad, but since we're going for that total stage three look, we had to use a set of these Rouse chrome plated wheels wrapped in a set of 2 75 40 18 Cooper
Zion rubbers.
Of course, our upgrades up front involve a brake swap. And for that, we got something that's more than enough to haul down all that horse power we made last time, a set of
rush engineered four piston calipers
and check this a pair of two piece slotted rotors that measure 14 inches in diameter. Now, that's two inches bigger than stock
to remove the stock brakes. We first disconnect the line,
remove this hose bracket from the body,
remove the line locator from the strut
and on both the caliper and remove it.
Next, we can remove the rotor
and the dust shield. Well, that's it for the break disassembly. Now, while we've got the room and you've got a good view. Let's get started with the front suspension and just like the back, we're gonna start with the sway bar.
Then with the car lowered and supporting the lower control arm with the jack.
We need to remove the nut from the top of the strut.
Then after lowering the jack to unload the springs,
we unbolt the strut from the spindle and pull it and the spring out as an assembly,
these new springs from the kid are designed to lower the front of the car right at an inch. We'll install these along with these new struts that have been tuned by the guys at Ralph's performance for superb handling.
Finally, we install the new thicker front sway bar that comes with new urethane bushings.
Well, meanwhile, back at the brakes, we've got our shield and new rotors in place. And next comes this billet caliper bracket. Now notice how it relocates the mounting boats farther back to get plenty of clearance for those massive calipers. Now, boats up to the spindle using stock hardware.
Ok. Well, that cinched down,
we can move on to bolting up big red here.
Now you'll know you've got the orientation of this caliber correct
when the bleeder screws up on top and this crossover pipes down below.
Finally using the braided line from the kit, we complete the installation.
Well, that's it except for bleed the brakes and we'll show you how we handle that after the break. Plus we got a cool cosmetic makeover in store for this pony. So stay tuned
brake fluid. Don't get it on you. Hey, thank you. Why don't you see if your old dusty bones will let you get in that car
quicker than you any day? I bet.
Hey, welcome back to horsepower. If you just joined us, we're installing a Rouse stage three package on this 06 Mustang
out back. We installed shorter progressive rate springs,
new performance shocks
and a larger diameter sway bar
up front. Another sway bar swap
and a new set of springs and specifically Tne struts.
We also installed 14 inch two piece rotors
and four piston calipers
to bleed a set of newer A BS brakes. You want to make sure not to use a vacuum pump that can create air pockets between the A BS pump and the master cylinder. So we're going to do it the old fashioned way. Go ahead and pump it. Joe.
Of course, it's also important to bed in the new brakes and we'll show you how to handle that later. Right. Now, though, we're going to turn this plain Jane pony into a stage three stallion with this. Now, if you've ever seen a real rash on the road, you know what a body kit can do to a Mustang's attitude.
Now, we'll start with this front fascia that also includes new fog lamps and an air splitter.
First, we need to transfer the side marker lamps from the stock
fascia
along with the original grill that just snaps into place.
Next, install the grill inserts
and the two piece extractors.
We built up the fog lamp brackets
and the fog lights.
Then the facer can go back on the car
and then we can install the air splitter with eight bolts from the kit
and last but not least up front the chin spoiler. Another thing that sets the rouse pony apart is the hood scoop. But before we get to this, we have to remove the push pins that hold the under hood liner in place.
Then make marks with a center punch using the template
and drill seven holes from the top side,
attach the grill to the scoop.
Then using tape and hardware from the kit,
install the scoop to the hood.
Yeah, looking more like a stage three every minute.
Meanwhile, here's a place where that new Mustang design kind of comes up short. These back quarter windows are rather plain and just begging for a set of louvers.
Now we got this template in place for three brackets. Each one has tape backing and a little U nut. All we gotta do is remove the tape
press into place,
wait for about an hour.
Then after removing the template, use three supplied screws to attach the louver to the brackets, we had to take off that rear wheel again to remove the stock rocker panel. Now, before we put the new pieces on, we want to make sure to rub everything down with some rubbing alcohol.
After installing the tape NW clips from the kit,
we can install this rocker onto the car.
Now attach the push pins to the moldings
and after lining the moldings, remove the protective tape,
finally install fasteners through the rear and front body flans.
Although we replace the entire front facial, we're just going to modify the stock rear one with this three piece balance kit. Now the center section goes on first with four screws and you got it more tape. Now we can line up the side balances and mark some more holes for drilling.
Then we put the rear facia back on the car
and cut out two sections of it for the exhaust tips
and finally the tip.
Ok. The rear spoiler swaps last on our list and notice how we use pins to line up our template so we can mark and drill two more holes for the center spoiler.
Then with tape and foam applied to the bottom of the centerpiece, we can drop it into place,
remove the tape
and secure it with four nuts from the bottom side.
Then we drill four holes for each side spoiler
and we secure them with the rest of the hardware from the kit. And with that, we got the whole rush
attitude working from the front,
the sides
and out back. Well, now we know we got this Mustang looking and running like a stage three. The question is, will it break and handle like one? We'll find out later. Meanwhile, after the break, we're heading to the races. So don't you go away?
Hey, whenever there's smoke there's drag racing. And this week it's courtesy of the new and improved National street car Association.
A new revamped class structure made for wheel standing thrills and amazing fast qualifying times.
There's also a class for just about every kind of racer,
factory modified, fit the bill for the driver of this 57 Chevy with a blown small block.
That's true. Street class cars can't be back, half must be stock suspension,
stock frame rails. More of a total street car stuff that we drive on the streets.
Super Street is just another name now for 10 5 outlaw and the red hot class attracted the likes of David Hans and his beautiful mustang powered by a twin turbo small block.
It's not the guy with the most money
or the most power.
It's who can put the whole package together and stay consistent. You never know what's going to happen when two of these cars come to the starting line
in the headliner Pro Street class.
Lalo
guys seem to be laying down the big qualifying numbers like top qualifier, Tim
o'hare in his 69 Camaro
with a 526 inch big block here posting a 642 at 222 miles an hour.
We're probably talking about 24
2400
job done
out here.
Yes, it is. And at this time you have to though, when you run against people like
and the rest of
them,
they got to make it down every time they got to get out on me and they got to stay in front of me.
Nitro
Pontiac stayed ahead of most qualifiers here. He gets a 652 qualifying pass but pat the driver was also playing at the teacher this weekend
helping a racer all the way from the mid east to get his pro
mod license.
He's doing pretty good. I'm pretty happy with him.
I mean, he's got the burnout deal to.
These cars are not easy to drive, you know that.
Well, here goes the student final exam time and maybe he better stay after class ready for some hard core horsepower.
Hey, here's the first for you. They've combined outlaw and Pro Street into one class. But you're going to see last year's champions face off in the first round of eliminations.
That's going to be a race in itself.
Here they are John Stanley last year's outlaw street champ against the legend of pro street. Pat. Muy
does Pat have the edge. Of course, he does. He win 644 camp and John had a little problem yesterday, but they've both been six for
now. So to me it's a race but if I gave the edge, I'd give a little bit to Pat today. But first round's tough
and it's incredibly close, but Mui
pulls ahead with a 654 at 215
in Super Street Hands. And that pretty pony advanced to the finals. That's when he got a killer 21,000 s light but loses to Leo Barnaby. Ran a 724
with the crew and the, and the car I drove pretty consistent. The car ran within 1/10 of the whole weekend of eight runs. So you can't beat that. I mean, consistency is going to win in a drag race. Tim
o'hare was consistent at least up to the semifinals. That's when Steve King finally had his blown viper dialed in enough to take the win line.
Meanwhile, Mui
was showing his form setting up a nitrous versus blower shootout.
Ok. In the finals, pat takes the lead but spins his tires while King laid down his best pass of the weekend at 644. This was a struggle all weekend. We just throw the car together. The last two weeks, we were going to set the year out
to come up here and struggle with chassis problems for last Friday and Saturday. And we finally got together and made three consistent runs. Today.
There's that word consistent again
and again, it paves the way all the way to the wind line.
Hey, welcome back, time to take this GT turn stage three out for a test drive. And the first thing we're going to do is bed in the brakes and we'll show you the right way. Let's go
after you find a stretch of road with no traffic. Make a series of 10 stops from 60 to about 10 miles an hour.
Don't come to a complete stop during this procedure though,
that could imprint pad material onto the rotor and cause a vibration.
Then after the 10 stop series, you want to drive as much as possible without braking to cool them.
All right, now that we got them cooled off, I'm gonna try a little test using this G tech meter to check our 70 to 0 stopping distance. By the way, a stock Mustang GT does this in 100 and 70 ft.
Wow. According to the G tech, it only took about 100 and 42 ft
to test the new suspension. I'm gonna use the Sop method which stands for seat of the pants
man. This new suspension is awesome. This thing handles better than any stock GT I I've ever
well, mission accomplished. We made this thing run look break and handle like a Mustang twice its price.
Now it's time to head back to the shop for some hot parts.
That guy has all the fun. Well, since we are in a Mustang mode, here's a clutch kit for your pony that can be tailor made for its purpose. But Anza makes their clutch kits with disc with four different levels of performance from Carving Kar
like this for all out street use to steel for racing. Now, you not only get the disc and pressure plate, each kit comes with a throw out bearing, pilot bearing and a line tool. Now
also make some pretty cool aluminum fly wheels, lightweight, of course and CNC machine for a custom fit and finish don't have a Mustang. Well, they got them for a variety of other applications. With prices that vary. Here's an upgrade from hurst for your 83 to 01 Mustang. It's their billet plus performance shifter that comes with AC NC machine built aluminum base heat treated billet, steel gear selector with a high pivot
to give you those shorter throws. Now, it also has these gear stops so you don't do any damage to your transmission
and it comes with self centered lining that way, the shifts from second to third are always really smooth.
Well, how much to get one of these put on your Mustang? About 100 and 90 bucks. Well, finally, how would you like to browse a cool car bookstore without leaving home? Well, now you can write on our website, you'll find everything from the popular motor books workshops
series to, well, things like this handy Haines, text book for suspension and drive lines or for your coffee table. How about 40 years of Mustang? Now this thing's loaded with colorful photos and facts and well, all you got to do is log on to our website, Power Block, tv.com and click on bookstore. Well, we'll turn the page to another chapter of horsepower next week. See you then I know whose coffee table that's going on.
Yes, sir.
Show Full Transcript
stage three plus a door slam at heads up competition and a legendary drag strip in Maryland.
Hey, welcome to the horsepower shop.
Last week, you might recall, we set out on a mission to transform the stock Mustang GT into a ruse
stage three in stages. Of course. Well, the first phase as you might have guessed,
make more horsepower,
we used a complete Ralph Charger kit that included a radiator intercooler
water pump for the radiator,
a new manifold with a built in inner cooler
and a polished root style charger unit.
We also handle the wiring
and modifications to components like the throttle body and air intake system.
Then after Rouse re flashed our power control by Joe, we made 358 horsepower 93 over the baseline.
However, we also bolted up a pair of their 304 stainless mufflers
and got a grand total of 369 horsepower.
Today, we're gonna pump up the appearance of this Mustang with the new body kit a little later on. But first we're gonna make this thing handle and break like a real stage three. Now, the suspension kit comes with all your sway bars, shops, struts and springs. The front brakes are new calipers and rotors,
plus a set of new rouse wheels and rubber to really set this thing off. Now, all we need to do is get rid of the stock suspension pieces
starting out back. We remove the stock sway bar
and unbolt the pan hard bar from the frame.
Next unbolt the shocks
and lower the rear end with a floor jack so you can remove the stock springs
finally from inside the trunk, unbolt the top shock nuts and let them drop.
Of course, we install the new springs first. But before we do check out the difference between this one and the stocker, we just removed, not only shorter for a better ride height but engineered for a much more progressive spring rate. In fact,
let's take this one over to the press and see how it behaves on the road.
The bigger diameter coils on bottom compress first. Then as the load increases the smaller diameter coils compress
bottom line is you get a stiffer sports car handling with a mild street car ride.
After we install our new shocks,
we can put the springs into place
and install the final piece of our rear suspension upgrade. A new sway bar.
Now, this one's a few millimeters thicker than the stock bar and comes with new end links and polyurethane bushings.
The stock 06 GT wheels don't look that bad, but since we're going for that total stage three look, we had to use a set of these Rouse chrome plated wheels wrapped in a set of 2 75 40 18 Cooper
Zion rubbers.
Of course, our upgrades up front involve a brake swap. And for that, we got something that's more than enough to haul down all that horse power we made last time, a set of
rush engineered four piston calipers
and check this a pair of two piece slotted rotors that measure 14 inches in diameter. Now, that's two inches bigger than stock
to remove the stock brakes. We first disconnect the line,
remove this hose bracket from the body,
remove the line locator from the strut
and on both the caliper and remove it.
Next, we can remove the rotor
and the dust shield. Well, that's it for the break disassembly. Now, while we've got the room and you've got a good view. Let's get started with the front suspension and just like the back, we're gonna start with the sway bar.
Then with the car lowered and supporting the lower control arm with the jack.
We need to remove the nut from the top of the strut.
Then after lowering the jack to unload the springs,
we unbolt the strut from the spindle and pull it and the spring out as an assembly,
these new springs from the kid are designed to lower the front of the car right at an inch. We'll install these along with these new struts that have been tuned by the guys at Ralph's performance for superb handling.
Finally, we install the new thicker front sway bar that comes with new urethane bushings.
Well, meanwhile, back at the brakes, we've got our shield and new rotors in place. And next comes this billet caliper bracket. Now notice how it relocates the mounting boats farther back to get plenty of clearance for those massive calipers. Now, boats up to the spindle using stock hardware.
Ok. Well, that cinched down,
we can move on to bolting up big red here.
Now you'll know you've got the orientation of this caliber correct
when the bleeder screws up on top and this crossover pipes down below.
Finally using the braided line from the kit, we complete the installation.
Well, that's it except for bleed the brakes and we'll show you how we handle that after the break. Plus we got a cool cosmetic makeover in store for this pony. So stay tuned
brake fluid. Don't get it on you. Hey, thank you. Why don't you see if your old dusty bones will let you get in that car
quicker than you any day? I bet.
Hey, welcome back to horsepower. If you just joined us, we're installing a Rouse stage three package on this 06 Mustang
out back. We installed shorter progressive rate springs,
new performance shocks
and a larger diameter sway bar
up front. Another sway bar swap
and a new set of springs and specifically Tne struts.
We also installed 14 inch two piece rotors
and four piston calipers
to bleed a set of newer A BS brakes. You want to make sure not to use a vacuum pump that can create air pockets between the A BS pump and the master cylinder. So we're going to do it the old fashioned way. Go ahead and pump it. Joe.
Of course, it's also important to bed in the new brakes and we'll show you how to handle that later. Right. Now, though, we're going to turn this plain Jane pony into a stage three stallion with this. Now, if you've ever seen a real rash on the road, you know what a body kit can do to a Mustang's attitude.
Now, we'll start with this front fascia that also includes new fog lamps and an air splitter.
First, we need to transfer the side marker lamps from the stock
fascia
along with the original grill that just snaps into place.
Next, install the grill inserts
and the two piece extractors.
We built up the fog lamp brackets
and the fog lights.
Then the facer can go back on the car
and then we can install the air splitter with eight bolts from the kit
and last but not least up front the chin spoiler. Another thing that sets the rouse pony apart is the hood scoop. But before we get to this, we have to remove the push pins that hold the under hood liner in place.
Then make marks with a center punch using the template
and drill seven holes from the top side,
attach the grill to the scoop.
Then using tape and hardware from the kit,
install the scoop to the hood.
Yeah, looking more like a stage three every minute.
Meanwhile, here's a place where that new Mustang design kind of comes up short. These back quarter windows are rather plain and just begging for a set of louvers.
Now we got this template in place for three brackets. Each one has tape backing and a little U nut. All we gotta do is remove the tape
press into place,
wait for about an hour.
Then after removing the template, use three supplied screws to attach the louver to the brackets, we had to take off that rear wheel again to remove the stock rocker panel. Now, before we put the new pieces on, we want to make sure to rub everything down with some rubbing alcohol.
After installing the tape NW clips from the kit,
we can install this rocker onto the car.
Now attach the push pins to the moldings
and after lining the moldings, remove the protective tape,
finally install fasteners through the rear and front body flans.
Although we replace the entire front facial, we're just going to modify the stock rear one with this three piece balance kit. Now the center section goes on first with four screws and you got it more tape. Now we can line up the side balances and mark some more holes for drilling.
Then we put the rear facia back on the car
and cut out two sections of it for the exhaust tips
and finally the tip.
Ok. The rear spoiler swaps last on our list and notice how we use pins to line up our template so we can mark and drill two more holes for the center spoiler.
Then with tape and foam applied to the bottom of the centerpiece, we can drop it into place,
remove the tape
and secure it with four nuts from the bottom side.
Then we drill four holes for each side spoiler
and we secure them with the rest of the hardware from the kit. And with that, we got the whole rush
attitude working from the front,
the sides
and out back. Well, now we know we got this Mustang looking and running like a stage three. The question is, will it break and handle like one? We'll find out later. Meanwhile, after the break, we're heading to the races. So don't you go away?
Hey, whenever there's smoke there's drag racing. And this week it's courtesy of the new and improved National street car Association.
A new revamped class structure made for wheel standing thrills and amazing fast qualifying times.
There's also a class for just about every kind of racer,
factory modified, fit the bill for the driver of this 57 Chevy with a blown small block.
That's true. Street class cars can't be back, half must be stock suspension,
stock frame rails. More of a total street car stuff that we drive on the streets.
Super Street is just another name now for 10 5 outlaw and the red hot class attracted the likes of David Hans and his beautiful mustang powered by a twin turbo small block.
It's not the guy with the most money
or the most power.
It's who can put the whole package together and stay consistent. You never know what's going to happen when two of these cars come to the starting line
in the headliner Pro Street class.
Lalo
guys seem to be laying down the big qualifying numbers like top qualifier, Tim
o'hare in his 69 Camaro
with a 526 inch big block here posting a 642 at 222 miles an hour.
We're probably talking about 24
2400
job done
out here.
Yes, it is. And at this time you have to though, when you run against people like
and the rest of
them,
they got to make it down every time they got to get out on me and they got to stay in front of me.
Nitro
Pontiac stayed ahead of most qualifiers here. He gets a 652 qualifying pass but pat the driver was also playing at the teacher this weekend
helping a racer all the way from the mid east to get his pro
mod license.
He's doing pretty good. I'm pretty happy with him.
I mean, he's got the burnout deal to.
These cars are not easy to drive, you know that.
Well, here goes the student final exam time and maybe he better stay after class ready for some hard core horsepower.
Hey, here's the first for you. They've combined outlaw and Pro Street into one class. But you're going to see last year's champions face off in the first round of eliminations.
That's going to be a race in itself.
Here they are John Stanley last year's outlaw street champ against the legend of pro street. Pat. Muy
does Pat have the edge. Of course, he does. He win 644 camp and John had a little problem yesterday, but they've both been six for
now. So to me it's a race but if I gave the edge, I'd give a little bit to Pat today. But first round's tough
and it's incredibly close, but Mui
pulls ahead with a 654 at 215
in Super Street Hands. And that pretty pony advanced to the finals. That's when he got a killer 21,000 s light but loses to Leo Barnaby. Ran a 724
with the crew and the, and the car I drove pretty consistent. The car ran within 1/10 of the whole weekend of eight runs. So you can't beat that. I mean, consistency is going to win in a drag race. Tim
o'hare was consistent at least up to the semifinals. That's when Steve King finally had his blown viper dialed in enough to take the win line.
Meanwhile, Mui
was showing his form setting up a nitrous versus blower shootout.
Ok. In the finals, pat takes the lead but spins his tires while King laid down his best pass of the weekend at 644. This was a struggle all weekend. We just throw the car together. The last two weeks, we were going to set the year out
to come up here and struggle with chassis problems for last Friday and Saturday. And we finally got together and made three consistent runs. Today.
There's that word consistent again
and again, it paves the way all the way to the wind line.
Hey, welcome back, time to take this GT turn stage three out for a test drive. And the first thing we're going to do is bed in the brakes and we'll show you the right way. Let's go
after you find a stretch of road with no traffic. Make a series of 10 stops from 60 to about 10 miles an hour.
Don't come to a complete stop during this procedure though,
that could imprint pad material onto the rotor and cause a vibration.
Then after the 10 stop series, you want to drive as much as possible without braking to cool them.
All right, now that we got them cooled off, I'm gonna try a little test using this G tech meter to check our 70 to 0 stopping distance. By the way, a stock Mustang GT does this in 100 and 70 ft.
Wow. According to the G tech, it only took about 100 and 42 ft
to test the new suspension. I'm gonna use the Sop method which stands for seat of the pants
man. This new suspension is awesome. This thing handles better than any stock GT I I've ever
well, mission accomplished. We made this thing run look break and handle like a Mustang twice its price.
Now it's time to head back to the shop for some hot parts.
That guy has all the fun. Well, since we are in a Mustang mode, here's a clutch kit for your pony that can be tailor made for its purpose. But Anza makes their clutch kits with disc with four different levels of performance from Carving Kar
like this for all out street use to steel for racing. Now, you not only get the disc and pressure plate, each kit comes with a throw out bearing, pilot bearing and a line tool. Now
also make some pretty cool aluminum fly wheels, lightweight, of course and CNC machine for a custom fit and finish don't have a Mustang. Well, they got them for a variety of other applications. With prices that vary. Here's an upgrade from hurst for your 83 to 01 Mustang. It's their billet plus performance shifter that comes with AC NC machine built aluminum base heat treated billet, steel gear selector with a high pivot
to give you those shorter throws. Now, it also has these gear stops so you don't do any damage to your transmission
and it comes with self centered lining that way, the shifts from second to third are always really smooth.
Well, how much to get one of these put on your Mustang? About 100 and 90 bucks. Well, finally, how would you like to browse a cool car bookstore without leaving home? Well, now you can write on our website, you'll find everything from the popular motor books workshops
series to, well, things like this handy Haines, text book for suspension and drive lines or for your coffee table. How about 40 years of Mustang? Now this thing's loaded with colorful photos and facts and well, all you got to do is log on to our website, Power Block, tv.com and click on bookstore. Well, we'll turn the page to another chapter of horsepower next week. See you then I know whose coffee table that's going on.
Yes, sir.