HorsePower Builds

Parts Used In This Episode

Accel
Accel Silver Tip Racing Spark Plugs.
Comp Cams
1.6 Ratio Ultra Pro Magnum Rocker Arm Set.
Comp Cams
Cam, Lifters, Valvetrain, Hydraulic Roller Tappet, Advertised Duration 286/286, Lift .598/.598, Ford 5.0L, Kit.
Comp Cams
Guide Plates.
Comp Cams
Hydraulic Roller Lifter, Retro Fit, Steel Spider, Ford, Small Block, Cleveland, Modified, Kit.
Comp Cams
Rocker Arm Studs.
Hedman Hedders
Long Tube Headers
Holley
4150 HP 600cfm Holley Carburetor
Hooker Headers
Hooker Competition Darkside Ceramic Coated Headers
Loctite
Anti-Seize Silver Stick
Loctite
Loctite PST Thread Sealant with PTFE
Moroso
Oil Pan, Steel, Clear Zinc, 8 qt., Ford, Small Block.
Moroso
Oil Pump Pickup.
MSD Ignition
8.5MM Super Conductor Wire Set
MSD Ignition
MSD Pro-Billet Distributor
Racing Head Service
200cc Hydraulic Roller Pro Action Cylinder Heads for SB Ford.
Summit Racing
Cast Aluminum Valve Covers
Summit Racing
Summit Rotating Assembly with Eagle Crank, .030 KB Pistons, Summit Racing I-Beam Rods, Clevite Main and Rod bearings, Fel-Pro Gasket Set, Sealed Power Rings, Melling High Volume Pump, Fel-Pro One piece Oil Pan Gasket.
Weiand
X-Celerator Intake Manifold
Gold Eagle Co.
STA-BIL Fogging oil
O'Reilly Auto Parts
O'Reilly 10W30 Motor Oil
O'Reilly Auto Parts
Pioneer timing cover
Video Transcript

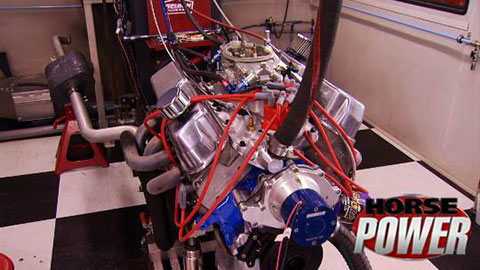
Today on horsepower, we're using the original block from this old Mustang for a unique engine project

for you. It's a way to build a low cost, beefed up 306 version

of Ford's famous small block. The 302,

ok.

It was the dawn of America's muscle car era.

Even before the momentous Mustang came along. Ford had production cars that needed a new performance small block.

The 289 was the answer for cars like the comet cyclone

horsepower rating. Well, only about 210,

but that quickly could be jacked up to 271 with a now rare K code Hypo version.

It was really more like 350

later in 68 shorter connecting rides, increased stroke

and built up the displacement to 302. Ford's longest running small block tradition

was off and roaring

throughout the eighties and half the nineties 302 s were popular, affordable hot rod platforms that were most amenable to performance build ups,

horsepower Scarlett Stallion project car was a prime example.

We discovered the ultimate build up of a 302 and we stroked 1 to 347 cubic inches

we squeeze 518 horsepower out of this little monster.

We got the idea for today's project after we pulled our 92 mustangs 302 out to make way for a twin turbo.

Of course, nobody says a budget build engine has to be ugly.

So after a thorough cleaning, our buddy, Tommy down in muscle car masked off the bare block

round away all the imperfections,

then went over with the sanding roll,

stepping up to a carbide fit for rougher areas.

The next three coats of primer to seal the bare metal

sanding with 320 grit paper to smooth out the texture.

And finally a couple coats of single stage or blue.

The only prep work besides paint and the oiling system upgrade was having the block washed new cam bearings installed and the cylinders overboard 30 thousands. Now, since there were so many of these Ford 30 twos made, they're still super easy to find and very inexpensive. Now, this motor made 225 horsepower in its day. But today we're shooting for about 400 horsepower with a parts list of three grand turn. Our 302 into a potent 306

for a beefy budget minded bottom end summit racing offers this rotating assembly value pack. Now, what you get is a brand new Casteel crank Summit racing forged I beam rods, Keith Black Hyper Eutectic flattop pistons, rings bearings, oil pump and all the gaskets, you need to complete the job

when removing the old caps, make sure to keep them in order. Now, Ford did a good job by including the number of the cap in the casting itself. Now, while these parts are budget minded, they're not cheap clevite bearings, for example, have been used in NASCAR engines since 1948.

Now, the crank comes from summit with a three inch stroke and it's externally balanced.

The main caps can go back on now with a few hammer taps from a brass hammer to seat them and make sure the arrows face towards the front of the motor,

add a couple of dabs of silicone to ensure oil doesn't seep past the rear main seal with oil on the bolt threads. Our torque specs are 70 ft pounds.

Now it's standard procedure to wash your new rods and solvent

and this is why the protective coating they put on the rods for storage and shipping can actually interfere with your tolerances and you don't want this stuff in your engine to begin with.

These are I beam rods that measured the stock length, which is 5090 inches. We send them out to the machine shop to have them press fit with a rod heater to our KB hyper

etic pistons with a flat top design and dual valve reliefs.

Now due to the expansion rate of these hyper eutectic,

the top ring of your ring set is gonna be a little larger than normal. So always refer to your manufacturers specs for the right size.

Ok. Don't be stingy with the motor oil and the rings and pistons and don't forget the piston skirts.

She gets some boots too and they're not the kind for walking. They're made to protect the cranks journals from getting nicks from the rod bolts when the piston gets put into place. And as far as the champ for goes, make sure that's towards the cranks journal

for the cam. The real brain of the small block. A comp hydraulic roller.

It's a single pattern design which means intake and exhaust duration and lift are the same in

this case, 2 35 98 respectively.

Next with a new double roller set in place. We're boating up a basic stock timing cover from o'reilly Park store.

We're using a high volume oil pump because more flow is always ideal if you're using a large capacity oil pan and you've done modifications to the block like we did. Now, some of you may be asking what about a high volume pump in a stock pan. Well, that's where some problems could arise. See the high volume pump will pump more oil to the top of the motor before it can return to the sump and that's where those problems will begin.

We're finishing up the oiling system with a one piece pan gasket and a seven core pan for moroso after the break we're gonna see what $3000 will give us at 6000 RPM. I know. I'll see you back here in a few minutes.

How long have those been soaking? Oh, at least three hours. Oh, they're good.

And we're back with more tricks for our 306 here. And

in case you're late, we just spent half of our $3000 budget on the bottom end,

the rest on that top end and

that includes a set of well soaked lifters.

All the valve train components came from comp cams, including these hydraulic rotor lifters and the lifter guides or dog bones as might cause them

the spiders next. And you might notice we remove the tubing from the top end of our oiling modifications.

After the spider installed,

the tubes can go back over it

again with budget friendly performance is our goal. We're going with cast iron aluminum heads from RHS cheaper than aluminum, but they do have high flowing 200 cc intake runners

valves that speck out at 2020 intake, 1 600 exhaust

and combustion chambers that spec out at 58 CCS.

That's gonna mean a compression ratio of about 10.2 to 1.

Now, we're coating these A RP bolts with lock tight ceiling because the holes are tapped into the water jackets.

Next, we can drop on the guide plates and rocker studs and torque them to 45 ft pounds.

Followed by harden push rods that measure 6.5 inches.

Now, the 38 stud mounted rockers,

they're full rollers with a ratio of 1.6.

Our intake is a wind accelerator, single plane with a power band from 15 to 7 grand

for valve covers. I'm repurposing this set that we used on a previous engine build and they came from Summit. Now, here's a little tip. I wanna share to you guys that tend to rip valve cover gaskets or have a hard time lining them back up, whether you're working in your driveway or at the track making valve adjustments or camshaft changes. Now, it's a little tip that I like to use. It saves time and money in gaskets in the long run.

The first step is to dab silicone around the rail of the valve cover,

then drop the gasket into place and smear a little oil around the gasket itself that way, it doesn't stick to the cylinder head on

off, on

off on

the headman and 58 long tubes with three inch collectors go on next.

Now, we're filling it up with six quarts of o'reilly motor oil

and we're running an MS D PRO billet dropping distributor,

a set of their 8.5 millimeter wires

and to feed our 306, we're using a Holly 600 CFM car and pumping it with 89 octane.

The reason I like this build so much is because it's so simple if you've got an old 302 that's starting to knock or smoke. Go ahead. Pull it out, bore it 30 over and keep the same stroke. That'll keep your machine cost down. Then you can throw in a nice rotating assembly, raise the compression and you'll have a nice little 306 thumper like this one. Now, as far as power goes, I'm not making any guesstimates. I'll leave that to you, but let's find out

good.

All right,

Mar

Pumps on

circulating.

Oh,

that sounds nice. Sounds good. Already

with the base timing, set

a

break in session

and the motor up to temp,

we're good to make a pull.

Not too bad.

383 horsepower, 375 ft pounds of torque.

Uh Power came in at 5500. So it's still climbing. Believe the power curve, it's just straight climbing all the way up and the torque picks up and I mean, fast. Look at the game there.

You wanna zing it to six.

Yes, sir. Let's do that. Everything looks good. Take it to six.

Just sit here and just pick up

right.

393 horsepower at 5900 370 ft pounds at 52.

That's 158. More than nice. All right.

I almost don't want to do anything but I know we can improve on it

two more degrees in time.

402 horsepower, 380 ft pounds of torque

and 5000 RPM.

Every

man, this is a high RPM little screamer

101 167 horsepower over

the old baseline

baseline on a stock 302 high out. Put in a mustang.

That's sad.

That's

enough for us. Look at the horsepower and torque lines. The horsepower looks like one continuous line, but it's actually three lane over each other. Now, the one on the torque that looks like it's a little off scale. That's what that timing change we made.

That's a consistent motor

and consistent with our 400 horse prediction. Plus we were right on target with our parts budget of three grand.

Well, no time to celebrate. We got more horsepower coming up,

build on a budget horsepower projects that save you time and money.

This may look like a strange assortment of items on the table and I promise I'm not gonna cook anything. But how many times you've been working in the garage or in the house, you've got a lot of small nuts and bolts or nails and screws. You get up on top of a ladder, move around a little bit and they fall off or you've got all your stuff on the inner flange of the fender and they just roll off onto the floor.

Well, here's something that's gonna take care of that. You can involve your kids. It'll be a little fun and the best part you can even raid your wife's cabinet for a little cooking pan like this. The other things you're gonna need are super glue a magnet which I pulled off of a stereo speaker

and some felt

start out by putting glue on one side of the magnet,

then lay the piece of felt over it. This will protect a magnet from damaging a painted surface.

Now cut the felt to the shape of the magnet

and glue the other side of it to stick to the pan.

Now, after we let the glue dry, we've got a nice little magnetic tray to hold all your new

bolts, nuts and fasteners. Now, the best part, it only costs about 450 to $5 to make. And when it's not in use, you can stick it on the side of your toolbox, on the side of a lift or on the side of a metal cabinet

making gaskets can be an easy task if you've got the right tools like this nice gasket punch set. But let's say you don't have one of these. You're working a late night in your garage or you're out on the road in your hot rod and you just don't have the room for this. Well, some of you guys might be saying, what about a razor blade and a set of scissors? Well, that could work out, but you're gonna have a nasty looking gasket and probably a bunch of frustration.

So here's the next best thing, it's super compact. It won't cost you a thing. And if you're into firearms, it'll be even easier for you.

If you're not pick up your phone book and find your local gun range or gun shop, you'll be able to pick these things up for nothing. Now, the ones we were looking for are common gasket hole sizes like a nine millimeter which is five sixteens, a 38 which is three eights, a 45 which is seven sixteens and a 50 cal which is a half inch.

I traced this gasket and marked the location of the holes out of this master. So let's see how our new bullet casing gasket punch really works.

Now, you got a nice clean looking gasket that you know, is gonna make the seal. Now, here's a few things you need to pay attention to the first one on the back of the casing, make sure that the primer has a mark in it from the hammer. That way, you know, it's been fired. And if you've got young kids at home, don't let them play with the casings. If they ever get a hold of a live round, they may not know the difference. Now,

here's the real kicker. If you've got a pregnant wife at home or a really young child, make sure you wash the casings and your hands before you handle either one of them because of the lead content. Now, some of you may be wondering, how am I gonna keep track of all these little small pieces? Well, the answer is simple. Just drop them into the 50 cow casing. You've got a nice little tool you can store just about anywhere.

I used to get a call from my wife on a regular basis saying she either locked her keys in her car or she simply can't find them. So I thought an easy fix was gonna be one of these magnetic key holders that go underneath the car. Well, the answer was wrong because these things will fly off if you hit a pothole hard enough. So the solution is over here.

Now, this little chore won't take you long at all. What you're gonna need to find is a conspicuous area underneath the car where you're not gonna drill into the floorboard or any gas or brake lines. Now, what you're gonna need are a drill,

a short bolt,

a wing nut,

a

lock washer

and the spare key

first drill your hole,

then put your bolt through the key,

tuck it up out of the way

and secure it with a lock washer and a wing nut.

Now that only took about five minutes and it was a lot cheaper than going out and buying a key holder. Plus, you know that spare key is always gonna be there and you're gonna get the last laugh because when your wife comes home with a dirty shoulder, you'll know exactly what she's been doing.

Hopefully we'll be right back.

You're watching Horsepower for a DVD copy of this episode. Just go to Power Block tv.com and order your copy for just 595 plus shipping and handling. Start your own horsepower collection delivered right to your door from the power block.

Now it's time for a few hot parts and here's the first one, it's stable fog and oil and it's made to protect your engine when you store it and also loops up the cylinders for a nice easy start up. Now, when we get done with an engine on the dyno and start a new project, we throw them on an engine stand, put a bag over them and storm in our warehouse now, just because they're inside doesn't mean they're not prone to humidity and moisture

and that can rust up the cylinders and the rings.

So if you've got an engine, you're getting ready to store or a weekend road warrior, you're gonna put up for the winter. You might wanna pay attention to this. Here's how it works

with the engine running. Start spraying it down the carburetor until the motor chokes out and dies,

then pull out all the plugs, spray some in each cylinder,

put the plugs back in

and you're ready to store your engine or start it whenever you want.

Swapping plugs in your daily driver is a no brainer as most of you know, you wanna do the work when the engine's cold,

you wanna get them tight but

not too tight.

And if you're screwing them into an aluminum block,

be sure to put some anti

sees on the threads of the plug.

Oh, finally, here's another performance upgrade idea. If you step up to a performance plug, like these silver tips from Excel, you'll get more performance for your pennies. Why? Silver? Well, it's the best thermal, electrical conductor of all metals. And, well, if you add to that better insulation and a faster burn rate, you're gonna have a plug upgrade that you can feel. When you mash the pedals.

Here's an upgrade you'll like when you feel and see it. It's a set of Hookers, new dark side ceramic coated headers. Now, they're made from 16 gauge steel with a 5, 16 inch flange. Now, this set here is for a big block Chevrolet.

It's got two inch primaries that blow down into a 3.5 inch color.

Now, the people at hooker tell us they have an improved thermal resistance up to 1700 degrees. That means less heat migration through the headers and lower under hood temps the price. 450 bucks. Well, it's time for us to turn off the lights and get on out here. We'll see you next time.
Show Full Transcript