HorsePower Builds

Parts Used In This Episode

Roush Performance
18-Inch Chrome Cast Wheels
Roush Performance
2010 Roush Ford Mustang Supercharger Kit
Roush Performance
275/40R18 Cooper Zeon 2XS Tires
Roush Performance
Complete Ford Mustang Suspension Kit
Roush Performance
Ford Mustang High Performance Front Brake Kit
Roush Performance
Ford Mustang Off-Road Exhaust System
Roush Performance
Ford Mustang Short Throw Shifter
Roush Performance
Ford Mustang Wheel Hop Reduction Kit
Roush Performance
Rear Slotted Brake Rotor Kit
Roush Performance
Retro Ford Mustang Shifter Knob

Video Transcript

First, it was a late model Camaro we supercharged for big horse power, got a powerful Camaro.

Thank

you. I appreciate it.

Then a new Dodge Challenger. They got a turbo kit. Gentlemen, that's some horsepower. And to

I tell you, I think we're there. The horsepower wars are on again and it's the seventies all over again.

On today's horsepower. It's Ford's turn for some new modern muscles.

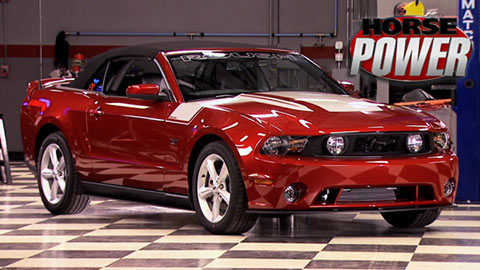
It looks like a Ralph Mustang but it doesn't perform like one yet. That is,

you see, it's actually a stock 2010 GT work in progress.

The look comes from the race inspired convertible stripe kit and the body kit you can add to any stock pony from the front fascia

to the rear spoiler,

the rear balance,

front splitter

and side splitters are an unpainted grain texture that matches the stock rocker panels and will resist chips from rocks.

It's got a slew of inside add ons too

padded light bar,

signature seats,

gauge cluster,

even rouse pedals and door sills

to complete the transformation feature.

Eye on this. A black chrome powder coated Rouse charger originally designed for limited edition cars now available in kits for 05, 2010 models. Now, you can still get the standard black version, of course, but either way with the inter cooler heat exchanger and all the other components,

it's, you'll be given your 4.6 L Mustang motor 435 horsepower, 400 ft pounds of torque

to compliment that. We got a complete rouse suspension kit

with the same good stuff they use in the 427 R. Now, the idea is to give you superior handling without giving up ride quality. Well, there's even more involved in this stock to rouse redo but time to quit talking and start working

before the kit goes on. A few things have to come off like the front fascia

and the upper air box tube and lid.

After draining the coolant, the throttle body comes off

but make sure to keep the gasket,

we disconnect the fuel line and remove the stark fuel rail assembly.

Then the manifold

and the alternator

plus this heater tube assembly, which has to be modified

by first removing the water restrictor,

then by separating the metal tubes,

we also have to modify the air box by removing the harness

and then cutting off the end of this clip for some clearance. Later

back under the hood, we can reconnect all the heater hoses

and now began putting on some new parts starting with this new heavy duty belt tensioner

and the intake manifold with air to water inner cooler

when the supercharger gets installed, it relocates the throttle body and a couple other sensors. So what we're gonna do is peel back a couple of the wires in the main engine harness, but don't get turned off by it. There's no cutting or splicing. Everything remains plug and play

while removing the loom. Be careful not to cut through your finger or any of the wires shielding.

The point of this is to relocate a sensor.

Now connect the in and out intercooler water hoses to the back of the manifold.

And after connecting a vacuum line for the boost gauge and fuel pressure regulator,

we can install the new fuel rails loaded with

rush's 38 pound high flow injectors

with the harness position, we can reinstall the thermostat and water

neck.

Now we can drop in the centerpiece of this kit, the M 90 root style supercharger unit with that cool chrome finish.

Next, we're using the factory gasket. It's time to bolt up the stock throttle body.

A new alternative bracket goes on,

followed by the two new idler pulleys.

Then after removing the ears from the alternator for clearance, we can install it in the new position,

then route the new serpentine belt.

The heat exchanger installs in the usual spot in front of the radiator,

but Rausch

has relocated the pump position in front of it on a bracket for a quick install.

Then one hose connects the pump to the heat exchanger

and another connects the pump to the de gas bottle that mounts to the radiators shroud.

Now we reconnect the radiator hose to the water neck to complete the plumbing.

After bolting the air box back in place, we can install the new air tube assembly

connected to the throttle body and make all the connections.

Well, here's the last step in our installation, which for you ought to be the first you see, you have to send your stock PC M to rush,

they'll calibrate it

and overnight it back to you by the time you're ready to install it,

the install went super smooth now for you novice mechanics. This will take you about a weekend in your driveway. Now, in the five speed version, this thing actually puts out less emissions than a bone stock GT as far as fuel consumption goes. That depends how much you can keep your foot out of the pedal. Joe, you clear.

Oh, yeah. I can't wait to get this thing on the dyno,

but not yet. You see we got more in store for this supercharged Mustang.

After the break. You don't need to go anywhere, not to the kitchen, not to the bathroom.

Come on, you can hold it

be a man

today. Horsepower is transforming this 2010 GT into a rouse performance car.

We just installed one of their water to air super chargers with its chrome root style blower.

It's an upgrade that should up the horse power 100 35 over stock

to complete the conversion. Though, we're also gonna make it breathe, handle and break like a real

rush car.

That means first removing the front brake caliper,

then removing the rotor,

the dust plate

and sway bar in link,

then we can unbolt the strut from the tower

before we pull the strut out. Here's a little safety tip. I wanna show you that may end up saving you a finger in the long run.

This tab is captured on the nut to aid in tightening and loosening the bolt. Now, a lot of people will put their finger there, hit it with the impact and this is what happens.

Remember,

you've been warned.

Now, we can lower the floor jack to remove the strut in spring.

After that, the stock sway bar can go.

The new suspension we're putting on has a one G skid pad rating.

And here's one reason why

the stock sway bar looks almost as thick as the rouse. But the big difference is the fact that

stock sway bars are hollow.

This thing is

heavy solid and 45% stronger

struts are also a more heavy duty construction with springs that are thicker, more tightly wound and designed to lower the car about one inch.

The new sway bar goes up in place first,

then the strut and spring assembly

and the dust shield

then separate the caliber brake line from the factory hard line

and be sure to cap the hard line.

Next, the kits caliber bracket goes on,

followed by the new 14 inch slotted rotor.

Now we can install the new four piston front caliber

finally connect the new line to the stock hard line to finish the front setup.

Now it's time to get started on the rear suspension to match all the cool components we put up front. Now, this is

Rush's anti wheel hop kit, which is also known as a rear upper trailing arm. It's designed to help eliminate wheel hop during hard acceleration when planting the tire to the ground is an issue. Now, along with that goes, their springs and rear shocks which are

specifically designed for this whole suspension kit.

It comes with the rear sway bar and the rear brakes. We're not upgrading in size, but we are gonna go ahead and step up to a slotted rotor to help improve the rear braking. And along with it comes a stock caliper painted red to match the front. Now to get started, we need to remove some rear bracing from the car.

Then we can remove the stock rear sway bar

and unbolt the shocks.

Next, we need to lower the rear end a few inches so we can remove the springs

for the trailing arm swap. We have to lower the fuel tank to create a little clearance.

Then after securing the rear end,

we can remove all the trailing arm bolts, but one

in order to access it, we have to remove the back seat bottom.

Then the stock piece can come out

and we can bolt the new one in place

while we're down here. It's a good time to replace the stock bump stops with the stiffer new ones from our kit.

Next, we can free up the shocks for removal

and bolt up the new ones.

Then with the car back up and rear supported new springs go in

shocks get bolted up

and the trailing arms are attached to the rear end.

Final step in our rear suspension upgrade is this new stiffer rear sway bar.

Then it on with the new slotted voters

and the red calipers.

Ok.

Now we can bleed the brakes before our next upgrade, which is a high performance exhaust system that first boats up to the factory mid pipe

followed by a tail pipe and a polished intent plus rouse claims more horsepower and fuel economy and the sound. Well, anytime you go from this

to this,

you don't need Eagle Eye to see that baffling material is not gonna hold back much of the roar.

Well, that sounds, speaks for itself. After a couple more months, we'll be ready to make more noise on the

dyno

coming right up.

Horsepower is turning a stock GT pony into a rouse road piece today with the root style super charger for power,

high performance suspension for road race handling

and new beefier brakes. For superior stopping.

No stopping us though. Till we make the complete transformation.

A true performance shifter behind all those upgrades is something you're gonna notice every time you get in the car.

Now, while the stalker here is pretty good,

there's always room for improvement. When it comes to quicker, more positive shifts

with the knob removed, we have to loosen the console to disconnect three electrical connectors.

Then we need to free up this harness retainer

and remove the foam insulating pad.

Finally, the shifter gromit comes out

underneath the disconnected shifter comes out a lot easier. If you also on both the drive shaft,

here's a good way to see up close. The advantages of short throw shifter. First, the stock shifter has a pivot point that's pretty low.

There's only a short amount of rod on bottom requiring more distance on top to shift gears. Now, with the rouse piece

much higher pivot point,

much more material down below and only a short distance needed to bang those gears.

We need to transfer two nylon bushings from the stock shifter to the new one

along with two rubber insulators.

Then the new shifter can go back in place from under the car.

And after installing a new taller boot, we can bolt up this new retro style shifter handle,

then put the console back in place

and reinstall the knob

for the finishing touches today, four new 18 inch chrome plated cast aluminum wheels wrapped in Cooper

Zion rubber.

There it goes.

Well, that's it for the R

to make over. Now at last, we can see what we got from our horsepower upgrades that new Ralph

Charger and the high performance exhaust system.

While 2010 stock GTs make about 315 horses at the fly wheel that translates to about 272 at the rear wheels.

We'll consider that our baseline

while all of our runs were really consistent within a horsepower of each other. We ended up making 378 which is 100 and six horsepower gain at the rear tires.

So in terms of power, our stock GT to a

conversion is a success.

Hey, but what about the handling and braking? Well, for that, the only proof is out on the pavement. So we'll be right back. Let's get this thing unhooked. All right,

you're watching Horsepower for a DVD copy of this episode. Just go to power block tv.com and order your copy for just 595 plus shipping and handling. Start your own horsepower collection delivered right to your door from the power block.

We're back and we know how much power this

Rusch Mustang makes on the

dyno.

But what about how it handles

for that? We turn to our good pals in the Franklin Police Department.

Their Ibok training course is the perfect spot to run it through its paces.

We may have the right to remain silent,

but I was there to disturb the peace.

Yeah.

First stop, the slalom course.

We had the cone set up pretty close and passed through them at 45 miles an hour.

The steering response, lack of body roll and spot on shock valving made it an easy chore for the stage three.

I've driven a lot of mustangs in my day and I'll tell you what this is night and day from a stock GT.

The engineers at

Rush really did a good job on this car. Hell, I've even been in some race cars. I haven't handled this good.

I didn't want to hog all the action. So we let the instructors take a shot at it when we're training our officers on our evo course. Uh, we're using these crown vics out here and they don't handle nowhere near as good as this car does.

There's no, no problems at all. The braking is there? The steering is there? Uh, hardly any body roll? Uh, great car, great car.

It's all about the driver. The car can do it if the driver and operator can do it.

It's such a flat performing vehicle as far as suspension goes. The engine supercharger kicks in.

Uh, it's just a, a well performing vehicle I would enjoy if they rush could make a police package for my crown vic. So,

if you could do that for me, that'd be great. I appreciate that.

All right. Right. Now we're gonna do a 60 to 0 break.

See how to get this thing stopped.

Not too shabby.

A stock GT has a stopping distance of 100 and 7 ft.

Let's see what we got.

98 ft and four inches, about 10 ft shorter.

All right, you can run the cones all day long, do as many brake tests as you want.

But the real test is out on the course.

I've got a cop car chasing me from behind. So we're gonna see how good this Mustang will run away from them.

The overall stability of the car is just

amazing.

No body roll. You put it on the path you want and it's staying there

in a car this comfortable. It's hard to believe it can carve the corner so well,

it can definitely outrun the police cruiser. But like the old saying goes, you can't outrun the radio.

Absolutely. No break, ba

and I am putting these things through some heat right now.

Delay, delay and then throttle starts to pick back up, track control is off. So that's not a factor.

And the leg

all

it was about 100 yards in front of me. He started out almost on my rear bumper

and, uh, we are moving in on him quick.

That's five laps. We're caught up to them already. That is pretty impressive.

The end.

Oh, that's fun. That is fun.

Running from a cop with his lights on.

Don't try that at home,

man. That was awesome. I can't. Thank you enough. Thanks, Mike. Thanks for inviting Franklin.

We had a blast, man. You did a good job. It

was amazing. You guys did a good job driving now, since you couldn't catch me. I guess I got to see how tight the back, check

it

out for me if you don't mind. Be a lot of fun there. All right. Not too bad. Not too bad.

I

was,

hey,

let's get it

insurance.

You

can't trust anybody these days.
Show Full Transcript