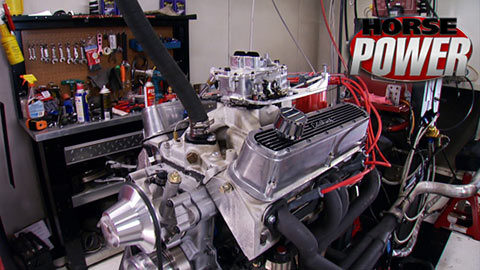
HorsePower Builds

Parts Used In This Episode

Dupli-Color
Low Gloss Black Engine Enamel
Lakewood Industries
Rear Adjustable Toe Links for 2010-2011 Camaro
Lakewood Industries
Rear Lower Trailing Arms for 2010-2011 Camaro
Lakewood Industries
Strut Tower Brace for 2010-2011 Camaro
Lakewood Industries
Sub-Frame Connectors for 2010-2011 Camaro
MSD Ignition
8.5mm Super Conductor Spark Plug Wire Set
MSD Ignition
Pro-Billet Distributor
Summit Racing
King HP-Series Cam Bearings
Summit Racing
King HP-Series Rod Bearings
Summit Racing
King SI-Series Main Bearings
Summit Racing
Sealed Power Gasket Set
Summit Racing
Summit Racing 750cfm Street & Strip Carburetor

Video Transcript

This could be the start of horsepower's ultimate budget engine build. The challenge find a high performance, used 360 Mopar

small block, tear it down and build it up with a minimum of new parts all on a budget of 1500 bucks.

Since scouring junkyards and swap meets can eat up a lot of time. We started our search online

where you could find a used engine modified with quality aftermarket parts, like heads ignition and so forth.

You've at least spent your money. Well,

we found this 360 with a lot of performance parts on it for 475 bucks.

For example,

the previous owner had upgraded to Miros oil pan that still looks good.

Now, the water coming out of the block looks normal, which is a good sign.

The wires had been replaced, but they're now too brittle for reuse.

And the distributor was pretty corroded on the inside.

The Edelbrock valve covers our keepers

and so are the aftermarket roller rockers and original rocker shafts.

Even though they show signs of an engine that sat outside for a long time.

We're not sure about these rusty springs. Hopefully, we can save them with the clean up.

Our 360 had been modified with an Edelbrock performer air gap intake that will go back into action

with the intake off. We can see more evidence of condensation.

Those lifter walls would normally be covered with oil instead of rust,

we'll find some use for this power master alternator down the road.

Meanwhile, these aluminum heads will be good to go after a cleanup.

Next, I wanna mike one of the cylinders to find out how many times this motor's been machined. In the past,

they measure out at 20 over.

The lifters were also upgraded at one time and are definitely reusable.

It also has an electric water pump that cost a couple 100 bucks new,

but we won't know if it's good until we put some power to it.

And what's this? Your guess is good as mine

seeing this much water in the oil pad might make you nervous about a possible cracked block. Unbelievable.

But since we saw no signs of a cracked cylinder,

we'll just point the gun at more condensation

and believe it or not,

this gunk from the oil pan is just more evidence of that.

But here's a very decent discovery, a perfectly reusable double roller timing set

and the still good roller cam will stuff back in during the rebuild.

Looks like we've got a pick up that matches the oil pan and the high volume pump that shows no sign of damage

the main caps will be fitted with new bearings.

So now let's see what the pistons look like.

They've also been replaced recently, but the rods are original, so we'll set them both aside and just replace bearings.

Finally, the crank shaft, which so far looks like a keeper as well.

Well, no doubt we lucked up our junkyard three sixty's got plenty of high performance parts ready for new life that is after a clean up of them. The block and replacement of customary things like gaskets, bearings and so forth.

Anyway, we're on our way to reaching our goal of building a potent Mopar

small block on a total budget of $1500

horsepower Junkyard 360 project is well underway. Now it's time to give this small

park a block a good hot bath.

Chances are you don't have a Sonic cleaner in your garage, but for about 20 bucks, you can take yours to a machine shop for a hot tank job.

Now, as far as other machining goes, this time, we're gonna have to pass. However, we check the cylinder walls to make sure they still have their cross hatches and don't have any scratches.

The lifter boards are smooth and unblemished

and the old bearing showed no signs of abuse either.

So, because of that and our rock bottom budget this time we're moving on

while the block's bathing, we can finish cleaning up these aluminum heads. Now, the Sonic cleaner took care of the rust on the springs, but we still have some gasket material left to remove

and we need to clean up the surface around the combustion chambers.

After 2 15 minute cycles, the blocks ready to come out of the Sonic cleaner.

While the grease and grime is gone, there's still stubborn old paint on the block.

So here's where we need a coat of duple color stripper. A

good old pressure washer

and a partner willing to do the work

with the block. Totally clean and bare. A little compressed air helps to speed up the drying process.

Now there's a race against rust. So no time to waste masking off the head mating services and all the openings.

Then a couple of coats of dup color engine enamel which dries quickly

before we can start filling it with parts. We need to chase all the bolthole threads to get rid of any debris. This is vital to getting the proper torque values,

then go into the cylinders with a scotch pad to clean up the walls.

Now, we can wipe them down with Acetone before coating them with oil to prevent any new rust.

Even on the barest of budgets, new bearings are a must for the bottom end. Even for the camshaft, you need a special tool for this with different size heads first to punch the old ones out.

You have to knock out the freeze plug, of course, to get rid of the rear

here's some close up proof of why a bearing replacement was imperative with this deal.

There's not only scarring inside this bearing but a joint where it was put together and that creates a rough edge which could nick a journal and they're all that way.

Our replacements from summit are one piece which totally eliminates that problem.

The cam bearings are different sizes, see how it goes to the first and the second journal, but stops at the third, we know it's the right one. Now, this black line I drew is perfectly opposite with the oiling hole that lines up with the hole in the block. Now, once we drive it into place,

we'll know it's in the exact location.

We also got a new main seal

and new bearings for the mains to get covered with plenty of assembly loop.

Now, the crank shaft can go back home in the block.

We discovered it's got a 358 inch stroke

next, the main caps with new boats

and that's the way an installed crank should feel like

we're still going to mount the magnetic base and dial indicator to check the crank thrust.

It should be between two and seven thousands and not to exceed 10. Now, we're at five which is near perfect.

We opted to use the pistons again and even the rings, the rods, however, get brand new bearings before we install the assemblies into the block.

Now, we discovered the second hand solid roller can came from comp and they told us it's got a duration of 230 on the intake, 236 on the exhaust at 50 thousands. Now, the lift comes in on the intake at 5 53 5 65 on the exhaust which makes it a pretty stout street cam. As we mentioned earlier, the oil pickup and pump are good to use again

along with the old pan, which looks a little better after a clean up.

Remember those nasty old lifters?

Well, the Sonic Cleaner made a big difference. They've soaked in oil since then. And after installing them back in the block, we're ready to soak them and the cam with more oil,

we're lucky. One of the previous owners stepped up to these performer rpo heads

inside those 63 CC combustion chambers are valves that measure 202 intake, 160 exhaust

new

fro head gaskets. Of course.

And those 1 71 CC intake runners should help in the power department.

Of course, another plus is having this RPM air gap manifold to work with our heads

and we're even giving it new bolts

to finish the valve train. We just drop the push rods back in place,

reinstall the rocker arms and shafts and lash them down.

Now we're ready for the valve covers and we can't go wrong. They're old classic kettle rocks.

Well, she's not the prettiest engine we've built in this shop, but today's drill is all about budget

and about horsepower and the

dyno

and that's where we're gonna be next.

Our challenge was simple. First find the used cheap but complete Mopar 360 engine

which we then tore down here in the shop.

By the way, we were bound and determined not to spend more than 1500 bucks

including the 475 we spent for the small block

after cleaning the block and giving it a fresh coat of paint. We're ready to reinstall the performance parts that are still in good condition.

We are using new bearings for the cam,

the mains and the stock connecting rods.

Now nearly buttoned up. It's getting swapped to the dyno cart for a quick ride to the dyno Cell

only after we finish it up, fire it up and run it.

Will we know if we succeeded or if we spent money on a dud?

I know.

So now, you know where we stand so far with this budget Mopar

project? But

do you know where the name

Mopar came from?

Well, I gotta admit neither did we till we looked it up.

It seems that back in the thirties, a think tank for Chrysler was charged with coming up with a catchy word for their new aftermarket motor and parts division.

Some genius decided to put those two words together motor and parts and

you got it.

Here's something we noticed when we were getting the balancer ready to reinstall this TCI piece is neutral balance for an internally balanced engine.

The only problem with that is these L A 360 are externally balanced and you can see that with the counterweight built into this one. Now, I can only imagine how bad this motor danced around.

That's probably a good reason why it was laid to rest.

Now, I'm priming it and turning the motor over at the same time. So the holes in the cam line up with the holes in the block to come up through the heads and oil the rocker shafts.

If you don't turn it over and the holes aren't lined up, top of the motor won't get primed.

As we mentioned earlier, the old distributor had to go. So we invested in an MS D Pro billet which will plug right up to the Dino's ignition.

We also shelled out for a set of their plug wires. This is how we're gonna feed our 360. It's one of summit racing street strip cars we've used before. This is a 750 version

with mechanical secondaries. Now, this is the most expensive extra part we had in our budget, but

it only cost about 340 bucks. So we're still in good shape.

It's not a budget build unless it runs on pump gas.

Oh,

let me see.

Let me see

it.

Hold still.

We had a little delay in this engine build and that kind of explains why I'm wearing these sunglasses. I was grinding on one of the head of the bolts on that thing and got a metal shard in between my safety glasses and it stuck in my cornea.

Now it hurt like hell and took about two hours in the emergency room for him to get it out. Now, needless to say I was pretty lucky that I didn't lose an eye. Now, something else that's pretty cool is they use the same tools that we use in here. A metal, be

a pick and even a Q tip to get the thing out. Now, what I'm really trying to stress is make sure you're using the proper safety glasses for the kind of work you're doing.

I'm gonna get a set that covers the top and bottom of the ice so I don't lose one next time.

I'm sure it's been a while since these parts all dashed together.

Sounds like someone is out of step.

They

need to have one bow off.

I do. Yeah.

Looks like I got in a hurry when I set this one.

Let's try it again.

Good oil pressure, stable water, temp,

air fuels are good.

Well, she comes up quick,

nice power curve, nice torque curve. What do you think the numbers are?

Wow.

Pretty good.

419 horsepower, 438 ft pounds of torque. Can you imagine

what this thing would sound like with that old balance throw?

Just idling?

Well, just imagine looking into it,

it would be dancing all around on that car exhaust would be shaken.

We'd have, we'd have thrown a bearing out of this thing by now.

Yeah, it could have been

interesting.

Oh, man. Yeah, it would have been nasty.

Let's add another two degrees.

You know. Secondaries come in.

Wow. 4 44 66.

That's a really cool torque curve. I mean, I don't, I don't think I've seen one that

just perfectly flat,

super smooth too.

You wanna see where we max out on our timing?

Yeah,

he

might take another degree. Don't you think

it's still going?

We bumped it up to about 35.5. Ok.

Same RPM range. See what she got.

4 42 4 67.

I'd say with that little of the game we're, we're about maxed out if we put any more in it, we're gonna start going backwards for what we got here. That's very respectable.

Not only did we had good power numbers. We also hit our numbers budget wise. 475 bucks for the used engine. About 930 for new parts. So it a little over 1400 were well under that $1500 limit. Of course, it's uh, a gamble. Anytime you get a used engine, you never know if the block's got a crack in it or what shape the valve trains in. But, hey,

this time we gambled and won and

anybody with one. I could see that

nice.

You're watching Horsepower for a DVD copy of this episode. Just go to Power Block tv.com and order your copy for just 595 plus shipping and handling. Start your own horsepower collection delivered right to your door from the power block.

You've heard it before. The only horse power that counts is the horse power you can plant in the ground.

The 2010 Camaro comes from the factory with impressive power,

but they've got an inherent tendency to wheel hop.

Wait a minute. Let's see that a little closer

wheel hop is caused by loading and unloading the factory rubber pushings and stamp steel used in both the rear tow links and trailing arms. It not only makes for a lousy lunch.

It kind of makes you look stupid at the script.

We've got some new suspension upgrades that'll heal the hopping problem

and improve the overall handling characteristics of the car.

First though, we need to remove the oe trailing arms that are attached to the rear cradle while

we're at it, we'll also remove the factory tow links that are attached the same way.

All right. Now, time for the old side by side comparison, these Lakewood lower control arms are made of heavy gauge tubular steel to eliminate the flex you get from the stamp steel pieces. Also they have polyurethane bushings for stability.

Now the Lakewood tow links are a bastard

prove it over stock a

lot stronger, fully adjustable and they too have the polyurethane bushings. Both pieces are power coated for good looks.

Make sure to support the suspension at ride height to install the new trailing arms and tow links and you reuse the factory hardware.

We've also got something to stiffen up the unibody chassis. Lakewood just came out with tubular Subra connectors for the Camaro that use threaded tabs to join the rear Subra to the front.

And each one uses a brace that attaches from the connector to the differential crater

to finish firming up the Camaro. We're installing one of Lakewood's powder coated steel truck tower braces. This will help reduce flex during hard pouring.

If this Camaro looks familiar, you probably saw it on the power block recently as one of the cars, some lucky winner can choose from in the MMX sweepstakes.

The other choices are a new Mustang GT and Dodge Challenger S RT.

If the winner chooses this Camaro, well, they'll be getting one with better handling, less flex and now

with no wheel hop.

Yeah.

And to the winner.

Sorry about those tires.
Show Full Transcript