More '70 Chevy Nova "Old Blue Hair" Episodes
More Project Blue Hair Episodes
MuscleCar Builds
Want more content like this?
Join the PowerNation Email NewsletterParts Used In This Episode
Chevrolet Performance
Crate motor for Nova.
Detroit Speed & Engineering
Control arms
Holley
Hooker header flanges and tubing.
Master Power Brakes
Disc brake conversion kit.
Rockland Standard Gear (RSG)
T56 six-speed transmission.
Video Transcript
Coming up on muscle car. Old blue hair grows some teeth. Our sleeper Nova gets the LS motor and headers and disc brakes later. We'll see what one collector calls the ultimate factory muscle car.
This is why we call it muscle car. Look at all the cool stuff I get to play with.
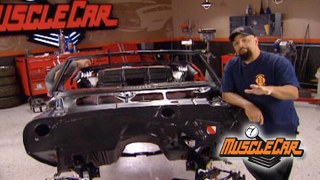
Now, I know most of you guys like myself have a really hard time finishing one project before you start another and that's ok. But today we're gonna finish stuffing this LS two into this 70 Nova that I'm affectionately calling. Oh Blue Hair.
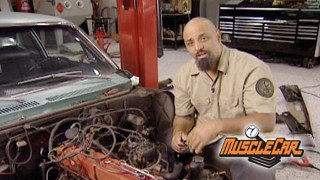
We found this car literally right around the corner and boy, what a score. This Nova was a one owner car that was driven 17 miles a week to the grocery store, the beauty shop and I'm not really sure what she did on Sunday.
Yeah, a little old lady. Hence the name old blue hair. Now you rest, those guys will be happy to know that I'm saying.
Leaving the parts on this thing just in case we wanna put it back to stock project. Blue Hair is gonna start its new life as a sleeper. It's gonna look exactly like it was when we found it, it's gonna have the same paint, it's gonna have the same stint. It's even gonna have hubcaps but something different. This LS Two were slamming in it.
Now, we just got level and we started the engine mounts
and I had to cut a small piece of the floor out.
Why? Because I've got to make room for this massive six piece so I can get this baby going down the road. I don't think granny would have liked it too much. Next thing I'm gonna do being that, I've got the transmission and engine where I want it.
I'm gonna put some bracing in so I can get it up in the air and build a cross member
that tranny is much longer than the original. So I'm cutting up this junkyard piece in the three sections.
That way I can take advantage of my original mounting point. Then all I have to do is connect the dots.
Ha
ha
ha
ha.
Now I was tempted to show off and fab went out of some stock, but this is much easier to do
time to yank out the engine so as I can finish up the engine mouse
and now I'm gonna address this 36 year old suspension.
I'm gonna use these 120 wall dom tubular up in the lower control arms from Detroit speed and engineering.
The thing that's really cool about this is that stainless steel cross shaft because they actually use slugs so you can really dial in your suspension. So, if you want to change it around and get that maximum road race ability, you can get it.
And the thing that's cool about these lower control arms is these Delran bushings and inside they've got transfer slots. So all the grease gets throughout the whole surface of the bushing
really high tech stuff.
That's some nice stuff. The brakes is next.
Now, we've been accused of using only high dollar brake kits. Well, that's all about the change. Check this out for $850. You can go to master power brakes and get this complete disc brake conversion. You get the spindles, you get the calipers, you get the brackets, you get the rotors, you get the dust shield, you get all the related hardware, you even get a brake booster and a master cylinder. Now that's a complete kit.
Every part is stopped, either new or rebuilt. Only the spindles are modified slightly to accept the larger caliber bracket.
We're reusing our tie rod ends because they're still good.
Remember
no one ships their bearings pack.
That part's up to you.
Keep in mind this is a budget disc brake conversion. So these rotors, they're not drilled and slotted, they're not 14 inch, but they're more than enough for our Sleeper project.
So far, everything's going together real nice. Nobody likes surprises.
Just when you think it can't get any better. It does they give you a proportioning valve, the bracket to mount it. They even give you the fitting for the back of the intake manifold and a hose. But I'm gonna hold off on installing all of that because I wanna make sure when I put the engine back in, I'm not reaching over everything to get the headers on and I got plenty of room, but you're gonna see that later on in the show
next on muscle car, big engine in a small car, but lou is gonna make it all fit.
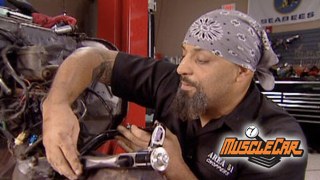
Welcome back to the shop. I've got my brakes in place, my suspension on. We've even got the LS two motor stabbed in the place where it belongs. Now, there's a few header companies that make headers for this application but being that I got impatient and made my own engine mounts, I have encountered a small problem.
My headers don't fit.
That's ok.
I've got a solution
and here it is a lot of your header companies will sell you just the
s so you can build your own headers. We got ours from hooker and they like to use 38 mile steel and it gives you a nice ceiling surface and prevents warpage. But this is only the start.
Now. They sell weld up kits, but I prefer to get all my own stuff. But when you do that, you gotta make sure that you order everything you need like collectors reducers. If you're gonna run 02 sensors. You gotta have it.
I prefer these J bends because you've got the 180 degree bend. So whatever angle you need, all you gotta do is cut it.
I'm gonna start by putting a quarter inch washer between the flange and the block.
And the reason why you do that is you want the head of two
fit flush against the block.
I'm starting in the rear, hugging the engine as much as possible.
Remember, no matter what tool you use, the square of the cut, the easier to work with.
Now underneath, I like to take a piece of tube and so I can get a visual on where everything's gonna go
and then I'll tag the collector in place. So I know where each tube needs to fall.
It's a simple matter of visualizing where you want the tubes to go
and then how to get them there.
I'm using these alignment rings. The thing that's really neat about them
is that they provide nice smooth flow on the inside. This way, if you have a gap, you don't have a bunch of wire in there
and
they'll hold your tubing up. I'm just tacking everything in place for now because we might have to make some changes.
I hope not,
but I might,
you're probably wondering why I've got these tubes going all over the place. There's a few good reasons you wanna be able to access your spark plugs you wanna be able to clear your steering box and most of all you wanna try and get it where you can get these headers out of the car without having to take the engine out. And I'm gonna run this one straight down here and it'll clear everything.
I like it.
They gotta be careful not to break any of the T,
oh, yeah. There it is. There it is.
Oh, another successful job.
You need to take everything off the flange. So you're able to weld up your tubes.
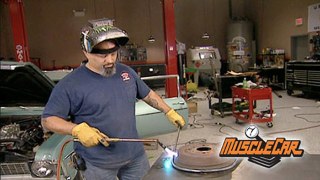
I prefer to use a tig welder.
It's easier to control. So there's less chance of burning a hole.
Now, at this point, you might be tempted to take all your tubes and weld them to the flange. But you don't want to do that. I got something to show you after the break.
Coming up on muscle car, they're few and they're fast. The 69.5 6 pack road runner.
Some people say that the 69.5 4, 46 pack road runner is the ultimate muscle car just because of the way it came out of the factory. And we're gonna show you one
muscle car flashback this week, the 69.5 6 pack road runner.
You're a muscle car guy around Milwaukee. You've probably been to the Wednesday night cruising at Pistol Peak
and just about anything is liable to drive up on that lot.
But you can always count on a bunch of mo
cars.
Roadrunners, Hammy
Kutas.
Uh, you see some really nice cars there.
They don't see one of these too often because there just aren't many of them around in this kind of shape. A
69.5
and code 446 pack. Road runner.
That's right. 32 barrels, a total concourse restoration right down to the lift off hood.
No hinges on that fiberglass. That hood was part of the 812 option package
available in the second half is 69
and that monster scoop made it obvious that there was something big and nasty underneath the hood.
The six pack was almost as powerful as the street
hemi several $100 cheaper. I might add which fit right in with the road runner's bare bones approach to performance, man. It didn't even have hubcaps.
The A 12 option was all about some serious power. The 440 had a big cam heavy duty valves and springs, an oversized radiator
and an Edelbrock manifold. In those three Deuces
Chrisler started putting this set up in their pea bodies in the spring of 69 Plymouth called it a six barrel. But nobody says that
it's the six pack.
This $200,000 showpiece belongs to Colin Coma, a dealer and muscle car expert who buys and sells about 200 muscle cars a year.
But Collin says he's hanging on to this one
because he thinks the six pack roadrunner is the number one best possible example of what a muscle car should be.
I think this, this is the muscle car.
This car is,
is bare bones, you know, bare minimum, essential street racing parts.
These cars were designed to go race and beat people up on the street. That's about
it. I mean, these things were a bear bench seat,
no air, no radio,
no power steering,
power brakes were optional. And if you wanted an oil pressure gauge or attack, you put it in yourself. But that her shift of poking up through the floor meant that this baby was built to run
and the six pack didn't sit all that square to the ground because it had an extra leaf spring on the right rear to handle a twist from the big block up front
and with the cart springs in the back, drum brakes stand all the way around. This thing rode like a truck and it turned like one too.
But who cares?
The six pack was meant for one thing
going in a straight line.
You could drive one of these babies off the showroom floor run high twelves with brand new stock tires on it.
Chrysler only made about 1406 pack road runners before the 70 model came along and they put these cars out there on the street
guys were,
you know, whooping, but
all cars are like instruments, I guess. And, uh,
muscle cars are, you know, are
like a crappy set of drums.
You really pound on them.
But if you can find an original 69.5, that's not all rusted out,
you'll probably have the purest form of street muscle that ever come out of Detroit.
And Collins says only one thing better than having a six pack is having another one right next to him.
Next, let's put it together and see how it looks. Blue hairs back right after this.
Hey, we're back on our custom headers for project blue hair. You know, we started out with a couple of flags and a bunch of J bends. Then we cut them up, we tack them up to fit, then we disassemble them to weld up the tubing.
Now you don't want to weld your headers up on the table over there because the heat could distort your tubing.
So, what I did was I mounted my flans back on the engine and now I'm test fitting everything.
If they fit your collector and they still not flush with your heads, you can take them out and weld them up,
check it out. We're almost home. Now, make sure your wells come up above the flange. So you have enough to surface
so far the tools needed for this header build you probably have in your garage. But for this step, you gotta use a belt
in.
It's worth a trip to the machine shop to get this done. Right.
Well, there you go.
A bunch of J bends in a whole lot of time. You can build yourself a set of headers. If I had more time, I'd fill all this in and make them nice and Purdy. Now in the passenger side, we had a header that almost fit and we got lucky. So we cut it right here and we fabricated the bottom half
time to finish the brakes. If you remember, I had to wait till I got my headers in to install this. And that was because I needed to make sure I had enough clearance which I do if you feel it's too close, you can always make a heat shield.
This massive power brake kit came with a proportioning valve even though this Nova didn't have one. This hookup is pretty simple,
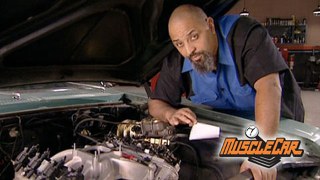
man. I am loving this project. Old blue hair, got a massive shot of Geritol, put some new suspension on it, new brakes, all that to try and slow down a six speed that's being spun by an LS two that's making 440 horse and it's carbureted.
Now, hooking this monster up is gonna take some really neat stuff like the ignition. For example, it not only hooks into all the stock sensors but it's run by for lack of a better terms, a processor now that is cool, but you know what? That's a whole another show,
but I do have time to put this thing together because I'm dying to see what it looks like.
Bingo.
Well, the old Nova looks like a little old lady would still be driving it and that's the look we were going for, but there's still some issues that need to be dealt with. Like the rear end. I'm thinking maybe a nine inch just because you got plenty of gear selections. But the amount of fabrication it would take to put one of those in
a lot. I could go with a 12 volt because that's what they came with from the factory.
Not only that,
it'll take the abuse. I'm getting ready to throw at it.
Now, these 14 sixes, they're not going to give me the traction that I need. So I decided to go with a 17 inch steel wheel and I get to keep
the hubcaps.
I need you guys to do me a favor. Send me some emails. I wanna know what you think of it, how you would do it and even what you would change on this project. But there's one thing
I'm not changing my mind on
something. No sleep. It should be without old lady Curb Feelers
and all is right with the world later.
Show Full Transcript
This is why we call it muscle car. Look at all the cool stuff I get to play with.
Now, I know most of you guys like myself have a really hard time finishing one project before you start another and that's ok. But today we're gonna finish stuffing this LS two into this 70 Nova that I'm affectionately calling. Oh Blue Hair.
We found this car literally right around the corner and boy, what a score. This Nova was a one owner car that was driven 17 miles a week to the grocery store, the beauty shop and I'm not really sure what she did on Sunday.
Yeah, a little old lady. Hence the name old blue hair. Now you rest, those guys will be happy to know that I'm saying.
Leaving the parts on this thing just in case we wanna put it back to stock project. Blue Hair is gonna start its new life as a sleeper. It's gonna look exactly like it was when we found it, it's gonna have the same paint, it's gonna have the same stint. It's even gonna have hubcaps but something different. This LS Two were slamming in it.
Now, we just got level and we started the engine mounts
and I had to cut a small piece of the floor out.
Why? Because I've got to make room for this massive six piece so I can get this baby going down the road. I don't think granny would have liked it too much. Next thing I'm gonna do being that, I've got the transmission and engine where I want it.
I'm gonna put some bracing in so I can get it up in the air and build a cross member
that tranny is much longer than the original. So I'm cutting up this junkyard piece in the three sections.
That way I can take advantage of my original mounting point. Then all I have to do is connect the dots.
Ha
ha
ha
ha.
Now I was tempted to show off and fab went out of some stock, but this is much easier to do
time to yank out the engine so as I can finish up the engine mouse
and now I'm gonna address this 36 year old suspension.
I'm gonna use these 120 wall dom tubular up in the lower control arms from Detroit speed and engineering.
The thing that's really cool about this is that stainless steel cross shaft because they actually use slugs so you can really dial in your suspension. So, if you want to change it around and get that maximum road race ability, you can get it.
And the thing that's cool about these lower control arms is these Delran bushings and inside they've got transfer slots. So all the grease gets throughout the whole surface of the bushing
really high tech stuff.
That's some nice stuff. The brakes is next.
Now, we've been accused of using only high dollar brake kits. Well, that's all about the change. Check this out for $850. You can go to master power brakes and get this complete disc brake conversion. You get the spindles, you get the calipers, you get the brackets, you get the rotors, you get the dust shield, you get all the related hardware, you even get a brake booster and a master cylinder. Now that's a complete kit.
Every part is stopped, either new or rebuilt. Only the spindles are modified slightly to accept the larger caliber bracket.
We're reusing our tie rod ends because they're still good.
Remember
no one ships their bearings pack.
That part's up to you.
Keep in mind this is a budget disc brake conversion. So these rotors, they're not drilled and slotted, they're not 14 inch, but they're more than enough for our Sleeper project.
So far, everything's going together real nice. Nobody likes surprises.
Just when you think it can't get any better. It does they give you a proportioning valve, the bracket to mount it. They even give you the fitting for the back of the intake manifold and a hose. But I'm gonna hold off on installing all of that because I wanna make sure when I put the engine back in, I'm not reaching over everything to get the headers on and I got plenty of room, but you're gonna see that later on in the show
next on muscle car, big engine in a small car, but lou is gonna make it all fit.
Welcome back to the shop. I've got my brakes in place, my suspension on. We've even got the LS two motor stabbed in the place where it belongs. Now, there's a few header companies that make headers for this application but being that I got impatient and made my own engine mounts, I have encountered a small problem.
My headers don't fit.
That's ok.
I've got a solution
and here it is a lot of your header companies will sell you just the
s so you can build your own headers. We got ours from hooker and they like to use 38 mile steel and it gives you a nice ceiling surface and prevents warpage. But this is only the start.
Now. They sell weld up kits, but I prefer to get all my own stuff. But when you do that, you gotta make sure that you order everything you need like collectors reducers. If you're gonna run 02 sensors. You gotta have it.
I prefer these J bends because you've got the 180 degree bend. So whatever angle you need, all you gotta do is cut it.
I'm gonna start by putting a quarter inch washer between the flange and the block.
And the reason why you do that is you want the head of two
fit flush against the block.
I'm starting in the rear, hugging the engine as much as possible.
Remember, no matter what tool you use, the square of the cut, the easier to work with.
Now underneath, I like to take a piece of tube and so I can get a visual on where everything's gonna go
and then I'll tag the collector in place. So I know where each tube needs to fall.
It's a simple matter of visualizing where you want the tubes to go
and then how to get them there.
I'm using these alignment rings. The thing that's really neat about them
is that they provide nice smooth flow on the inside. This way, if you have a gap, you don't have a bunch of wire in there
and
they'll hold your tubing up. I'm just tacking everything in place for now because we might have to make some changes.
I hope not,
but I might,
you're probably wondering why I've got these tubes going all over the place. There's a few good reasons you wanna be able to access your spark plugs you wanna be able to clear your steering box and most of all you wanna try and get it where you can get these headers out of the car without having to take the engine out. And I'm gonna run this one straight down here and it'll clear everything.
I like it.
They gotta be careful not to break any of the T,
oh, yeah. There it is. There it is.
Oh, another successful job.
You need to take everything off the flange. So you're able to weld up your tubes.
I prefer to use a tig welder.
It's easier to control. So there's less chance of burning a hole.
Now, at this point, you might be tempted to take all your tubes and weld them to the flange. But you don't want to do that. I got something to show you after the break.
Coming up on muscle car, they're few and they're fast. The 69.5 6 pack road runner.
Some people say that the 69.5 4, 46 pack road runner is the ultimate muscle car just because of the way it came out of the factory. And we're gonna show you one
muscle car flashback this week, the 69.5 6 pack road runner.
You're a muscle car guy around Milwaukee. You've probably been to the Wednesday night cruising at Pistol Peak
and just about anything is liable to drive up on that lot.
But you can always count on a bunch of mo
cars.
Roadrunners, Hammy
Kutas.
Uh, you see some really nice cars there.
They don't see one of these too often because there just aren't many of them around in this kind of shape. A
69.5
and code 446 pack. Road runner.
That's right. 32 barrels, a total concourse restoration right down to the lift off hood.
No hinges on that fiberglass. That hood was part of the 812 option package
available in the second half is 69
and that monster scoop made it obvious that there was something big and nasty underneath the hood.
The six pack was almost as powerful as the street
hemi several $100 cheaper. I might add which fit right in with the road runner's bare bones approach to performance, man. It didn't even have hubcaps.
The A 12 option was all about some serious power. The 440 had a big cam heavy duty valves and springs, an oversized radiator
and an Edelbrock manifold. In those three Deuces
Chrisler started putting this set up in their pea bodies in the spring of 69 Plymouth called it a six barrel. But nobody says that
it's the six pack.
This $200,000 showpiece belongs to Colin Coma, a dealer and muscle car expert who buys and sells about 200 muscle cars a year.
But Collin says he's hanging on to this one
because he thinks the six pack roadrunner is the number one best possible example of what a muscle car should be.
I think this, this is the muscle car.
This car is,
is bare bones, you know, bare minimum, essential street racing parts.
These cars were designed to go race and beat people up on the street. That's about
it. I mean, these things were a bear bench seat,
no air, no radio,
no power steering,
power brakes were optional. And if you wanted an oil pressure gauge or attack, you put it in yourself. But that her shift of poking up through the floor meant that this baby was built to run
and the six pack didn't sit all that square to the ground because it had an extra leaf spring on the right rear to handle a twist from the big block up front
and with the cart springs in the back, drum brakes stand all the way around. This thing rode like a truck and it turned like one too.
But who cares?
The six pack was meant for one thing
going in a straight line.
You could drive one of these babies off the showroom floor run high twelves with brand new stock tires on it.
Chrysler only made about 1406 pack road runners before the 70 model came along and they put these cars out there on the street
guys were,
you know, whooping, but
all cars are like instruments, I guess. And, uh,
muscle cars are, you know, are
like a crappy set of drums.
You really pound on them.
But if you can find an original 69.5, that's not all rusted out,
you'll probably have the purest form of street muscle that ever come out of Detroit.
And Collins says only one thing better than having a six pack is having another one right next to him.
Next, let's put it together and see how it looks. Blue hairs back right after this.
Hey, we're back on our custom headers for project blue hair. You know, we started out with a couple of flags and a bunch of J bends. Then we cut them up, we tack them up to fit, then we disassemble them to weld up the tubing.
Now you don't want to weld your headers up on the table over there because the heat could distort your tubing.
So, what I did was I mounted my flans back on the engine and now I'm test fitting everything.
If they fit your collector and they still not flush with your heads, you can take them out and weld them up,
check it out. We're almost home. Now, make sure your wells come up above the flange. So you have enough to surface
so far the tools needed for this header build you probably have in your garage. But for this step, you gotta use a belt
in.
It's worth a trip to the machine shop to get this done. Right.
Well, there you go.
A bunch of J bends in a whole lot of time. You can build yourself a set of headers. If I had more time, I'd fill all this in and make them nice and Purdy. Now in the passenger side, we had a header that almost fit and we got lucky. So we cut it right here and we fabricated the bottom half
time to finish the brakes. If you remember, I had to wait till I got my headers in to install this. And that was because I needed to make sure I had enough clearance which I do if you feel it's too close, you can always make a heat shield.
This massive power brake kit came with a proportioning valve even though this Nova didn't have one. This hookup is pretty simple,
man. I am loving this project. Old blue hair, got a massive shot of Geritol, put some new suspension on it, new brakes, all that to try and slow down a six speed that's being spun by an LS two that's making 440 horse and it's carbureted.
Now, hooking this monster up is gonna take some really neat stuff like the ignition. For example, it not only hooks into all the stock sensors but it's run by for lack of a better terms, a processor now that is cool, but you know what? That's a whole another show,
but I do have time to put this thing together because I'm dying to see what it looks like.
Bingo.
Well, the old Nova looks like a little old lady would still be driving it and that's the look we were going for, but there's still some issues that need to be dealt with. Like the rear end. I'm thinking maybe a nine inch just because you got plenty of gear selections. But the amount of fabrication it would take to put one of those in
a lot. I could go with a 12 volt because that's what they came with from the factory.
Not only that,
it'll take the abuse. I'm getting ready to throw at it.
Now, these 14 sixes, they're not going to give me the traction that I need. So I decided to go with a 17 inch steel wheel and I get to keep
the hubcaps.
I need you guys to do me a favor. Send me some emails. I wanna know what you think of it, how you would do it and even what you would change on this project. But there's one thing
I'm not changing my mind on
something. No sleep. It should be without old lady Curb Feelers
and all is right with the world later.