More '70 Chevy Nova "Old Blue Hair" Episodes
More Project Blue Hair Episodes
MuscleCar Builds
Want more content like this?
Join the PowerNation Email NewsletterParts Used In This Episode
Centerforce
clutch assembly, flywheel.
Classic Industries
gas tank
Classic Industries
shock relocate plate.
Detroit Speed & Engineering
pulleys
Moroso
rack and pinion.
Moroso
shocks and adjustable pinion snubber.
Nashville Spring
leaf springs and hardware.
Randy's Ring & Pinion
bearings and seals.
Summit Racing
axles shafts
Summit Racing
Posi-Unit
Summit Racing
ring and pinion
Video Transcript
Today on muscle car lou shows you how to make a set of old fashioned super stock springs perfect for any sleeper project along with a beefed up rear end and some creative exhaust suitable for old blue hairs temper.
Welcome to the shop. Last week, we woke up our sleeper project. This week, we're gonna get her on her feet.
We're running a G MLS 364 crate engine in this original 70 Nova.
Last week, we put in a gas tank, fuel pump, ran the lines, wired the ignition and stiffen up the frame to handle the extra horsepower. Then we started her up.
Now, RLS makes 440 horse and that's not gonna stand up to the abuse. We're gonna put it to, we do however, have some options. Most guys would just put a nine inch Ford in this thing and go about their business, but that's gonna ruin our sleeper. Look,
I'm going to use this original GM 10 bolt except I'm gonna put better gears and better axles in it. I also want to convert the Nova from Mono leaf to multi leaf. Now, this junkyard rear end is exactly like the one that came out of our Nova except
it has correct purchase for multi leaf. This rear end is commonly referred to as an 8.2 because of the size ring gear that it is now a lot of guys really like the 8.5 because it's a larger ring gear. There's more gear selection and better axle selections. The only downside is they're becoming harder to find, which means they're getting to be more expensive. Here's a tip for you when you're shopping at the junkyard. See how this cover has a ridge. This is an 8.2 an 8.5 is smooth like this one here.
The 8.2 is perfect for what we want to do. We're going to use this eat limited slip differential. The posi
performance comes with carbon fiber disk. You can get it for 17 or 28 flying axles. We went with 28 because it's stronger.
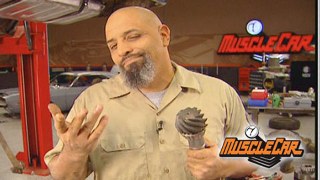
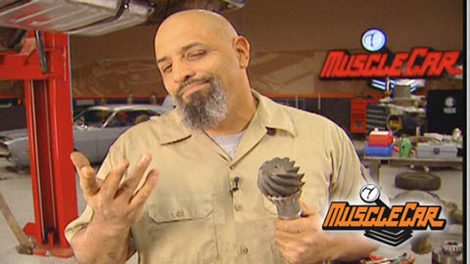
Our ring and pin are street gears from Richmond. They make everything from a 308 to a 513 for this rear end. We're using a 411. That'll give us great jump off the line. Now for you, younger guys, let me tell you what all those numbers mean.
There's probably more stress on the ring and pin than anything else in the car
because this is where all the engines power takes a right hand turn
R 411 means opinion gear has to turn just over four times to make the ring gear go around once, great for fast starts and spinning those tires, but not good for cruising. Because the engines running at a higher RPM
with the higher gear like a 308, the engine's running at a lower RPM. So it's better on gas, but slower off the line.
Like love
life and muscle cars. There's a downside to everything. You've got this higher gear, which has more teeth, so it has more contact area with the ring gear, unlike this lower gear, which is smaller and it has less teeth. So it's gonna have less contact area and it's gonna suffer more abuse. That's why I'm going with this 411. It's a good compromise
and if it breaks, it was worth it,
rebuilding a rear end is not that difficult. However, there's a lot of specs for torques and clearances. You need to pay attention to your ring set will include all that information. If you screw this up, the cloud behind your car won't be from your tires
before I go any further. I gotta make some room for some new parts. I like to spray my brakes down before I tear it apart. It keeps the dust down
a
few weeks ago. You saw me do a disc brake conversion on the front of this thing being at the front. Does the bulk of the stopping? I decided to go with stock drums in the back
I've seen this mistake before. Primary shoe, secondary shoe, you always wanna have your primary shoe going towards the front of the vehicle now, you know?
All right,
I needed some axles that weren't gonna break. So I called Summit and they sent me a pair of these superior axles, the Evolution series and they're made of high quality steel, check it out.
The splines are rolled and pressed during the forging process making them 35% stronger than stock. So they're tough.
Now, cut axle splines are machined after the steel cools. So they won't be as strong as what I've got right here.
We changed our 8.2 from a 308 to a 411 with a posse
and put some seriously tough axles in it. When we get back from the break, we're gonna give granny sneakers some serious traction.
Welcome back. We updated our rear rim with new gears, pos
unit axles and drum brakes. Now it's time to address the suspension. This mono
is old and outdated and it's not gonna work for the abuse we're going to put it through. So it's out of there.
We have a few different ways we can fix this, we can mini tub it, we can put a three link in it or a four link or even ladder bar it. But those mods are really hard to hide and I don't want to cut up old blue hair that much
back in the day, the big yellow traction bars were the norm. They were great for keeping the axle where it was supposed to be when you're nailing it, the rear end wants to twist upwards. And mo
car races back in the sixties had the most problems with that.
So they came up with a solution.
The Super stock spring,
when power is transferred to the rear end, the P
tries to rotate upwards, putting more stress on the front of the springs.
Our stock mono leaf was not designed to handle this kind of abuse. So the tire spins,
not what we want. On the other hand, superstock springs have more leaves up front, which means more tension.
This forces the tires back to the ground so they can hook up.
There's a stock replacement spring for a second generation Nova, but it's gonna need a slight modification.
Remember those super stock springs I told you about, I'm gonna show you how to make a pair. Be careful when you're taking these packs apart. They need to be clamped
so they won't fly apart when you're pulling off the hardware.
I'm gonna cut this center pin here, but I'm gonna leave these two C clamps in place just for safety.
Remember, we're not cutting on the front only on the rear of the leaves, so I'll mark them to avoid any screw ups.
I'm basically creating a short stagger. This Nova only needs a two inch cut that'll take out all the resistance from the rear of the leaves.
If you don't have a cold sore for this, a chop saw or a cut off wheel will do the trick.
Now, I've got a slight problem. I got a pretty big gap from end to end. I can fix that. What you can do is go wander around the junkyard or
you can finally spring around your shop and use it
again. A two inch stagger is all I want.
Once they're cut,
I'll round him off with a grinder and create a bevel to help him slide better.
It's about time to slam these babies back together, but I've encountered a slight problem.
My new center pin is larger than my old one, but that's ok.
Now, you can bore these out if you take your time
with a good drill, but I ain't got time
fire
fire.
We're finally ready to put these together, starting with the slider pads,
then can press the leaves with C clamps
and put in the center pins.
These factory style plants will allow the leaves to slide but it won't allow them to come apart.
It's not required, but I'm attacking them anyway because we plan to push these babies to the limit.
And that's how you make your own superstock springs, less tension in the rear, more upfront you Mo Park guys, you can go out and buy some, you Ford and Chevy guys, you gotta make your own. But now you know how
with new bushings in the rear
and also on the springs,
they can be installed with the original hardware.
I've got one more thing to help these superstock springs do their job. This little P snub is adjustable and it helps limit the rotation of the rear end. So it gets all the power it needs to go the ground.
Once I had the rear end in position,
I can connect the back of my springs with new shackles. Then introduce our beefed up 8.2 to its new companion and we'll keep it all together with new U
bolts and brackets from classic industries.
This is what we started out with.
This is what we got
who set size doesn't matter.
Now, the last piece of this puzzle are these competition engineering three way adjustable drag shocks. Now, I've encountered a slight problem being that I'm running a bigger tire. My stock shock location was on the outside of the leaf spring. I'm changing it, moving it to the inside and that'll give me the clearance that I need
using eight inch steel. I'll mount these brackets against the frame. They'll help distribute all that force we're gonna put on it.
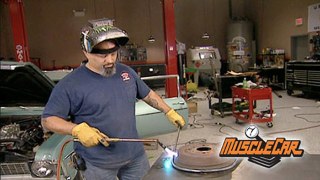
I'm tacking in steel tubing as a cross memory to mount the shock still.
Then after figuring out where they need to be connected,
I'll weld in a bolt.
Well, it may seem like a lot of work to run bigger tires, but it's all worth it. I assure you later on in the show, I'm gonna show you how to convert your exhaust system to go in and out of stealth mode.
In 1969 aerodynamics was coming of age and NASCAR Mercury responded with the cyclone spoiler too. A winner at the track and on the street
this week's profile is the rare Mercury cyclone. It was built for the high banks of NASCAR.
But this one had a really strange life.
This week's muscle car flashback, the 69 Mercury cyclone spoiler too.
NASCAR races were running some strange looking machinery. Back in 69
the Plymouth Super Bird and the Ford Torino Talladega were the cars to beat on the big tracks.
Mercury Cyclone spoiler needed some help.
The cyclone spoiler two took care of that.
An aerodynamic fast back built low, long and dangerous
neal Yarborough get the decker flag
but Ford had to make 500 of these babies for the street before the spoiler two could take the track. They named him after two of Ford's NASCAR drivers red for K Yarborough blew for Dan Gurney even though Gurney never drove one in a race
D
Fleer
Spoiler two is one of about 90 that is still running.
There's the spoiler two and the spoiler
and this is the one they built especially for NASCAR very limited production,
special body mods. The spoiler two was all about the body. It had to be low. It had to be arrow and it had to be done yesterday so they could get this thing on the track
a 19 inch extension on the nose bent down for better air flow at high speed and welded in a hurry man. You can still see this
scene
front grill from Ford's NASCAR Torino with a rubber gasket all around. So the air would flow just a tiny bit better. A Torino rear bumper sat up front on the spoiler,
chopped up into three pieces and welded up to fit and out back, a full width spoiler made from the finest of plastic, totally useless until you're doing at least 100 turns
out of a Ford van.
You don't need them on a race car. They just stuck in whatever was
in
the spoiler. Twos even had the rocker panels rolled under a little further just so the car could sit a tiny bit closer to the ground.
They then had to reshape the fender. So it would match the rocker panel when they got to the track. The car was an inch lower
and a lot faster.
The NASCAR spoilers had 427 big blocks and Mercury made some for the street with 428.
But all you could get in a spoiler too was a Collin shift automatic and a 351 was a small block,
a
four barrel and 290 horses made it the strongest 351 that Ford ever put out 3400 pounds and a 325 gear in the rear end made the spoiler a lot better on the top end than on the box.
But it rolls like a freight train. Once you get that thing going speed didn't matter to one guy who owned the spoiler back in the seventies.
He was more interested in taking it slow.
Whoa,
this is just wrong but it gets worse if you wanna pull lawn mowers, get a truck,
it's got a good home now.
Spoiler. Twos aren't that expensive considering how rare they are. A clean one in good shape. Can bring about 75 grand.
And that just might be a bargain for guys who appreciate NASCAR muscle and a piece of racing history.
I'd like to get one of those little trailers to pull behind old blue hair. I think it'd be pretty cool.
Stick around. We'll be right back.
Welcome back. I've only got a few minutes left to finish up this exhaust. Now, I really wanna scare the hell out of my competition before I blow the doors off. So I put in these Y pipes for some old school cut outs, but I'm gonna teach an old dog, new tricks.
Now, back in the day, you would have to manually undo the pipe covers that would allow the exhaust to come straight out of the headers.
But I've got an even better way
and here it is.
I got these electric cut outs from D mh performance.
The flip of a switch, this butterfly opens up and you've got open exhaust. Now they're made out of aircraft grade aluminum and you can get them anywhere between two and four inch diameter.
What's cool about these is you can put them on your existing exhaust with little or no modifications.
Now, check this out, this switch will get mounted underneath the dash.
Be afraid, be very afraid
since we're hiding these underneath.
I'm making some short turndowns to avoid cooking the floor.
No, I'm not huffing fumes. I'm using this aluminum tubing to mimic my three inch drive shaft that I've got on order because I'm using 2.5 inch exhaust. I've got to make sure that I've got enough clearance to put it all in
and this is doable.
Now, I'm gonna finish these off with some cherry bombs. Now, you all the guys that remember that classic round tubular glass pack. Well, they're still available but times have changed.
They also came out with an entire line of performance mufflers for every application.
These are the new Vortex series. Since the exhaust goes through the middle, these vortex series mufflers are reversible. That means they can be installed any way you want.
I'm taking extra care to keep these pipes close to the body because we don't want anybody to see the bigger exhaust.
I got one more thing to fool that unsuspecting victim. A little bit of street camouflage.
We did a lot of stuff this week, but this is by far the coolest
next week we're gonna button this baby up and then we're gonna see what trouble we can get into later.
Show Full Transcript
Welcome to the shop. Last week, we woke up our sleeper project. This week, we're gonna get her on her feet.
We're running a G MLS 364 crate engine in this original 70 Nova.
Last week, we put in a gas tank, fuel pump, ran the lines, wired the ignition and stiffen up the frame to handle the extra horsepower. Then we started her up.
Now, RLS makes 440 horse and that's not gonna stand up to the abuse. We're gonna put it to, we do however, have some options. Most guys would just put a nine inch Ford in this thing and go about their business, but that's gonna ruin our sleeper. Look,
I'm going to use this original GM 10 bolt except I'm gonna put better gears and better axles in it. I also want to convert the Nova from Mono leaf to multi leaf. Now, this junkyard rear end is exactly like the one that came out of our Nova except
it has correct purchase for multi leaf. This rear end is commonly referred to as an 8.2 because of the size ring gear that it is now a lot of guys really like the 8.5 because it's a larger ring gear. There's more gear selection and better axle selections. The only downside is they're becoming harder to find, which means they're getting to be more expensive. Here's a tip for you when you're shopping at the junkyard. See how this cover has a ridge. This is an 8.2 an 8.5 is smooth like this one here.
The 8.2 is perfect for what we want to do. We're going to use this eat limited slip differential. The posi
performance comes with carbon fiber disk. You can get it for 17 or 28 flying axles. We went with 28 because it's stronger.
Our ring and pin are street gears from Richmond. They make everything from a 308 to a 513 for this rear end. We're using a 411. That'll give us great jump off the line. Now for you, younger guys, let me tell you what all those numbers mean.
There's probably more stress on the ring and pin than anything else in the car
because this is where all the engines power takes a right hand turn
R 411 means opinion gear has to turn just over four times to make the ring gear go around once, great for fast starts and spinning those tires, but not good for cruising. Because the engines running at a higher RPM
with the higher gear like a 308, the engine's running at a lower RPM. So it's better on gas, but slower off the line.
Like love
life and muscle cars. There's a downside to everything. You've got this higher gear, which has more teeth, so it has more contact area with the ring gear, unlike this lower gear, which is smaller and it has less teeth. So it's gonna have less contact area and it's gonna suffer more abuse. That's why I'm going with this 411. It's a good compromise
and if it breaks, it was worth it,
rebuilding a rear end is not that difficult. However, there's a lot of specs for torques and clearances. You need to pay attention to your ring set will include all that information. If you screw this up, the cloud behind your car won't be from your tires
before I go any further. I gotta make some room for some new parts. I like to spray my brakes down before I tear it apart. It keeps the dust down
a
few weeks ago. You saw me do a disc brake conversion on the front of this thing being at the front. Does the bulk of the stopping? I decided to go with stock drums in the back
I've seen this mistake before. Primary shoe, secondary shoe, you always wanna have your primary shoe going towards the front of the vehicle now, you know?
All right,
I needed some axles that weren't gonna break. So I called Summit and they sent me a pair of these superior axles, the Evolution series and they're made of high quality steel, check it out.
The splines are rolled and pressed during the forging process making them 35% stronger than stock. So they're tough.
Now, cut axle splines are machined after the steel cools. So they won't be as strong as what I've got right here.
We changed our 8.2 from a 308 to a 411 with a posse
and put some seriously tough axles in it. When we get back from the break, we're gonna give granny sneakers some serious traction.
Welcome back. We updated our rear rim with new gears, pos
unit axles and drum brakes. Now it's time to address the suspension. This mono
is old and outdated and it's not gonna work for the abuse we're going to put it through. So it's out of there.
We have a few different ways we can fix this, we can mini tub it, we can put a three link in it or a four link or even ladder bar it. But those mods are really hard to hide and I don't want to cut up old blue hair that much
back in the day, the big yellow traction bars were the norm. They were great for keeping the axle where it was supposed to be when you're nailing it, the rear end wants to twist upwards. And mo
car races back in the sixties had the most problems with that.
So they came up with a solution.
The Super stock spring,
when power is transferred to the rear end, the P
tries to rotate upwards, putting more stress on the front of the springs.
Our stock mono leaf was not designed to handle this kind of abuse. So the tire spins,
not what we want. On the other hand, superstock springs have more leaves up front, which means more tension.
This forces the tires back to the ground so they can hook up.
There's a stock replacement spring for a second generation Nova, but it's gonna need a slight modification.
Remember those super stock springs I told you about, I'm gonna show you how to make a pair. Be careful when you're taking these packs apart. They need to be clamped
so they won't fly apart when you're pulling off the hardware.
I'm gonna cut this center pin here, but I'm gonna leave these two C clamps in place just for safety.
Remember, we're not cutting on the front only on the rear of the leaves, so I'll mark them to avoid any screw ups.
I'm basically creating a short stagger. This Nova only needs a two inch cut that'll take out all the resistance from the rear of the leaves.
If you don't have a cold sore for this, a chop saw or a cut off wheel will do the trick.
Now, I've got a slight problem. I got a pretty big gap from end to end. I can fix that. What you can do is go wander around the junkyard or
you can finally spring around your shop and use it
again. A two inch stagger is all I want.
Once they're cut,
I'll round him off with a grinder and create a bevel to help him slide better.
It's about time to slam these babies back together, but I've encountered a slight problem.
My new center pin is larger than my old one, but that's ok.
Now, you can bore these out if you take your time
with a good drill, but I ain't got time
fire
fire.
We're finally ready to put these together, starting with the slider pads,
then can press the leaves with C clamps
and put in the center pins.
These factory style plants will allow the leaves to slide but it won't allow them to come apart.
It's not required, but I'm attacking them anyway because we plan to push these babies to the limit.
And that's how you make your own superstock springs, less tension in the rear, more upfront you Mo Park guys, you can go out and buy some, you Ford and Chevy guys, you gotta make your own. But now you know how
with new bushings in the rear
and also on the springs,
they can be installed with the original hardware.
I've got one more thing to help these superstock springs do their job. This little P snub is adjustable and it helps limit the rotation of the rear end. So it gets all the power it needs to go the ground.
Once I had the rear end in position,
I can connect the back of my springs with new shackles. Then introduce our beefed up 8.2 to its new companion and we'll keep it all together with new U
bolts and brackets from classic industries.
This is what we started out with.
This is what we got
who set size doesn't matter.
Now, the last piece of this puzzle are these competition engineering three way adjustable drag shocks. Now, I've encountered a slight problem being that I'm running a bigger tire. My stock shock location was on the outside of the leaf spring. I'm changing it, moving it to the inside and that'll give me the clearance that I need
using eight inch steel. I'll mount these brackets against the frame. They'll help distribute all that force we're gonna put on it.
I'm tacking in steel tubing as a cross memory to mount the shock still.
Then after figuring out where they need to be connected,
I'll weld in a bolt.
Well, it may seem like a lot of work to run bigger tires, but it's all worth it. I assure you later on in the show, I'm gonna show you how to convert your exhaust system to go in and out of stealth mode.
In 1969 aerodynamics was coming of age and NASCAR Mercury responded with the cyclone spoiler too. A winner at the track and on the street
this week's profile is the rare Mercury cyclone. It was built for the high banks of NASCAR.
But this one had a really strange life.
This week's muscle car flashback, the 69 Mercury cyclone spoiler too.
NASCAR races were running some strange looking machinery. Back in 69
the Plymouth Super Bird and the Ford Torino Talladega were the cars to beat on the big tracks.
Mercury Cyclone spoiler needed some help.
The cyclone spoiler two took care of that.
An aerodynamic fast back built low, long and dangerous
neal Yarborough get the decker flag
but Ford had to make 500 of these babies for the street before the spoiler two could take the track. They named him after two of Ford's NASCAR drivers red for K Yarborough blew for Dan Gurney even though Gurney never drove one in a race
D
Fleer
Spoiler two is one of about 90 that is still running.
There's the spoiler two and the spoiler
and this is the one they built especially for NASCAR very limited production,
special body mods. The spoiler two was all about the body. It had to be low. It had to be arrow and it had to be done yesterday so they could get this thing on the track
a 19 inch extension on the nose bent down for better air flow at high speed and welded in a hurry man. You can still see this
scene
front grill from Ford's NASCAR Torino with a rubber gasket all around. So the air would flow just a tiny bit better. A Torino rear bumper sat up front on the spoiler,
chopped up into three pieces and welded up to fit and out back, a full width spoiler made from the finest of plastic, totally useless until you're doing at least 100 turns
out of a Ford van.
You don't need them on a race car. They just stuck in whatever was
in
the spoiler. Twos even had the rocker panels rolled under a little further just so the car could sit a tiny bit closer to the ground.
They then had to reshape the fender. So it would match the rocker panel when they got to the track. The car was an inch lower
and a lot faster.
The NASCAR spoilers had 427 big blocks and Mercury made some for the street with 428.
But all you could get in a spoiler too was a Collin shift automatic and a 351 was a small block,
a
four barrel and 290 horses made it the strongest 351 that Ford ever put out 3400 pounds and a 325 gear in the rear end made the spoiler a lot better on the top end than on the box.
But it rolls like a freight train. Once you get that thing going speed didn't matter to one guy who owned the spoiler back in the seventies.
He was more interested in taking it slow.
Whoa,
this is just wrong but it gets worse if you wanna pull lawn mowers, get a truck,
it's got a good home now.
Spoiler. Twos aren't that expensive considering how rare they are. A clean one in good shape. Can bring about 75 grand.
And that just might be a bargain for guys who appreciate NASCAR muscle and a piece of racing history.
I'd like to get one of those little trailers to pull behind old blue hair. I think it'd be pretty cool.
Stick around. We'll be right back.
Welcome back. I've only got a few minutes left to finish up this exhaust. Now, I really wanna scare the hell out of my competition before I blow the doors off. So I put in these Y pipes for some old school cut outs, but I'm gonna teach an old dog, new tricks.
Now, back in the day, you would have to manually undo the pipe covers that would allow the exhaust to come straight out of the headers.
But I've got an even better way
and here it is.
I got these electric cut outs from D mh performance.
The flip of a switch, this butterfly opens up and you've got open exhaust. Now they're made out of aircraft grade aluminum and you can get them anywhere between two and four inch diameter.
What's cool about these is you can put them on your existing exhaust with little or no modifications.
Now, check this out, this switch will get mounted underneath the dash.
Be afraid, be very afraid
since we're hiding these underneath.
I'm making some short turndowns to avoid cooking the floor.
No, I'm not huffing fumes. I'm using this aluminum tubing to mimic my three inch drive shaft that I've got on order because I'm using 2.5 inch exhaust. I've got to make sure that I've got enough clearance to put it all in
and this is doable.
Now, I'm gonna finish these off with some cherry bombs. Now, you all the guys that remember that classic round tubular glass pack. Well, they're still available but times have changed.
They also came out with an entire line of performance mufflers for every application.
These are the new Vortex series. Since the exhaust goes through the middle, these vortex series mufflers are reversible. That means they can be installed any way you want.
I'm taking extra care to keep these pipes close to the body because we don't want anybody to see the bigger exhaust.
I got one more thing to fool that unsuspecting victim. A little bit of street camouflage.
We did a lot of stuff this week, but this is by far the coolest
next week we're gonna button this baby up and then we're gonna see what trouble we can get into later.