MuscleCar Builds

Parts Used In This Episode

Afco Racing Products
REAR HUBS MADE BY PORT CITY.
American Racing
17 X 9.5 SHELBY COBRA CUSTOM DRILL 18 X 10 SHELBY COBRA CUSTOM DRILL
ARP
CROSS DRILLED BRAKE HAT BOLTS, 1/4-28X .750 AND NUTS.
ARP
SMALL HEAD FLYWHEEL BOLTS,BALANCER BOLT.
BF Goodrich
255/40R17 KDW 285/40R18 KDW
Bilstein
NON FILLED AND UNSPRUNG SHOCK ASSEMBLY.
Dan Olson Racing Products
Custom Aluminum Oil Pan
Fuel Safe
BOLT IN REPLACEMENT FUEL CELL WITH BLADDER.
G-Force Racing
Super T-10 Transmission.
Momar Injection
FUEL INJECTION SETUP,MANIFOLD,PUMPS AND CONTROLLER,EAGLE ROTATING ASSEMBLY,ARP FASTENERS,ROUSH CYLINDER HEADS,JE PISTONS,CROWER CAM ROCKER ARMS AND PUSHRODS.
Painless Performance
12 CIRCUIT FORD HARNESS,SPLIT SLEEVING.
Performance Friction
RACING SET UP CUSTOM MADE FROM OUR SPINDLE DESIGN.
Performance Friction
REAR SETUP,CUSTOM FOR OUR QUICK CHANGE REAREND.
Prothane
STOCK MOTOR MOUNTS.
Safe Craft
Fire System.
Video Transcript

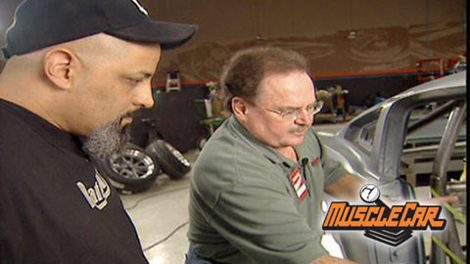
It's time for more muscle car. The SCCA inspector will be here any minute to put an eyeball on the roll cage of our Mustang road racer

and I ain't quite finished yet. Time's a wasted

at

this point. We're done with the jig.

This frame is solid and square

in order to finish up the suspension and start loading it up with minor things like the engine, transmission and fuel cell. I need it on the ground.

There's still some parts of the cage I didn't want to put in just yet.

Like the door bars, hoop supports, third link supports

and engine compartment bracing.

Let's hope the inspector has an imagination or at least a sense of humor

and it's time to find out.

Hey, it's the SCCA inspector.

His official title is the Chief Sweet

Deer.

I'm not kidding.

We're just going to call him Phil from Memphis. This is what I did. I've never built a road race chassis so it is what I did was I got the stuff that I knew was that I knew was right.

And then I put everything else in tape

so you could see it. And then if I need to change anything. It would be easier for me to change it.

So, tell me what you think.

Well, I like it.

Uh, I would, I would like to see this bar lower down here around the city area.

Almost.

Right.

Right. Almost even with it

behind it.

And this is, might be a little bit much, but it's ok. And I like this diagonal and these vertical pieces all tied together. Well, the tape didn't bother him

and it didn't slow him down

without the proper stock.

There'd be no reason to continue.

I learned we need three permanent holes for random checks of wall thickness.

Previous measurement was 1.6 inch. You

got roughly 1.51. So that's 0.15. Cool all

requires 0.12 I'm in there. You

good to go cold baby.

That was easy.

But I'm still crossing my fingers.

My main concern is safety.

We're looking for the structural integrity of the cage, you know, to make sure the wells are good. They're not pitted, looking at the uh uh fuel cell and all that, the firewall

and just looking at the overall componentry of the cage, make sure everything just kind of fits well. And

I just wanted his opinion before I welded it all up. It's time to pick his brain for things like fuel cell requirements. You know, you gotta have a frame down here for your fuel cell and p

something across here more side impact bars as long as it stays in the same plane is the main hoop and it's horizontal. Ok.

Cool,

additional bracing and then triangulate everything and more common sense.

Yeah, you gotta think, think a little bit ahead there. After 50 more questions,

I finally got what I wanted. I like it. Your wells look really good. Thank you. I've seen some wells that looks really pitted and really bad before.

Yeah.

And I don't know how they passed inspection. This is before I got to me.

I'll take that as a green light from the Chief Scrutineer,

like I said before, I've never built one of these. So the fun part is we're learning as we go along. Phil was and will continue to be a great source of information

as a matter of fact. So are some of you guys a few weeks ago, I made my upper ray arms for the front suspension

and I made them the way I always have.

But some of your emails told me that I screwed up and you know what

you were right?

The arms needed to be about two inches lower for better handling at the track.

So, Brent and I started over cutting off the entire front end and dropping it down where it should be. Then ref fab the upper arms, I'll swallow my pride any day to get the project right. It may have taken on weekend, but check out this travel

perfectly level and all the camera I need.

Now we let the engine hide exactly where we wanted it to be 5.5 inches off the ground. So this oil pan won't do. It's just too deep. So, Dan Olsen racing products, custom made is a shorter one. It's a dry sump pan, converted to wet sump and holds the same amount of oil because it is kick out

a single stage. External pump will pull oil from here. That means that this old internal pumps got to go.

This pan has billet rails for a good seal. It's aluminum for less weight and it's designed with a slew of trap doors to keep the oil where it needs to be

with the intake off

and the engine played on,

we can swing it,

roll it,

drop it

and learn another lesson.

Our stacks are six and a quarter inches tall. We thought we had to cut enough just to clear them, but I was obviously wrong. It looks like we got to cut about 2 ft.

I love my job.

Drum roll, please.

I see what you got.

Is it clear in the back?

Fair with you?

Barely is good enough for me,

man. I love it when plan C works. Now, these engine plates are sufficient but there's a lot of power here. So these stock style mounts and the transmission are next.

So what do you think this thing is starting to turn into one nasty piece? Of machinery with the green light from our inspector and our power plant in place. It's time to make sure it stays there.

These plates will keep the engine from twisting on the torque but they don't do much for the pushing and pulling.

Some guys will use the transmission mount to contain this, but I'm not gonna do that

while these stock mounts are great and they allow some twisting, they'll stop that forwards and backwards movement plus their polyurethane and they'll absorb some of that vibration because there's gonna be plenty of that.

This bracing will serve three purposes. The engine mount, the strut rod support

and protection for the oil pan.

We had to mount a plate to slide the engine mount out to clear the kick up in the pan. Now, it's just a matter of marrying the two together.

The strut rod will mount here

with a tight fitting notch. The bung will also give his strength back to the cross member.

The last thing that we can do up front for right now is mount our front shocks. Bill Stein sent us these mock up coil overs so we can fabricate our brackets. Now, something that you really need to remember before you order your springs, you have to have the whole car done

and scale so you can determine the weight on each tire this way, you know exactly what springs to order.

Since Brent's taken off the fly wheel, it looks like the tranny and the clutch are next.

This isn't for your moped. A

street car guys always thought that size really mattered. Apparently, it doesn't.

This Quartermaster 5.5 inch diameter three disc clutch along with this ring gear and tiny button are just as effective as your 13 inch.

It's just smaller and lighter.

Don't forget the spacer to compensate for the engine plane.

This button acts as a fly wheel, but without the starter teeth,

the whole point here is to keep things flush with the bottom of the oil pan.

A stack of three centered bronze discs, spinning three floater plates

all working together is why this is so compact

and this is where the starter makes it fight. The aluminum bell housing is also designed for low ground clearance man. You wouldn't believe how light this baby is

and the hydraulic throw out bearing spacer

machined aluminum for a perfect fit.

Now, the idea of bolting a tranny to the back of the bell housing is nothing new,

but the racing industry has perfected it

because at the track time is everything.

We picked this five speed tranny because it's lightweight and its small size, which means swapping a gearbox just became that much faster with a 59% overdrive and a 295 1st gear and a hard and input shaft that's not going to break

bingo.

The mounting surface is not level. Some cars need room for the exhaust.

So with some two by one stop,

we made some relief cuts

and formed it to fifth

in case you hadn't noticed this thing is being built to be faster on the track and fast out of the pits. And if everything goes right, you'll see this thing on the ground. Later on in the show,

the Corvette was the first American muscle car. It came on the scene back in 1953 in 62 it got a new V8 making some serious power.

It was the first car to make style and muscle and it's been that way ever since

this week's muscle car flashback. The 62 Chevrolet Corvette

back in 1953 General Motors, legendary designer Harley Earl was about to release a sports car that would set a new standard in automotive performance.

This steel framed fiberglass body was christened the Chevrolet Corvette

G M's assembly lines would crank out 300 units between June and December 1953.

The options were few,

100 and 50 horse blue flame in line six backed by a power glide transmission.

The color options were simple white

with a sportsman red interior. A very humble beginning for an American icon.

GM started offering larger engines including one with fuel injection,

different transmissions and new colors to choose from.

The vets were starting to gain recognition on the track as GM Ned Corvettes and er races such as Sere

and lemons.

This was a perfect test bed to see what these cars could really do.

1962 was a defining year for the Corvette.

This was the last year of the classic Corvette body style, mixed with subtle hints of a vet yet to come.

That's why Bobby Aycock chose the 62 Corvette.

Not only is this his dream car, but it's the last year of the C one series.

What made this model year interesting was that it came with many different changes for 62.

This was the first year for the 327 V8 with multiple horsepower options.

The paint didn't have that two tone scheme

like the 56 to 61 models.

The chrome accents on the cove and rocker panels were a new design and the grill was now blacked out

design cues such as exposed dual headlights, the inset cove and wrap around windshield would no longer be available. This was also the last year for a solid rear axle.

Bobby's vet came with some pretty decent options.

The paint was Ermine white with a white convertible top,

classic red interior

wonderbar AM radio, a four speed close ratio synchro mesh transmission for slamming those gears.

And a first year 3 27 250 horse small block topped off with a four barrel carburetor.

This is the first year they made the uh

327 and uh this is a 250

uh they made a 250 a 260 A

300 a 340

a 360 fuel, a fuel injected.

According to Bobby,

this matching number street machine was reconditioned a little over 4000 miles ago.

This awesome resto definitely gets a lot of respect.

He'll tell you that no matter where he goes, people stop just to ask him about the car.

It runs great. Sounds good too.

It's my catcher.

It really is,

but don't think about trying to buy it because you're gonna have to dig pretty deep to get it away from you.

If you see an old school white vet creeping up in the rear view,

remember it could be packing some muscle under the hood.

So be careful what you do because you might get better.

Here's another piece of history for you. Back in 1963 the vet was redesigned all because of a deep sea fishing trip. GM Chief designer William Mitchell caught a Mako shark and a new style was born.

Now, you know, we'll be back in a minute.

The engine is in

tranny stuck to it.

Front shocks are hung

time for the rear.

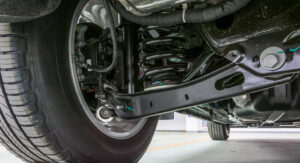
We've already got our stud mounted on our axle tube and if you remember we got these mock up coil overs from Bill Stein. I'm going to order the correct springs later.

I already tacked in my upper mount one more check and I'll weld them up. You want your shot to run parallel to the rear end, but yet no more than 40 degrees angle to the ground.

There'll be a lot of stress on these tabs. So some gussets are in order.

Last part of the rear end is the panhard bar. It stops your movement from side to side. It needs to be as long as possible and as parallel to the rear end as you can get

it.

Now, I made this front bracket so I can mount the pan

out bar as close to the dry shaft as possible.

This way, I don't have to weld anything on to the rear end

and I clocked it so I can make the bar as long as possible.

This bar will be the home for the other end.

A leftover link bar will do just fine.

I'll use my pneumatic marker so I know where to cut,

shorten it up,

cap it.

And it's done

since we use the torque link on our rear suspension, it will allow the rear end to rotate. That's why we use the hind joint. So it wouldn't bind. Now, if this was a circle track car, we would have an adjustable spring loaded pan art bar. So we could really tweak the whole rear suspension for those left turn only tracks

like everything else on the car. These parts are designed for extreme abuse and the brakes are no exception. As a matter of fact, the brake pedal is gonna see just as much action as the gas pedal does.

So we got these from performance friction, 4, 12 inch slotted and vented rotors. They'll keep this baby nice and cool the bolts that hold on the rotor. We're gonna wire down for safety later on. Right now. We're just test fitting everything

and these will slow them down. They're a four piston design and they're seeing seed out of a chunk of aluminum and these pads, all they would tell me is that they're a secret recipe of carbon metallic race formula,

performance friction's been erasing for a long time. So these huge hubs were no problem for them.

A fo got us these port city hubs for the rear as well. In fact, Tiger custom built our rear rent just so we can use them. Now, we've got a way to slow them down,

Brent and I have enjoyed this project so much. We got to talking and we're gonna make a little change. We know this thing will be fun on the track,

but think of the kick in the pants. It would be on the street. So we're gonna put everything on it to make it street legal as well

starting with a 9.5 inch footprint from BF Goodrich G four kdws, all weather tires mounted on American racing. 17 inch Shelby replicas, polished aluminum with gun metal gray centers,

a

little more room in the rear

for some 18 inches with 10.5 on the pavement.

Oh, man, this thing is Right. I love the stance. It's as low as a snake and as wide as a Hummer, it's gonna scare people when they see it, that's for sure. It's gonna need some fender flares, but that's ok. We got a plan for that,

man. I love the way this thing rolls.

Race car parts are so cool. There's no resistance.

We're out of parts for a while.

Next, we need a fuel cell fire extinguisher, setup, electronics, seats, et cetera, et cetera.

And we'll need to finish welding it up, then we'll blow it apart and paint it.

But for now it's one more for the waiting room. You know, the rules of the shop, one comes out, another one's gotta go in next week. Project overkill.
Show Full Transcript