More '67 Pontiac LeMans Episodes
MuscleCar Builds
Want more content like this?
Join the PowerNation Email NewsletterParts Used In This Episode
Ames Performance Engineering
Inner wheel houses, full trunk floor, and taillight panel.
BF Goodrich
Tires: 225/45R18 KDW,285/40R18 KDW
Intro Wheels
Wheels: 18 X 7 5X4.75 B.C. 4.5 " B/S,18X10 5X4.75 B.C. 5.5" B/S
YearOne
Rear quarter panels, rocker panels, trunk extension panel, dashboard, timing cover, outer wheel houses, rear floor pan, front lower quarter panels, four speed hump, window felts, window channels, full front floor pans.
Video Transcript
Today on muscle car with cut off tools, five boxes of
Clios, a little of this boom to go. Wow. Wow. Some of that
and 200 pounds of pudding lou made another show.
Some of you may recognize the ref
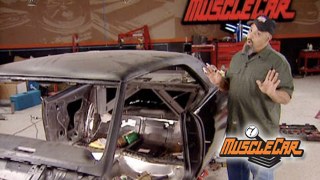
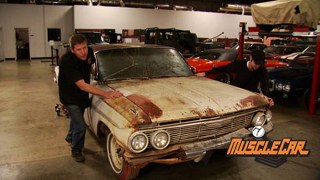
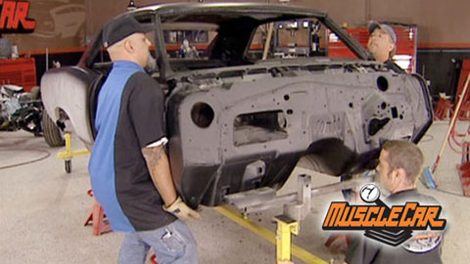
fab realigned, repainted, not to mention rep powered frame for our soon to be restored. 67 lemons. Now, I just got our body back from the blaster and we're going to see exactly how accurate our parts list was. Now, every time I say the word blaster, you guys who prefer to do chemical dipping, bombard me with email.
Well, let me tell you it's all personal preference and here's why I prefer to blast.
If this car were dipped, you'd have some really clean loose metal, but the media blasting blows away everything that would fall off in the next couple of years. And it's the only true picture of what you're working with.
We knew the floor pans were shot
but because blasting shows weak metal better, we found somewhere we didn't expect.
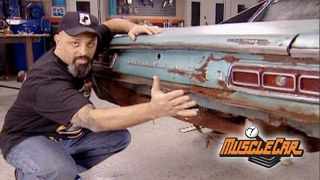
And a real surprise we looked here but couldn't see how bad it was till the media took it away.
Sometimes well sealed mud will say during dipping,
all our mud is gone. So we can see problems like this.
Hey,
I don't care how you do it. You already know how I'm gonna do it. The bottom line. A lot of this car needs to be cut out. So today, all of this will become part of the
lemons.
Since this is a frameless body, we'll need to distribute the load. So it doesn't buckle
the floor bracing still looks good.
We'll mark up the floor so we don't destroy one.
This looks like a plastic surgeon's layout for a facelift. Probably for your favorite has been celebrity.
Let the surgery begin.
We already laid in a new floor panel to see what to cut out
the tin left on the bracing is spot welded.
They make a tool for that.
We both agree. A drill bit is fast.
We got really lucky as bad as these floors were. Normally, you'd have to drill out these spot wells, lift up the rocker, slide the floor underneath and reattach it. But being that this is solid on the edge, all we're going to do is lay down the floor and weld it up. One last comment about plastic surgery. Do they really think that they're fooling anybody but themselves? We should all age gracefully. Like our producer Don
Year one supplied most of the parts for this project like these pans, they're slightly oversized and need to be trimmed
along with a little bit of the floor.
Then we can mark the underside to determine where rosette holes will need to be
some well through primer in the braces
and it's time to weld them in
these pants fit good
but not perfect.
They may not lay on the bracing flush,
but some self tapping sheet metal screws will draw up the gap.
There's a lot of holes and gaps to fill, but this gets rid of about 30% of our rust.
Here goes another 60.
Yeah.
When we bought the car, we knew all this had to go,
a little bracing will keep what's left from collapsing
there. You have it. We save the firewall, the rockers, the roof, the B pillars, the rest is trash.
Now, you guys are probably thinking these guys bought a parts car
but
the rarer a car gets, the more we're willing to do to save one, you'll see more after the break.
We're back so far. We offended car dippers.
Cut out all the rotten flooring,
made fun of plastic surgery,
replaced the floor. Whoa, laughed at our producer
and cut away the entire rear half.
That's what's left of the car. Well, almost the rest of the parts are over here and the wheelhouses are next.
We need to test for these wheelhouses to see if any modifications need to be done.
They're a two piece design. So I'm going to assemble them first.
We're using Clios to hold them together temporarily. If you've never seen these before. They work like a popper of it, but you can install and remove them as needed.
All the rear tin work will be based off of these. And since the inner quarter is the only consistent part of the car that's left,
they are reference point.
We're going with a larger wheel and tire combo.
So I'll widen these out to be safe.
I'll use some tape as a guide.
Now, I can start cutting up these brand new tubs.
Brent's making these extensions that'll add one inch to the tubs
and the flanges will make it easier to weld.
Mhm.
With the inner wheelhouse lined up,
I'll hold them in place with some more
Clios
and then do the same to the outers,
weld them up, smooth them out.
It's better to do this while they're out of a car
than when they're in.
Since we made the tubs wider, something needs to be made smaller
like the rear floor pans
with one inch off of each side.
That'll do it.
We need to save the lip to mount the wells to
by simply sliding them underneath and welding them in.
Even the factory overlapped them here in the middle.
Now, nobody's remaking this part of the trunk pants. So saving it's my only option. Plus it's not as bad as it looks.
These corners were shot, but an easy repair.
They too need to be one inch shorter on each side for the tubs
looks like the number of saved parts
just grew by one.
It's finally time to hang our quarters and it's starting to look like a lemons again. Like everything else. A little trimming is in order,
since we're gonna attach it on the body line, we've got to cut our panel on the body line,
then we're gonna cut it a quarter of an inch in from the door seam.
These panels are designed to overlap the B pillow, the rockers and beyond the body line,
that'd be the easy way to do it.
We're taking the high road and button the panels together that way she won't have any unsightly seams from overlapping metal
and it won't give that funk any chance to get in there and rot it out
because you wanna keep that funk out of your seams and I don't mean boom to go. Wow. Wow.
All that welding will come later.
It's still
Clio's for now.
It's time to protect the engine
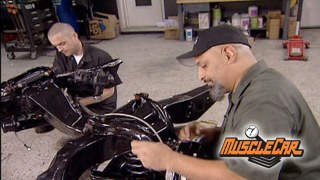
and chassis
because it's going back under the body.
We cut so much out of it. It would be real easy to screw up the entire rear third if it doesn't align with the frame
and more polyurethane bushing.
If you're a true car guy, you probably noticed these custom 18 inch aluminum matrix by intro,
10 inch wide and back, seven inch up front and BFGKDWS for rubber.
It took a few weeks to get them, but it was well worth the wait and I hope you guys can see the vision that we're going for something sexy yet strong but still all lemons. And we're gonna continue on it later on in the show
this week's Muscle car flashback, the 1970 Ford Torino.
It's the early seventies and in the world of NASCAR
Plymouth Super Birds and Charge of Daytonas dominated the super speedways. If you were lucky enough to outrun one and grab the checkered flag,
then you probably had a crew chief who could build one nasty stock car or a driver with serious skills. Sometimes you need a vote,
Ford's Torino Talladega and the Mercury Division cyclone spoiler too
were going toe to toe with them but they didn't exactly get the results they were looking for Ford needed a solution to the Mopar
threat.
So a more Aerodynamic Torino was called for
redesigned for 70. The Torino Cobra hit the track to go up against mo
parts winged Warriors. It had some success on the short tracks, but the aerodynamics just weren't enough to make the difference on the big tracks
along
wheelbase and bigger body made it heavier, forcing drivers to use the 69 models, what it lacked on the track and made up for on the street. This snake had plenty of venom and its strike was fast enough to put a hurting on some of the meanest muscle cars, less than 7700 of these were built. So if you run across one at a car show. It's pretty rare.
The fight went on the streets, huh? Good luck.
This one belongs to Mike Cunningham and he has no problem driving this one in its natural habitat.
The road,
they made 7675 of these back in 1970 which the uh Torino at the time was a motor train car of the year out of 39 factory color choices. This one is Grabber green. If the paint didn't get your attention, the standard black hood with rotary lockdowns and ram air shaker did dual exposed headlights flaked out grill, sleek body lines and magnum 500 wheels give this ride one sinister look. The sport group or fast back with an aerodynamic design. The window louvers were a factory install
and if you happen to come across one of these at a red light,
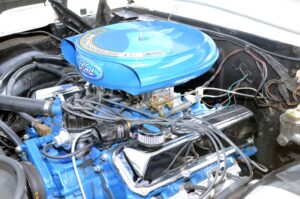
there's a warning sticker on the lower fender. 429 had three different versions of it. The thunder jet, the Cobra jet and then the super Cobra jet.
This for
29 was the new 385 engine series for 70.
It's packed 370 horse with 450 ft pounds of torque.
A hydraulic cam and hydraulic lifters topped off with a rock Chester four barrel carburetor.
It was a pretty good performance engine
for uh almost a two ton car.
A top load of four speed with a Hertz shifter made it good for mid fourteens at around 100 and two miles an hour. All black interior with vinyl bucket seats, cobra badging on the doors, a redesigned dash
and check out this ribbon tag
that was optional.
This Torino's got it where it counts.
It may not have been what Ford was hoping for in the track but on the street and strip, you don't want to mess with it if you ever run across one of these, take Mike's advice.
Leave it alone. This car does scream performance when you let loose of it.
If you think he's talking trash,
then maybe a demonstration will clear things up for you.
Hey,
don't go anywhere, hustle car be right back.
Glad you made it back
so far, we cut away about 70% of our lemons
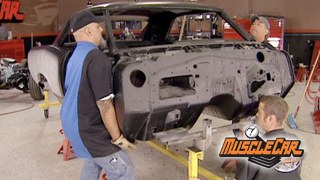
Tubb out the wheel wells, laid some flooring and started the quarters finally rolled the chassis back under it and bolted them up.
12 new braces and panels will replace four body mounts support the trunk pans, gas tank, wheel wells, quarters and rear panel and this is all that's left of our parts pile. We couldn't go any further until we got the chassis in place because the rear third of this car is literally held in place by all the
Clios. We let the old rear body supports in for now
just to keep things lined up,
the forward mounts are next and again, a little off the sides to make way for the tubs.
The same goes for the outer trunk pants. Again, reusing the lip is important,
will bolt the body mounts in
recheck that the frame rails are level,
tie the braces together,
position the side pans
now sandwich and both to the wheel.
We can tell we're doing a good job since the inner panel fits so nice.
Some things we just have to remake like this intention will be fun.
Some one inch tubing
clamps,
angle iron will do the trick.
You gotta admire a guy who trusts his work this much.
Not to mention his faith in
Clios. 200 pounds of pudding,
six parts on
six left to go.
We're bracing defenders together because the rest of the rear is coming out.
Don't forget to salvage the things you can't buy
including these body mount nut cages. We can save one
but the others trash.
But that's ok.
The fun is in the creation.
We knew these tabs were shot and we'll make new ones later,
but now they'll hold the panel in place and yes, it's for a GTO.
We'll fix that too
since things seem to be aligned here too,
it's safe to put in our side panels that secure to the quarters.
Another panel needs making
with some rather odd bends.
It's the trunk pan extension.
Ours was shot.
We'll leave a slight overhang till the bumpers are pre ft.
The last two braces helped tie the pants together and it also gives the tanks something to hang from
everything at this point is fit really well. But now the true test the trunk deck,
it's really close but not quite perfect.
And that's why we burned through almost 200 Clios. We're not welding it up till it's spot on.
We kept our word, our pile of parts is gone and our Lamons got a facelift, a tummy tuck. It even got some lipo. Now, next week we're gonna deal with something that you guys are probably dealing with at home. Tin worm carnage until then keep the rust out of your seams later.
Show Full Transcript
Clios, a little of this boom to go. Wow. Wow. Some of that
and 200 pounds of pudding lou made another show.
Some of you may recognize the ref
fab realigned, repainted, not to mention rep powered frame for our soon to be restored. 67 lemons. Now, I just got our body back from the blaster and we're going to see exactly how accurate our parts list was. Now, every time I say the word blaster, you guys who prefer to do chemical dipping, bombard me with email.
Well, let me tell you it's all personal preference and here's why I prefer to blast.
If this car were dipped, you'd have some really clean loose metal, but the media blasting blows away everything that would fall off in the next couple of years. And it's the only true picture of what you're working with.
We knew the floor pans were shot
but because blasting shows weak metal better, we found somewhere we didn't expect.
And a real surprise we looked here but couldn't see how bad it was till the media took it away.
Sometimes well sealed mud will say during dipping,
all our mud is gone. So we can see problems like this.
Hey,
I don't care how you do it. You already know how I'm gonna do it. The bottom line. A lot of this car needs to be cut out. So today, all of this will become part of the
lemons.
Since this is a frameless body, we'll need to distribute the load. So it doesn't buckle
the floor bracing still looks good.
We'll mark up the floor so we don't destroy one.
This looks like a plastic surgeon's layout for a facelift. Probably for your favorite has been celebrity.
Let the surgery begin.
We already laid in a new floor panel to see what to cut out
the tin left on the bracing is spot welded.
They make a tool for that.
We both agree. A drill bit is fast.
We got really lucky as bad as these floors were. Normally, you'd have to drill out these spot wells, lift up the rocker, slide the floor underneath and reattach it. But being that this is solid on the edge, all we're going to do is lay down the floor and weld it up. One last comment about plastic surgery. Do they really think that they're fooling anybody but themselves? We should all age gracefully. Like our producer Don
Year one supplied most of the parts for this project like these pans, they're slightly oversized and need to be trimmed
along with a little bit of the floor.
Then we can mark the underside to determine where rosette holes will need to be
some well through primer in the braces
and it's time to weld them in
these pants fit good
but not perfect.
They may not lay on the bracing flush,
but some self tapping sheet metal screws will draw up the gap.
There's a lot of holes and gaps to fill, but this gets rid of about 30% of our rust.
Here goes another 60.
Yeah.
When we bought the car, we knew all this had to go,
a little bracing will keep what's left from collapsing
there. You have it. We save the firewall, the rockers, the roof, the B pillars, the rest is trash.
Now, you guys are probably thinking these guys bought a parts car
but
the rarer a car gets, the more we're willing to do to save one, you'll see more after the break.
We're back so far. We offended car dippers.
Cut out all the rotten flooring,
made fun of plastic surgery,
replaced the floor. Whoa, laughed at our producer
and cut away the entire rear half.
That's what's left of the car. Well, almost the rest of the parts are over here and the wheelhouses are next.
We need to test for these wheelhouses to see if any modifications need to be done.
They're a two piece design. So I'm going to assemble them first.
We're using Clios to hold them together temporarily. If you've never seen these before. They work like a popper of it, but you can install and remove them as needed.
All the rear tin work will be based off of these. And since the inner quarter is the only consistent part of the car that's left,
they are reference point.
We're going with a larger wheel and tire combo.
So I'll widen these out to be safe.
I'll use some tape as a guide.
Now, I can start cutting up these brand new tubs.
Brent's making these extensions that'll add one inch to the tubs
and the flanges will make it easier to weld.
Mhm.
With the inner wheelhouse lined up,
I'll hold them in place with some more
Clios
and then do the same to the outers,
weld them up, smooth them out.
It's better to do this while they're out of a car
than when they're in.
Since we made the tubs wider, something needs to be made smaller
like the rear floor pans
with one inch off of each side.
That'll do it.
We need to save the lip to mount the wells to
by simply sliding them underneath and welding them in.
Even the factory overlapped them here in the middle.
Now, nobody's remaking this part of the trunk pants. So saving it's my only option. Plus it's not as bad as it looks.
These corners were shot, but an easy repair.
They too need to be one inch shorter on each side for the tubs
looks like the number of saved parts
just grew by one.
It's finally time to hang our quarters and it's starting to look like a lemons again. Like everything else. A little trimming is in order,
since we're gonna attach it on the body line, we've got to cut our panel on the body line,
then we're gonna cut it a quarter of an inch in from the door seam.
These panels are designed to overlap the B pillow, the rockers and beyond the body line,
that'd be the easy way to do it.
We're taking the high road and button the panels together that way she won't have any unsightly seams from overlapping metal
and it won't give that funk any chance to get in there and rot it out
because you wanna keep that funk out of your seams and I don't mean boom to go. Wow. Wow.
All that welding will come later.
It's still
Clio's for now.
It's time to protect the engine
and chassis
because it's going back under the body.
We cut so much out of it. It would be real easy to screw up the entire rear third if it doesn't align with the frame
and more polyurethane bushing.
If you're a true car guy, you probably noticed these custom 18 inch aluminum matrix by intro,
10 inch wide and back, seven inch up front and BFGKDWS for rubber.
It took a few weeks to get them, but it was well worth the wait and I hope you guys can see the vision that we're going for something sexy yet strong but still all lemons. And we're gonna continue on it later on in the show
this week's Muscle car flashback, the 1970 Ford Torino.
It's the early seventies and in the world of NASCAR
Plymouth Super Birds and Charge of Daytonas dominated the super speedways. If you were lucky enough to outrun one and grab the checkered flag,
then you probably had a crew chief who could build one nasty stock car or a driver with serious skills. Sometimes you need a vote,
Ford's Torino Talladega and the Mercury Division cyclone spoiler too
were going toe to toe with them but they didn't exactly get the results they were looking for Ford needed a solution to the Mopar
threat.
So a more Aerodynamic Torino was called for
redesigned for 70. The Torino Cobra hit the track to go up against mo
parts winged Warriors. It had some success on the short tracks, but the aerodynamics just weren't enough to make the difference on the big tracks
along
wheelbase and bigger body made it heavier, forcing drivers to use the 69 models, what it lacked on the track and made up for on the street. This snake had plenty of venom and its strike was fast enough to put a hurting on some of the meanest muscle cars, less than 7700 of these were built. So if you run across one at a car show. It's pretty rare.
The fight went on the streets, huh? Good luck.
This one belongs to Mike Cunningham and he has no problem driving this one in its natural habitat.
The road,
they made 7675 of these back in 1970 which the uh Torino at the time was a motor train car of the year out of 39 factory color choices. This one is Grabber green. If the paint didn't get your attention, the standard black hood with rotary lockdowns and ram air shaker did dual exposed headlights flaked out grill, sleek body lines and magnum 500 wheels give this ride one sinister look. The sport group or fast back with an aerodynamic design. The window louvers were a factory install
and if you happen to come across one of these at a red light,
there's a warning sticker on the lower fender. 429 had three different versions of it. The thunder jet, the Cobra jet and then the super Cobra jet.
This for
29 was the new 385 engine series for 70.
It's packed 370 horse with 450 ft pounds of torque.
A hydraulic cam and hydraulic lifters topped off with a rock Chester four barrel carburetor.
It was a pretty good performance engine
for uh almost a two ton car.
A top load of four speed with a Hertz shifter made it good for mid fourteens at around 100 and two miles an hour. All black interior with vinyl bucket seats, cobra badging on the doors, a redesigned dash
and check out this ribbon tag
that was optional.
This Torino's got it where it counts.
It may not have been what Ford was hoping for in the track but on the street and strip, you don't want to mess with it if you ever run across one of these, take Mike's advice.
Leave it alone. This car does scream performance when you let loose of it.
If you think he's talking trash,
then maybe a demonstration will clear things up for you.
Hey,
don't go anywhere, hustle car be right back.
Glad you made it back
so far, we cut away about 70% of our lemons
Tubb out the wheel wells, laid some flooring and started the quarters finally rolled the chassis back under it and bolted them up.
12 new braces and panels will replace four body mounts support the trunk pans, gas tank, wheel wells, quarters and rear panel and this is all that's left of our parts pile. We couldn't go any further until we got the chassis in place because the rear third of this car is literally held in place by all the
Clios. We let the old rear body supports in for now
just to keep things lined up,
the forward mounts are next and again, a little off the sides to make way for the tubs.
The same goes for the outer trunk pants. Again, reusing the lip is important,
will bolt the body mounts in
recheck that the frame rails are level,
tie the braces together,
position the side pans
now sandwich and both to the wheel.
We can tell we're doing a good job since the inner panel fits so nice.
Some things we just have to remake like this intention will be fun.
Some one inch tubing
clamps,
angle iron will do the trick.
You gotta admire a guy who trusts his work this much.
Not to mention his faith in
Clios. 200 pounds of pudding,
six parts on
six left to go.
We're bracing defenders together because the rest of the rear is coming out.
Don't forget to salvage the things you can't buy
including these body mount nut cages. We can save one
but the others trash.
But that's ok.
The fun is in the creation.
We knew these tabs were shot and we'll make new ones later,
but now they'll hold the panel in place and yes, it's for a GTO.
We'll fix that too
since things seem to be aligned here too,
it's safe to put in our side panels that secure to the quarters.
Another panel needs making
with some rather odd bends.
It's the trunk pan extension.
Ours was shot.
We'll leave a slight overhang till the bumpers are pre ft.
The last two braces helped tie the pants together and it also gives the tanks something to hang from
everything at this point is fit really well. But now the true test the trunk deck,
it's really close but not quite perfect.
And that's why we burned through almost 200 Clios. We're not welding it up till it's spot on.
We kept our word, our pile of parts is gone and our Lamons got a facelift, a tummy tuck. It even got some lipo. Now, next week we're gonna deal with something that you guys are probably dealing with at home. Tin worm carnage until then keep the rust out of your seams later.