More '67 Pontiac LeMans Episodes
MuscleCar Builds
Want more content like this?
Join the PowerNation Email NewsletterParts Used In This Episode
Auto Custom Carpets INC.
Replacement molded carpet set, Houndstooth trunk mat, floor mats with Pontiac logos.
Heavy's Customs
Headliner install with factory bows and factory style material.
Hot Rod Air
Hot Rod Air, Inc. manufactures several Hot Rod, Street Rod, Custom & Classic Vehicle Systems as well as specific factory replacement kits and various universal applications.
Hushmat
30 sheets of 12" x 23" hushmat ultra damping pads.
Matco Tools
Plastic welding kit.
Painless Performance
12 circuit GM keyed wiring kit.
YearOne
5 piece headliner bow set, front headliner windlace, headliner insulation, headliner side welting, headliner.
YearOne
AM/FM stereo with 12 disc JVC cd changer,rear deck pad, dual front speakers, 6x9 triaxial speakers, package tray.
YearOne
Sunvisors, sunvisor brackets, sunvisor bushing tips, interior rearview mirror, headliner side welting, reveal molding clips.
Video Transcript
On today's show. Interior restoration from headliners to steering wheels. Muscle car is going to show you how to do it
and we take a look back at a luxury sport classic.
Welcome to the shop. Our 67 Lemon's budget project is coming together just as we planned and we've managed to save a lot of the original parts
last week, Brent and Rick got the body work and paint finished.
I took care of some odds and ends including the brake and fuel plumbing and exhaust.
Now, today we need to get the wiring and the ac done, get the interior in and get the gauges installed. Now, I gotta be honest with you here. I hate wiring. In fact, I'd rather drag my
through a mile of broken glass and do wiring. So you know what, I'm gonna let lou take a crack at it. I'm gonna go do the steering column.
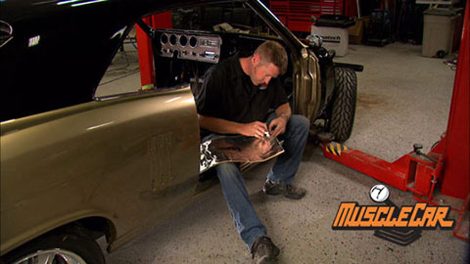
Now, since this car was an auto and we're going for speed the, on the column shift or an indicator. Gotta go.
Ok. And now you wanna be really careful and save all these original parts here. Oh,
cut off wheel plus hammer equals no more unwanted pieces
with the wheel pulled off and the guts removed. I can patch the holes.
Now, for the bigger one, I'm using a piece of steel welding a place. The smaller one gets a glob of JB weld.
And more often than not, you see these old steel was thrown in the trash can, but you don't have to do that. You can save them and it's not that difficult.
Rough ages need to be ground down
and then filled with two par plastic repair,
a layer of body filler and a lot of sanding gives it a smooth surface.
The automotive paint butter black of course works just fine for the column on the wheels.
You know, this thing is looking pretty good and with a new turn signal switch, it's gonna work great. Also,
now, while I've been bringing the steering column back to its former glory, Brent's been working on restoring some original pieces too.
Parts that have to withstand rough conditions like bumper brackets and wheel wells need something tougher than paint to protect them.
And that's where powder coating comes in.
The parts are hit with a negative charge and the powder is positively charged. So once you start spraying, the powder is attracting the part just like a magnet.
Now, once they're coated, it's into the oven,
we're looking for a surface temp of 400 degrees. So we need to wait just a few more minutes on these.
And once it cools. It's tough as nails and ready to use. Why is it? Rainbow colored?
Ok. It's the only color we had on hand and
it's magically delicious.
Wiring a car is not an easy job, but if you take your time, you'll get it right. And it'll save you a lot of headaches later on down the road. This harness from painless is good because everything is labeled, making it a lot easier.
Another great thing about this harness is that the fuse block is prewired.
I've already bundled up the wires and I'm running them out where they need to go.
These run in the trunk
and a strip of hush Maack helps keep them in place,
trim out all the lines you're not using and hook up the rest.
If you really want to be chilling in your ride, then this add ons for you. No factory ac no problem. This kit from Hot Rod Air has everything you need.
The best part is you send them your original control panel and they modify it to work with the kit. That means you keep your stock. Look with just a small knob that you can hide under the dash.
If your car came with dash fans, you'll want to use them. The lemons
didn't. So we're going to use the ones that came with the kit.
The evaporator mounts under the dash.
Remember this is a universal kit.
So you may have to fabricate some mounting brackets,
you don't want this thing to land on your feet on a bumpy road.
I want to use the original defrost vents because they bolt right in and they fit nice and tight. My only problem is, is using the one from the kit and being able to join it to the old one. I was told a plastic welder could do this. Now, I've never used one before, but I heard Rick has, did someone say plastic welding?
I'll give it a shot.
This plastic welder kit from Metco is pretty cool and it's not too expensive.
Now, once you know what kind of plastic you've got and yes, that does mean reading the instructions. Then you know what kind of rod you use and where to set your heat.
Got pictures. Yes, it does.
We're covered, we're covered
now, make sure the plastic is clean. So you'll get good adhesion and move the welder slow enough to melt the base material.
The fumes from this thing had our camera guy a little loopy.
You need to use the sa
I don't think they're toxic. So, uh he must have some other issues
and yes, the round tip is used to smooth out the rough edges
now, a few minutes to cool and it's ready to install.
This. Makes you a plastic surgeon.
00,
yeah, that fits perfect.
Now that everything fits like it's supposed to, I'm gonna take some duct tape and wrap it around just to make sure there's no loose edges,
that's one vent down. But we've got several more to go.
Wire ties are great for this. Everybody's got some laying around
and they're easy to use.
Year one supplied us with the radio.
It's an original analog style, but it's really a modern digital inside
complete with a CD changer and speakers because Brent says it's not really a car without tunes.
We're making a lot of progress on our interior projects, but there's lots more to go. Brent's installing the gauges. Rick's putting in the quarter glass after the break, I'm gonna be installing the AC compressor.
If you tackle headliner installation yourself, find out after the break,
we're back. I run the AC lines through the firewall so it's time to mount the compressor, but I've encountered a slight problem. This bracket is made for a 350
not a 326 Pontiac. And to the best of my knowledge, nobody makes one. So I'm going to do what I got to do. I'm going to modify it.
I had to get creative.
I pulled together some materials I found around the shop and welded everything together to make it work.
I used an old extension cord as a mock up because I didn't know how long the belt would be. Then I tightened everything up, made my measurements welded it. You wanna make sure that the bracket is nice and tight. So when the clutch engages, it doesn't twist around and throw the belt.
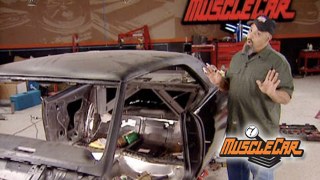
Now while Lou finishes the Ac Brent and I are working on the interior. We still have a lot left to do. We still have to get the hush mat down the carpet, the seats, the door panels is a lot there. But if you notice the headliner has already been installed and that takes a lot of patience to do and do correctly. And that's a little something we're short on around here. So we called in an expert.
Go ahead and start figuring
Kevin from,
he's in Lebanon, Tennessee has done hundreds of these and he dropped by to show us how it's done.
So, why are you actually steaming it before you put it in anyway?
Uh, these are box wrinkles and they'll eventually come out if we don't steam them first. Uh huh.
But I like to get them out. So the job looks right when it's, when I'm ready to walk away from it, it's done.
His first tip
lu the bows with WD 40 for easy insertion. So, how long have you been doing this anyway? 32 years, 32 years now, make sure you know which bows are, which before getting in the car,
I guess we're putting the center in first. Yeah,
I got it in my hand
and Kevin makes it look easy. It's time for me to give it a try
here. It is
not too shabby
now. Kevin's using Weldwood, which is an industrial grade adhesive specifically for this type of job.
If you're trying this, yourself, search the local hardware store and you should be able to find some
once the glue is set, smooth out the wrinkles as you stick it down
the edges and corners get trimmed and tucked in
and the welting holds it in place and hides the raw cuts.
The sail panels need to be glued in before the rear deck.
Now, before the headliner was installed, Kevin had the forethought to put screws in all the needed holes as placeholders when the time comes to install the mirror bracket,
visors, dome light and coat hooks. Just feel for the screws and snip the holes.
Wow, man. Looks like you're almost done just about. Got it. Oh, awesome job, dude. It looks beautiful.
Oh,
thank you.
So, what do you think? Could I do this now?
Uh,
I, I could do it at home if he wanted to, but you have to have a lot of patience. Yeah. Good group. Yeah, I tell you, I'm more than happy to let you take care of this one for us. I appreciate it.
Ok. The headliner is in and the dash is looking great. But before we go any further, we're gonna insulate the interior with some hush mat.
It keeps the car quiet by reducing vibration. Now it's easy to install. Just cut it to shape, peel and stick.
The goal is to cover 75% of the interior surfaces.
AC C makes carpet to fit almost any car, including our lemons. It's molded so it already fits the contours of the floor pan.
We have to cut a hole for the shifter and the best way to do that is to lay it in place and cut it in the car,
the seats and sill plates will hold it down.
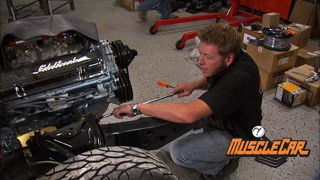
We wanna get as much on the engine as we can while the front clip is off. So we're installing the power steering pump in the alternator and we're reusing the original brackets. Hey, little, don't you wanna install the steering con first? And it, this way,
since this is the original column, there shouldn't be any problems putting it in.
Next comes the power steering pump.
Then the alternator, everything lines up. So we're in good shape.
Something you wanna remember, coils are full of oil. That's what keeps them cool. So when you mount it, make sure your poles are down low. If you have it where the pole is up top, if there's an air bubble, it'll cause it to burn up and you'll be going to the store to buy a new one.
I'm mounting the coil as close to the distributor as possible. This way, I don't have a long coil wire which means less resistance.
I
finished up everything I could do in the engine compartment. But after the break, we're going to finish up the interior and start hanging some body panels
next up. It may not be at the top of the muscle car list, but with a 390 this bird can get up and go.
Today's muscle car flashback. A 65 thunderbird 390
the year is 1955 and Ford is rolling out a completely new line of cars. The name Thunderbird
marketed as a personal luxury vehicle. The new Ford line was stylish, sporty and pricey.
It was said that Joe
Oros, the designer of the early Thunderbirds took styling cues from the Navy's Chance VF seven U when he was designing, the early birds
looks evolved over the next 10 years. And by 1965 the focus was still luxury but 300 horses pulling the rear wheels, put some pepper in this bird's tail feathers.
Just ask Katrina Fleer.
It has the power, it has the elegance, it has all the amenities.
It's a beautiful vehicle. It just has the essence of the sixties
beauty
is exactly what Ford was aiming for.
Hood scoops and reverse scoops behind the front wheels complement the long smooth body lines that run the entire length of the car,
chrome
trim and bumpers along with a set of wire wheels accent the turquoise paint perfectly.
The sequential taillights out back were supposed to be new in 64 but legal red tape prevented them from making their debut until the following year.
The cockpit like interior looked as if it were carved out of the external shell,
the back seats are perfectly contoured with the body
power windows and mirrors start the long list of luxury accessories, bucket seats were designed with passenger comfort in mind and a swing away steering column allows for easy entry and exit
AM FM radio with reverb
controls and gauges that look like they belong in an airplane
and a factory installed AC but who needs it?
There's only one way to roll in one of these.
Oh, always the top down.
The convertible top is tucked away into the trunk with the simple push of a button.
And with the top back, this bird is ready to cruise.
This is my country cruiser.
This car is, uh, very reliable. Um, I would drive this car across country and not worry about it.
We take it back on the country roads and just have a good time with it.
The 390 is mounted to a three speed automatic transmission and it smoothly direction 300 horses out to the rear wheels,
power disc brakes were new in 65 and replaced the drums from earlier models,
fad
and water resistance is important on a two ton vehicle capable of 120 miles an hour.
Katrina picked up this beauty a few years back from the original owner at the time, she wasn't looking for a t bird, but just one look, changed everything.
And as soon as I saw the car and I saw that frost turquoise and the white top
I was sold.
Maybe it's the luxury interior or it could be the 300 horses on command.
Maybe it's just because it's so darn good looking. Whatever the reason these cars have chiseled out of place in car collectors, hearts and American lore
stick
around more muscle car coming up after the break.
Hey, we got our seats in the lemons and the interior is done except for just a few more details.
Again, we recycled as many old parts as we could,
but we did end up having to order some things like the visor.
Now, I've been building and painting cars for a lot of years and I've been to a lot of car shows, had a lot of cars in car shows. One thing I've noticed time and time again over the years is that even though a car may really grab your attention from across the lot,
sometimes you walk over and take a look at it and the interior is trash. You know, you see wires hanging out from under the dash, loose knobs, torn upholstery and whatnot
really detracts from the vehicle as a whole.
Now, I know that the interior may not be the most exciting part of a vehicle build, but it really needs to be done correctly. And if it's done correctly, it can add to the whole experience of driving and comfort and whatnot and it can actually make it feel like a brand new car. You don't mind driving it to the shows instead of trailer in it.
Now, I know our lemons here is still a work in progress and it's really, it's really coming together nice and it's gonna be something that we can be proud of. So I'm gonna continue working on it here and see how close I can get it back to stock.
I've still got to get our slave cylinder mounted. This is one more thing that's gonna require some modification because of our four speed conversion.
I'm using this original hole in the firewall and I've modified the mounting plate. Rick Give me a hand with this man.
Now, this is actually the old fuse box hole. We only need to drill one hole and the wider mounting plate will add the surface area need to disappear it.
We modified the pedal with an added piece to line it up with a clutch master cylinder.
Sweet. We get to start hanging some body panels. That's right. The first thing that goes on is the doors, the fenders. After that, we can finish up the wiring and then the trim in the bumper. Let's not forget about the glass because I don't like getting bugs in my teeth when I'm driving
next time you see the lemons,
we're gonna finish it up and then we're gonna be tearing up some pavement later. Hell yeah, let's do this.
Show Full Transcript
and we take a look back at a luxury sport classic.
Welcome to the shop. Our 67 Lemon's budget project is coming together just as we planned and we've managed to save a lot of the original parts
last week, Brent and Rick got the body work and paint finished.
I took care of some odds and ends including the brake and fuel plumbing and exhaust.
Now, today we need to get the wiring and the ac done, get the interior in and get the gauges installed. Now, I gotta be honest with you here. I hate wiring. In fact, I'd rather drag my
through a mile of broken glass and do wiring. So you know what, I'm gonna let lou take a crack at it. I'm gonna go do the steering column.
Now, since this car was an auto and we're going for speed the, on the column shift or an indicator. Gotta go.
Ok. And now you wanna be really careful and save all these original parts here. Oh,
cut off wheel plus hammer equals no more unwanted pieces
with the wheel pulled off and the guts removed. I can patch the holes.
Now, for the bigger one, I'm using a piece of steel welding a place. The smaller one gets a glob of JB weld.
And more often than not, you see these old steel was thrown in the trash can, but you don't have to do that. You can save them and it's not that difficult.
Rough ages need to be ground down
and then filled with two par plastic repair,
a layer of body filler and a lot of sanding gives it a smooth surface.
The automotive paint butter black of course works just fine for the column on the wheels.
You know, this thing is looking pretty good and with a new turn signal switch, it's gonna work great. Also,
now, while I've been bringing the steering column back to its former glory, Brent's been working on restoring some original pieces too.
Parts that have to withstand rough conditions like bumper brackets and wheel wells need something tougher than paint to protect them.
And that's where powder coating comes in.
The parts are hit with a negative charge and the powder is positively charged. So once you start spraying, the powder is attracting the part just like a magnet.
Now, once they're coated, it's into the oven,
we're looking for a surface temp of 400 degrees. So we need to wait just a few more minutes on these.
And once it cools. It's tough as nails and ready to use. Why is it? Rainbow colored?
Ok. It's the only color we had on hand and
it's magically delicious.
Wiring a car is not an easy job, but if you take your time, you'll get it right. And it'll save you a lot of headaches later on down the road. This harness from painless is good because everything is labeled, making it a lot easier.
Another great thing about this harness is that the fuse block is prewired.
I've already bundled up the wires and I'm running them out where they need to go.
These run in the trunk
and a strip of hush Maack helps keep them in place,
trim out all the lines you're not using and hook up the rest.
If you really want to be chilling in your ride, then this add ons for you. No factory ac no problem. This kit from Hot Rod Air has everything you need.
The best part is you send them your original control panel and they modify it to work with the kit. That means you keep your stock. Look with just a small knob that you can hide under the dash.
If your car came with dash fans, you'll want to use them. The lemons
didn't. So we're going to use the ones that came with the kit.
The evaporator mounts under the dash.
Remember this is a universal kit.
So you may have to fabricate some mounting brackets,
you don't want this thing to land on your feet on a bumpy road.
I want to use the original defrost vents because they bolt right in and they fit nice and tight. My only problem is, is using the one from the kit and being able to join it to the old one. I was told a plastic welder could do this. Now, I've never used one before, but I heard Rick has, did someone say plastic welding?
I'll give it a shot.
This plastic welder kit from Metco is pretty cool and it's not too expensive.
Now, once you know what kind of plastic you've got and yes, that does mean reading the instructions. Then you know what kind of rod you use and where to set your heat.
Got pictures. Yes, it does.
We're covered, we're covered
now, make sure the plastic is clean. So you'll get good adhesion and move the welder slow enough to melt the base material.
The fumes from this thing had our camera guy a little loopy.
You need to use the sa
I don't think they're toxic. So, uh he must have some other issues
and yes, the round tip is used to smooth out the rough edges
now, a few minutes to cool and it's ready to install.
This. Makes you a plastic surgeon.
00,
yeah, that fits perfect.
Now that everything fits like it's supposed to, I'm gonna take some duct tape and wrap it around just to make sure there's no loose edges,
that's one vent down. But we've got several more to go.
Wire ties are great for this. Everybody's got some laying around
and they're easy to use.
Year one supplied us with the radio.
It's an original analog style, but it's really a modern digital inside
complete with a CD changer and speakers because Brent says it's not really a car without tunes.
We're making a lot of progress on our interior projects, but there's lots more to go. Brent's installing the gauges. Rick's putting in the quarter glass after the break, I'm gonna be installing the AC compressor.
If you tackle headliner installation yourself, find out after the break,
we're back. I run the AC lines through the firewall so it's time to mount the compressor, but I've encountered a slight problem. This bracket is made for a 350
not a 326 Pontiac. And to the best of my knowledge, nobody makes one. So I'm going to do what I got to do. I'm going to modify it.
I had to get creative.
I pulled together some materials I found around the shop and welded everything together to make it work.
I used an old extension cord as a mock up because I didn't know how long the belt would be. Then I tightened everything up, made my measurements welded it. You wanna make sure that the bracket is nice and tight. So when the clutch engages, it doesn't twist around and throw the belt.
Now while Lou finishes the Ac Brent and I are working on the interior. We still have a lot left to do. We still have to get the hush mat down the carpet, the seats, the door panels is a lot there. But if you notice the headliner has already been installed and that takes a lot of patience to do and do correctly. And that's a little something we're short on around here. So we called in an expert.
Go ahead and start figuring
Kevin from,
he's in Lebanon, Tennessee has done hundreds of these and he dropped by to show us how it's done.
So, why are you actually steaming it before you put it in anyway?
Uh, these are box wrinkles and they'll eventually come out if we don't steam them first. Uh huh.
But I like to get them out. So the job looks right when it's, when I'm ready to walk away from it, it's done.
His first tip
lu the bows with WD 40 for easy insertion. So, how long have you been doing this anyway? 32 years, 32 years now, make sure you know which bows are, which before getting in the car,
I guess we're putting the center in first. Yeah,
I got it in my hand
and Kevin makes it look easy. It's time for me to give it a try
here. It is
not too shabby
now. Kevin's using Weldwood, which is an industrial grade adhesive specifically for this type of job.
If you're trying this, yourself, search the local hardware store and you should be able to find some
once the glue is set, smooth out the wrinkles as you stick it down
the edges and corners get trimmed and tucked in
and the welting holds it in place and hides the raw cuts.
The sail panels need to be glued in before the rear deck.
Now, before the headliner was installed, Kevin had the forethought to put screws in all the needed holes as placeholders when the time comes to install the mirror bracket,
visors, dome light and coat hooks. Just feel for the screws and snip the holes.
Wow, man. Looks like you're almost done just about. Got it. Oh, awesome job, dude. It looks beautiful.
Oh,
thank you.
So, what do you think? Could I do this now?
Uh,
I, I could do it at home if he wanted to, but you have to have a lot of patience. Yeah. Good group. Yeah, I tell you, I'm more than happy to let you take care of this one for us. I appreciate it.
Ok. The headliner is in and the dash is looking great. But before we go any further, we're gonna insulate the interior with some hush mat.
It keeps the car quiet by reducing vibration. Now it's easy to install. Just cut it to shape, peel and stick.
The goal is to cover 75% of the interior surfaces.
AC C makes carpet to fit almost any car, including our lemons. It's molded so it already fits the contours of the floor pan.
We have to cut a hole for the shifter and the best way to do that is to lay it in place and cut it in the car,
the seats and sill plates will hold it down.
We wanna get as much on the engine as we can while the front clip is off. So we're installing the power steering pump in the alternator and we're reusing the original brackets. Hey, little, don't you wanna install the steering con first? And it, this way,
since this is the original column, there shouldn't be any problems putting it in.
Next comes the power steering pump.
Then the alternator, everything lines up. So we're in good shape.
Something you wanna remember, coils are full of oil. That's what keeps them cool. So when you mount it, make sure your poles are down low. If you have it where the pole is up top, if there's an air bubble, it'll cause it to burn up and you'll be going to the store to buy a new one.
I'm mounting the coil as close to the distributor as possible. This way, I don't have a long coil wire which means less resistance.
I
finished up everything I could do in the engine compartment. But after the break, we're going to finish up the interior and start hanging some body panels
next up. It may not be at the top of the muscle car list, but with a 390 this bird can get up and go.
Today's muscle car flashback. A 65 thunderbird 390
the year is 1955 and Ford is rolling out a completely new line of cars. The name Thunderbird
marketed as a personal luxury vehicle. The new Ford line was stylish, sporty and pricey.
It was said that Joe
Oros, the designer of the early Thunderbirds took styling cues from the Navy's Chance VF seven U when he was designing, the early birds
looks evolved over the next 10 years. And by 1965 the focus was still luxury but 300 horses pulling the rear wheels, put some pepper in this bird's tail feathers.
Just ask Katrina Fleer.
It has the power, it has the elegance, it has all the amenities.
It's a beautiful vehicle. It just has the essence of the sixties
beauty
is exactly what Ford was aiming for.
Hood scoops and reverse scoops behind the front wheels complement the long smooth body lines that run the entire length of the car,
chrome
trim and bumpers along with a set of wire wheels accent the turquoise paint perfectly.
The sequential taillights out back were supposed to be new in 64 but legal red tape prevented them from making their debut until the following year.
The cockpit like interior looked as if it were carved out of the external shell,
the back seats are perfectly contoured with the body
power windows and mirrors start the long list of luxury accessories, bucket seats were designed with passenger comfort in mind and a swing away steering column allows for easy entry and exit
AM FM radio with reverb
controls and gauges that look like they belong in an airplane
and a factory installed AC but who needs it?
There's only one way to roll in one of these.
Oh, always the top down.
The convertible top is tucked away into the trunk with the simple push of a button.
And with the top back, this bird is ready to cruise.
This is my country cruiser.
This car is, uh, very reliable. Um, I would drive this car across country and not worry about it.
We take it back on the country roads and just have a good time with it.
The 390 is mounted to a three speed automatic transmission and it smoothly direction 300 horses out to the rear wheels,
power disc brakes were new in 65 and replaced the drums from earlier models,
fad
and water resistance is important on a two ton vehicle capable of 120 miles an hour.
Katrina picked up this beauty a few years back from the original owner at the time, she wasn't looking for a t bird, but just one look, changed everything.
And as soon as I saw the car and I saw that frost turquoise and the white top
I was sold.
Maybe it's the luxury interior or it could be the 300 horses on command.
Maybe it's just because it's so darn good looking. Whatever the reason these cars have chiseled out of place in car collectors, hearts and American lore
stick
around more muscle car coming up after the break.
Hey, we got our seats in the lemons and the interior is done except for just a few more details.
Again, we recycled as many old parts as we could,
but we did end up having to order some things like the visor.
Now, I've been building and painting cars for a lot of years and I've been to a lot of car shows, had a lot of cars in car shows. One thing I've noticed time and time again over the years is that even though a car may really grab your attention from across the lot,
sometimes you walk over and take a look at it and the interior is trash. You know, you see wires hanging out from under the dash, loose knobs, torn upholstery and whatnot
really detracts from the vehicle as a whole.
Now, I know that the interior may not be the most exciting part of a vehicle build, but it really needs to be done correctly. And if it's done correctly, it can add to the whole experience of driving and comfort and whatnot and it can actually make it feel like a brand new car. You don't mind driving it to the shows instead of trailer in it.
Now, I know our lemons here is still a work in progress and it's really, it's really coming together nice and it's gonna be something that we can be proud of. So I'm gonna continue working on it here and see how close I can get it back to stock.
I've still got to get our slave cylinder mounted. This is one more thing that's gonna require some modification because of our four speed conversion.
I'm using this original hole in the firewall and I've modified the mounting plate. Rick Give me a hand with this man.
Now, this is actually the old fuse box hole. We only need to drill one hole and the wider mounting plate will add the surface area need to disappear it.
We modified the pedal with an added piece to line it up with a clutch master cylinder.
Sweet. We get to start hanging some body panels. That's right. The first thing that goes on is the doors, the fenders. After that, we can finish up the wiring and then the trim in the bumper. Let's not forget about the glass because I don't like getting bugs in my teeth when I'm driving
next time you see the lemons,
we're gonna finish it up and then we're gonna be tearing up some pavement later. Hell yeah, let's do this.