MuscleCar Builds

Parts Used In This Episode

Auto Body Color & Supply Co.
Primer and sealers, Rust Defender.
Metalcraft Tools
The English Wheel is shaped like a large "C". There is a large 9" x 3" wheel with a flat working surface mounted at the top. There is a smaller 3" x 3" wheel mounted at the bottom with a curved working surface.
Tennsmith
Tennsmith's slip rolls combine precision-turned, ground and polished high carbon steel rolls with heavy-duty, cast iron end frames and a welded steel base to make an accurate and durable forming tool.
Video Transcript

Today on muscle car, there's a section.

How much cutting does it take to make an A FX drag car?

We'll show you and take a ride in a dodge designed to go straight from street to strip.

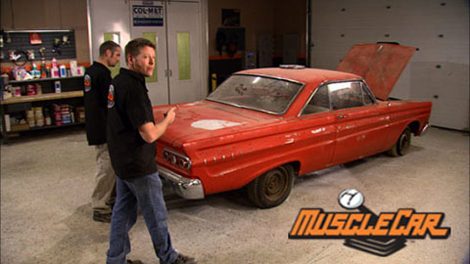
Hey, guys, welcome to the shop and it's getting a little crowded in here. We got project red sled over here, taking up floor space. The body work is coming along great over here, we got the firebird hanging on the rotisserie or what's left of it anyway. And it's awaiting its fate. But now we're rolling in a whole new project. Call us gluttons for punishment. The 64 Comet here has been screaming one word to us since the day it rolled in here, altered

tire, smoke wheel stands and a driver with a gallon of adrenaline in his vein. Slamming. Four gears are hallmarks of a time in drag race in history that will never be seen again. Based off of production models, the A FX cars were factory experiments and how far you can push the limits

for better weight transfer off the line. The Ray axel was moved forward and the front end was raised to achieve

nose high stance. A straight axle was mounted under the front with the biggest motor they could find in nerves of steel. These cars paved the way for what are now top fuel funny cars.

The heyday of a FX cars is gone, but certainly not forgotten. And we're going to build a tribute to these pioneers in muscle car history with our own axle twisting drag car project altered

on most of our projects. saving and organizing parts is the name of the game.

But with this one, we don't really need to keep a whole lot other than the body panels, we're not even going to use the interior parts and trim. So it makes blowing this thing apart a whole lot faster and easier knowing we're not going to have to reuse every little piece.

The last piece to come out is the rear end. Now, we have several options for replacing it. We might go with the nine inch, we might go with a quick change. We might even go with a completely custom fab rear end at this point. We're really not sure what we're gonna do, but one thing I am sure of this thing's ready to get sent off and get blasted. And that means I've got time to get some primer on red sleds, fenders and doors.

Now, you guys that have been watching for a while will recognize this primer and we've had a lot of emails about it. It's Z chrome Rusty Fender by Klosson.

Now it's actually a sprayable plastic filler. We like it because of its versatility.

It bonds to anything and its high build rate means you don't have to put down 10 coats. And we've used this a lot in our shop and found it to have virtually no shrinkage, which means you won't have body work showing back through.

Well, Firebird is on its way back to year one where the team of experts are gonna take care of some of that extensive rust repair and that means that we can keep rolling on some of our other projects which brings us back to the comet. It's back from the blaster and looking pretty good. But before we start chopping it up, we need to get some primer on it to keep it from rusting.

All right. Now, granted, a lot of this car is going to get chopped up, but open metal is like a sponge and we don't want it soaking anything up a

good co of DP sealer and we won't have to worry about anything bubbling up later.

Well, it's time to start sectioning out the back end and neither one of us has ever built an A FX car. So odds are, we're probably gonna make some mistakes along the way. But hey, that's why they call it a learning curve, not a learning line. So we're just gonna jump in and basically see what happens. But before we start making cuts. We need to back off a little bit

and make sure that all of our cuts are gonna be where they need to be

ready.

Let's do it. All right, man.

Besides, it's gonna clear that line right there

and make sure that we're not gonna clip or get too tight into this body lines

right

there.

Coming in behind here. I have no idea why they did that here. It's actually not a full box. Just a, you

just take all of it. Shoot me

off the top of it. Cool. Let's make some marks and get some fresh blades, man. Start cutting the sucker up.

The idea is to move the rear wheels as far forward as possible to maximize weight transfer. Now, there are some sections you don't want to chop up like the wheel arches, there's a section.

So our cuts need to stay away from the body lines.

We're measuring out 18 inches on the floor to match what we're taking out of the quarters with cutting weapons in hand. We're ready to attack.

Now, I know this looks a little intimidating, but as long as you got a plan, you just take it one step at a time. Eventually all this stuff will fall back together, or at least we hope. But for now we got this big old chunk of metal cut out of the car and I think this front section here, it's gonna be easier to just chop it off and build all new sheet metal. Once we got it out and got a little bit better look at it. There's just hardly anything left of it.

So, first thing we're gonna do is cut this off. After that, we'll get these brackets here trimmed off and then it'll be down to figuring out how to get these little tiny tubs to fit them big old meats.

Watch for you.

Normally, I'd use one of can cut spot weld cutters. But with this much rust, you can't tell where the welds are. So an air chisels, the answer.

Well, we got our rear tub section here all cleaned up. But before we can shove it back under the car, we need to widen out these tubs to get that big old chunk of rubber underneath there. So stick around because coming up after the break, we got a lot more cut to do

altered egos been sliced and diced. Check out how it starts coming back together with a whole new. Look after the break.

Hey, guys, we're back. You know, we were hoping we'd luck out. We wouldn't have to move these frame rails in.

It doesn't look like today is gonna be our lucky day. We're gonna have to tub this in here probably a good couple inches. So

I know Brent. What do you think is a good game plan here?

Oh, we should cut this thing out first, do away with these brackets.

So knock some brackets loose. I know we ain't gonna be able to use these either. These are coming right into the tire so we can get rid of this,

get the tub out of there, knock those off of there and then we'll tack it back in place and see where we're at.

Let's do it

before the air chisel and saw have a chance to cool off. They're back at work, cutting out all the parts that are gonna do nothing but just get in our way.

Now, once the fat's trimmed off, it's time for a test fit.

Looks good. Yeah, we're say we're up against it over here

on this side.

Yeah, we'll, we'll trim it off.

Well, let's get a, let's get a saw or something. Cut those out of the way then. Huh?

Yeah. Push up and then get tacked in place

with a little more trimming. It fell right in place and next is lining up the rockers burning up some welding wire.

All right. Let's check our

measurement side to side here. We've got seven and three quarter, seven and three quarter. Dude, we are dead nuts.

That shall

weld it.

The side to side measurements look good so we can stitch it back together

out

out.

Since we kept our cut lines level, we ended up with a clean butt, weld almost the entire length of the wheel wells.

When we laid out our initial cuts, we measured for an optimistic 18 inches

but because of wheel well interference. Well, we ended up with 16

that left us with a two inch gap that needs to be filled.

Well, Brent's been working on the other side. I've been doing essentially the same thing over here. Now, somehow I managed to get stuck with a bent up, rested side. But that's all right. We'll get it taken care of. The next thing I got to do though is get this outside piece here patched in to get some support back into the side,

then I can start on the inner structure and once that's done, I can come back out here and start patching in this outside again.

I've got a patch already cut and I'm marking where the roll needs to start. I'm leaving it along because it's easier to weld it in place and trim it to length afterwards,

the slip roller is the easy way to get the curvy. But if you don't have one, you can bend it around a piece of pipe,

an old drive shaft or your neighbor's head. If he still hasn't returned your lawn mower from last summer,

even with a slip roller, some good old fashioned hand Forman still comes in handy.

You know, oddly enough,

the shape of a 64 comet is the same shape

as my leg.

Now, once the shape is just right, it can fill in that big old hole.

Yeah.

Now that I've got the big piece in to maintain the shape. I can start patching in the smaller areas.

I still got a few little holes left in here, but I'll come back later on some silicon bronze and get those little buggers filled in.

What I can do right now is get this patch put in and once I get my body line straight, I can come back and start patching in the rest of the sheet mail, but stick around because we got a lot more cutting and patching coming up later in the show,

Dodges double duty performer hits the street after the break.

Today's flashback. A 69 Dodge Coronet RT

in the early sixties, Dodge didn't have a total muscle car package like the GTO or the SS and it was seriously cutting into sales. Now, lots of guys wanted a car they could drive to work and take to the strip on the weekends.

So in 67 they came up with the RT class which stood for road tracks.

This 69 Dodge Coronet RT is a classic example of that kind of double duty muscle machine.

Well, what caught my eye about the car was is that in fact the color being a B five blue car and a cornet RT track pack, you don't see a whole lot of those on the road.

The track pack included a four speed Hearst shifter,

a heavy duty cooling system

and a set of 354 gears hung in a Dana axle with a sure grip dip.

You also got hemi

suspension and

hemi brakes.

Now it doesn't have a

hem

engine

but it does have the beefy 440 magnum.

It's rated 375 horses propelling this RT from 0 to 60 in under seven seconds.

Those dual hood scoops. Well, they ain't just there for looks.

They feed the ram charger fresh air induction system.

The air vents can be open and closed manually while driving

to switch from warm air to cooler outside air boosting engine performance.

The

car handles great. It doesn't, uh perform as well on the curves as it does on the straightaways, uh because of its size and the body type, but

it loves the straightaways

when I was a kid, you know that you just weren't allowed to have those cars. You always wanted one

life gets you and then all of a sudden when you're mid forties or something, you decide finally you're gonna get what you've always wanted.

Styling remained pretty much the same as 68 except for minor changes.

The grill was narrowed in the center and flared out at the headlights.

The tail light design was changed to three long rectangles placed side by side across the entire rear end.

The RT emblem was also removed from the front fender and moved to the rear Bumblebee Strike.

The Dodge only produced 1541 RT hard top forestries. This year and even fewer than that had the track pack options.

So by the time you break it down to the color, the options on it, the RT stripes, the, the, you know, the options on that particular car,

it's a pretty rare car,

but that doesn't stop Joe from driving this beauty hard

coming up. The Comet gets a rear section. Revamp

ouch.

Hey, we're back, Brent just about got all the rust repaired on the other side and I just have one more little spot right here to take care of. Once I get this patcher welded in, we can attack that center section and make room for those big tubs,

those of you on the West coast, but you guys can get pretty spoiled. But the rest of us know what it's like to spend days on end, cutting out rust, making patches and welding them in

when you're dealing with cars that have survived 40 plus winters of salty roads. It's something you just got to do

while I've been putting sheet metal in Brent's been cutting sheet metal out.

You may wonder why we put the center section in just to turn around and chop it back out again.

Well, the answer tubs,

the outer section of the wheel wells need to be in the final spot in order for our measurements to be correct.

We'll be

there

with the chunk back on the floor. Brent's marking out four inches right down the center, that'll give us the two inches we need on each side to make room for the new wheels and tires.

And yeah,

and that needs more cutting

with the excess trimmed away. All that's left is some grinding

and it can be fused back together.

Since we cut out the tunnel to make room for the tubs, we've got to make a new one besides, it gives Bren a chance to show off his mad metalwork skills.

Once he's got it rucked in with a hammer, the English will smooth it out

a front, made it bigger than necessary. That way he can trim it for a perfect fit

yet. Morton chopped out of the center section and he could finish welding it all together.

Come,

it's taken a big step out of the barn and towards the drag strip today and I'm going to get busy on filling up these trim holes while Brent finishes up his masterpiece over there. After that, we can get that rear end stuff underneath there for the last time to get the tubs finished up. But this week we're out of time. So we're out of here.
Show Full Transcript