MuscleCar Builds
Want more content like this?
Join the PowerNation Email NewsletterParts Used In This Episode
Matco Tools
Deep hook attachment, Plugweld pliers, Spot weld drill kit.
Matco Tools
Four ton Porta-Power.
Metalcraft Tools
Lancaster Porto-Metal Former.
PlymoVent
A mechanical portable filter for welding fumes and other dry dust.
Tennsmith
Hand brake, slip rolls, shears and notchers.
Volunteer Welding Supply
At Volunteer Welding Supply, you'll find the finest equipment and supplies by Miller, Lincoln, ESAB, Victor, Tweco and others, plus experienced professionals who can help you determine your firm's needs.
Video Transcript
Today on muscle car, red sled has some junk in the trunk.
See how it gets worked out. We'll show you how to safely remove lead filler and the buick that marked the pinnacle of eighties muscle.
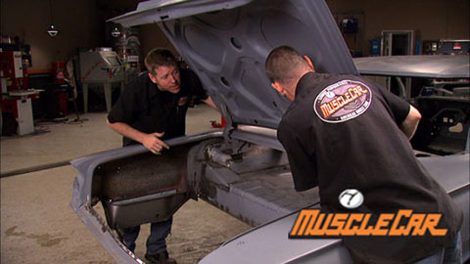
Hey, welcome to muscle car. We're knocking out some trouble spots on a 61 impala today. Now, we've already taken care of a lot of rust spots, but believe me, there's plenty more where that came from. We also need to get all the lead filler out
the last time we got the rear seat pans in,
we got the quarter panels patched in
and started the body work on the fenders.
And next up is this piece of Swiss cheese here that used to be a weather strip channel. I've heard a guy actually passing up on project cars because of problems just like this. It can be a real pain in the, you know what to fix because what we've actually got here is three separate pieces.
This outer piece here, we're going to patch this in and save it.
The inner piece is part of the trunk floor. So what's gonna get chopped out and replaced with the rest of it.
This little channel right here, we're gonna custom make that and replace that one piece at a time.
After measuring the length and total width of the part, I'll share it to width and make the bends.
The shrink or stretcher will help tweak it to the right shape.
We need to keep the trunk bump stops. So I'll remove those first.
When sheet metal gets this flimsy, it can bend out of shape when you pull it off. So I made the new piece before removing the old one.
That way, I'd still be able to compare the two.
Now's a good time to repair some of the rust that will be hard to get at once the channel is put back on
the new channel goes in next.
Then I'll drill out the spot welds and get the rest of the old trunk
out of the way
while I'm packing more junk in the trunk. Brent has his eye on some rust. Now, some of these holes are going to have to be patched. But these small ones, well, they can be filled with silicon bronze,
but before anything can happen, he's grinding it down to bare metal.
Silicon bronze has a low melting point. So the steel doesn't melt before the bronze fills the hole.
Bren
is a tig because it's a lot easier to control the heat.
Now, we've replaced a lot of sheet metal around this trunk. So there's a chance that things aren't gonna line up the way that they should. So, before we get that rear brace in and get the trunk floor in, we're gonna hang the trunk lid and make sure it still lines up
as you get. It's getting a little tight down on the end. So it's perfect over here.
We'll, we'll work on this side over here.
I think we come back, push that out
and then knock this out a little bit before we weld that brace and stuff and it will be cool.
This is where a good old fashioned hammer and dolly come into play. Now, don't make the mistake of using too much force. The sheet metal was stamped in the shape and has a memory. You're just reminding it where it's supposed to be.
Now, sometimes I'll use a rubber mallet because it doesn't stretch the metal like a steel hammer does.
There we go.
See that's coming out. Now,
it's a
beautiful,
I
can see it's still inched a little bit.
So I'm gonna take one more wax. I can sight this one right down that other one
since I'm looking at this and that's almost the same radius
as that.
I'm gonna use this tip on the inside
and whack the snot out of it. Get my body line back in.
All right here, we got a high spot where this got hit and it pushed that metal up and created a, a high point. So you gotta work that down, but you can't just hit it. Or else you move the whole area back down.
So you need to get a dolly, put the dolly on the back side of it to support the low area and then hit the high spot.
And
as you move that down, that low spot will actually walk back up
just like that
beautiful
with the taillight opening back to its former glory. The rest of the trunk can go in
with the help of some
Clios and plug welds. It all comes together easy as pie.
Bring it up in your
up.
Uh Right there
time the custom makes and more parts than nobody rep pops cardboard and a marker can be your best friend here.
Now, from the factory, these extensions were part of the trunk floor,
but the aftermarket parts don't include them. So it looks like we're on our own,
but
we're not done yet and it's becoming obvious why some guys would pass up a car with this kind of problem.
The two of us have spent about 15 hours using a lot of specialized tools to bring together over a dozen separate pieces just in the trunk alone,
just like any project. You just need a game plan and take it one piece at a time.
Now, we got a lot of pieces and a lot of man hours into patching the rear end of this thing together, we're gonna get the rest of this trunk floor welded in when we come back. We'll see if the deck lid still lines up.
Got it.
Uh,
uh,
look at this
after the break suit up. It's time to get the lead out.
Now comes the moment of truth, time to drop the deck lid. Now that we've got everything welded together and see how far off our body lines are.
It's rough.
Oh,
yeah, it is.
You know what that means?
I don't need a port power. I think you got it. I'll go grab it.
A port of power is basically a portable hydraulic ram. It comes with a pump, ra m extensions and different feet.
This one is a four ton model, but they come in other sizes too.
You can use them for what we're doing here, spreading the gap,
but they can also be used for straightening frame rails, pushing roof pillars or just about anything else you need a lot of pushing power for.
Oh,
you're cracking.
Like I said earlier, metal has a memory so you'll have to over push it and let it spring back to where you want it. Yeah, better
not overhanging anymore. At least
I still got a way to go.
It's better to make several pushes, increasing the pressure slightly each time than to make one big push too far.
Yeah,
I
think he got moved.
Where's a hammer
that he didn't relieve some of the stress across her?
I gotta move to play another 16th or eight of an inch
hitting it with a hammer while it's under stress will give the metal new memory helping it to stay in place.
That's one tough car, man.
Yeah. Needs to go more.
Let's see if
we're actually pulling in the, see where it's sucking it in.
We're actually pulling on the factory spot. Ws now.
There we go. Perfect.
Hey, it's time to get the lead out. Literally a lead filler can cause a lot of problems in your paint down the road like blistering and bleeding. So we're gonna melt it out. But you gotta keep in mind lead can be really dangerous stuff. So you gotta protect yourself. That means covering yourself up, wearing a respirator and using good ventilation,
a portable local exhaust system with a HEPA filter will keep the fumes from contaminating the area.
Wear a suit and gloves and don't forget to cover your feet.
If a child or susceptible person comes in contact with the residue left in your clothing, shoes or body,
they can get lead poisoning which can cause brain damage. So shower and wash your clothes afterwards and don't let yourself clean.
While the method is pretty simple, use a torch to heat the lead to its melting point, then scrape it off.
The more heat you apply, the more fumes are released. So use as little heat as you can to get the job done.
If you have access to a flameless heat source, use it.
You also need to dispose of the lead properly, place it in a six mil bag and take it to your local hazardous waste disposal site and don't forget to clean the floor
with all the sheet metal work done on a red sled. We can get rolling on the mud work. But before we do that, we need to get the body back on the chassis, make sure the tires still clear and make sure the body mats still line up.
You know, we've been pretty lucky so far with this project.
But as the body drops down,
our luck runs out.
Now, as any guy knows who builds cars, if you change one thing, it can have a domino effect. Case in point is the body mounts. Since we Tubb each side by an inch, our body mounts are now off by an inch.
Now, there's a few ways that you could fix this, but sometimes the best way is the easiest way. So we're just gonna drill some holes and run some bolts through them. I don't go anywhere because once I get this fixed, we're gonna start hanging some body pads
coming up. Buick's mean modern muscle car.
Today's flashback. A 1987 Buick GNX
all across the country. Guys love racing. Their Buicks and their motto going fast for class, going fast with class.
We headed to the GS Nationals in Bowling Green, Kentucky to find out just how fast
a
little of everything here, but it's gotta be good power. That's what the Nationals is all about.
One of the fastest cars on the strip is the Grand National.
I like racing Grand Nationals because you can make so much power with a V6.
When it comes to mean modern muscle cars. The GN is in a class all its own
and the ultimate GN. Oh,
well, that title belongs to a limited edition 87 gnx.
The GNX is just a good looking classy ride. Buick only made 500 47 of these bad beauties and they came in one color black
this car right here. What's number 31 off the production line? And it's owned by Buick lover Michael Norman driving a GNX is totally different than any other Grand national out there. It's got so much more torque from the bottom end up.
It just really gets
going.
The GNX was only available in 1987. He
was retiring the Grand National that year and wanted to send it off with a bang.
So they partnered with a Sc mclaren to produce a more powerful version and dubbed it the GNX.
Lurking under that hood is the standard turbo V6 engine,
but it's been enhanced with a Garrett T three turbo charger which has a lighter turbine wheel made of ceramic.
The inlet pipe and heat shield are both coated with ceramic to dissipate heat.
The turbo could produce up to 15 pounds of boost giving this engine 276 horsepower.
It's an increase of 31 horse over the standard.
All this extra power meant it needed greater cooling capacity. So a new intercooler with more fence per row was added.
The suspension also got beefed up with a rear pan, hard bar and ladder bar to handle all that extra torque
buick also added larger 16 by eight inch alloy wheels with a black mesh design.
Fender flares were enlarged to handle the wider tires and louvers were added to help remove heat from the engine bay.
The inside looks like a GN except for the sleek Stewart Warner analog gauges
and only GN
X has had a special plaque and bossed with a production number fitted above the glove box door.
Another way to spot a true GNX is to check out the vehicle emission tag under the hood.
Instead of saying General Motors, it should say a sc
it may surprise you but the GNX was the fastest production car in 1987.
It even beat out the Corvette. It was a true Sleeper car back in his day. Thanks to its incredible performance power and limited edition status. The GNX is a highly sought after and very collectible car
but that's not stopping Michael from having a little fun.
If I want to have a car, I'd rather
get out and drive it. If I can't drive it, I'd rather have a picture on the wall.
Hey, welcome. Back. We got a body mounts taken care of and we're ready to start hanging some body panels. Now, considering all the cut and chopping we've done on red sled. The problems that we've run into have been pretty minor,
but to avoid any problems in the future, we're gonna hang all of our sheet metal, set our gaps and then we'll finish our body work.
Let's go up with it. Little crystal by
line right here
down
there to take it up to slide it back a little bit.
The core support needs to go on before we can hang the fenders. This used one showed up just in time. We'll get it blasted and prime it later, but it'll do just like it is for Moca
shim
in
now, back in the day, even the factory used shims and we're no different if you're in the right spot and the driver's side is looking nice.
Oh,
this side ain't looking so good.
Hey, Brent, give me a hand for a second.
That mountain there is a mile away
from the,
the mounts like an inch arm.
So what do you think? Pull the fender off and try to bend that
bend that corner down.
I can bend that back.
Let me see what that bracket looks like on the other side.
Whoever took the fender off the donor car bent. It is what happened? Hey, it's, it's rolled up bad. Is it? Yeah, this side, it's like, like kick straight up. Yeah, you're right. This side here is all bent up.
The whole thing's bent up. Probably a good
quarter inch. Do you wanna try to bend in that bracket down?
Let's
snitch
your fender
off. Yeah.
Oh,
dude,
it's not moving. I
need a bar.
Here's something to put.
You hold that in down. See if I can get this in tweak.
There it goes.
Yeah, it's going your way now.
There it goes,
I'll try it back on there.
They gonna move it to ST,
sometimes the TV stuff can get in the way of the car stuff and sometimes TV stuff
it gets in the way of snack time.
But through sheer determination we forge on.
Yeah.
Yeah.
Does it line up the hole?
Dude?
We are the best panel liner uppers ever.
It's perfect. That's it right there. Cool.
Our original hinges were tweaked and we're still trying to find another set. That's all right. We don't need the hood to open and close. We just needed a place to set our gaps. So we're gonna drop it in and keep rolling on our body work now, keep tuning in because red sled still got a lot of hours left in the shop. But for now we're out of here.
Show Full Transcript
See how it gets worked out. We'll show you how to safely remove lead filler and the buick that marked the pinnacle of eighties muscle.
Hey, welcome to muscle car. We're knocking out some trouble spots on a 61 impala today. Now, we've already taken care of a lot of rust spots, but believe me, there's plenty more where that came from. We also need to get all the lead filler out
the last time we got the rear seat pans in,
we got the quarter panels patched in
and started the body work on the fenders.
And next up is this piece of Swiss cheese here that used to be a weather strip channel. I've heard a guy actually passing up on project cars because of problems just like this. It can be a real pain in the, you know what to fix because what we've actually got here is three separate pieces.
This outer piece here, we're going to patch this in and save it.
The inner piece is part of the trunk floor. So what's gonna get chopped out and replaced with the rest of it.
This little channel right here, we're gonna custom make that and replace that one piece at a time.
After measuring the length and total width of the part, I'll share it to width and make the bends.
The shrink or stretcher will help tweak it to the right shape.
We need to keep the trunk bump stops. So I'll remove those first.
When sheet metal gets this flimsy, it can bend out of shape when you pull it off. So I made the new piece before removing the old one.
That way, I'd still be able to compare the two.
Now's a good time to repair some of the rust that will be hard to get at once the channel is put back on
the new channel goes in next.
Then I'll drill out the spot welds and get the rest of the old trunk
out of the way
while I'm packing more junk in the trunk. Brent has his eye on some rust. Now, some of these holes are going to have to be patched. But these small ones, well, they can be filled with silicon bronze,
but before anything can happen, he's grinding it down to bare metal.
Silicon bronze has a low melting point. So the steel doesn't melt before the bronze fills the hole.
Bren
is a tig because it's a lot easier to control the heat.
Now, we've replaced a lot of sheet metal around this trunk. So there's a chance that things aren't gonna line up the way that they should. So, before we get that rear brace in and get the trunk floor in, we're gonna hang the trunk lid and make sure it still lines up
as you get. It's getting a little tight down on the end. So it's perfect over here.
We'll, we'll work on this side over here.
I think we come back, push that out
and then knock this out a little bit before we weld that brace and stuff and it will be cool.
This is where a good old fashioned hammer and dolly come into play. Now, don't make the mistake of using too much force. The sheet metal was stamped in the shape and has a memory. You're just reminding it where it's supposed to be.
Now, sometimes I'll use a rubber mallet because it doesn't stretch the metal like a steel hammer does.
There we go.
See that's coming out. Now,
it's a
beautiful,
I
can see it's still inched a little bit.
So I'm gonna take one more wax. I can sight this one right down that other one
since I'm looking at this and that's almost the same radius
as that.
I'm gonna use this tip on the inside
and whack the snot out of it. Get my body line back in.
All right here, we got a high spot where this got hit and it pushed that metal up and created a, a high point. So you gotta work that down, but you can't just hit it. Or else you move the whole area back down.
So you need to get a dolly, put the dolly on the back side of it to support the low area and then hit the high spot.
And
as you move that down, that low spot will actually walk back up
just like that
beautiful
with the taillight opening back to its former glory. The rest of the trunk can go in
with the help of some
Clios and plug welds. It all comes together easy as pie.
Bring it up in your
up.
Uh Right there
time the custom makes and more parts than nobody rep pops cardboard and a marker can be your best friend here.
Now, from the factory, these extensions were part of the trunk floor,
but the aftermarket parts don't include them. So it looks like we're on our own,
but
we're not done yet and it's becoming obvious why some guys would pass up a car with this kind of problem.
The two of us have spent about 15 hours using a lot of specialized tools to bring together over a dozen separate pieces just in the trunk alone,
just like any project. You just need a game plan and take it one piece at a time.
Now, we got a lot of pieces and a lot of man hours into patching the rear end of this thing together, we're gonna get the rest of this trunk floor welded in when we come back. We'll see if the deck lid still lines up.
Got it.
Uh,
uh,
look at this
after the break suit up. It's time to get the lead out.
Now comes the moment of truth, time to drop the deck lid. Now that we've got everything welded together and see how far off our body lines are.
It's rough.
Oh,
yeah, it is.
You know what that means?
I don't need a port power. I think you got it. I'll go grab it.
A port of power is basically a portable hydraulic ram. It comes with a pump, ra m extensions and different feet.
This one is a four ton model, but they come in other sizes too.
You can use them for what we're doing here, spreading the gap,
but they can also be used for straightening frame rails, pushing roof pillars or just about anything else you need a lot of pushing power for.
Oh,
you're cracking.
Like I said earlier, metal has a memory so you'll have to over push it and let it spring back to where you want it. Yeah, better
not overhanging anymore. At least
I still got a way to go.
It's better to make several pushes, increasing the pressure slightly each time than to make one big push too far.
Yeah,
I
think he got moved.
Where's a hammer
that he didn't relieve some of the stress across her?
I gotta move to play another 16th or eight of an inch
hitting it with a hammer while it's under stress will give the metal new memory helping it to stay in place.
That's one tough car, man.
Yeah. Needs to go more.
Let's see if
we're actually pulling in the, see where it's sucking it in.
We're actually pulling on the factory spot. Ws now.
There we go. Perfect.
Hey, it's time to get the lead out. Literally a lead filler can cause a lot of problems in your paint down the road like blistering and bleeding. So we're gonna melt it out. But you gotta keep in mind lead can be really dangerous stuff. So you gotta protect yourself. That means covering yourself up, wearing a respirator and using good ventilation,
a portable local exhaust system with a HEPA filter will keep the fumes from contaminating the area.
Wear a suit and gloves and don't forget to cover your feet.
If a child or susceptible person comes in contact with the residue left in your clothing, shoes or body,
they can get lead poisoning which can cause brain damage. So shower and wash your clothes afterwards and don't let yourself clean.
While the method is pretty simple, use a torch to heat the lead to its melting point, then scrape it off.
The more heat you apply, the more fumes are released. So use as little heat as you can to get the job done.
If you have access to a flameless heat source, use it.
You also need to dispose of the lead properly, place it in a six mil bag and take it to your local hazardous waste disposal site and don't forget to clean the floor
with all the sheet metal work done on a red sled. We can get rolling on the mud work. But before we do that, we need to get the body back on the chassis, make sure the tires still clear and make sure the body mats still line up.
You know, we've been pretty lucky so far with this project.
But as the body drops down,
our luck runs out.
Now, as any guy knows who builds cars, if you change one thing, it can have a domino effect. Case in point is the body mounts. Since we Tubb each side by an inch, our body mounts are now off by an inch.
Now, there's a few ways that you could fix this, but sometimes the best way is the easiest way. So we're just gonna drill some holes and run some bolts through them. I don't go anywhere because once I get this fixed, we're gonna start hanging some body pads
coming up. Buick's mean modern muscle car.
Today's flashback. A 1987 Buick GNX
all across the country. Guys love racing. Their Buicks and their motto going fast for class, going fast with class.
We headed to the GS Nationals in Bowling Green, Kentucky to find out just how fast
a
little of everything here, but it's gotta be good power. That's what the Nationals is all about.
One of the fastest cars on the strip is the Grand National.
I like racing Grand Nationals because you can make so much power with a V6.
When it comes to mean modern muscle cars. The GN is in a class all its own
and the ultimate GN. Oh,
well, that title belongs to a limited edition 87 gnx.
The GNX is just a good looking classy ride. Buick only made 500 47 of these bad beauties and they came in one color black
this car right here. What's number 31 off the production line? And it's owned by Buick lover Michael Norman driving a GNX is totally different than any other Grand national out there. It's got so much more torque from the bottom end up.
It just really gets
going.
The GNX was only available in 1987. He
was retiring the Grand National that year and wanted to send it off with a bang.
So they partnered with a Sc mclaren to produce a more powerful version and dubbed it the GNX.
Lurking under that hood is the standard turbo V6 engine,
but it's been enhanced with a Garrett T three turbo charger which has a lighter turbine wheel made of ceramic.
The inlet pipe and heat shield are both coated with ceramic to dissipate heat.
The turbo could produce up to 15 pounds of boost giving this engine 276 horsepower.
It's an increase of 31 horse over the standard.
All this extra power meant it needed greater cooling capacity. So a new intercooler with more fence per row was added.
The suspension also got beefed up with a rear pan, hard bar and ladder bar to handle all that extra torque
buick also added larger 16 by eight inch alloy wheels with a black mesh design.
Fender flares were enlarged to handle the wider tires and louvers were added to help remove heat from the engine bay.
The inside looks like a GN except for the sleek Stewart Warner analog gauges
and only GN
X has had a special plaque and bossed with a production number fitted above the glove box door.
Another way to spot a true GNX is to check out the vehicle emission tag under the hood.
Instead of saying General Motors, it should say a sc
it may surprise you but the GNX was the fastest production car in 1987.
It even beat out the Corvette. It was a true Sleeper car back in his day. Thanks to its incredible performance power and limited edition status. The GNX is a highly sought after and very collectible car
but that's not stopping Michael from having a little fun.
If I want to have a car, I'd rather
get out and drive it. If I can't drive it, I'd rather have a picture on the wall.
Hey, welcome. Back. We got a body mounts taken care of and we're ready to start hanging some body panels. Now, considering all the cut and chopping we've done on red sled. The problems that we've run into have been pretty minor,
but to avoid any problems in the future, we're gonna hang all of our sheet metal, set our gaps and then we'll finish our body work.
Let's go up with it. Little crystal by
line right here
down
there to take it up to slide it back a little bit.
The core support needs to go on before we can hang the fenders. This used one showed up just in time. We'll get it blasted and prime it later, but it'll do just like it is for Moca
shim
in
now, back in the day, even the factory used shims and we're no different if you're in the right spot and the driver's side is looking nice.
Oh,
this side ain't looking so good.
Hey, Brent, give me a hand for a second.
That mountain there is a mile away
from the,
the mounts like an inch arm.
So what do you think? Pull the fender off and try to bend that
bend that corner down.
I can bend that back.
Let me see what that bracket looks like on the other side.
Whoever took the fender off the donor car bent. It is what happened? Hey, it's, it's rolled up bad. Is it? Yeah, this side, it's like, like kick straight up. Yeah, you're right. This side here is all bent up.
The whole thing's bent up. Probably a good
quarter inch. Do you wanna try to bend in that bracket down?
Let's
snitch
your fender
off. Yeah.
Oh,
dude,
it's not moving. I
need a bar.
Here's something to put.
You hold that in down. See if I can get this in tweak.
There it goes.
Yeah, it's going your way now.
There it goes,
I'll try it back on there.
They gonna move it to ST,
sometimes the TV stuff can get in the way of the car stuff and sometimes TV stuff
it gets in the way of snack time.
But through sheer determination we forge on.
Yeah.
Yeah.
Does it line up the hole?
Dude?
We are the best panel liner uppers ever.
It's perfect. That's it right there. Cool.
Our original hinges were tweaked and we're still trying to find another set. That's all right. We don't need the hood to open and close. We just needed a place to set our gaps. So we're gonna drop it in and keep rolling on our body work now, keep tuning in because red sled still got a lot of hours left in the shop. But for now we're out of here.