MuscleCar Builds

Parts Used In This Episode

ididit Inc.
1970-74 'Cuda tilt w/ignition black paintable column, steering u-joints.
Powermaster
XS Torque starter.
Summit Racing
Hedman shorty headers 1.75" to 2.5" collectors.
howtoASAP
MIG Welding Automotive Sheetmetal DVD.
MHT Luxury Alloys
18x8 and 18x10 Foose Classic style Challenger series wheels.
Pirelli Tire NA LLC
255/35R18 Pirelli PZero Rosso, 285/40R18 Pirelli PZero Rosso.
Wilwood Engineering
Superlite 4R Series Rear Axle Disc / Drum Internal Parking Brake Kit with 12.90 Diameter Vented Drilled SRP Rotors.
Wilwood Engineering
Superlite 6 Big Brake Front Hat Kit with 13.06 Diameter Vented and Drilled SRP Rotors.
XV Motorsports
Rear Suspension:</br> XV Custom Valved Aluminum Body Monotube Adjustable Coil-Over Shock Absorbers 100% Dyno Tested , XV Three Link Rear Billet Aluminum Lower Links, Adjustable Upper Link w/ Mount, XV Spec Tubular Splined Anti-Roll Bar w/ Billet Arms Mounted Through Frame Rails, Spherical Rod End Anti-Roll Bar End Links, Rear End Brackets Lower Link & Coil-Over Mount, Upper Link Mount, Panhard Bar Mount, Anti-Roll Bar End Link Mount, Upper Coil-Over Mount.
Video Transcript

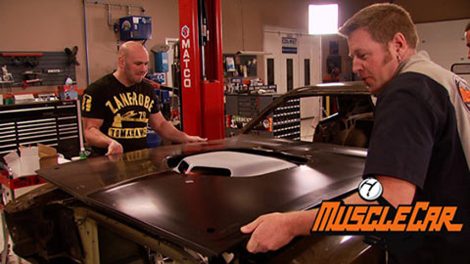
Today on Muscle car UFC President Dana White drops by to check out project Street Fighter. We show you some header tricks that'll keep you ahead of the game and take a ride in a car that'll give the Coyote a run for its money.

Hey, welcome to muscle car, front suspension engine and trains are mocked up in project Street Fighter. And today we'll be working out our header clearance issues first. We need to finish the rear suspension. So we're gonna mount the rear sway bar, one more brace stuff, all the guts in this rear axle housing and finally mount the brakes.

The

one Barracuda rolled into the shop with very little rust and no drive train. We blew it apart and started installing the suspension kit including frame connectors K member and steering rack. After mocking up the engine and tranny, we got this nine inch rear end under it and put in most of the rear suspension.

Now, we're planning on track testing this thing when it's done. So to make sure that this paying hard bar amount stays where we put it,

I'm going to take out a little insurance policy and brace it up

now, even though the instructions don't call for it, we figured an extra four ounces of weight will be worth the payoff in additional strength.

The rear sway bar comes next. This isn't your average ground scraping bar. It's mounted high and tight right through the frame rails.

XV.

Motorsports supplied templates with their suspension kit that help you lay out exactly where the holes go.

When you're hacking on the frame rails, you don't want to have to cut more than once.

The plasma cutter throws an awful lot of slag. So I'm going to protect these nice shiny coil overs just in case

note to self, even though it's habit,

don't knock the plug into the frame rail.

I'm pre assembling the bushings and sleeves to the sway bar so I can set the whole assembly in place and make sure everything lines up before I weld it

after sliding the bar through and making sure there's no binding. I can tack the sleeves in place.

I pulled the bushings back out before I finished welding and now that the sleeves are cool, they can go back in

the bushings are pretty tight. So getting the bar in might require a little persuasion.

Holy smoke.

I don't think they wanted any deflection in those bushings.

I got a good work out with the dead blow, but I ain't done yet.

The end links and trailing arms still need to go on

to finish it up the mounting tds are tacked to the housing. We'll finish well of them along with all the other brackets. When we drop the housing back out.

Now, before the brakes can go on, we got to stuff some guts in the housing. So the center section and axles are next

to keep the axles from falling out while getting the brakes mocked up. A couple of retainer plates will do the trick.

Hey, man, check out what Chip Foose just sent us.

Oh, man, those are awesome. Yeah, they're the challengers that mh T wheels are building for him. Those are cool,

man. I was about ready to put these back brakes on. But what do you say? We put one of those on the front and make sure it's gonna work.

Yeah.

Uh Let's see what we got here.

Well, they look good. Oh, that's not good.

Yeah, this thing is sitting solid on that, on that Caliper. Dude, there's no way that's gonna work. These wheels have to go in the car. Yeah, absolutely.

You know what that means?

I gotta go break shopping,

won't you do that?

I'll get these hunters put on. All right, sounds good. That's coming up right after the break

up next meet the ultimate fighter who will be behind the wheel of street fighter. You have no idea how excited I am for this car

summit sentences he

and block Hugger headers that should work with the

brock heads

and since they sit in closer to the block. We'll have more room for the steering. First starter needs to go in.

We're using a mini high torque starter to make it easier to route the exhaust.

Hey, Brent. Look busy, man. Guess who I found wandering around out in a warehouse. Pleasure to meet you,

Di

di

There it is, man.

Been ripping and tearing and going 100 miles an hour on it, man.

Took a long time to find this thing. Huh? Yes, it did. It did six months worth of searching.

Well, you wanna check out the wheels, man. Yeah. Yeah, let's see the wheels.

When Chip Foose came in here,

we're talking about the rendering. Looks at the picture and he goes,

are those the wheels you're gonna put on it?

We go, yeah, we're gonna have to have someone custom build them. He goes, well, I make those. So he hooked us up with these. I love the rendering. So that that's awesome.

Should have handled like a dream. You have no idea how excited I am for this car. This is literally all I think about.

I have like five cars. This is the only car I think about

and I tell you what they sure are desired cars

to get something like this

and done the way that you guys are doing it.

Believe me,

I get it and I appreciate it. Cool, man.

Now the whole basis of this bill is the fact that you're actually gonna be able to get this thing and drive the crap out of it. That's, that's the key too. That's what I want. I didn't want some show car, you know,

some car you lock up in the garage, you know, because you don't wanna drive it. I, I'm gonna drive this

all the time. I'm, I'm more excited about this car than anything I've ever bought in my life or had in my life. Well, anytime you want to bring a Ferrari Bar, let me drive it,

I'll tell you what, next time you're in Vegas, you can, uh,

you can drive the Ferrari and I'll drive this.

It's

coming

out to Vegas.

It's a deal.

I'm one of those guys I lay on the couch and watch on Saturdays. I watch every Saturday and I'm fascinated by the whole thing. I don't know

anything about building cars. I know how to put gas in it. That's about it. And I'm fascinated by how they're built and how you guys do this stuff. I done an extreme hook. This is like a little Punisher

school

we're thinking about right above where the, where the third link mounts to the rear end.

It's actually gonna be like right up in there.

Just give a little something to look at. It was really cool and then Rick was, was gonna do some pinstriping on the pump in here and

really doll it up. That is so cool. You guys are so talented. It's unbelievable.

I was on the phone with Will wood. I think we got a set of brakes that'll work on this thing. The problem with is that they're basically just too thick and they have the wheels mounted on there. The back space on the wheel just wasn't, wasn't enough. And it was basically a running into the calipers. So Will wood makes a really good product. So we'll get those on there.

See if it

sit on there, Richard

Dana

give me,

I didn't even see that. Yeah.

So you are literally the first one to set this hood on this car

and I just hope that it fits right.

I think we're actually gonna have to trim the hood up

to make it

clear it right there.

Well, I get it,

I get it and I like it.

Thank you guys so much. I'm so excited. Seriously. There are too many things to get me excited and I'm excited about that.

That's definitely cool.

Dan is amped up about this project, so we want to keep moving and

that means it's time to test fit these headman headers.

Looks like we're in the ballpark but not quite a home run.

The engine mount will need a little off the top, then we can see if they'll cinch up.

Well, that got us a little closer but not close enough.

Well, I got Dana heading back west. He's got a big old grin on his face. That's cool, man.

We're having some issues here. Where are we at?

Well, I trimmed the mound

up a little bit right there, but this joint enough, I mean, we either got to modify the tube and modify them out.

Let's say

what

the tube,

that tube and the whole header.

Probably the whole header.

Yeah, I'm up for anything.

Yeah, we'll try that. Ok, cool.

Don't you just love chopping up brand new headers? And? well, we really don't either, but sometimes chopping up new ones is still way cheaper than having custom ones made.

Build on a budget muscle car projects that save you time and money.

A custom set of headers can set you back at least 1500 bucks.

You can pick these headman block huggers up from Summit for under 300. Add a couple of collectors and some U bends and you're still in under 500 bucks.

Something else you'll have to invest is some time and some creativity.

Now it may seem drastic. But since we're modifying the tubes, the first step is to get the collector out of the way, then we can re evaluate the situation.

All right, looks like these are gonna work.

I'll get the first piece cut and tack it in, then I can finish them up off the car. So don't go anywhere because we'll be moving ahead on these later in the show

after the break. It may look like a cartoon, but this rides a grown up's dream

me.

Today's flashback. A 1970 Plymouth road runner

need me

in 1968. Plymouth decided to get a little crazy with its muscle cars and unleash a stripped down bare bones version of its tried and true Belvedere.

And they named it after a cartoon character.

Hey, it was the six

even.

The road runner was an instant hit. Many of Ford and Chevy spent time chasing down the bird car but like the Coyote, they had a hard time catching it.

What I like about driving the car is, is how it handles the car handles. Great.

The engine is never came out of the car. It still runs excellent

power and his baby is a 3 83 4 barrel.

It hammers out 335 horsepower

for some extra dough. You could throw in a 446 pack or a hammy if you really wanted to leave them in the dust.

If Lester's out on the road and wants a little extra umph,

he just flips the switch under the dash and up pops the air driver scoop to suck in some cold air.

This was the only year to have this feature and this one still has the original stickers,

the switch triggers a vacuum assist

which then opens the scoop

only cars equipped with a setup, got the unique coyote duster air cleaner

made a few cosmetic changes this year. Like moving the badge from the door up to the front fender.

Now this one features the optional gold dust trail

body lines were smoothed out

and side scoops were molded into the rear quarters.

They also got new grills with vertical fins and a Plymouth emblem. For the first time

bumpers now featured integrated turn signals and the tail lights were split into two narrow slivers.

Now it wouldn't be a road runner without that one of a kind

plym

engineer spent thousands of dollars designing a horn that sounded just right.

The road runner kicked off Mo's

signature cartoon cars which included the super bee, the duster

and the demon.

It was a budget minded muscle car coming in at around three grand.

The 383 was standard along with heavy duty brakes and suspension.

An optional rear spoiler shows this bird is ready to fly.

Unfortunately, roadrunners didn't fly off the lots this year, only about 41,000 were sold

less than half the total from 69

of those most came with a 383. This is a pretty rare bird considering it has the air scoop dust stripe vinyl top and a wild paint job in violet,

matching speed with eye popping looks really turn this car into a living cartoon, which is one of the reasons roadrunners remain so popular to this day.

Good luck chasing this one down.

I believe, believe, believe, believe that's flash back. Folks.

You guys have seen us work a lot of body panels here on muscle car and we get plenty of emails asking us for tips. We found a great answer for those of you looking to learn more about welding sheet metal, how to a scp.com offers a 52 minute mig Welding DVD from nationally renowned car builder, Craig Hopkins. It features a high definition helmet camera shows you what the different welds actually look like as they're being done.

Whether you're a beginner or a pro wanting to improve your restoration skills. Check out this new video from how to ASA p.com

coming up. Don't call the custom shop. We'll show you how to modify your own headers.

Hey, welcome back.

Ready to piece these headers together for the C

A.

Now, I was gonna use the same collector I cut off earlier, but it's a lot easier to start with a new one. So it's out of here.

Got the first two welded in. It's time to finish them up.

Brent starts out knowing where the flange will be, where the collector will be and where he wants each tube to be making the pieces to fill in those gaps is the tricky part

with U bends. You can choose which portion of the bend you need to get the right shape.

This can be done with a hacksaw or cut off wheel instead of the band saw, just make sure you end up with cuts straight across each section of pipe.

These sleeves will hold the pieces together and give the welder some material to grab on to

these headers are gonna be coated once they're done. So we're using the tig for a cleaner weld.

I, I

go to work.

This is why when I'm making headers, I like to test fit it after every piece I put in.

As you can see,

I've got a huge problem here.

It looks like this tube here is going to be chopped out,

rerouted around the steering.

But first I need to finish up these two back tubes.

You,

this piece is being welded with a header in the car so we can make sure it's in the right place.

It's easier to use AM

for this. Since you only have room for one hand in these tight quarters,

you'll pull it back out to finish it with the,

with all the tubes in the right place. The new collector has to come back off so Bren can add a filler piece and weld up all the gaps.

Now, this is a three inch collector, but it needs to be made up to a 2.5 inch flange. So some PP

will allow it to be reduced.

Oh, man, that's looking good.

Yeah. Doctor

ought to give you plenty of room for that steering.

Oh, yeah. Yeah. Set the knuckle right there.

It's almost a straight shot now

because it's time for me to get the steering in.

Yeah,

I did. It sent as this nice tilt column. It's made just for E bodies so it bolts right up to the factory mouse.

The DIDD installation kit includes all the parts you need to connect the dots.

Now, I know what you're thinking,

man. That is a good looking steering wheel.

I hate to burst your bubble. This isn't the one that's gonna stay on here. We needed something to steer this thing around the shop for a while. So I stole this off of one of extremes projects.

Sent us a set of P ZERO S to wrap around our foose wheels from mht.

The tread pattern is designed to keep a safe grip on the asphalt even at high speeds.

Man. It's good to finally see this thing sitting on the ground. Heck, yeah, I can't wait to leave some of that rubber right on the road. It's gonna be a long time before that happens though. Yeah, that's the truth. We still gotta get that scoop mounted, get the exhaust finished up, strip this whole thing to all the body work and paint. But that's gonna have to wait for another day because we're out of time. So until next time we're out of here.
Show Full Transcript