MuscleCar Builds
Want more content like this?
Join the PowerNation Email NewsletterParts Used In This Episode
Grainger
(3) Each, Receptacles, Covers, Boxes
Lowes
Jasco aerosol and quart size paint remover.
Napa Auto Parts
3/8" TUBING NUT, 3/8" UNION
Napa Auto Parts
Knotted Wire Brush
O'Reilly Auto Parts
Auto-strip, peeler.
O'Reilly Auto Parts
Competition Engineering shocks
O'Reilly Auto Parts
3/8" Inverted Flare Union (10)
O'Reilly Auto Parts
3/8" INV. FLARE UNION, 90 DEG. BRASS, 1/4" NPT TO 3/8" INVERTED FLARE, 3/8" TUBING NUT
O'Reilly Auto Parts
Brake Hose Clip (11)
Video Transcript
Today on muscle car altered ego gets shocked.
The guys keep rolling on the roll cage. Rick shows you the safe way to handle strippers and we do the math on a 64 Catalina two plus two.
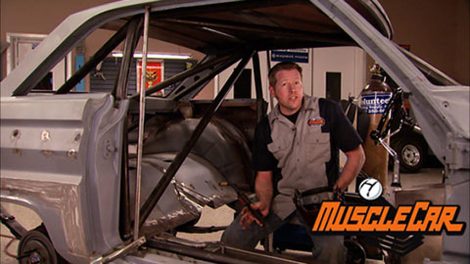
Hey guys, welcome to muscle car. Since we rolled the 64 Comet into the shop, you've seen it go from an average grocery getter to an altered wheelbase in your face. A FX car.
Today we're taking alter ego a few steps closer to the track by installing the shocks and finishing up the roll cage.
This come, didn't know what it was
in forward. We got a hold of it.
We blew it apart, shoved the tubs forward a full 16 inches and stiffened up its bones. Then we threw some tubes at it. Mocked up the engine in trans and
fed up some new sheet metal to match. We mounted the rear suspensions, then got the steering box and linkage installed.
We robbed these plates off a project street fighter and as you can see, they've already got shock mounts on them. The only problem with using them is that it's going to set our shock way too high. Plus the location could actually interfere with our headers
by mounting them on top of the axle. It's going to lower the height of our shock tower. Plus it's going to give our headers a lot more clearance.
Since we're trying to mount straight edge tabs on a curved axle, I've got some trimming to do when cutting a piece. This small, you need a push block. If you want to keep your fingers attached to your hand, a small piece of scrap metal does the trick here always be sure to keep your fingers clear
for the shock to be most effective. It needs to be mounted perpendicular to the ground.
Any variance in the angle will decrease its effectiveness.
Now, you may have noticed that when we're tack welding stuff, we usually don't wear a helmet. Well, we do get emails about it. So I figured I'd take just a second and explain to you why we do it the way we do.
And there's a lot of lights involved in making TV. And they're bright enough that it makes the sensors think you're welding even when you're not. And that makes the lens dark all the time in the real world. You should always wear a helmet
with the south end attached. I gotta figure out where the north end is gonna go. You need to design the height of the bracket with the shock and mid travel to make sure it stays in its operating range. Otherwise you could end up with damage.
A simple cardboard template gives me a rough idea that I can transfer to steel to make the upper mount.
Yeah, that'll work.
Now, this mount is gonna take some abuse and failure is not an option. So I'm using a chunk of two by four box tubing.
Ok.
I'm pre drilling some holes for the plug wells. It'll be perimeter welded but plug welds will give it some extra strength.
Bye
five.
Once it cools down, the shot can be test fitted
when tightening the shock cinch it down until the bushing is the same diameter as the washer.
While Rick's
fing up some brackets for the other side, I'm gonna get started on the rear shocks. We're reusing these old plates off the Firebird, but this one's bent just a little. So before I get started, I gotta make a repair,
I'm using a torch to heat up the bracket so it'd be easier to bend
after letting it cool, the lower shock bolt can go on
just like the front. The shocks need to be at 90 degrees to the ground.
I'm using standard shock bolts, but with some modification,
instead of bulking them to a bracket, they will be welded to a plate which will be attached to the frame rail,
same
with the suspension about done. It's time to get back on this roll cage. Now, the main structure is here, but we still have to lay out the rest of it.
The roll cage and alter Eagle needs to protect the driver but also stiffen the chassis. So we'll take a look at how to get that done right after the break
up next. Why drag cars need different bars?
Hey, we're back with altered ego and we pretty much have the roll cage here all laid out. There's a lot of different ways you can do this, depending on what it is. You're trying to accomplish a cage for a round track style vehicle is strongest around the driver with both ends designed to crush in on impact, but a straight line car like ours. Well, this thing has to be rigid from front all the way to the back. That'll give you more predictable handling and let the suspension do its job.
We already measured,
cut,
bent
and notch our tubing.
So we're ready to move on
with our main cage already installed in the car. We can start by building off the front and back. Our front tub is gonna attach to the A pillar bar, run through the firewall and attach the front frame ramp.
This will help by stiffening the frame and keep the suspension from moving around.
Now, some styles of cages incorporate crush zones. These are areas that use smaller diameter tubing and bends, engineered for controlled failure. That way, if the car ever goes into the wall, the cage will absorb the impact and not the driver altered ego let's using a rigid cage all the way through. And that means no crush zones.
You should never weld roll cage tubes straight to sheet metal. It has very little strength and the bar is likely to just rip off. So we're welding on a plate to reinforce the area before the tube goes in.
And with the front frame rails tied into the rest of the cage, it's time to stiffen up the driver's compartment, the side rail, it actually forms a lower part of the cube that surrounds the driver. Plus it's going to help eliminate this weak point in the factory chassis.
Now, diagonal bars. Well, they do help stiffen up the chassis but their main purpose is to protect the driver. Now the door bar and the seat bar. Well, those are going to have to wait until we actually get our seats built and mounted.
We're checking placement of the side rails. Now, before we weld them in,
we want them to be as low as possible. So we're not tripping over them when we get in the car, but they also need to clear the floor.
Something to note when designing your own cage. All sanctioning bodies require this bar to be one piece.
The rear bars are a lot like the ones we installed up front. They tie the main cage to the frame rails, stabilizing the suspension.
We'll also be installing an X bar. This ties the left rail and right rail together helping to equalize the torsional load
we designed these so they attach right over the leaf spring mount. This will transfer the energy from the leaf springs into the cage more effectively.
That's about all we can do until we get our seats mounted. Now, keep in mind, alter ego is not being built for any one particular class. And if you build your own cage, you're gonna have to do a little research before you start chopping up any tubes, check with the sanctioning body for the class that you wanna run in to make sure you're meeting all the required.
Yeah, because there's 1000 different style cages for 1000 different style vehicles out there. So make sure that your design will work with what you're trying to accomplish.
The internet can be your best friend if you're needing some more in depth information, but don't hit that computer yet because there's more motor cars coming up
after the break. A 64 Pontiac full size that packs some serious power.
Today's flashback. A 1964 Pontiac Catalina two plus two.
Hey, here's a pop quiz for you.
What do you get when you add two plus two?
Well, if you're talking Pontiacs, you get a full size car with all the power style and attitude of a GTO.
The two plus two was dreamed up after the suits at GM issued a ban on all racing activity in 63 killing the super duty line of Catalina
options like the famed Swiss Cheese frame and the Super duty 421 Ss were gone.
Pontiac
needed a sporty package to take on full size rivals like the Impala Ss and Galaxy 500
thus the two plus two was born.
The name meant you could fit two in the front and two in the back. But in reality, you could actually pack in a family of five.
It only came in a coop or rag top and you got bucket seats, top grade Moro
co
upholstery, a center console, heavy duty suspension
and plenty of
40 options like a hurst four speed.
A 389 V8 was standard or you could jack it up to one of 3421 big blocks, something you couldn't do in a GTO
the 64 model sport in the top of the line. 421 high output tri power.
The setup featured special heads and exhaust manifolds. A mckellar cam and could churn out 370 horses. It's a real stump puller making 460 pound feet of torque at 3800 RPM. They're definitely a motor that if you don't know what you're doing, when you let off the clutch and hit the gas,
you can
be in trouble.
0 to 60 took 7.2 seconds and it could do the quarter mile in 16.1.
Not bad for a nearly two ton beast.
The Galaxy and Impala were a half second faster, but they also weighed 100 pounds less.
One killer option on this ride is the eight lugs. The brake drum actually fits inside the wheel.
They were originally designed for Poncho stock cars to give a better breaking and a stronger right front hub,
but they also just look cool.
All cats got spruced up this year with more chrome on the grill and the arrowhead was moved to the hood,
front fenders were squared off with the headlights instead of the cut back look curvier body lines and boomerang shaped tail lights rounded out the new package.
Now, if you've never heard of the 22, you're not alone for its short life. It was always overshadowed by the GTO.
They both debuted in 64 and less than 8002 plus two s were sold versus nearly 34,000 goats.
The Impala and Galaxy also swamped it in sales.
Pontiac continued to tweak the package and sales were bumpy over the next few years until they finally nixed it in 68.
It's fitting that the two plus two only lasted four years.
You don't see them at a car show every day and you sure don't see them going down the road every day. They're, they're extremely rare farm,
but more and more people are taking note of the car both for its rarity and its potent street performance. However, you add it up the Catalina two plus two equals one rocket street machine
coming up. What kind of stripper is best for you? Rick puts them to the test.
Hey, guys, welcome back. The last time you saw a project Street Fighter, we had it blown apart and ready to strip. So while Tommy's knocking the green off the body, I grabbed a couple of panels here to work on. Now, there's more than one way to skin a cat or a ka.
In this case, you can do it for a lot of money or a little
build on a budget muscle car projects that save you time and money.
Now, if you got a spare 1500 bucks laying around, then your best bet is to have your car professionally blasted. But if you like the rest of us, you're looking for ways to strip your car without stripping your wallet and that's where a hand stripping comes in.
It has two different methods. You can use either abrasive or chemical. I'll show you the basics of both. Let's start with. Chemical has two kinds, either aerosol or brush.
The aerosols are convenient and less messy but they evaporate faster and generally aren't as effective.
The brush stripper evaporates slower and bites deeper which means fewer applications to see metal.
One thing to remember when working with strippers is to cover up.
You don't want to mess around here, you'll end up getting burned when it comes to application. Just follow the manufacturer's directions. Some have specific D's and don't that can affect the result.
I'll tell you what. Since we got a few different brands here. Let's do a little experiment. We'll try the aircraft stripper next.
Well, those strippers need to work for a little bit. We got a whole box of stuff to play with. Let's try one of these
that'll work.
Yes,
they've given these things about 10 minutes to work. So it's time to see what we got.
Well, the jazz co
looks like it's softened it up. Not a whole lot of bubbling but
did get it to a point where you could probably scrape it off with a little bit of work.
Now, this is kind of interesting. The aircraft stripper actually evaporated faster
but
it did a lot more effective job of
getting that finish off.
All right. See how the aerosol did.
Yeah, I've definitely seen better.
Well, it looks like the aircraft stripper worked the best on this acrylic lacquer. Let's run with that
once the paint is soft and scrape off what you can using a putty knife, rinse off the residue with water
and go back over the area with any grit to knock off, anything left behind.
Now, remember there's different kinds of strippers for different kinds of finishes. So you might have to do a little experimenting to find the one that works best for your right. But I know one that'll work no matter what kind of finish. You got 40 grit.
The mechanical stripping is pretty straightforward. Just mount up a disk and have at it. But that doesn't mean you can get all medieval on it because you can actually do a lot of damage with a 40 grit disk, especially on corners like that.
You catch that wrong and you will sand right through that sheet metal.
Keep a low speed, don't push on it and let the abrasive do the work.
You don't want to take all the finish off with the 40 grid. You'll end up grinding off too much metal. Once you've removed, about 80% go back over with 80 grid
with the metal exposed. You either need to body work it and prime it right away or seal it up with some epoxy primer.
So for the $25,000 question, do you mechanically strip or do you chemically strip? Mechanical stripping is cheaper and it can rip through multiple layers of material pretty quickly. The downside of it, it does remove some of your base metal and you can't use it on aluminum.
Chemical stripping doesn't affect your base metal and it's great for
hard to reach areas but it's slower. It's toxic and it can cause chemical burns. Now, I've shown you guys the basics, but it's up to you to decide which one is gonna work best for your ride.
Man. I got a mess to clean up here. Plus I still have to finish stripping these panels. But for this week I'm out of time. So until next time I'm out of here.
Show Full Transcript
The guys keep rolling on the roll cage. Rick shows you the safe way to handle strippers and we do the math on a 64 Catalina two plus two.
Hey guys, welcome to muscle car. Since we rolled the 64 Comet into the shop, you've seen it go from an average grocery getter to an altered wheelbase in your face. A FX car.
Today we're taking alter ego a few steps closer to the track by installing the shocks and finishing up the roll cage.
This come, didn't know what it was
in forward. We got a hold of it.
We blew it apart, shoved the tubs forward a full 16 inches and stiffened up its bones. Then we threw some tubes at it. Mocked up the engine in trans and
fed up some new sheet metal to match. We mounted the rear suspensions, then got the steering box and linkage installed.
We robbed these plates off a project street fighter and as you can see, they've already got shock mounts on them. The only problem with using them is that it's going to set our shock way too high. Plus the location could actually interfere with our headers
by mounting them on top of the axle. It's going to lower the height of our shock tower. Plus it's going to give our headers a lot more clearance.
Since we're trying to mount straight edge tabs on a curved axle, I've got some trimming to do when cutting a piece. This small, you need a push block. If you want to keep your fingers attached to your hand, a small piece of scrap metal does the trick here always be sure to keep your fingers clear
for the shock to be most effective. It needs to be mounted perpendicular to the ground.
Any variance in the angle will decrease its effectiveness.
Now, you may have noticed that when we're tack welding stuff, we usually don't wear a helmet. Well, we do get emails about it. So I figured I'd take just a second and explain to you why we do it the way we do.
And there's a lot of lights involved in making TV. And they're bright enough that it makes the sensors think you're welding even when you're not. And that makes the lens dark all the time in the real world. You should always wear a helmet
with the south end attached. I gotta figure out where the north end is gonna go. You need to design the height of the bracket with the shock and mid travel to make sure it stays in its operating range. Otherwise you could end up with damage.
A simple cardboard template gives me a rough idea that I can transfer to steel to make the upper mount.
Yeah, that'll work.
Now, this mount is gonna take some abuse and failure is not an option. So I'm using a chunk of two by four box tubing.
Ok.
I'm pre drilling some holes for the plug wells. It'll be perimeter welded but plug welds will give it some extra strength.
Bye
five.
Once it cools down, the shot can be test fitted
when tightening the shock cinch it down until the bushing is the same diameter as the washer.
While Rick's
fing up some brackets for the other side, I'm gonna get started on the rear shocks. We're reusing these old plates off the Firebird, but this one's bent just a little. So before I get started, I gotta make a repair,
I'm using a torch to heat up the bracket so it'd be easier to bend
after letting it cool, the lower shock bolt can go on
just like the front. The shocks need to be at 90 degrees to the ground.
I'm using standard shock bolts, but with some modification,
instead of bulking them to a bracket, they will be welded to a plate which will be attached to the frame rail,
same
with the suspension about done. It's time to get back on this roll cage. Now, the main structure is here, but we still have to lay out the rest of it.
The roll cage and alter Eagle needs to protect the driver but also stiffen the chassis. So we'll take a look at how to get that done right after the break
up next. Why drag cars need different bars?
Hey, we're back with altered ego and we pretty much have the roll cage here all laid out. There's a lot of different ways you can do this, depending on what it is. You're trying to accomplish a cage for a round track style vehicle is strongest around the driver with both ends designed to crush in on impact, but a straight line car like ours. Well, this thing has to be rigid from front all the way to the back. That'll give you more predictable handling and let the suspension do its job.
We already measured,
cut,
bent
and notch our tubing.
So we're ready to move on
with our main cage already installed in the car. We can start by building off the front and back. Our front tub is gonna attach to the A pillar bar, run through the firewall and attach the front frame ramp.
This will help by stiffening the frame and keep the suspension from moving around.
Now, some styles of cages incorporate crush zones. These are areas that use smaller diameter tubing and bends, engineered for controlled failure. That way, if the car ever goes into the wall, the cage will absorb the impact and not the driver altered ego let's using a rigid cage all the way through. And that means no crush zones.
You should never weld roll cage tubes straight to sheet metal. It has very little strength and the bar is likely to just rip off. So we're welding on a plate to reinforce the area before the tube goes in.
And with the front frame rails tied into the rest of the cage, it's time to stiffen up the driver's compartment, the side rail, it actually forms a lower part of the cube that surrounds the driver. Plus it's going to help eliminate this weak point in the factory chassis.
Now, diagonal bars. Well, they do help stiffen up the chassis but their main purpose is to protect the driver. Now the door bar and the seat bar. Well, those are going to have to wait until we actually get our seats built and mounted.
We're checking placement of the side rails. Now, before we weld them in,
we want them to be as low as possible. So we're not tripping over them when we get in the car, but they also need to clear the floor.
Something to note when designing your own cage. All sanctioning bodies require this bar to be one piece.
The rear bars are a lot like the ones we installed up front. They tie the main cage to the frame rails, stabilizing the suspension.
We'll also be installing an X bar. This ties the left rail and right rail together helping to equalize the torsional load
we designed these so they attach right over the leaf spring mount. This will transfer the energy from the leaf springs into the cage more effectively.
That's about all we can do until we get our seats mounted. Now, keep in mind, alter ego is not being built for any one particular class. And if you build your own cage, you're gonna have to do a little research before you start chopping up any tubes, check with the sanctioning body for the class that you wanna run in to make sure you're meeting all the required.
Yeah, because there's 1000 different style cages for 1000 different style vehicles out there. So make sure that your design will work with what you're trying to accomplish.
The internet can be your best friend if you're needing some more in depth information, but don't hit that computer yet because there's more motor cars coming up
after the break. A 64 Pontiac full size that packs some serious power.
Today's flashback. A 1964 Pontiac Catalina two plus two.
Hey, here's a pop quiz for you.
What do you get when you add two plus two?
Well, if you're talking Pontiacs, you get a full size car with all the power style and attitude of a GTO.
The two plus two was dreamed up after the suits at GM issued a ban on all racing activity in 63 killing the super duty line of Catalina
options like the famed Swiss Cheese frame and the Super duty 421 Ss were gone.
Pontiac
needed a sporty package to take on full size rivals like the Impala Ss and Galaxy 500
thus the two plus two was born.
The name meant you could fit two in the front and two in the back. But in reality, you could actually pack in a family of five.
It only came in a coop or rag top and you got bucket seats, top grade Moro
co
upholstery, a center console, heavy duty suspension
and plenty of
40 options like a hurst four speed.
A 389 V8 was standard or you could jack it up to one of 3421 big blocks, something you couldn't do in a GTO
the 64 model sport in the top of the line. 421 high output tri power.
The setup featured special heads and exhaust manifolds. A mckellar cam and could churn out 370 horses. It's a real stump puller making 460 pound feet of torque at 3800 RPM. They're definitely a motor that if you don't know what you're doing, when you let off the clutch and hit the gas,
you can
be in trouble.
0 to 60 took 7.2 seconds and it could do the quarter mile in 16.1.
Not bad for a nearly two ton beast.
The Galaxy and Impala were a half second faster, but they also weighed 100 pounds less.
One killer option on this ride is the eight lugs. The brake drum actually fits inside the wheel.
They were originally designed for Poncho stock cars to give a better breaking and a stronger right front hub,
but they also just look cool.
All cats got spruced up this year with more chrome on the grill and the arrowhead was moved to the hood,
front fenders were squared off with the headlights instead of the cut back look curvier body lines and boomerang shaped tail lights rounded out the new package.
Now, if you've never heard of the 22, you're not alone for its short life. It was always overshadowed by the GTO.
They both debuted in 64 and less than 8002 plus two s were sold versus nearly 34,000 goats.
The Impala and Galaxy also swamped it in sales.
Pontiac continued to tweak the package and sales were bumpy over the next few years until they finally nixed it in 68.
It's fitting that the two plus two only lasted four years.
You don't see them at a car show every day and you sure don't see them going down the road every day. They're, they're extremely rare farm,
but more and more people are taking note of the car both for its rarity and its potent street performance. However, you add it up the Catalina two plus two equals one rocket street machine
coming up. What kind of stripper is best for you? Rick puts them to the test.
Hey, guys, welcome back. The last time you saw a project Street Fighter, we had it blown apart and ready to strip. So while Tommy's knocking the green off the body, I grabbed a couple of panels here to work on. Now, there's more than one way to skin a cat or a ka.
In this case, you can do it for a lot of money or a little
build on a budget muscle car projects that save you time and money.
Now, if you got a spare 1500 bucks laying around, then your best bet is to have your car professionally blasted. But if you like the rest of us, you're looking for ways to strip your car without stripping your wallet and that's where a hand stripping comes in.
It has two different methods. You can use either abrasive or chemical. I'll show you the basics of both. Let's start with. Chemical has two kinds, either aerosol or brush.
The aerosols are convenient and less messy but they evaporate faster and generally aren't as effective.
The brush stripper evaporates slower and bites deeper which means fewer applications to see metal.
One thing to remember when working with strippers is to cover up.
You don't want to mess around here, you'll end up getting burned when it comes to application. Just follow the manufacturer's directions. Some have specific D's and don't that can affect the result.
I'll tell you what. Since we got a few different brands here. Let's do a little experiment. We'll try the aircraft stripper next.
Well, those strippers need to work for a little bit. We got a whole box of stuff to play with. Let's try one of these
that'll work.
Yes,
they've given these things about 10 minutes to work. So it's time to see what we got.
Well, the jazz co
looks like it's softened it up. Not a whole lot of bubbling but
did get it to a point where you could probably scrape it off with a little bit of work.
Now, this is kind of interesting. The aircraft stripper actually evaporated faster
but
it did a lot more effective job of
getting that finish off.
All right. See how the aerosol did.
Yeah, I've definitely seen better.
Well, it looks like the aircraft stripper worked the best on this acrylic lacquer. Let's run with that
once the paint is soft and scrape off what you can using a putty knife, rinse off the residue with water
and go back over the area with any grit to knock off, anything left behind.
Now, remember there's different kinds of strippers for different kinds of finishes. So you might have to do a little experimenting to find the one that works best for your right. But I know one that'll work no matter what kind of finish. You got 40 grit.
The mechanical stripping is pretty straightforward. Just mount up a disk and have at it. But that doesn't mean you can get all medieval on it because you can actually do a lot of damage with a 40 grit disk, especially on corners like that.
You catch that wrong and you will sand right through that sheet metal.
Keep a low speed, don't push on it and let the abrasive do the work.
You don't want to take all the finish off with the 40 grid. You'll end up grinding off too much metal. Once you've removed, about 80% go back over with 80 grid
with the metal exposed. You either need to body work it and prime it right away or seal it up with some epoxy primer.
So for the $25,000 question, do you mechanically strip or do you chemically strip? Mechanical stripping is cheaper and it can rip through multiple layers of material pretty quickly. The downside of it, it does remove some of your base metal and you can't use it on aluminum.
Chemical stripping doesn't affect your base metal and it's great for
hard to reach areas but it's slower. It's toxic and it can cause chemical burns. Now, I've shown you guys the basics, but it's up to you to decide which one is gonna work best for your ride.
Man. I got a mess to clean up here. Plus I still have to finish stripping these panels. But for this week I'm out of time. So until next time I'm out of here.