MuscleCar Builds
Want more content like this?
Join the PowerNation Email NewsletterParts Used In This Episode
Aeromotive Inc.
Fuel celll with in-tank sump box and electric pump system with sending unit.
Miller Electric Manufacturing Co.
Spectrum 875 plasma cutter. Compact size but plenty of power in a machine with easy operator controls, for optimum cutting and gouging performance. Spectrum 375 X-TREME plasma cutter. Auto-Line and MVP Plugs make this 18 pound unit the most portable ever! Diversion 165 TIG Welder. The Personal User's AC/DC TIG machine. Set a material type and thickness, and you are ready to weld.
Video Transcript
Today on muscle car altered ego is back for some critical upgrades. Tips on tig welding aluminum and a little mercury with big attitude.
Hey, welcome to muscle car alter ego coming along slowly but surely. And today we're gonna try our hand at some aluminum sculpting and fab us some custom race seats, but that's not the only aluminum that's getting loaded up in the Comet. Today, we got a fuel cell to get mounted up in this thing. And since I don't wanna end up in a fiery ball of death,
I want the safest fuel system possible. So we'll show you how a
moive
is gonna give me one less thing to worry about. When I stab. The throttle
alter ego started life as a plain old 64 comet, but we've altered the wheelbase stiffened it up, welded in a roll cage and swapped out the steering
and suspension and turn it into an old school. A FX drag car,
a
emotive sent us this prototype of the new fuel cell. And the really cool thing about it is that it uses an in tanks
box and electric fuel pump and fuel filter. Now, aero
moive fuel pumps are the most versatile on the market. These will run either a carbureted daily driven engine or even a high horsepower. EF I set up. All you have to do is swap out the regular
later
and you're good to go. Now, the sun box means that there's always fuel weather pickup, so you never have to worry about vapor lock or pump failure. And this whole system is available as a weld in unit. So you can retrofit almost any tank, whether it's a stock or a custom.
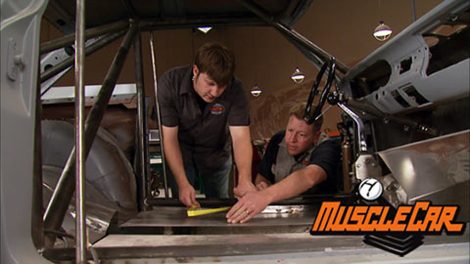
We got all our measurements and decided how to place the tank. So Tommy's cutting to pieces for the mount. The main thing,
keep in mind when mounting the tank is place in it so that in case of a collision, it won't be punctured or torn loose by its own weight. One nice thing about a
motives tank is that it can be mounted in any direction because there's no rear sump and all the line speeding through the top. This means the same tank will work for a drag car or road race car. Got it.
Yes,
we're using nuts as spacers to get the frame away from the tank. So it will be easier to weld
square this dude up
about 29 and an eight
3988 dead nuts.
Once everything is true and square, we can tack it together and mount it in the car
with the mount tacked in. It's time for one last test fit,
making sure everything clears here.
We got clearance of the bars. We think
once I weld it, it's there.
I think that dog would hunt
right on.
Get out the way.
Gotta do the time
now for another ounce of prevention. Don't forget the safety straps.
We'll get the fuel lines and the pressure regulator installed once we finish out the tin work around the tank and that means we can move on to
fing up our seats. But before we get to those, we're taking a trip back to the classroom for some tig welding 101 that's coming up after the break.
Hey, guys, we're back. The custom seats were building for alter ego. Like most racing seats are gonna be
fed out of aluminum and the best way to weld aluminum is with the tig. Now you've seen us do a lot of tig welding here on the show, but there's always new techniques to be learned. So we're bringing in an expert to help us demonstrate how it's done. This is Jim Knife from Miller Welding. Thanks for coming in today, man. I appreciate you're glad to help any time.
So, uh here he brought in some new stuff to show us. This is the 875 plasma relatively new machine for Miller. It's a 78 quality cup machine.
Uh Let me swing around here just a second
self diagnosing machine. If you didn't have the right pressure if you
change the consumables, any of those types of things, this machine is gonna tell you what's wrong if the consumables were bad, et cetera.
Um So basically, if you have a clog tip or something else going on, this is gonna tell you. Absolutely. OK, Rick, I just thought I'd walk you through the 875 plasma real quick. Nothing real difficult about this at all. Very safe torch.
It has a drag cup on it.
This is a safety so the trigger can't be pulled, it can't ignite until I'm ready. Pull this up.
Then she's ready to go. Different materials. Take a different heat setting that's set at 40 amps right now.
And you can also gouge with this machine
for cleaning out welds or whatever. Yes. Cleaning out a weld. Absolutely. Very.
Go ahead and cut real quick.
Nice, clean cut.
Hey, why don't you tell us about this little dude?
I'd be glad to.
This is the 375 extreme plasma.
It's uh a garage guy's dream. This machine will cut three eights anytime you want to on 110 or 230 power actually get better capacities out of the 230 power.
Um really half inch sever capacity. Then
no jumper links to change
very low amp. Draw great for the garage guy.
Uh Once again, 90 P si come into the machine.
Um
Just your
very similar here.
If you're running 110 power, you can only run 20 AMPS, Max, which would be with this end,
if you're running 230 power, you can get full power out of this machine, which is 27 amps.
That's amazing. Out of a machine. That's small. Let's cut something.
I found some scrap aluminum. But before we start sticking it together, why don't you give us the basics on how to set up a tig?
Well, this is a very simple machine. Um, relatively new. It's called the Diversion 165. It's a full package machine.
Um, foot control hand remote built into the torch. Very simple setup. Color coded for the polarity. You're gonna run also the material you're gonna run. So gray would be aluminum. We'll run on this eight inch material, which is 0.125
we should be ready to go.
Ok. I'm gonna attack this piece in a couple of spots so it doesn't spread out and get away from us and then we'll go ahead and make a, well,
there's the puddle.
Now I start adding material.
Well, it looks pretty straightforward here when you're welding together two pieces of the same thickness, right? But what happens when you got two pieces
that are different? It's the same technique, same everything except I concentrate my heat to the thicker of the two materials we've already had this piece tacked up.
Now, we come from the thickness that we
here is 0.125 and we set it for this material. The heavier of the two materials and we're gonna concentrate our heat to the thicker of the two materials and let it blend back into the thinner. Ok. It's almost like when you're mig welding and take your heat from there and you draw it up on your absolutely. Ok. Got you.
There we go.
Ok. So I'm concentrating my heat on the bigger of the two materials.
Well, I did a beautiful job on that, but my understanding is this machine is designed to go up to 3/16. Correct. Correct. Ok.
So what happens if we basically max this thing out with 316 aluminum, should you pre heat it or
there's two things that you can do when you get up close to the capacity of a machine pre heat, as you mentioned, which is normally done with a propane torch or rose bud on an oxygen settling torch.
Um You have to be careful not to put too much heat into it,
but you can easily do
material that's thicker than a machine should do for short periods of time.
Um The other thing you can do is what you've done here is bevel the material
and we went ahead and tact this
and we capped it a little bit. We'll get a little separation to get a little better penetration into that bead.
Where's the bottle?
That looks fantastic, man. It's nice to see what a pro can do.
Thanks for having us. Appreciate the time. Awesome. I appreciate you coming in and showing us some new tips and tricks and techniques anytime.
Well, hey, we got some seeds to build. So coming up later in the show, you're gonna see us put all these newfound skills to the test
after the break. Meet altered ego's comic cousin, The cyclone.
Today's flashback, a 1964 mercury comet cyclone.
The comet was a surefire hit when it debuted in 1960 riding a wave of compact car beaver. It was based off the Hot Falcon, but with a slightly longer frame
and was supposed to be part of the Etzel Line. When that got scrapped in 59 the Comet debuted as its own brand didn't become a Mercury until 62.
By then, sales were flagging. So big m known for its racing prowess threw some big power
its little car in 1964 the Comet
Cyclone was unleashed.
It was a two door hard top with bucket seats, a dash mound attack
and a storm brewing under the hood.
The super 289 V8 cranked out 210 horsepower the most in any compact car at the time,
it featured hydraulic lifters,
a four barrel carb and a chrome dress up kit to make it shine
outside. The Cyclone was all business shedding. Most of the chrome scene on other comics that year,
the only flash was the wheel covers made to look like a chrome rim seen on luxury model Mer,
a newly designed grill gave it just a touch of class
small badges behind the front tires were the only warning. This wasn't your run of the mill econo car.
It was also roomier than most compacts. Thanks to the longer than average 114 inch wheelbase. Cyclones got a hot rod style of upholstery black vinyl trim,
a console and a three spoke sport steering wheel.
The entire Comet line was revamped with a look that emphasized be finally living up to its name from the sawed off front end to the sweeping side coves to the space age taillights. This car looked ready to launch
and to help launch it. The folks at Mercury, they did something pretty wild
in the fall of 63. They rented out the track at Daytona and put five Comets through 100,000 mile endurance run for almost six weeks. Racers drove round the clock in six hour shifts, braving everything from hurricanes and the stray birds.
At the end of it, all over 100 world records were set including an overall speed of 100 and eight miles an hour.
Mercury flated up in their ads
and total comet sales soared by 40% to 190,000.
The
cyclone didn't hit showrooms until mid year and close to 7500 were sold.
A
few of those got solid lifter engines making 271 horses known as Cobra to
289 S.
They weren't listed as a factory option. The Ford didn't want the spotlight taken away from its forthcoming mustang.
Later that year, Mercury announced a boss dragster
a 427 powered comet that was only available to race.
Dyno
Don Nicholson made 12th quarter miles in his A fx come
racking up numerous winds.
The 64 cyclone was just the beginning of a storm that would only gather in speed and intensity as the sixties went on
today. It stands as a proud reminder of a heritage 100,000 miles long.
Coming up. Race seats from a catalog. Come on. We're building them.
Hey, welcome back. When it came time to choose seats for altered ego. We could have just ordered up a set and been done with it. Hey, where's the fun in that? Besides, this is no mail order hot rods. So we're gonna build our own aluminum is a standard material used for race seat. So we went ahead and got a sheet of 14 gauge ready to go. So I went online, pulled out some images to help us come up with a plan like those. We don't really have a way to do rivets though. It's kind of bulky there though.
Well, I like the higher bolsters on it though because it helps hold you in a little bit. What I don't like about this one though
is the back like that. It has too much of a modern kind of a look to it. You know,
this one I like if we raise the bolsters a little bit
to give you a little bit more support on the side, but I like the shape of the back of it. So I was thinking maybe do something along those lines. What do you think about the holes though?
Too many? That's way too many.
Get rid of them or
reduce the number,
get rid of some of them. Keep a few, maybe even change up. I like,
like this other side, it's got different sizes to it.
I like that. Look.
Well, what about you mentioned to me before? You had an idea about doing like a, a
reinforcement around the outside of it.
Yeah, we could
put up some of the holes around here to help dress up the side. Yeah, I like that idea. Let's get started. All right, sweet.
All right. What kind of room we got here?
Uh, with about three inches from the tunnel, about 17 inches would work. Yeah, that would get the room.
17. We can run a runner over here and then come off of this cage over here for the other side
for months. Yeah, that'll work
all
inos.
You know what's cool about working with your own design? There's no right or wrong way
but aluminum is not cheap. So design it in cardboard. First, cut it out and be sure you're happy with the design
something. Like that. Yeah, I like that. That'll give us a nice, gentle curve on the top,
right where that first break comes in is just about the time that that's gonna be rounding off
under your shoulder.
Now, granted, this may be more time consuming than picking up the phone and ordering a set. But when they're done,
you can take all the credit.
Here you go, man. Put some duct tape on it. A little bit of fire retardant, mount it in the car. We're good to go.
I guess I'll watch you go down the track first time.
What do you think about relief cutting it across here so we can actually move that forward. So it like support your shoulders a little better
think that work a couple pipe cuts and just roll that whole top forward
with the cardboard version looking good. It's time to break it down and transfer it to the aluminum
Tommy's making the bends to match the shape of the seat bottom. Now, once the angles are right, it's ready to get tacked together.
Hey, man, what you doing? I designed some headrest. You know, I really like the look of a low back on the street, but I like the safety aspects of a high back on the track. So I think we'll just build some, make them removable. Cool, man. Do you think you could burn this thing together? So I cut out the other side? Mm. Yeah, we can do that. Sweet
tig welding puts a lot more involved than mig. But for aluminum, what's your best bet?
And that's why leaving a little overlap there isn't necessarily a bad thing. I didn't use any rod all the way down there.
Well, that gives you a pretty good idea what these seats are gonna look like when they're done. But I still have to build the headrest, add a bunch of bracing and build the tracks. Plus I just have a whole bunch of welding yet to do and I really don't want to bore you guys with all that. So until next time we're out of here.
Show Full Transcript
Hey, welcome to muscle car alter ego coming along slowly but surely. And today we're gonna try our hand at some aluminum sculpting and fab us some custom race seats, but that's not the only aluminum that's getting loaded up in the Comet. Today, we got a fuel cell to get mounted up in this thing. And since I don't wanna end up in a fiery ball of death,
I want the safest fuel system possible. So we'll show you how a
moive
is gonna give me one less thing to worry about. When I stab. The throttle
alter ego started life as a plain old 64 comet, but we've altered the wheelbase stiffened it up, welded in a roll cage and swapped out the steering
and suspension and turn it into an old school. A FX drag car,
a
emotive sent us this prototype of the new fuel cell. And the really cool thing about it is that it uses an in tanks
box and electric fuel pump and fuel filter. Now, aero
moive fuel pumps are the most versatile on the market. These will run either a carbureted daily driven engine or even a high horsepower. EF I set up. All you have to do is swap out the regular
later
and you're good to go. Now, the sun box means that there's always fuel weather pickup, so you never have to worry about vapor lock or pump failure. And this whole system is available as a weld in unit. So you can retrofit almost any tank, whether it's a stock or a custom.
We got all our measurements and decided how to place the tank. So Tommy's cutting to pieces for the mount. The main thing,
keep in mind when mounting the tank is place in it so that in case of a collision, it won't be punctured or torn loose by its own weight. One nice thing about a
motives tank is that it can be mounted in any direction because there's no rear sump and all the line speeding through the top. This means the same tank will work for a drag car or road race car. Got it.
Yes,
we're using nuts as spacers to get the frame away from the tank. So it will be easier to weld
square this dude up
about 29 and an eight
3988 dead nuts.
Once everything is true and square, we can tack it together and mount it in the car
with the mount tacked in. It's time for one last test fit,
making sure everything clears here.
We got clearance of the bars. We think
once I weld it, it's there.
I think that dog would hunt
right on.
Get out the way.
Gotta do the time
now for another ounce of prevention. Don't forget the safety straps.
We'll get the fuel lines and the pressure regulator installed once we finish out the tin work around the tank and that means we can move on to
fing up our seats. But before we get to those, we're taking a trip back to the classroom for some tig welding 101 that's coming up after the break.
Hey, guys, we're back. The custom seats were building for alter ego. Like most racing seats are gonna be
fed out of aluminum and the best way to weld aluminum is with the tig. Now you've seen us do a lot of tig welding here on the show, but there's always new techniques to be learned. So we're bringing in an expert to help us demonstrate how it's done. This is Jim Knife from Miller Welding. Thanks for coming in today, man. I appreciate you're glad to help any time.
So, uh here he brought in some new stuff to show us. This is the 875 plasma relatively new machine for Miller. It's a 78 quality cup machine.
Uh Let me swing around here just a second
self diagnosing machine. If you didn't have the right pressure if you
change the consumables, any of those types of things, this machine is gonna tell you what's wrong if the consumables were bad, et cetera.
Um So basically, if you have a clog tip or something else going on, this is gonna tell you. Absolutely. OK, Rick, I just thought I'd walk you through the 875 plasma real quick. Nothing real difficult about this at all. Very safe torch.
It has a drag cup on it.
This is a safety so the trigger can't be pulled, it can't ignite until I'm ready. Pull this up.
Then she's ready to go. Different materials. Take a different heat setting that's set at 40 amps right now.
And you can also gouge with this machine
for cleaning out welds or whatever. Yes. Cleaning out a weld. Absolutely. Very.
Go ahead and cut real quick.
Nice, clean cut.
Hey, why don't you tell us about this little dude?
I'd be glad to.
This is the 375 extreme plasma.
It's uh a garage guy's dream. This machine will cut three eights anytime you want to on 110 or 230 power actually get better capacities out of the 230 power.
Um really half inch sever capacity. Then
no jumper links to change
very low amp. Draw great for the garage guy.
Uh Once again, 90 P si come into the machine.
Um
Just your
very similar here.
If you're running 110 power, you can only run 20 AMPS, Max, which would be with this end,
if you're running 230 power, you can get full power out of this machine, which is 27 amps.
That's amazing. Out of a machine. That's small. Let's cut something.
I found some scrap aluminum. But before we start sticking it together, why don't you give us the basics on how to set up a tig?
Well, this is a very simple machine. Um, relatively new. It's called the Diversion 165. It's a full package machine.
Um, foot control hand remote built into the torch. Very simple setup. Color coded for the polarity. You're gonna run also the material you're gonna run. So gray would be aluminum. We'll run on this eight inch material, which is 0.125
we should be ready to go.
Ok. I'm gonna attack this piece in a couple of spots so it doesn't spread out and get away from us and then we'll go ahead and make a, well,
there's the puddle.
Now I start adding material.
Well, it looks pretty straightforward here when you're welding together two pieces of the same thickness, right? But what happens when you got two pieces
that are different? It's the same technique, same everything except I concentrate my heat to the thicker of the two materials we've already had this piece tacked up.
Now, we come from the thickness that we
here is 0.125 and we set it for this material. The heavier of the two materials and we're gonna concentrate our heat to the thicker of the two materials and let it blend back into the thinner. Ok. It's almost like when you're mig welding and take your heat from there and you draw it up on your absolutely. Ok. Got you.
There we go.
Ok. So I'm concentrating my heat on the bigger of the two materials.
Well, I did a beautiful job on that, but my understanding is this machine is designed to go up to 3/16. Correct. Correct. Ok.
So what happens if we basically max this thing out with 316 aluminum, should you pre heat it or
there's two things that you can do when you get up close to the capacity of a machine pre heat, as you mentioned, which is normally done with a propane torch or rose bud on an oxygen settling torch.
Um You have to be careful not to put too much heat into it,
but you can easily do
material that's thicker than a machine should do for short periods of time.
Um The other thing you can do is what you've done here is bevel the material
and we went ahead and tact this
and we capped it a little bit. We'll get a little separation to get a little better penetration into that bead.
Where's the bottle?
That looks fantastic, man. It's nice to see what a pro can do.
Thanks for having us. Appreciate the time. Awesome. I appreciate you coming in and showing us some new tips and tricks and techniques anytime.
Well, hey, we got some seeds to build. So coming up later in the show, you're gonna see us put all these newfound skills to the test
after the break. Meet altered ego's comic cousin, The cyclone.
Today's flashback, a 1964 mercury comet cyclone.
The comet was a surefire hit when it debuted in 1960 riding a wave of compact car beaver. It was based off the Hot Falcon, but with a slightly longer frame
and was supposed to be part of the Etzel Line. When that got scrapped in 59 the Comet debuted as its own brand didn't become a Mercury until 62.
By then, sales were flagging. So big m known for its racing prowess threw some big power
its little car in 1964 the Comet
Cyclone was unleashed.
It was a two door hard top with bucket seats, a dash mound attack
and a storm brewing under the hood.
The super 289 V8 cranked out 210 horsepower the most in any compact car at the time,
it featured hydraulic lifters,
a four barrel carb and a chrome dress up kit to make it shine
outside. The Cyclone was all business shedding. Most of the chrome scene on other comics that year,
the only flash was the wheel covers made to look like a chrome rim seen on luxury model Mer,
a newly designed grill gave it just a touch of class
small badges behind the front tires were the only warning. This wasn't your run of the mill econo car.
It was also roomier than most compacts. Thanks to the longer than average 114 inch wheelbase. Cyclones got a hot rod style of upholstery black vinyl trim,
a console and a three spoke sport steering wheel.
The entire Comet line was revamped with a look that emphasized be finally living up to its name from the sawed off front end to the sweeping side coves to the space age taillights. This car looked ready to launch
and to help launch it. The folks at Mercury, they did something pretty wild
in the fall of 63. They rented out the track at Daytona and put five Comets through 100,000 mile endurance run for almost six weeks. Racers drove round the clock in six hour shifts, braving everything from hurricanes and the stray birds.
At the end of it, all over 100 world records were set including an overall speed of 100 and eight miles an hour.
Mercury flated up in their ads
and total comet sales soared by 40% to 190,000.
The
cyclone didn't hit showrooms until mid year and close to 7500 were sold.
A
few of those got solid lifter engines making 271 horses known as Cobra to
289 S.
They weren't listed as a factory option. The Ford didn't want the spotlight taken away from its forthcoming mustang.
Later that year, Mercury announced a boss dragster
a 427 powered comet that was only available to race.
Dyno
Don Nicholson made 12th quarter miles in his A fx come
racking up numerous winds.
The 64 cyclone was just the beginning of a storm that would only gather in speed and intensity as the sixties went on
today. It stands as a proud reminder of a heritage 100,000 miles long.
Coming up. Race seats from a catalog. Come on. We're building them.
Hey, welcome back. When it came time to choose seats for altered ego. We could have just ordered up a set and been done with it. Hey, where's the fun in that? Besides, this is no mail order hot rods. So we're gonna build our own aluminum is a standard material used for race seat. So we went ahead and got a sheet of 14 gauge ready to go. So I went online, pulled out some images to help us come up with a plan like those. We don't really have a way to do rivets though. It's kind of bulky there though.
Well, I like the higher bolsters on it though because it helps hold you in a little bit. What I don't like about this one though
is the back like that. It has too much of a modern kind of a look to it. You know,
this one I like if we raise the bolsters a little bit
to give you a little bit more support on the side, but I like the shape of the back of it. So I was thinking maybe do something along those lines. What do you think about the holes though?
Too many? That's way too many.
Get rid of them or
reduce the number,
get rid of some of them. Keep a few, maybe even change up. I like,
like this other side, it's got different sizes to it.
I like that. Look.
Well, what about you mentioned to me before? You had an idea about doing like a, a
reinforcement around the outside of it.
Yeah, we could
put up some of the holes around here to help dress up the side. Yeah, I like that idea. Let's get started. All right, sweet.
All right. What kind of room we got here?
Uh, with about three inches from the tunnel, about 17 inches would work. Yeah, that would get the room.
17. We can run a runner over here and then come off of this cage over here for the other side
for months. Yeah, that'll work
all
inos.
You know what's cool about working with your own design? There's no right or wrong way
but aluminum is not cheap. So design it in cardboard. First, cut it out and be sure you're happy with the design
something. Like that. Yeah, I like that. That'll give us a nice, gentle curve on the top,
right where that first break comes in is just about the time that that's gonna be rounding off
under your shoulder.
Now, granted, this may be more time consuming than picking up the phone and ordering a set. But when they're done,
you can take all the credit.
Here you go, man. Put some duct tape on it. A little bit of fire retardant, mount it in the car. We're good to go.
I guess I'll watch you go down the track first time.
What do you think about relief cutting it across here so we can actually move that forward. So it like support your shoulders a little better
think that work a couple pipe cuts and just roll that whole top forward
with the cardboard version looking good. It's time to break it down and transfer it to the aluminum
Tommy's making the bends to match the shape of the seat bottom. Now, once the angles are right, it's ready to get tacked together.
Hey, man, what you doing? I designed some headrest. You know, I really like the look of a low back on the street, but I like the safety aspects of a high back on the track. So I think we'll just build some, make them removable. Cool, man. Do you think you could burn this thing together? So I cut out the other side? Mm. Yeah, we can do that. Sweet
tig welding puts a lot more involved than mig. But for aluminum, what's your best bet?
And that's why leaving a little overlap there isn't necessarily a bad thing. I didn't use any rod all the way down there.
Well, that gives you a pretty good idea what these seats are gonna look like when they're done. But I still have to build the headrest, add a bunch of bracing and build the tracks. Plus I just have a whole bunch of welding yet to do and I really don't want to bore you guys with all that. So until next time we're out of here.