More '70 Chevy Camaro RS "Limelight" Episodes
MuscleCar Builds
Want more content like this?
Join the PowerNation Email NewsletterParts Used In This Episode
American Powertrain Systems
70-74 BIG BLOCK ALUMINUM EXHAUST SYSTEM-2 1/2""
Auto Body Color & Supply Co.
O.E. replacement carburetor
Classic Industries
69-74 Big block 5 piece alternator bracket
Classic Industries
70-71 GM F-body pedal set
Classic Industries
70-72 Chevrolet big block power steering bracket set
Dupli-Color
Body fillers and supplies
Video Transcript
Today on muscle car limelight's big block gets buttoned up. Tommy takes car building to new heights and Horsepower's Thunderbird has some body alignment issues but Rick's on the case.
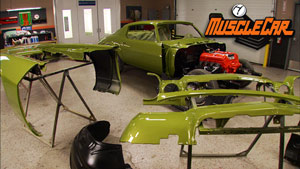
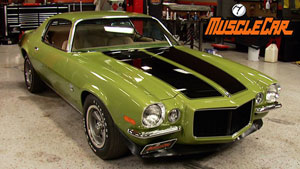
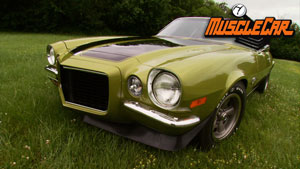
Hey guys, welcome to muscle car project. Limelight here is coming into the final stages of the build. Our goal is to recreate an RSS S3 96 using all the options that we would have chosen if we had ordered it way back in 1970. And when we're all set and done, this baby is not only gonna look factory fresh, but it's gonna drive just like it did back in the day.
We started this OEM style build with a nice rust free splitt bumper Rs.
Very little body work was needed before we hosed on the original GM Citrus Green. A
402 block was built up to the L 78 3 96 specs and bolted up to a month at four speed. The front end was upgraded to the F 41 special suspension option using all factory spec bushings and parts
and we gave it a 12 volt since this was the last year, you could get one in an F body.
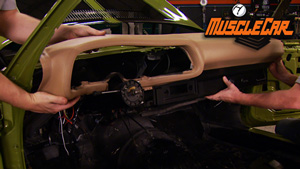
Then we made over the interior
to look just like a 1970 Camaro should.
Well, the engine's been installed but it's not ready to fire up yet. We still need a bolt on a bunch of parts like the carburetor and all the engine accessories. Then we can attend to a few details like the clutch linkage and wiring.
You don't have to remove the hood to do this. We went ahead and snatched it off to give you guys a better look at what we're doing.
Now. L 78 Camaros came with a very specific carburetor while most of bodies came with a quadrajet. We need a rare Haley for our application
and these things are not easy to come by,
but the parts place specializes in factory correct reproduction carbs and they hooked us up with this one.
You know, this is kind of cool because if someone comes up
and they're all like, hey man, what pound, what pound injectors are you running on your motor? And you look at them and go, dude, I'm running a Haley back up.
We now
in accessories from classic industries and these are all remanded parts made to replicate what would have originally come on an L 78 Camaro
and they've got these kind of pieces for a ton of different builds,
the cooling components and wine
are all the same story. All this stuff is built to marry up together right out of the box sweet, no modifications necessary.
I
need to double check because from the factory, they use a resistance wire right here
that actually cuts the voltage down to six volts instead of 12. So the points last longer,
but we put in uh electronic ignition. So we need to double check
and make sure it's not gonna screw it up.
All right. Now, this is why we go back and check stuff. Apparently it's ok to leave the ballast wire in place.
But you do need to get your hot
off. A 12 volt source, not the six volt on the other side of the resistor.
So that means I need to find myself a new 12 volt switch source.
No biggie
with the radiator cover and F
rod in place. That means we're done shoving big pieces into the engine bay.
Time to take off these old pickup truck valve covers and swap them out for the correct crumbs.
I'll bet you thought we were gonna leave these orange ones on. Huh?
Well,
I,
the plugs, distributor cap and ignition wires are also stock OEM parts right down to the original rubber booties.
We're missing a few small things like wire separators and some hoses, but pretty soon limelight's gonna be ready for the prom.
Oh, yeah.
Coming up, installing a factory style big block Camaro exhaust system. And is this a hair ball or fiberglass?
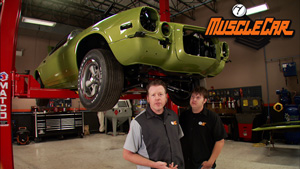
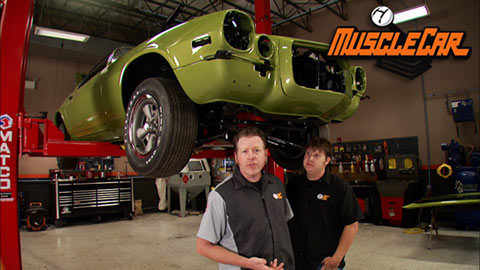
Hey, guys, welcome back. Got all the brackets mounted for the clutch linkage. I'm ready to drop in the Z bar. Now, all of these OEM style of four speed conversion parts came from American power train. And once I get all this stuff mounted, we'll get it up here in the rack, make some final adjustments so it engages and disengages in the right spots. Doesn't cause any damage.
Here's a peak in 1970
technology for you back when you didn't need a phd in astrophysics to properly set up a clutch. Nowadays, when a manufacturer runs a manual transmission,
the clutch system is all hydraulic with a tiny little magical leprechaun who makes it all work?
Hey, Tom,
be,
yes. You
wanna jump in the car and give me a hint, adjusting the clutch.
I reckon
whole thing's pretty comfortable.
You know, this thing in like a four wheel drive version wouldn't be too bad either
when you're adjusting the play in the clutch, it helps to have somebody that can sit in the driver's seat and run the pedal for you.
All right, Tommy. Where are we at? In the clutch?
It feels like you got clutch but it doesn't feel like it gets good to almost at the floor,
bring it all the way down again. One more time.
Getting better
if you keep going,
keep going.
Yeah, it feels about right. Rick cool. We're dialed,
we ordered the correct exhaust for a big block from classic industries. Now, this kit comes with a larger diameter pipe than what our original small block 307 used to breathe through. These are made from aluminized steel, which would have been the material of choice back in the 19 seventies.
Now it's Rick's turn to be the placeholder guy.
He does a pretty good job.
I think it hangs a little low.
It's gonna sound all might, it might scrape a little bit. It's a good thing. He's pretty knowledgeable about exhaust.
This is what you call a transverse muffler
GM used this design for decades.
The pony car sat really low to the ground. So they had to compensate for this by shoving the muffler up between the rear end and the gas tank. We're reusing the factory hangers which still fit this exhaust, even though the car came with a single tail pipe.
A
little bit of wiggling is all it takes to get the pieces in place.
The kit comes with all the oe style clamps to hold everything together. Just don't tor
them down super tight until you have everything lined up where it's supposed to be.
And voila a factory, correct exhaust system.
We've got the exhaust all buttoned up and it's gonna look and sound real nice. The pieces are coming together on limelight. Yeah, we're getting dangerously close to taking her out for a maiden voyage, but we still have to hang a gas tank, the brake booster bolt on a few shiny parts and tighten up some loose ends
straight ahead. Rick shows us how to widen the fiberglass hood and blend to an existing paint job with no color code.
Hey, guys, over the years you've seen us paint a lot of cars in the shop here more often than not, we shoot the entire thing, but if you're just replacing one panel, well, you don't necessarily need to shoot the entire car
a perfect example of this. Well, horsepower dropped a big block into this old T bird. Now, we got a little problem.
The hood doesn't fit. So we're gonna do the same thing that any other red blooded hot roder would do a hood swab.
Now, just like with all aftermarket parts, we better make sure this thing fits first.
All right, first trial fit here and we'll see what we got.
We got a little bit of a fitment issue over here on the side. You can tell in the corners there we don't want to go any further back. So that means this fender right here.
It's gonna have to get moved in a little bit.
That's a ha
man.
I have to make up that big old gap. The only way to do that is to build up the hood, which means I need to add half of an inch
to the side of that hood.
D
I'll start off by opening up the mounting holes in the fender to give me more room to shove it over
the further I can move the fender the less I have to add to the hood.
All right. See how much we gained here.
We gain some.
Now, I'm about to start making a rain fiberglass all over the top of the fender and hood. So I'm masking it off to protect them from dust
to give the hood surface good adhesion. I'm using ad a sander to wrap it all up.
Ok. Take a look at this. That wasn't there until I started standing on it and I took the gel coat off. You park it out in the sunlight, it warms up and that'll actually pop loose and you'll have a hole in your brand new painted hood. So keep a real close eye out for little spots like that.
Now, since this is a structural part of the hood, I'm using long strand fiberglass filler. It's stronger than the Short hair variety and it's close to what the hood is actually made of.
Well, it don't look pretty, but
getting there
the stuff is starting to harden up, but it's not quite hard yet. Be sure to come in here and slice it back loose with a real sharp razor blade.
That way you can get the hood back open if you don't do this, makes it a real pain in the butt
to get it back open. Trust me.
Here we go.
All right. Let this set up just a little bit longer after making my cut.
Now it's time to get rid of this extra stuff here.
It's not gonna be pretty yet.
I'm just trying to get the spacing right.
I'm using a long board and some 80 grid to take off a little bit at a time. Remember, it's easier to take it off than it is to put it back on.
You can already see here where that gap is starting to come into line.
Not looking too bad.
Next, I'll break the D A back out to smooth off the top. You give me a better idea of how the gap is looking.
Yeah, that's looking good.
Another few swipes with a long board and I'm ready to finish work it with some plastic filler.
Now, the structural work is done.
Now it's time for the cosmetic surgery.
All right, let's see what we got.
There we go. That's looking pretty good.
I just got to pull it off and
body work. It,
it's getting there.
Still ahead. Rick reveals the mysteries of paint blending.
You're watching muscle car for a DVD copy of this episode. Just go to Power Block tv.com and order your copy for just 595 plus shipping and handling. Start your own muscle car collection delivered right to your door from the power block.
We got the hood bit on the T bird. It's actually looking pretty good. I ended up adding about 38 of an inch to this lip over here, but the gaps
pretty tight. Well, now we're ready to get the rest of this thing smoothed out
as usual. I'll start off by knocking down the shine with the D A and some 80 grid.
Now, since this is all cosmetic repair, I can go straight to the plastic filler.
I hit it with some guide code to show me the lowest spots.
Roll out the long board and get it flat and ready for primer.
I'm using an Epoxy primer because it's highly compatible with the makeup of the hood
with the primer drying on the hood and the booth. Now's a good time to get these fenders prepped out. I'm gonna be shooting the hood on the car that way I can blend the color from the hood onto the fenders and that means I gotta send them out with 1000 grid.
Yeah,
you may be wondering why I'm only sanding down to the body line right here. There's a good reason for that. There's a lot better chance of having a good color match from the fender to the door. If I keep my clear above this point, now you may be thinking, well, clear is clear. Why would it change the color? Think of it as taking like an old rock and dip it halfway in a glass of water. It's gonna change the color on half of that rock with the same thing on a car. If you take a part of a car, dip it into clear, it's gonna change the color. Even if it's just a little bit.
Now, I'm completely masking the engine compartment because I don't want any overspray getting on horsepower. Shiny new motor. A
final rub down with some 400 gra and water
and the hood's ready to go into place.
I'm covering up the top of the fender to keep the first coat of new color off of him. I'll explain why in a minute,
a little, a bird's been painted once before and not in the original color. And if you don't have the code for the color you're trying to match, there's a few ways you can do it.
You can get a color chip book, find the color as close as you can find and then tint it from there until you got a match or you can do like I did call up auto body color and supply, send them a part of the car and they'll do the match for you. We're ready to rock
with metallic paint like this. You have to watch your overlap really close. So you don't get tiger stripes.
I'm going to take the new color from the hood, blend it on to just the top of the fender,
but preserve the original color over here on the side. Then reclear the whole top of the fender. By the time it's done, you'll never even tell
and make sure you aim your guns that the overspray is blown away from the car and doesn't go all the way down to your mask line.
The last on is the clear. I put two coats on the hood and one on the fender. This time, you can spray all the way down to the tape line.
Well, that about wraps up horsepower's new T bird hood. I hope you guys have a little bit better understanding of how involved a project like this can be. Now, why you probably shouldn't be so surprised when a body shop hands you an estimate for $1200 to basically do the same thing. Now, if you have any questions about anything you saw on the show today, you can check it all out at Power Block tv.com.
I still gotta get this thing back down to horsepower, but for this week we're out of time. So until next time we're out of here.
Show Full Transcript
Hey guys, welcome to muscle car project. Limelight here is coming into the final stages of the build. Our goal is to recreate an RSS S3 96 using all the options that we would have chosen if we had ordered it way back in 1970. And when we're all set and done, this baby is not only gonna look factory fresh, but it's gonna drive just like it did back in the day.
We started this OEM style build with a nice rust free splitt bumper Rs.
Very little body work was needed before we hosed on the original GM Citrus Green. A
402 block was built up to the L 78 3 96 specs and bolted up to a month at four speed. The front end was upgraded to the F 41 special suspension option using all factory spec bushings and parts
and we gave it a 12 volt since this was the last year, you could get one in an F body.
Then we made over the interior
to look just like a 1970 Camaro should.
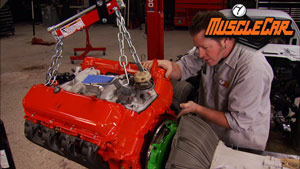
Well, the engine's been installed but it's not ready to fire up yet. We still need a bolt on a bunch of parts like the carburetor and all the engine accessories. Then we can attend to a few details like the clutch linkage and wiring.
You don't have to remove the hood to do this. We went ahead and snatched it off to give you guys a better look at what we're doing.
Now. L 78 Camaros came with a very specific carburetor while most of bodies came with a quadrajet. We need a rare Haley for our application
and these things are not easy to come by,
but the parts place specializes in factory correct reproduction carbs and they hooked us up with this one.
You know, this is kind of cool because if someone comes up
and they're all like, hey man, what pound, what pound injectors are you running on your motor? And you look at them and go, dude, I'm running a Haley back up.
We now
in accessories from classic industries and these are all remanded parts made to replicate what would have originally come on an L 78 Camaro
and they've got these kind of pieces for a ton of different builds,
the cooling components and wine
are all the same story. All this stuff is built to marry up together right out of the box sweet, no modifications necessary.
I
need to double check because from the factory, they use a resistance wire right here
that actually cuts the voltage down to six volts instead of 12. So the points last longer,
but we put in uh electronic ignition. So we need to double check
and make sure it's not gonna screw it up.
All right. Now, this is why we go back and check stuff. Apparently it's ok to leave the ballast wire in place.
But you do need to get your hot
off. A 12 volt source, not the six volt on the other side of the resistor.
So that means I need to find myself a new 12 volt switch source.
No biggie
with the radiator cover and F
rod in place. That means we're done shoving big pieces into the engine bay.
Time to take off these old pickup truck valve covers and swap them out for the correct crumbs.
I'll bet you thought we were gonna leave these orange ones on. Huh?
Well,
I,
the plugs, distributor cap and ignition wires are also stock OEM parts right down to the original rubber booties.
We're missing a few small things like wire separators and some hoses, but pretty soon limelight's gonna be ready for the prom.
Oh, yeah.
Coming up, installing a factory style big block Camaro exhaust system. And is this a hair ball or fiberglass?
Hey, guys, welcome back. Got all the brackets mounted for the clutch linkage. I'm ready to drop in the Z bar. Now, all of these OEM style of four speed conversion parts came from American power train. And once I get all this stuff mounted, we'll get it up here in the rack, make some final adjustments so it engages and disengages in the right spots. Doesn't cause any damage.
Here's a peak in 1970
technology for you back when you didn't need a phd in astrophysics to properly set up a clutch. Nowadays, when a manufacturer runs a manual transmission,
the clutch system is all hydraulic with a tiny little magical leprechaun who makes it all work?
Hey, Tom,
be,
yes. You
wanna jump in the car and give me a hint, adjusting the clutch.
I reckon
whole thing's pretty comfortable.
You know, this thing in like a four wheel drive version wouldn't be too bad either
when you're adjusting the play in the clutch, it helps to have somebody that can sit in the driver's seat and run the pedal for you.
All right, Tommy. Where are we at? In the clutch?
It feels like you got clutch but it doesn't feel like it gets good to almost at the floor,
bring it all the way down again. One more time.
Getting better
if you keep going,
keep going.
Yeah, it feels about right. Rick cool. We're dialed,
we ordered the correct exhaust for a big block from classic industries. Now, this kit comes with a larger diameter pipe than what our original small block 307 used to breathe through. These are made from aluminized steel, which would have been the material of choice back in the 19 seventies.
Now it's Rick's turn to be the placeholder guy.
He does a pretty good job.
I think it hangs a little low.
It's gonna sound all might, it might scrape a little bit. It's a good thing. He's pretty knowledgeable about exhaust.
This is what you call a transverse muffler
GM used this design for decades.
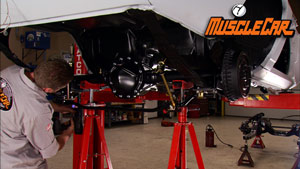
The pony car sat really low to the ground. So they had to compensate for this by shoving the muffler up between the rear end and the gas tank. We're reusing the factory hangers which still fit this exhaust, even though the car came with a single tail pipe.
A
little bit of wiggling is all it takes to get the pieces in place.
The kit comes with all the oe style clamps to hold everything together. Just don't tor
them down super tight until you have everything lined up where it's supposed to be.
And voila a factory, correct exhaust system.
We've got the exhaust all buttoned up and it's gonna look and sound real nice. The pieces are coming together on limelight. Yeah, we're getting dangerously close to taking her out for a maiden voyage, but we still have to hang a gas tank, the brake booster bolt on a few shiny parts and tighten up some loose ends
straight ahead. Rick shows us how to widen the fiberglass hood and blend to an existing paint job with no color code.
Hey, guys, over the years you've seen us paint a lot of cars in the shop here more often than not, we shoot the entire thing, but if you're just replacing one panel, well, you don't necessarily need to shoot the entire car
a perfect example of this. Well, horsepower dropped a big block into this old T bird. Now, we got a little problem.
The hood doesn't fit. So we're gonna do the same thing that any other red blooded hot roder would do a hood swab.
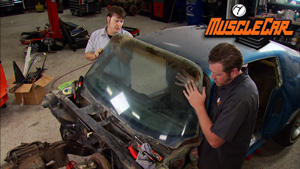
Now, just like with all aftermarket parts, we better make sure this thing fits first.
All right, first trial fit here and we'll see what we got.
We got a little bit of a fitment issue over here on the side. You can tell in the corners there we don't want to go any further back. So that means this fender right here.
It's gonna have to get moved in a little bit.
That's a ha
man.
I have to make up that big old gap. The only way to do that is to build up the hood, which means I need to add half of an inch
to the side of that hood.
D
I'll start off by opening up the mounting holes in the fender to give me more room to shove it over
the further I can move the fender the less I have to add to the hood.
All right. See how much we gained here.
We gain some.
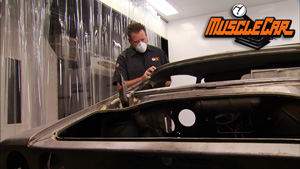
Now, I'm about to start making a rain fiberglass all over the top of the fender and hood. So I'm masking it off to protect them from dust
to give the hood surface good adhesion. I'm using ad a sander to wrap it all up.
Ok. Take a look at this. That wasn't there until I started standing on it and I took the gel coat off. You park it out in the sunlight, it warms up and that'll actually pop loose and you'll have a hole in your brand new painted hood. So keep a real close eye out for little spots like that.
Now, since this is a structural part of the hood, I'm using long strand fiberglass filler. It's stronger than the Short hair variety and it's close to what the hood is actually made of.
Well, it don't look pretty, but
getting there
the stuff is starting to harden up, but it's not quite hard yet. Be sure to come in here and slice it back loose with a real sharp razor blade.
That way you can get the hood back open if you don't do this, makes it a real pain in the butt
to get it back open. Trust me.
Here we go.
All right. Let this set up just a little bit longer after making my cut.
Now it's time to get rid of this extra stuff here.
It's not gonna be pretty yet.
I'm just trying to get the spacing right.
I'm using a long board and some 80 grid to take off a little bit at a time. Remember, it's easier to take it off than it is to put it back on.
You can already see here where that gap is starting to come into line.
Not looking too bad.
Next, I'll break the D A back out to smooth off the top. You give me a better idea of how the gap is looking.
Yeah, that's looking good.
Another few swipes with a long board and I'm ready to finish work it with some plastic filler.
Now, the structural work is done.
Now it's time for the cosmetic surgery.
All right, let's see what we got.
There we go. That's looking pretty good.
I just got to pull it off and
body work. It,
it's getting there.
Still ahead. Rick reveals the mysteries of paint blending.
You're watching muscle car for a DVD copy of this episode. Just go to Power Block tv.com and order your copy for just 595 plus shipping and handling. Start your own muscle car collection delivered right to your door from the power block.
We got the hood bit on the T bird. It's actually looking pretty good. I ended up adding about 38 of an inch to this lip over here, but the gaps
pretty tight. Well, now we're ready to get the rest of this thing smoothed out
as usual. I'll start off by knocking down the shine with the D A and some 80 grid.
Now, since this is all cosmetic repair, I can go straight to the plastic filler.
I hit it with some guide code to show me the lowest spots.
Roll out the long board and get it flat and ready for primer.
I'm using an Epoxy primer because it's highly compatible with the makeup of the hood
with the primer drying on the hood and the booth. Now's a good time to get these fenders prepped out. I'm gonna be shooting the hood on the car that way I can blend the color from the hood onto the fenders and that means I gotta send them out with 1000 grid.
Yeah,
you may be wondering why I'm only sanding down to the body line right here. There's a good reason for that. There's a lot better chance of having a good color match from the fender to the door. If I keep my clear above this point, now you may be thinking, well, clear is clear. Why would it change the color? Think of it as taking like an old rock and dip it halfway in a glass of water. It's gonna change the color on half of that rock with the same thing on a car. If you take a part of a car, dip it into clear, it's gonna change the color. Even if it's just a little bit.
Now, I'm completely masking the engine compartment because I don't want any overspray getting on horsepower. Shiny new motor. A
final rub down with some 400 gra and water
and the hood's ready to go into place.
I'm covering up the top of the fender to keep the first coat of new color off of him. I'll explain why in a minute,
a little, a bird's been painted once before and not in the original color. And if you don't have the code for the color you're trying to match, there's a few ways you can do it.
You can get a color chip book, find the color as close as you can find and then tint it from there until you got a match or you can do like I did call up auto body color and supply, send them a part of the car and they'll do the match for you. We're ready to rock
with metallic paint like this. You have to watch your overlap really close. So you don't get tiger stripes.
I'm going to take the new color from the hood, blend it on to just the top of the fender,
but preserve the original color over here on the side. Then reclear the whole top of the fender. By the time it's done, you'll never even tell
and make sure you aim your guns that the overspray is blown away from the car and doesn't go all the way down to your mask line.
The last on is the clear. I put two coats on the hood and one on the fender. This time, you can spray all the way down to the tape line.
Well, that about wraps up horsepower's new T bird hood. I hope you guys have a little bit better understanding of how involved a project like this can be. Now, why you probably shouldn't be so surprised when a body shop hands you an estimate for $1200 to basically do the same thing. Now, if you have any questions about anything you saw on the show today, you can check it all out at Power Block tv.com.
I still gotta get this thing back down to horsepower, but for this week we're out of time. So until next time we're out of here.