More '86 Ford Mustang "Dark Horse" Episodes

MuscleCar Builds

Parts Used In This Episode

BBK Performance
Subframe Connectors, Bolt-On, charcoal gray metallic powdercoated Steel, Ford, Mustang, Pair
Competition Engineering
Roll Bar, 8-Point, Ford, Mercury, Mustang/Capri, Kit
Dupli-Color
Paint, Guide Coat, Fast Dry, Flat Black, 12 oz., Aerosol, Each
Mickey Thompson
Tire, ET Street, 26 x 11.50 R15, Radial, Steel-Belted, Blackwall, Each
Northern Auto Parts
Polish, Professional Foam Pad, 1 qt., Each
3M
Stripe Off Wheel, 4 inch x 5/8 inch. Solid wheel designed for removal of vinyl striping tapes, decals, graphics and double sided tape.
Coker Tire
Hot Rod Steel - 15x10 Primed 5x4 1/2, 5x4 3/4 (multi-lug)
Video Transcript

Today on muscle car stepping lighting, reinforce project dark horse gets a pile of go fast body and chassis mods. Rick shows off some spot repair, know how and altered ego goes

vroom.

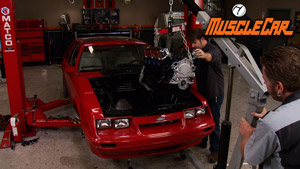
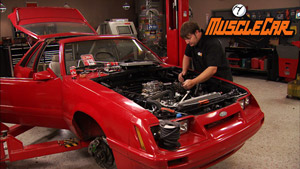
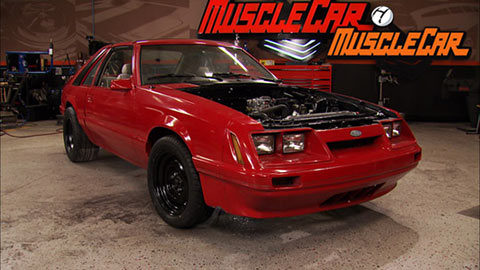
Hey y'all, welcome to muscle car. We've been covering some pretty serious ground on project Dark horse. We've got our 331 dropped in the hole along with the rear axle exhaust and most of the big parts.

Our goals for this car are pretty simple. We want it to be fast, we want it to be affordable and we want it to be treatable. The motor we've got in, it is pretty stout and with it being a T top car, it can be a little flexi so to make sure the body can hold up to what we're putting it through. We're gonna install a set of the Summit Racing Subra connectors.

Now, some Subra connectors are designed to be welded in. Some are designed to be bolted in.

We're gonna go ahead and weld ours in just because it'd be stronger and faster.

I'm gonna mark this so I can prep the body for a good solid. We,

he's come powder coated from the factory. Once I hit him with some 80 grid, a little bit, they're ready for some heat.

This is one of those

kind of things you really want to pay attention to, mainly because we're gonna be welding right beside some fuel line.

You strike an arc across one of them.

You're gonna be in a need of a band aid.

Yeah. All that up there

means it's galvanized. So, be sure to weld in a well ventilated area

or you'll be sick, sicker than a dog.

Well, that should stiffen her up on the bottom side. Another way to keep these old cars from flexing is by putting a good cage in it

and it looks like I got done just in time

if Rick is gonna get his hands dirty today. Now, one of the main reasons we wanted to build one of these cars because they're cheap and easy to get parts for the mailman just dropped off a whole mess of tube in here for a roll cage and a prefab kit like this can really save you a lot of time. Might save you a butt too.

But doing a bunch of welding with the interior still in the car isn't a good idea.

Plus we plan on lighting this thing up a good bit. So it gives us a good reason to snatch interior out of it.

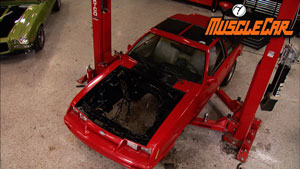
Now we pulled her off the lift so we didn't feel like fighting those pillars while we gutted this thing out now is a good time to show you what we have planned for the wheels and tires.

The,

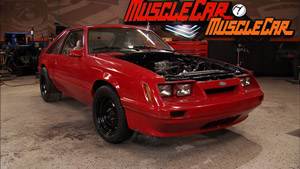
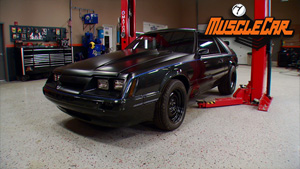
and we wanted something that was inexpensive, strong and subdued and the steel wheels from Coco tire fit the bill, the powder coated. So that menacing black finish isn't gonna go anywhere. Now, they're wrapped up in a set of Mickey Thompson et Street rads which are dot approved and require little to no burn out.

Yeah, she's got a little bit of a rake to her

and that's gonna look pretty dang. Mean, when she's all painted up

now, I can get out for this interior and these seats aren't exactly pristine.

In fact, they're kind of gross.

Some of the stuff will be going back in some of it's not gonna be going back in

some of it

will be going back in

but will be highly modified.

We haven't really decided

what parts fit into each category yet.

We'll figure that part out later

there. It is.

It's a good idea to try to not break these things creeping up on

25 years old

and uh, plastic starts getting a little brittle.

The stuff is great for sound deadening,

but it's also great for soaking up

smells and

rat poop

Hazmat team.

That's disgusting.

Oh, there we go. Now, what the hell could I do with my white snake cassette?

Still ahead. Installing a prefab quickie cage, a flathead motor that got poked into a different kind of Ford and a quick way to spot repair scratches.

We started prepping the car for installing the roll cage by removing all the interior, like we mentioned earlier, we wanted to lighten it up while we were in the process of doing that. Well, one piece by itself isn't all that heavy, but when you factor in this stuff covers from the front to the back

stuff adds up, it's not that hard to remove.

No need for fancy tools here. Anything you got that a scrape should do the trick.

You may have to get a little stabby with it though.

But in the end

it'll come out.

Let's see how much we shed.

Well, that's right, about 1213 pounds. That may not sound like a whole bunch. But whenever you add that up from 10 pounds here, 20 pounds there, all that weight means a faster car on the track and it improves fuel mileage all at the same time.

Now a lot of guys will pull all the glass out when they put it in a roll cage.

But since this car isn't gonna be

completely gutted,

I'm just gonna cover it up.

It's like any good welder knows. Always cover your glass.

Speaking of lighting up or lighting up the car,

I don't think we need that.

Now, we're using a universal cage for all fox body mustang. And anytime you attach the name universal to something,

it universally needs to be modified to fit and this is no different.

So we're gonna trim the ends of the tube,

drop it down just a little bit.

That'll give us clearance for our plates.

Yeah.

Ok. Right now we got our bar trimmed down a little bit and that gave us plenty of room for our plates. When you wanna remember when you're setting this thing up and kind of designing where everything is gonna sit.

Keep in mind that you have to have at least a quarter of an inch between your pipe and the edge. Otherwise it'll never pass tech.

And when you welding the plate in, remember, don't weld it all the way around because you're weakening the floor itself. So weld it about 70%. I'll usually weld the corners of it and leave the centers open. That way you still have the original stronger sheet metal that runs up under that plate gives you a lot better support.

We're building a street machine here, not a full blown race car. So we're not sinking this all the way down to the Subra

you.

I use a stripping wheel to remove the paint but only where I need to weld. We don't plan on repainting the whole interior.

I'll double check the height on my halo. The attack in the mountain plate.

I'm just gonna tack everything together. Now get the bar set in there and then we can set up the other bars, make sure everything's right before I weld it

from there, we can set the other tubes in, make sure everything's gonna fit and clear

once we do that and finish welding it up

a

kit like this is gonna need a little bit of trimming and fitting to get it in.

But the nice thing about a kit is that you don't have a whole bunch of leftover scrap when you're done. Plus you already know it's gonna pass tech when you bring it in to have it inspected.

After the break. Altered ego comes

a lie.

Jeez. That thing's loud and Rick steps it up with another paint tip.

If there's one car we get asked about all the time,

it's our old come altered ego.

You guys love this thing and if you were wondering where it's been since we painted it,

check this out.

We put in a phone call to an old friend to help us finish the car. Welcome to Milestone custom paint body.

My name is Jacob Miles.

Let's take a look inside and see what we do.

This 4100 square foot facility features state of the art equipment. This is where we do our body work.

Uh gets a lot of dust dirt up in here. This prep station takes care of eliminating it throughout the shop. This 64 C 10 here we're working on numerous body modifications.

It's gonna be an all about cool truck. We even got some special plans. Might even see it on an episode of Power Block. Yeah, I bet. I know a guy that can help you get it on there. I bet you do.

Hey, speaking of that,

you remember Clarence from Search and restart? Aren't you busy fellow?

He is, come, check out his work over here on this bed wood. Here's some of the, uh, wood for this

truck that we're doing here. Got a quite a bit of clear on there. Been wet sand and polished out probably about an hour per piece on these little pieces. And I got about six more 8 ft pieces to do. Of course, he'll sit here and nit pick 1000 more things wrong with it after an hour worth of buffing on it. But

is that good?

These guys are pretty well known for what they can do with a car, but this is a custom made black cherry paint that we made in house. I like how just then whenever the clouds went on top of the sun, it just turned black. It disappeared. Tommy. Come over here. Look at this 1970 El Camino big block. Sweet looking right man. This baby will hall the mail.

Oh, yeah.

It sound like it. Eat the pavement out from under

to come out here and look at this wash bay. It's about 600 square foot. We like to get our cars nice and clean before we roll them in the paint booth. So we wash them here, get them taped up

out of the environment and roll it right in the booth. That way you turn out a lot better work, I guess. And like cleaner

time you gotta check this out. Turns out he's got a nice spray booth too. 30 ft long

heated down draft,

got the hose reels on the sides, keep him out of kicking up any garbage up in your paint jobs. Definitely a professional set up by no means. Is this a halfway built shop man? You got some nice pieces of nice equipment. Not to mention the nice work that you guys do.

Let's go check out the other side of the shop because we got a lot of hot rides, muscle cars, but I've got something special here. I got a eight in tractor.

I got somebody that's been in the industry for decades

and he is a pro at knowing anything about tractors. Let's go meet him.

This is Cody.

How's it going there, fella?

Call

this thing? That's a flathead V8. Would you like to hear it? Start up?

Guy was very meticulous about when he restores a tractor. We do a lot of his body work and painting.

He does all the mechanical and rebuilds the motors and transmissions.

He puts his heart and soul in restoring tractors like we do doing cars and hot rods. Tell me we got one more special thing to show you

Cody. If you like to do the honors.

Tom. This thing has changed a lot since y'all first dropped it off, man. That's an understatement.

We did a lot of polishing up on the engine compartment. We got the fuel line plumb from the rear to the front. We got it neatly tucked up under the undercarriage. We got your front rear axles all painted up. We started installing the glass and the moldings,

man. You've got to hear this thing running. You sound awesome. Awesome. By all means fire this dude up. Let's do it

that.

Well. What do you think?

Sounds pretty sweet, man. Sounded real aggressive sound with a little bit of thumping going on. So

it was pretty cool actually, to hear it running,

I just can't wait to get this thing completed and pull the front wheels. Yeah,

neither can we.

It's time for a golden nugget of auto body wisdom. A paint tips coming up.

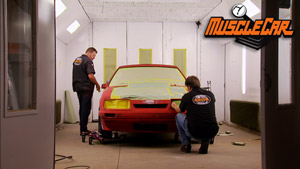
Hey, guys, now, you and I both know it doesn't matter how careful you are. Accidents happen. Take this Camaro hood here, for example and the black here that's scratched. Well, this is actually a sticker. Now, the O Ems have used stickers for decades because it's a whole lot easier to put this on as the car goes down the assembly line than it is to pay someone to sit there and mask it off and hand paint it. There's also a pretty good size dent over here in the yellow. Now, normally you take the stickers off, repair,

ding and reshoot the entire hood. But for demonstration purposes, I'm gonna show you how to do a spot repair and blend. Well, you might be asking yourself, well, why would you do a spot repair? Why not just shoot the entire panel? Well, perfect example of this is if a car gets scratched in the quarter panel, how do you shoot the entire panel? You'd have to do this one, the roof, the other panel, pull all the trim off. It's a lot of work. So that's why I'm gonna show you how to do a spot repair

when you're pulling stickers off like this, don't pull it too fast because you snap it and break it and it just makes more work. So just take your time, pull it nice and slow and steady.

Now we lucked out and our stripes came off pretty easy. But if you got an older car and the stripes have been on it for a while,

you can still get an eraser wheel put on the end of a drill, spins around and it just peels it right off easy as pie.

I'm gonna mask off the other half of the hood because yellow overspray on black graphics is not very flattering

and the dents we're working on here are really slight.

So I'm not even gonna take it down to the bare metal because the OEM paint

is a really good base. Remember you're doing a spot repair here. So keep it as small as you can.

I'm using spot putty here because Spot putty is a lot finer than like a plastic filler. You don't wanna build it up too much. You build up too much, gonna require a lot more sanding. More sanding

means more damage, paint around it. You wanna keep the repair as small as possible.

Now, when you got this thing just about blocked out and you see these edges here starting to feather out. I'm using 120 grit right now. That's the point that you want to stop and move on to a finer grit like some 180.

If you go too far with this, then you'll have to go back and refill it with primer.

It's time to mask it up,

but I'm not gonna lay my masking tape down flat like that and mask away from it ra

bean

that's gonna leave a pretty mean primer edge along there that you're gonna have to block out later.

So I'm gonna use a technique that's called back masking and that's when you take the tape

and roll it around like that.

Now, what that does is create kind of a rounded edge for the primer or the paint to bounce off of

and it gives you a softer transition. You're gonna need to take a couple of pieces of tape

and hold that back because if you don't, as soon as you start spraying that

the draw from the paint in here is gonna take that tape and suck it right into whatever you're spraying.

I'm using the K 38 primer to prep the damaged area, followed by some guide code.

Once it dries, I'll block it out with some 600. Then prep the surrounding areas with 1500.

Another round of back mask and we'll prep her for some color

with the first coat. All I want to do is cover up the primer spots.

Now I gotta hit it with some 1500 grid again

and that'll kinda

knock down that edge

between the blend

and we'll come back and dust a little bit more base coat over the top of it and blend that edge further out.

Then we can finally come back with a clear and then blend the clear.

Every step that we do here is growing out a little bit. You've got your original sanding spot and then your repair and then your primer and then your base. Each step it gets a little bit bigger. So that's why every time I need to move the masking back a little bit. So right now you can still see the outline of where I had that mask off and I laid down the first coat of base coat. What I'm doing now is going back and taking that color and blending it off into the edges and kind of losing that harsh side. So you gotta keep it real centralized and just blend it out. Nice and

easy.

You can see. Now we have a nice, easy transition to where that original repaired area was.

It transitions out into the original yellow

that's still out here.

My goal with the clear is to cover up all the base coat, but I'm not painting all the way to the mask

while it's still wet, I'll remove the mask, then blend all the edges with an over reduced clear.

This is the last run of what's in it. I'm using 1500 grit to basically go over

and send all the overspray off from my blend.

A quick final polish.

It will be done

a

little bit of polishing and hand glaze and she's ready for a brand new sticker. Well, if you have any questions about anything you saw on the show today, you can check it all out at Power Block tv.com. Well, for this week, we're out of time. So until next time we're out of here.
Show Full Transcript