More '86 Ford Mustang "Dark Horse" Episodes

MuscleCar Builds

Parts Used In This Episode

Dupli-Color
Grease And Wax Remover
Dupli-Color
Paint, Guide Coat, Fast Dry, Flat, Black, 12 oz., Aerosol, Each
Harwood
Hood, 2.5 in. Cowl-Style, Bolt-On, Fiberglass, Black Gelcoat, Ford, Mustang, Each
Summit Racing
Paint, 2-Stage, Base Coat (ONLY), Urethane, Granite Pearl, 1 Gallon, Each
Summit Racing
Paint, 2-Stage, Urethane, Satin, Hot Rod Black, 1 Quart, Each
Summit Racing
Paint, High-Solids, Acrylic Urethane, Gloss, Overall, Clear Coat, 1 Gallon, Each
Summit Racing
Paint, Single Stage, High-Solids, Acrylic Urethane, Gloss, Clear Coat, 1 Gallon, Each
Summit Racing
Paint, Single Stage, Hot Rod, Acrylic Urethane, Satin Clear Coat, 1 Gallon, Each
Summit Racing
Paint, Single Stage, UV Stable, Acrylic Urethane, Gloss, Bright Cobalt Blue Metallic, 1 Gallon, Eac
Loctite
Loctite 615 Hysol Epoxy Adhesive, Sandable is fast setting, blue, gap filling, high viscosity multi-surface structural adhesive. This sandable, low odor epoxy has a 10-minute worklife.
Video Transcript

Today on muscle car, our fox body project. Dark horse takes a trip to sand land and then gets a brand new code of Angry Plus AM C's experimental Jackrabbit.

Muscle car starts right now.

We get a lot of people right into the show asking us to build one of these

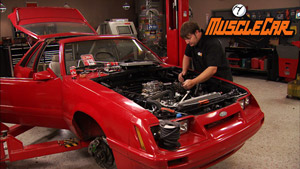
a fox body mustang. We picked ours up from a used car dealer, towed it at home and right away, got rid of that. Dinky little V6 that he had from the factory

then bolted in a new tubular K member.

Put in a cool over front suspension

swapped the four lug underpinnings to a later model five lug with slotted brakes,

rebuilt the factory pause unit

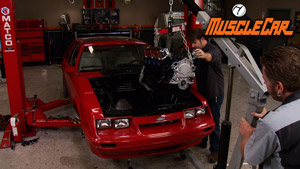
plugged in the crate. V8 dropped on a new intake system in fuel lines, then plumbed in a new factory style cooling system. Then we gave it a new exhaust out of the third pedal to make things a little more fun. Tied the front to the back with subprime connectors. Got rid of a bunch of stupid little frilly to lighten it up and then burned in a roll cage to reinforce it and make it nice and safe.

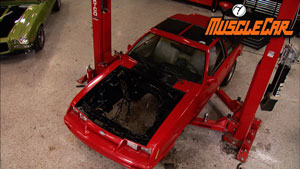
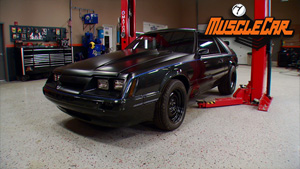
She's just about ready to take a trip down the road and the track. But hey, nobody wants to go to the prom in a pair of b of overalls. So we're gonna fix a few wrinkles straighten out a few dancing scuffs and then wrap her up in a nice new outfit. But before it can lay down a new coat of attitude on an old dark horse here, we need to do something about this bargain basement paint job we got going. But the only thing they did right on this thing was mask off the windows and honestly,

they didn't do a very good job of that either. We got our work cut out for us. But at the end of the day, this is not destined to be a show car. We just want a respectable street cruiser that's not gonna embarrass us at the track. But we've been pawing all over this thing with our greasy hands. If you don't take the time to wipe it down with some good wax and grease remover, you're flirting with disaster.

Dealing with 14 coats of paint on trim pieces is a pain in the butt. When they're aluminum, you can use paint stripper to do it. But what do you do with, say, a delicate plastic piece? How do you strip it without destroying it?

I got a trick for you and it's cheap. And

this is actually a trick that I learned when I was a little kid building model cars. I spent way too much time

hand sanding old models to get the paint off. I realized that you soaked them in brake fluid. All that paint just fell off

and you had a nice brand new model to play with again when you're all done, all you gotta do is take the part and wash it off in soapy water. Now, taking all this stuff apart isn't mandatory, but it allows you to make a lot nicer paint job. Just check out all the dirt and grime and stuff. Take a look at all this stuff coming out of the top piece of trim. All that stuff will end up in your paint job.

Now, sometimes it can be just easier to remove a part instead of taping it up.

Not to mention it's a lot cheaper because the cost of tape,

it's kind of high.

Another thing I like to do is to reinstall the hardware makes it a little easier to keep up with it.

We're dropping on the T tops and gonna roll up the window to plug his gigantic hole up because we're ready to start the sanding process and that generates a whole lot of dust that way we don't have to clean up near as much later down the road.

Would you look at that

coming up, Tommy goes through the ins and outs of emblem shaving and Rick exposes the ancient secrets of stripping paint from plastic. Don't rush it.

We pulled all the trim and it's getting prepped out for the next stage. We sealed up the interior to keep the dust out and we pulled all the parts that we really don't feel like masking and we are just about ready to start sanding this old dude down, get it ready for a fresh coat of shining. Now, our mustang body is not too far out of shape and who knows what's lurking under this last paint job. If you're building a car that's not really destined for the show circuit and you're on a tight budget. Sometimes you're just better off to fix what's visually wrong and go on.

Now, even though the factory hood was pretty cool.

No, it wasn't.

We're still gonna upgrade to this carl hood here from Summit

now. It looks good. Plus it'll give us a little bit of clearance if we ever want to upgrade anything on the top end of the motor, like, uh

maybe nitrous.

Now, sometimes you can send out a dent, but there's a requirement. The original material must be thicker than the depth of the dent.

Oh, yeah.

And what we've got is a really bad feathering job.

They could take the time and try to sand all this flat with AD A or something, but that can take a pretty good little while.

Best way you could do it to me for the time.

Make sure you send it there.

Add a little filler.

I wanna make sure to keep the block flat. I like to stop when you can still see the perimeter of it, change the grid of paper.

That way you step down your sanding stretches

and that's fixed

ad a center for those of you that don't know D A stands for dual action.

That means it spins around this way,

but it also moves this way.

That's the dual action.

This can be your best friend or it can be your worst enemy depending on how you use it.

You look at the door over here, you can see these marks that were actually in the black primer underneath.

That's when somebody was sending with the D A

that didn't know what they were doing and they were tipping it up

and to put all these sideways marks in this door or I'm using the paint basically as a primer. I'm sending back over keeping the D A flat,

the paint stain in the lows and going off on the, on the face of it. So

it's kind of a way of using the existing paint as a primer and getting it, get it flat.

We throw some primer on it and then move on.

Our emblem has seen better days. So we're gonna shave it, which simply means we're gonna remove it like it was never even there.

This thing's been glued on several times. It looks like

always works a little better too when you're not trying to save it. Now, we gotta prep our service so we can put some filler in it all this has to be clean for proper adhesion.

Now, I'm gonna use a small piece of 80 grit just to give it a little more too.

We're gonna use a two part epoxy to fill in where our emblem used to be just like any other filler. You wanna make sure to mix this stuff thoroughly.

whether our fox secured, we can rough shape it with an air grinder

with our shape roughed in. We're gonna take it one step closer with some 80 grid on ad eight.

I'm gonna use a polyester flexible filler. What this does? It allows it to sand out considerably smoother.

That way you can turn out a lot nicer job.

Now with our filler dry, we can sand it

on top it off with some blocks in it.

Mustangs here use a little fender extension down in the bottom. That's actually fiberglass and obviously this one here is broken.

Well, I see a lot of guys will come in here with fiberglass and just stick it over the top of it, form it and do whatever. Well, eventually that's gonna break off and that's because you still have that broken edge all the way along the, the edge of your repair there.

I'll use tape to mimic the original shape and then use fiberglass to build it up from the back side.

Now, once it's set up, I can pull the tape and start the repair on the outside.

Be sure to grind away the damaged fiberglass and feather the edge before you add any fresh material.

Like before I can use a few pieces of tape to help hold its shape. While the resin kicks off at this point, the repair is pretty much done. All you gotta do is sand it down and then finish the body work just like you would any other?

There you go, prime it

after the break. You think it's hard to find parts for your car. You won't see a whole lot of these running around an American Motors Classic. Coming up.

Today's flashback. A 1969 AM X.

You can drive these cars with three fingers,

34 inches either way, makes a world of difference right now.

Meet Todd Harrison and he's talking about a 69 American Motors experimental

and most muscle car enthusiasts will think big three when you ask them what their favorite riot is, but not Todd. He is a MC all the way. And this is one of four American

motor cars. He has parked in his garage,

this big bad blue 69. It was love at first sight for Todd. A

couple of cars and a bunch of parts came available and

my buddy Tim Kemp was telling me about it and said, you see it, you, you'll, you'll buy it, went and looked at it and

went and bought it the next day.

This Rare AM X has only a little over 29,000 ticks on the odometer. And it's in great shape

after Todd bought the car in OSE,

all it needed was a little engine work.

Now, some guys might lock up a car and stuff it full of mothballs after this sort of a fun

but not Todd. He bought this car for the go and with a 390 under the hood,

it's got plenty of it

when you're accelerating to pass a car or accelerating in any way, it just gains so much speed so fast that you give it a little bit of gas and you're really moving before you know it, it like this shouldn't be this fast already.

A Borg Warner T 10 4 speed backs up to 390

dual torque links coupled with a Posi

rear end, make sure all that power makes it to the asphalt

with the wheelbase and overall length exactly 12 inches less than its big brother. The Javelin.

The AM X was made to race

the shorter wheelbase allowed tighter handling through the windy roads. The trans AM racers were constantly subjected to around the curves, little windy roads or whatever, it's great in town

and it's also comfortable to drive on the interstate. It's a good all around vehicle.

The outward styling of these cars scream AMC,

the front bumper was painted to match the rest of the car in 69 but was changed to chrome in 70.

The sloping hatchback design keeps the car's aerodynamics in check

and outback AMC kept it simple with more paint on the bumpers and limited badge

as if these cars don't already stand out in a crowd. A MC decided to make three big bad colors. In 69

284 were big green.

283. Well, those are big orange

and only 100 and 95 were made like Tods in big bad blue.

The stripe that runs over the top indicated. This is a power pack car.

This option was only available in the 343 or 390 AM X and it included power disk brakes, red line tires, twin grip axle and 140 mile an hour speedometer.

The insides of these cars are down

small, two bucket seats up front and that's all she wrote. The gauges are oversized and easy to read and every AM X has a gas plate with a unique production number.

There's a lot of things that can be said about a 69 AM X but Todd likes to keep a simple philosophy on his

ranch wash and enjoy.

Don't go anywhere. There's a lot more muscle car coming at you after the break.

How much more dark could this be? The answer is none, none more dark.

You're watching muscle car for a DVD copy of this episode. Just go to Power Block tv.com and order your copy for just 595 plus shipping and handling. Start your own muscle car collection delivered right to your door from the power block.

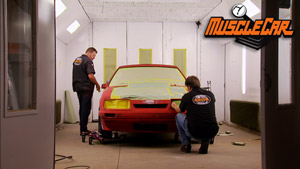
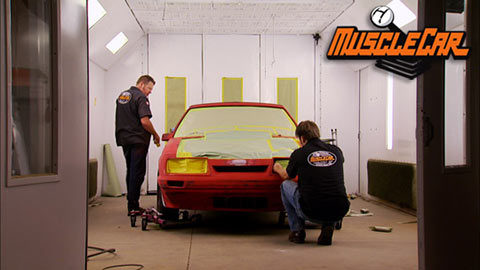
Well, we've stripped it down, built it up, smoothed it out and rolled it into the booth. No, dark horse here is ready to live up to its name. We got her all sanded out and now we're masking her up. Now, most of the cars we paint around here, we consider this first prime but taking into consideration the life that our little pony here is gonna lead, this is gonna be the only prime that doesn't mean she's gonna look like AJ

your dog. All it means is that she's gonna be prepped and shot the same way that about 90% of all the rest of the cars on the road today are done

when you're masking. Try to use the longest continuous piece of paper that you can. Every fold is another crack or crevice that over spray can get into or a place for debris to get stuck in and fall into your paint. Once it's had a good wipe down, it's ready to be primed.

I'll start by framing the repaired areas first, then follow up with a coat of primer all over the whole car.

That way there's extra meat to work with over the bad spots.

Our parts have been sitting in here for a little bit we'll see how they're

doing.

So it actually works pretty good. The trade goes, just put it in there and let it sit, just don't rush it.

Shower scene.

We hit it with a lay or guide coat and give it one last pass with some 320 to make it nice and smooth.

Yeah,

with a little persuasion.

It's back in the booth for a little cleaning

and a layer of sealer before it gets in color.

We decided to go with Summit Racings paint on this build. We're gonna use your hot rod black, some granite pearl and some Cobalt blue to give our pony some personality

and they supplied us with the sealer and primer. We used earlier,

the cobalt blue goes on first laying the foundation for a stripe that's going to split our other two base colors.

We've got our blue straight on, gave it plenty of time to dry.

We're ready to start laying out the stripe.

The granite pearl goes below the stripe. Anytime you do a two tone, even if the differences are subtle, try to keep the lighter color on the bottom.

It makes the car look lower and longer.

Now, once it's dried, we'll mask off the gray, then hit the top of the car with the black.

What we're using is Summits two stage urethane.

We want the bottom colors to be shiny, so we'll use their glossy clear. The top needs to stay nice and flat.

So we're gonna hit it with our satin clearance

as it dries, you can see it flatten out,

then we get to unmask it again this time pulling up the tape on the top of the stripe

and now we've got a clear coat at the bottom,

masking it off. And when taping off like this,

you wanna be just above your stripe that way you end up with just a tiny bit of overlap of the clear coat, something like a 64th. I mean, it's smaller.

I'll nail the blue stripe and the gray on the bottom with a couple layers of glossy clear then pull the masking off for the last time.

No, we didn't forget the hood either.

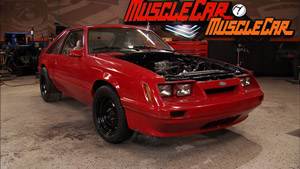
There you go. She's all dressed up and looking for a date. What do you think, Rick? I think she's looking like she's gonna chew someone's face off. But if you guys have any questions, hop on over to Power Block tv.com for now, we're all out of time. So until next week y'all keep it between the ditches.
Show Full Transcript