Want more content like this?
Join the PowerNation Email NewsletterVideo Transcript
(Jeremy)>> You're watching Powernation!
[ Music ] [ engine revving ] [ Music ]
(Katie)>> Welcome to Powernation Builds. Today an old school pickup is getting some new school vibes, here's Truck Tech.
[ Music ]
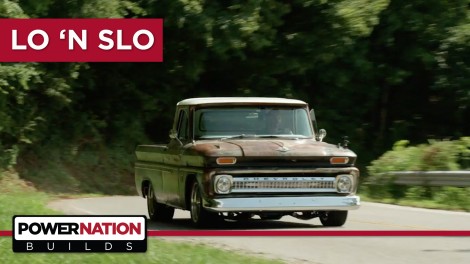
(LT)>> After months of searching we just picked up our newest project truck, this 1965 Chevrolet C-10 short box fleetside straight out of Marshall, Texas. We broke the number one rule of truck buying and pulled the trigger sight unseen. Since this truck had spent its life in sunny Marshall, Texas, we figured it would be pretty solid even though it's well over 50 years old.
(Austin)>> We brought it inside the shop, gave it a once over, and we were pleasantly surprised to find the sheet metal was in very good shape for its age. The truck was mostly original with the only major changes being the torched coils and a later model 305 small block. However, we did get the impression this truck was slapped together for a quick sale. Since the truck mechanically checked out, we decided to hit the road and see how this old girl performed, and it was a blast to roll through the gears with the three on the tree although the coils did make the ride a little bumpy. [ Music ]
(LT)>> And even though our truck is a more deluxe model by today's standards it's very bare bones. This was just before the days of air bags, and traction control, and a-b-s. Man we're lucky to have an f-m radio, and we couldn't end the shakedown without one very important test.
(Austin)>> What do you say we burn the rubber off these bad boys?
(LT)>> Why not? [ engine revving ]
(Austin)>> Yeah, don't stop baby! [ tires squealing ]
(Austin)>> Even got smoke on that one!
(LT)>> That's the old one tire fire. With all the fun out of our system we got right to work to begin the teardown process. We removed the bumpers, unbolted the bed, disconnected some hoses and wiring underneath the hood, and lifted the cab off getting down to the rolling chassis.
(Austin)>> With all the drivetrain removed we took a trip to Blast from the Past in Lebanon, Tennessee, where they strip and powder coat a wide range of parts for various applications. The powder coat process starts out with a crushed glass media, which removes all the rust and corrosion. Once prepped and in the booth the dry powder is electrostatically applied. This allows it to stick to the surface but will still require a quick bake in the oven to fully cure, and this is the finished product. Nice and clean! We chose the semi-gloss black powder coat for its durability and it's gonna last a long time. Now with a little pre-planning we knew we were gonna have to do some frame modifications, and with the style of suspension we're going with this front coil over is gonna come right through this crossmember. So, we had to cut out some holes. We chose to do it before the powder because we didn't want to cut into it after.
(LT)>> We took the same approach on the rear with the C-notch. Our reinforcement also includes an upper coil over mount and a lower pan hard bar mount that'll keep the axle located side to side. This kit is actually designed to be 100 percent bolt on with the bed still on the truck, but we just figured since we're blasting and coating the frame anyway why not weld it in ahead of time for a nice slick look?
(Austin)>> And that makes this chassis 100 percent ready to bolt on some parts. We've got some unboxing to do.
(LT)>> I got the scissors. We have two goals for the suspension on project Lo 'n Slo, our '65 C-10. First is to get it sitting closer to the ground, and second is to improve its handling. We didn't want to mess around with the hassle or complexity of an adjustable air suspension system. So instead, we're installing a QA-1 coil over conversion. The upper spring mount bolts onto the crossmember and the frame with some existing holes and new provided hardware. The lower coil over mount is bolted to the control arm with a spacer, and the coil over shock slides from underneath the crossmember and attaches to the spring mount with a through bolt and some more spacers. The control arm pivots up to meet the other end of the coil over, and all the hardware is tightened up. Up top the dished spacers slide onto the mounting point, and the control arm slides into place. The lower bump stop and bracket bolt onto the control arm, and the spindle attaches to the lower ball joint. With a little assistance the springs are compressed. Then the upper ball joint can be connected.
(Austin)>> Over at the table we'll attach the urethane bushings to the sway bar, slide on the brackets, and loosely tighten the hardware. The spherical end links attach to the sway bar. [ drill humming ]
(Austin)>> Mind grabbing that end over there? And the whole thing slides under the front end, and first connects to the lower control arms, and finally the brackets attach to the frame. This is as low as she's gonna get.
(LT)>> Those ballet classes are really starting to pay off.
(Austin)>> I almost fell through too.
(LT)>> This floor is pretty rough. It just kinda goes to show what condition this truck is or was in when we picked it up. Somebody really just pulled this out of the field, and they slapped it together. These planks, they're actually pretty new. It's just something that they must have had kicking around. They milled it up and they stuck it in, but it doesn't match and it's just kinda plain. Really this is more what we have in mind for the look on the floor of the bed. It still looks rustic, maybe kind of that old barn wood, but just something with a little bit more difference in the color. So let me show you guys what we picked up to make this happen. So, about a year and a half ago I was at the C-10 Nationals down in Texas. It was a great show, and I had a lot of time to walk through the manufacturers midway and see some of the new products that people had come out with for these trucks, and there was a bed wood floor kit that caught my eye and that's because there was a big giant graphic completely applied to the floor of the bed. Now that caught my attention because I first of all wondered how the heck do they get that in the bed cause wood is a tough material to work with? So, I stopped and I realized it actually wasn't wood. It was an extruded aluminum bed floor kit from Smokey Rhodes Rod Shop, and that's what we've ordered up here. Now first of all it has that nice barn wood texture that we're going for but there's a couple of advantages to using aluminum. Number one it's lightweight. This stuff is extruded, and it weighs almost nothing. Most traditional bed wood floor kits are made from hard wood and that's very heavy. So, if you want a fast truck lightweight is your friend, and the other advantage to this system is how clean it's going to look when it's installed. There are no exposed fasteners on these rails at all. There's a small groove on the back of the extrusion that the hardware's gonna go into that holds everything nice and tight and has a nice clean look, and on top of that we had our logo put in the bed, Project Lo 'n Slo. So, this thing is gonna look great. So as soon as we take the bed floor out of this thing there's really gonna be nothing that holds it in place. Basically, it could just flop over, and all our bed sides would be sitting on the ground. So, you take two straps and you run them at a diagonal, and they're gonna keep this thing nice and square so nothing falls apart.
(Katie)>> Coming up next the guys have some new school upgrades that are perfect for this bow tie.
(LT)>> Austin you've got to check this bed floor out. It's looking great!
(Austin)>> I like it, I like it! Well dude I just got finished prepping these. Scuffed them up with the d-a but honestly, I still don't know which route I'm taking as far as finish.
(LT)>> Well I mean I guess you've got a couple of different options. Number one, you could do the whole fake patina thing. We've done that before. Basically, you spray a little red oxide primer on there, you put some color on top, and you sand through in a couple of different areas, but the thing is it wouldn't match. It would almost stick out worse than it would blend in.
(Austin)>> For sure, and it's not the style of the truck. We have the real patina and then some newly fresh painted stuff. We know black doesn't look right because they were e-coated in black, and it was just a little off. If it was a rat rod, I would just say hey let's call it a day and bolt them up like it is.
(LT)>> Well we've just got to pick a color then to paint both the tubs and the strips and blend it all in.
(Austin)>> I've been thinking, and I honestly think it would look good if we carry that white over on the back cause it's a new part.
(LT)>> So still have the same pearl and the clear coat for a nice glossy look?
(Austin)>> Nice and shiny. [ spray gun hissing ]
(Austin)>> Oke-doke, let's see what we're actually working with here.
(LT)>> Honestly, I'm digging it. I mean the white just kinda flows from the roof to the strips, to the tubs, and works with the wood grain. It just works!
(Austin)>> I am too! When this 12 foot over that way it was a bit much and it looked weird but now that it's on the truck it flows, I like it!
(LT)>> I know what you mean. Just having it on the truck makes a huge difference, but I guess all we've got to do is put a hole in the floor for the filler neck and we're done.
(Austin)>> For sure, that'll wrap up the rear and what do you say we go see where they're at with the motor.
(Pat)>> Check wide open throttle there Mike.
(LT)>> I've got to say Pat this thing looks a heck of a lot different from the last time we saw it torn apart on the bench. You know the first thing I notice is there's no turbo on it yet. So, I guess you're doing a pull naturally aspirated first huh?
(Pat)>> Well the idea with that is to keep it simple. I want to make sure it has no oil leaks, no water leaks, and not that the turbo is a big factor in that. We want to keep it as simple as possible so there's nothing that's gonna make a funny noise, and it's hard to tell when there's a turbo involved. Now it's been run and we're actually ready to make some power pulls.
(Austin)>> For sure, and this will give us a good baseline. That way when we throw the boost to it, we know what to actually expect.
(LT)>> I think this looks great and I'm really excited to hear how it sounds. So, what do you say we go make a couple of pulls on it?
(Pat)>> Have you ever heard one of these run before?
(LT)>> Absolutely!
(Pat)>> Not like this you haven't. [ high pitch engine revving ]
(LT)>> Yeah that's where it starts to sound good! [ high pitch engine revving ]
(Pat)>> It sounds like an airplane.
(Mike)>> Awesome oil pressure, everything! Let's see what we got.
(LT)>> You guys will hate me for saying this, but it almost sounds like a Skyline motor.
(Pat)>> You shut your trap!
(Mike)>> 219, 269.
(LT)>> Wow 220 horsepower! So, these came from the factory with like what, 165?
(Austin)>> 160, 165 is what we looked up.
(Mike)>> This thing has way less compression. It does have better flowing head but other than that it's already 60 horse above what it came from the factory.
(Austin)>> Not even 8 to 1 on the compression.
(Mike)>> All the vitals, everything looks good. You guys gotta rock, paper, and scissor it for the first one to the console.
(Austin)>> Okay I've never done this before. Mike come back.
(Pat)>> This thing you don't even have to hit the gas pedal. Just hit starter and watch what happens. You've got to hold it. [ engine starts ]
(Pat)>> The most important thing on this is oil pressure. If that goes down at any point you abort the pull.
(Austin)>> What do I want to hit on it?
(Mike)>> When you go to full throttle and you see the r-p-m stabilize at 2,000 you hit "D", and that starts your sweep. When it gets up to 5,000 you'll hear the brake pull the engine down. Just pull out of it, that's all you've gotta do.
(Pat)>> Keep going, all the way open!
(Mike)>> Okay hit "D".
(Pat)>> Now watch this. Don't worry about anything else. [ high pitch engine revving ]
(Mike)>> Nice!
(Pat)>> Nicely done! Scarring the bejesus out of me.
(Mike)>> You're pull was better than mine.
(Pat)>> 220?
(Austin)>> Dude that's awesome, 220. That's a consistent little due.
(Mike)>> Alright LT it's your turn to drive. Less talking more driving, let's go!
(LT)>> You know the coolest thing about this whole project is we never really set out to make a ton of horsepower. We just wanted something that was oddball and I definitely think that we got it.
(Mike)>> I think Pat's about to slap you in the back of the head.
(Pat)>> You're messing around, come on!
(LT)>> Come on dad, where's the throttle?
(Pat)>> "S", activate, start. You're just like an old pro, look at you go!
(Mike)>> Holding it too long like that puts a lot of heat in the combustion chamber. It'll kill power. [ high pitch engine revving ]
(Mike)>> 219, 269, That thing is printing numbers.
(Pat)>> It's very, very consistent.
(Mike)>> So the engine's broke in. It's making awesome power for NA with the compression before the turbo. With the valve spring change I think we're knocking on the door of over 400 easy.
(LT)>> Let's get the turbo and bolt it, come on, boost!
(Pat)>> It's not that easy.
(LT)>> Finally we installed the turbocharger and intercooler and made a few more hits on the dyno where it laid down an impressive 376 horsepower and 510 pounds of torque at only 10.5 pounds of boost.
(Katie)>> Up next, it's more classic styling with fresh attitude for Project Lo 'n Slo.
(LT)>> So we're now at the point of a build where everything basically gets easier, and that's because all the hard work is done. The fab work for the turbo setup is complete and the engine, we know it runs and we know it doesn't leak, and we know exactly how much horsepower it's gonna make. So, the only thing we have to do is bolt all the parts back in place and we're headed down the road.
(Austin)>> And that's the best thing about these old trucks. You have all the room in the world in this engine bay to work. You can route your plumbing, run your wires, put my big ole hands in there without busting knuckles, and obviously this straight six helped matters too you know.
(LT)>> And speaking of the straight six a lot of people are gonna look at this and say why did you go with a throw away engine. For many, many years if you bought a truck that had a straight six underneath the hood the first thing you're gonna do is take that thing out and throw in a big block, a small block, or now days probably an LS, but a small displacement engine with forced induction is actually coming around again, and a lot of the manufacturers are using engines just like this today.
(Austin)>> It's kinda like that old pair of corduroy pants you've got hiding in the closet, trendy, and the six cylinder is no different. It's more popular now than ever, and that's for fuel efficiency. You add turbos, you put power adders, you still get those mid-level ranges of horsepower and they're torquey, and that's the thing that makes them fun to drive.
(LT)>> And if you want just a little bit of extra torque well that's easy. All you've got to do is mess with the waste gate and put a little more spring pressure on top of this thing. Your boost level goes up and so does your horsepower and torque. Now for our particular engine we are kinda near the limit because we have stock connecting rods and a stock crankshaft, but just in general terms that's one reason why turbocharging is so popular.
(Austin)>> And speaking of boost time to cool it down and slap that intercooler up front.
(LT)>> In order to eliminate any possibility of leaking silicone couplers we went ahead, and we welded the end charge pipes onto the tank. It ensures a nice leak free connection and just kinda looks cool as well. Now we did mount the intercooler up from because there is no space behind the grille, and when we first put this in we thought we could almost run this as the grille of the truck, but the problem was the headlights. We didn't really have a nice clean way to mount the buckets and have it look right. So, you might ask yourself why is an intercooler important? Well, it's simple, it's physics. That turbo up there as nice as it looks it's gonna make the intake air charge nice and hot. So just about every vehicle on the road with a turbocharger uses an intercooler to bring down the temperature of the air, increasing the density, increasing the oxygen content, and increases the capacity for horsepower.
(Austin)>> Now we decided to close up the front of this old girl with an original look, and to do that we're using this reproduction grille. Now this chrome work is gonna match the front bumper, some of the chrome trim on the wheels, and some of the other accents we got on the truck, and best of all in my opinion it'll cover up that intercooler, which will make it not look so aftermarket. It'll still have that classic truck vibe but sporting a turbo. Now I was able to reuse the original headlight buckets. They're in good shape, just had to tweak them a little to get them to work, but the original headlight retainer rings, these things have seen better days. So, we've got to order some new ones, and that is gonna be to mount these new projector l-e-d headlights. Once they're in they're gonna look pretty cool, and we'll definitely be able to see cruising at night. So, let's just wrap up this grille and call her a day. Good on that side?
(LT)>> Looking good buddy.
(Austin)>> Two more and they line up. [ metal clanging ]
(Katie)>> Up next, our '65 C-10 Fleetside gets a boost and then heads to the track.
[ Music ]
(Austin)>> There is nothing like the feeling you experience when you drive an old classic truck and driving this 1965 C-10 that me and ole Lawrence built is no different. Just cause it's a custom-built truck doesn't mean it doesn't still have those same old classic and nostalgic styling cues.
(LT)>> I think my favorite part about this old truck is the sound of it because it's so deceiving or confusing for people. Think about it. You see an old truck like this and you're gonna think it's gotta have a V-8 under the hood, and then you hear that distinctive inline 6 sound and that whistle of the turbo and the blow off valve. [ engine revving ] [ blow off valve whistling ]
(LT)>> I love it! An old rusty truck that drives and handles just like a brand-new sports car. It does not get any better than that. We're not the only ones cruising the back roads in a tricked-out C-10. We asked our buddy country music artist James Otto to join us in his '66 resto mod featured at the SEMA show.
(James)>> Well you know it's a 1966 C-10. It was my grandfathers. It spent its whole life on a farm up in North Dakota, and I wanted it to be a pro touring truck and that's the way we built it. I love the old patina look, it's a great look, but this thing needed to look high tech. It needed to look like 2020, and hopefully we accomplished that. It's got an LS under the hood, about 500 horse, 6-speed stick underneath it. It's got Ridetech suspension and does everything I need it to do. You know we found a stock short wheelbase chassis and then did a frame stiffener in it, and then did the stage 3 Ridetech setup underneath it. So, it handles like it's on rails. It's been a blast to drive. I'm having fun with it.
(LT)>> This is probably the coolest comparison that we could have done.
(James)>> I think so too. The juxtaposition of same body style and ending up in a completely different spot. Man, that's what hot rodding's all about.
(LT)>> You got that right. Well, it was great hanging out with James and his beautiful C-10, and it's built in a totally different style from this truck here but they're both perfect examples of classic American iron. Now for our truck it's time to put it to the test and see how fast it's going to go in a straight line.
(Austin)>> We about to the run the little C-10 down the track and see how fast it goes, and I don't know how fast it's gonna go.
(LT)>> Hey don't break it!
(Austin)>> I hope I don't break it. Why are you always worried about me breaking everything?
(LT)>> I know you too well. [ engine revving ] [ bleep ]
(Austin)>> It doesn't sound great. So, I went to second and when I went to third it didn't want it. So, I just had to get out of it. [ Music ]
(Austin)>> LT's gonna be mad at me. Well, you win some you lose some.
(LT)>> And?
(Austin)>> Complications, don't really know what they are at the moment but we're gonna take it back to shop and we're gonna figure it out. That's all part of it. You build it, you break it, bring it back, figure out what's wrong, and rebuild it.
(LT)>> Some things are just better left unsaid, and I really don't have anything to add. So yeah, in the trailer and back to the shop.
(Austin)>> You're just upset cause you didn't get to drive.
(LT)>> With our C-10 I was worried that we had damaged the 292 but it turns out the flywheel bolts had backed out. So, it was just rattling around, no big deal. [ Music ]
(Katie)>> Project Lo 'n Slo is the perfect combination of classic styling and modern attitude. Remember if you're into street, tracks, or trails we've got you covered right here on Powernation Builds.
Show Full Transcript
[ Music ] [ engine revving ] [ Music ]
(Katie)>> Welcome to Powernation Builds. Today an old school pickup is getting some new school vibes, here's Truck Tech.
[ Music ]
(LT)>> After months of searching we just picked up our newest project truck, this 1965 Chevrolet C-10 short box fleetside straight out of Marshall, Texas. We broke the number one rule of truck buying and pulled the trigger sight unseen. Since this truck had spent its life in sunny Marshall, Texas, we figured it would be pretty solid even though it's well over 50 years old.
(Austin)>> We brought it inside the shop, gave it a once over, and we were pleasantly surprised to find the sheet metal was in very good shape for its age. The truck was mostly original with the only major changes being the torched coils and a later model 305 small block. However, we did get the impression this truck was slapped together for a quick sale. Since the truck mechanically checked out, we decided to hit the road and see how this old girl performed, and it was a blast to roll through the gears with the three on the tree although the coils did make the ride a little bumpy. [ Music ]
(LT)>> And even though our truck is a more deluxe model by today's standards it's very bare bones. This was just before the days of air bags, and traction control, and a-b-s. Man we're lucky to have an f-m radio, and we couldn't end the shakedown without one very important test.
(Austin)>> What do you say we burn the rubber off these bad boys?
(LT)>> Why not? [ engine revving ]
(Austin)>> Yeah, don't stop baby! [ tires squealing ]
(Austin)>> Even got smoke on that one!
(LT)>> That's the old one tire fire. With all the fun out of our system we got right to work to begin the teardown process. We removed the bumpers, unbolted the bed, disconnected some hoses and wiring underneath the hood, and lifted the cab off getting down to the rolling chassis.
(Austin)>> With all the drivetrain removed we took a trip to Blast from the Past in Lebanon, Tennessee, where they strip and powder coat a wide range of parts for various applications. The powder coat process starts out with a crushed glass media, which removes all the rust and corrosion. Once prepped and in the booth the dry powder is electrostatically applied. This allows it to stick to the surface but will still require a quick bake in the oven to fully cure, and this is the finished product. Nice and clean! We chose the semi-gloss black powder coat for its durability and it's gonna last a long time. Now with a little pre-planning we knew we were gonna have to do some frame modifications, and with the style of suspension we're going with this front coil over is gonna come right through this crossmember. So, we had to cut out some holes. We chose to do it before the powder because we didn't want to cut into it after.
(LT)>> We took the same approach on the rear with the C-notch. Our reinforcement also includes an upper coil over mount and a lower pan hard bar mount that'll keep the axle located side to side. This kit is actually designed to be 100 percent bolt on with the bed still on the truck, but we just figured since we're blasting and coating the frame anyway why not weld it in ahead of time for a nice slick look?
(Austin)>> And that makes this chassis 100 percent ready to bolt on some parts. We've got some unboxing to do.
(LT)>> I got the scissors. We have two goals for the suspension on project Lo 'n Slo, our '65 C-10. First is to get it sitting closer to the ground, and second is to improve its handling. We didn't want to mess around with the hassle or complexity of an adjustable air suspension system. So instead, we're installing a QA-1 coil over conversion. The upper spring mount bolts onto the crossmember and the frame with some existing holes and new provided hardware. The lower coil over mount is bolted to the control arm with a spacer, and the coil over shock slides from underneath the crossmember and attaches to the spring mount with a through bolt and some more spacers. The control arm pivots up to meet the other end of the coil over, and all the hardware is tightened up. Up top the dished spacers slide onto the mounting point, and the control arm slides into place. The lower bump stop and bracket bolt onto the control arm, and the spindle attaches to the lower ball joint. With a little assistance the springs are compressed. Then the upper ball joint can be connected.
(Austin)>> Over at the table we'll attach the urethane bushings to the sway bar, slide on the brackets, and loosely tighten the hardware. The spherical end links attach to the sway bar. [ drill humming ]
(Austin)>> Mind grabbing that end over there? And the whole thing slides under the front end, and first connects to the lower control arms, and finally the brackets attach to the frame. This is as low as she's gonna get.
(LT)>> Those ballet classes are really starting to pay off.
(Austin)>> I almost fell through too.
(LT)>> This floor is pretty rough. It just kinda goes to show what condition this truck is or was in when we picked it up. Somebody really just pulled this out of the field, and they slapped it together. These planks, they're actually pretty new. It's just something that they must have had kicking around. They milled it up and they stuck it in, but it doesn't match and it's just kinda plain. Really this is more what we have in mind for the look on the floor of the bed. It still looks rustic, maybe kind of that old barn wood, but just something with a little bit more difference in the color. So let me show you guys what we picked up to make this happen. So, about a year and a half ago I was at the C-10 Nationals down in Texas. It was a great show, and I had a lot of time to walk through the manufacturers midway and see some of the new products that people had come out with for these trucks, and there was a bed wood floor kit that caught my eye and that's because there was a big giant graphic completely applied to the floor of the bed. Now that caught my attention because I first of all wondered how the heck do they get that in the bed cause wood is a tough material to work with? So, I stopped and I realized it actually wasn't wood. It was an extruded aluminum bed floor kit from Smokey Rhodes Rod Shop, and that's what we've ordered up here. Now first of all it has that nice barn wood texture that we're going for but there's a couple of advantages to using aluminum. Number one it's lightweight. This stuff is extruded, and it weighs almost nothing. Most traditional bed wood floor kits are made from hard wood and that's very heavy. So, if you want a fast truck lightweight is your friend, and the other advantage to this system is how clean it's going to look when it's installed. There are no exposed fasteners on these rails at all. There's a small groove on the back of the extrusion that the hardware's gonna go into that holds everything nice and tight and has a nice clean look, and on top of that we had our logo put in the bed, Project Lo 'n Slo. So, this thing is gonna look great. So as soon as we take the bed floor out of this thing there's really gonna be nothing that holds it in place. Basically, it could just flop over, and all our bed sides would be sitting on the ground. So, you take two straps and you run them at a diagonal, and they're gonna keep this thing nice and square so nothing falls apart.
(Katie)>> Coming up next the guys have some new school upgrades that are perfect for this bow tie.
(LT)>> Austin you've got to check this bed floor out. It's looking great!
(Austin)>> I like it, I like it! Well dude I just got finished prepping these. Scuffed them up with the d-a but honestly, I still don't know which route I'm taking as far as finish.
(LT)>> Well I mean I guess you've got a couple of different options. Number one, you could do the whole fake patina thing. We've done that before. Basically, you spray a little red oxide primer on there, you put some color on top, and you sand through in a couple of different areas, but the thing is it wouldn't match. It would almost stick out worse than it would blend in.
(Austin)>> For sure, and it's not the style of the truck. We have the real patina and then some newly fresh painted stuff. We know black doesn't look right because they were e-coated in black, and it was just a little off. If it was a rat rod, I would just say hey let's call it a day and bolt them up like it is.
(LT)>> Well we've just got to pick a color then to paint both the tubs and the strips and blend it all in.
(Austin)>> I've been thinking, and I honestly think it would look good if we carry that white over on the back cause it's a new part.
(LT)>> So still have the same pearl and the clear coat for a nice glossy look?
(Austin)>> Nice and shiny. [ spray gun hissing ]
(Austin)>> Oke-doke, let's see what we're actually working with here.
(LT)>> Honestly, I'm digging it. I mean the white just kinda flows from the roof to the strips, to the tubs, and works with the wood grain. It just works!
(Austin)>> I am too! When this 12 foot over that way it was a bit much and it looked weird but now that it's on the truck it flows, I like it!
(LT)>> I know what you mean. Just having it on the truck makes a huge difference, but I guess all we've got to do is put a hole in the floor for the filler neck and we're done.
(Austin)>> For sure, that'll wrap up the rear and what do you say we go see where they're at with the motor.
(Pat)>> Check wide open throttle there Mike.
(LT)>> I've got to say Pat this thing looks a heck of a lot different from the last time we saw it torn apart on the bench. You know the first thing I notice is there's no turbo on it yet. So, I guess you're doing a pull naturally aspirated first huh?
(Pat)>> Well the idea with that is to keep it simple. I want to make sure it has no oil leaks, no water leaks, and not that the turbo is a big factor in that. We want to keep it as simple as possible so there's nothing that's gonna make a funny noise, and it's hard to tell when there's a turbo involved. Now it's been run and we're actually ready to make some power pulls.
(Austin)>> For sure, and this will give us a good baseline. That way when we throw the boost to it, we know what to actually expect.
(LT)>> I think this looks great and I'm really excited to hear how it sounds. So, what do you say we go make a couple of pulls on it?
(Pat)>> Have you ever heard one of these run before?
(LT)>> Absolutely!
(Pat)>> Not like this you haven't. [ high pitch engine revving ]
(LT)>> Yeah that's where it starts to sound good! [ high pitch engine revving ]
(Pat)>> It sounds like an airplane.
(Mike)>> Awesome oil pressure, everything! Let's see what we got.
(LT)>> You guys will hate me for saying this, but it almost sounds like a Skyline motor.
(Pat)>> You shut your trap!
(Mike)>> 219, 269.
(LT)>> Wow 220 horsepower! So, these came from the factory with like what, 165?
(Austin)>> 160, 165 is what we looked up.
(Mike)>> This thing has way less compression. It does have better flowing head but other than that it's already 60 horse above what it came from the factory.
(Austin)>> Not even 8 to 1 on the compression.
(Mike)>> All the vitals, everything looks good. You guys gotta rock, paper, and scissor it for the first one to the console.
(Austin)>> Okay I've never done this before. Mike come back.
(Pat)>> This thing you don't even have to hit the gas pedal. Just hit starter and watch what happens. You've got to hold it. [ engine starts ]
(Pat)>> The most important thing on this is oil pressure. If that goes down at any point you abort the pull.
(Austin)>> What do I want to hit on it?
(Mike)>> When you go to full throttle and you see the r-p-m stabilize at 2,000 you hit "D", and that starts your sweep. When it gets up to 5,000 you'll hear the brake pull the engine down. Just pull out of it, that's all you've gotta do.
(Pat)>> Keep going, all the way open!
(Mike)>> Okay hit "D".
(Pat)>> Now watch this. Don't worry about anything else. [ high pitch engine revving ]
(Mike)>> Nice!
(Pat)>> Nicely done! Scarring the bejesus out of me.
(Mike)>> You're pull was better than mine.
(Pat)>> 220?
(Austin)>> Dude that's awesome, 220. That's a consistent little due.
(Mike)>> Alright LT it's your turn to drive. Less talking more driving, let's go!
(LT)>> You know the coolest thing about this whole project is we never really set out to make a ton of horsepower. We just wanted something that was oddball and I definitely think that we got it.
(Mike)>> I think Pat's about to slap you in the back of the head.
(Pat)>> You're messing around, come on!
(LT)>> Come on dad, where's the throttle?
(Pat)>> "S", activate, start. You're just like an old pro, look at you go!
(Mike)>> Holding it too long like that puts a lot of heat in the combustion chamber. It'll kill power. [ high pitch engine revving ]
(Mike)>> 219, 269, That thing is printing numbers.
(Pat)>> It's very, very consistent.
(Mike)>> So the engine's broke in. It's making awesome power for NA with the compression before the turbo. With the valve spring change I think we're knocking on the door of over 400 easy.
(LT)>> Let's get the turbo and bolt it, come on, boost!
(Pat)>> It's not that easy.
(LT)>> Finally we installed the turbocharger and intercooler and made a few more hits on the dyno where it laid down an impressive 376 horsepower and 510 pounds of torque at only 10.5 pounds of boost.
(Katie)>> Up next, it's more classic styling with fresh attitude for Project Lo 'n Slo.
(LT)>> So we're now at the point of a build where everything basically gets easier, and that's because all the hard work is done. The fab work for the turbo setup is complete and the engine, we know it runs and we know it doesn't leak, and we know exactly how much horsepower it's gonna make. So, the only thing we have to do is bolt all the parts back in place and we're headed down the road.
(Austin)>> And that's the best thing about these old trucks. You have all the room in the world in this engine bay to work. You can route your plumbing, run your wires, put my big ole hands in there without busting knuckles, and obviously this straight six helped matters too you know.
(LT)>> And speaking of the straight six a lot of people are gonna look at this and say why did you go with a throw away engine. For many, many years if you bought a truck that had a straight six underneath the hood the first thing you're gonna do is take that thing out and throw in a big block, a small block, or now days probably an LS, but a small displacement engine with forced induction is actually coming around again, and a lot of the manufacturers are using engines just like this today.
(Austin)>> It's kinda like that old pair of corduroy pants you've got hiding in the closet, trendy, and the six cylinder is no different. It's more popular now than ever, and that's for fuel efficiency. You add turbos, you put power adders, you still get those mid-level ranges of horsepower and they're torquey, and that's the thing that makes them fun to drive.
(LT)>> And if you want just a little bit of extra torque well that's easy. All you've got to do is mess with the waste gate and put a little more spring pressure on top of this thing. Your boost level goes up and so does your horsepower and torque. Now for our particular engine we are kinda near the limit because we have stock connecting rods and a stock crankshaft, but just in general terms that's one reason why turbocharging is so popular.
(Austin)>> And speaking of boost time to cool it down and slap that intercooler up front.
(LT)>> In order to eliminate any possibility of leaking silicone couplers we went ahead, and we welded the end charge pipes onto the tank. It ensures a nice leak free connection and just kinda looks cool as well. Now we did mount the intercooler up from because there is no space behind the grille, and when we first put this in we thought we could almost run this as the grille of the truck, but the problem was the headlights. We didn't really have a nice clean way to mount the buckets and have it look right. So, you might ask yourself why is an intercooler important? Well, it's simple, it's physics. That turbo up there as nice as it looks it's gonna make the intake air charge nice and hot. So just about every vehicle on the road with a turbocharger uses an intercooler to bring down the temperature of the air, increasing the density, increasing the oxygen content, and increases the capacity for horsepower.
(Austin)>> Now we decided to close up the front of this old girl with an original look, and to do that we're using this reproduction grille. Now this chrome work is gonna match the front bumper, some of the chrome trim on the wheels, and some of the other accents we got on the truck, and best of all in my opinion it'll cover up that intercooler, which will make it not look so aftermarket. It'll still have that classic truck vibe but sporting a turbo. Now I was able to reuse the original headlight buckets. They're in good shape, just had to tweak them a little to get them to work, but the original headlight retainer rings, these things have seen better days. So, we've got to order some new ones, and that is gonna be to mount these new projector l-e-d headlights. Once they're in they're gonna look pretty cool, and we'll definitely be able to see cruising at night. So, let's just wrap up this grille and call her a day. Good on that side?
(LT)>> Looking good buddy.
(Austin)>> Two more and they line up. [ metal clanging ]
(Katie)>> Up next, our '65 C-10 Fleetside gets a boost and then heads to the track.
[ Music ]
(Austin)>> There is nothing like the feeling you experience when you drive an old classic truck and driving this 1965 C-10 that me and ole Lawrence built is no different. Just cause it's a custom-built truck doesn't mean it doesn't still have those same old classic and nostalgic styling cues.
(LT)>> I think my favorite part about this old truck is the sound of it because it's so deceiving or confusing for people. Think about it. You see an old truck like this and you're gonna think it's gotta have a V-8 under the hood, and then you hear that distinctive inline 6 sound and that whistle of the turbo and the blow off valve. [ engine revving ] [ blow off valve whistling ]
(LT)>> I love it! An old rusty truck that drives and handles just like a brand-new sports car. It does not get any better than that. We're not the only ones cruising the back roads in a tricked-out C-10. We asked our buddy country music artist James Otto to join us in his '66 resto mod featured at the SEMA show.
(James)>> Well you know it's a 1966 C-10. It was my grandfathers. It spent its whole life on a farm up in North Dakota, and I wanted it to be a pro touring truck and that's the way we built it. I love the old patina look, it's a great look, but this thing needed to look high tech. It needed to look like 2020, and hopefully we accomplished that. It's got an LS under the hood, about 500 horse, 6-speed stick underneath it. It's got Ridetech suspension and does everything I need it to do. You know we found a stock short wheelbase chassis and then did a frame stiffener in it, and then did the stage 3 Ridetech setup underneath it. So, it handles like it's on rails. It's been a blast to drive. I'm having fun with it.
(LT)>> This is probably the coolest comparison that we could have done.
(James)>> I think so too. The juxtaposition of same body style and ending up in a completely different spot. Man, that's what hot rodding's all about.
(LT)>> You got that right. Well, it was great hanging out with James and his beautiful C-10, and it's built in a totally different style from this truck here but they're both perfect examples of classic American iron. Now for our truck it's time to put it to the test and see how fast it's going to go in a straight line.
(Austin)>> We about to the run the little C-10 down the track and see how fast it goes, and I don't know how fast it's gonna go.
(LT)>> Hey don't break it!
(Austin)>> I hope I don't break it. Why are you always worried about me breaking everything?
(LT)>> I know you too well. [ engine revving ] [ bleep ]
(Austin)>> It doesn't sound great. So, I went to second and when I went to third it didn't want it. So, I just had to get out of it. [ Music ]
(Austin)>> LT's gonna be mad at me. Well, you win some you lose some.
(LT)>> And?
(Austin)>> Complications, don't really know what they are at the moment but we're gonna take it back to shop and we're gonna figure it out. That's all part of it. You build it, you break it, bring it back, figure out what's wrong, and rebuild it.
(LT)>> Some things are just better left unsaid, and I really don't have anything to add. So yeah, in the trailer and back to the shop.
(Austin)>> You're just upset cause you didn't get to drive.
(LT)>> With our C-10 I was worried that we had damaged the 292 but it turns out the flywheel bolts had backed out. So, it was just rattling around, no big deal. [ Music ]
(Katie)>> Project Lo 'n Slo is the perfect combination of classic styling and modern attitude. Remember if you're into street, tracks, or trails we've got you covered right here on Powernation Builds.
